Android Studio App设置线性布局LinerLayout控件垂直/水平方向排列
1.线型布局用LinearLayout2.让控件垂直方向排列用android:orientation="vertical"注意此时内部控件不能将高度指定为fill_parent和match_parent,因为这样一个控件就把屏幕垂直方向全部占满了,没有其它控件的空间。垂直方向排列控件的整个xml内容范例如下:<LinearLayout xmlns:android="http:/
·
1.线型布局用LinearLayout
2.让控件垂直方向排列用
android:orientation="vertical"垂直方向排列控件的整个xml内容范例如下:
<LinearLayout xmlns:android="http://schemas.android.com/apk/res/android"
    xmlns:tools="http://schemas.android.com/tools" android:layout_width="match_parent"
    android:layout_height="match_parent" android:paddingLeft="@dimen/activity_horizontal_margin"
    android:paddingRight="@dimen/activity_horizontal_margin"
    android:paddingTop="@dimen/activity_vertical_margin"
    android:paddingBottom="@dimen/activity_vertical_margin" tools:context=".MainActivity"
    android:orientation="vertical">
    <EditText
        android:id="@+id/input"
        android:layout_width="fill_parent"
        android:layout_height="wrap_content"
        />
    <Button
        android:id="@+id/enter"
        android:layout_width="fill_parent"
        android:layout_height="wrap_content"
        android:text="输入"/>
</LinearLayout>
======
3.让控件水平方向排列:
android:orientation="horizontal"注意此时内部控件不能将宽度指定为fill_parent和match_parent,因为这样一个控件就把屏幕水平方向全部占满了,没有其它控件的空间。
<LinearLayout xmlns:android="http://schemas.android.com/apk/res/android"
    xmlns:tools="http://schemas.android.com/tools" android:layout_width="match_parent"
    android:layout_height="match_parent" android:paddingLeft="@dimen/activity_horizontal_margin"
    android:paddingRight="@dimen/activity_horizontal_margin"
    android:paddingTop="@dimen/activity_vertical_margin"
    android:paddingBottom="@dimen/activity_vertical_margin" tools:context=".MainActivity"
    android:orientation="horizontal">
    <EditText
        android:id="@+id/input"
        android:layout_width="200dp"
        android:layout_height="wrap_content"
        />
    <Button
        android:id="@+id/enter"
        android:layout_width="100dp"
        android:layout_height="wrap_content"
        android:text="输入"/>
</LinearLayout>

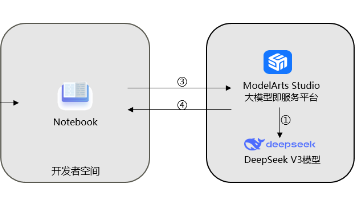
华为开发者空间,是为全球开发者打造的专属开发空间,汇聚了华为优质开发资源及工具,致力于让每一位开发者拥有一台云主机,基于华为根生态开发、创新。
更多推荐

 6
6 0
0- 0


 已为社区贡献1条内容

所有评论(0)