【云计算学习】open stack云平台安装部署(二)(小白手把手教会、保姆级教程)
controller。
·
open stack云平台安装部署——本地yun源配置
配置本地yum源
controller节点挂载本地yum源
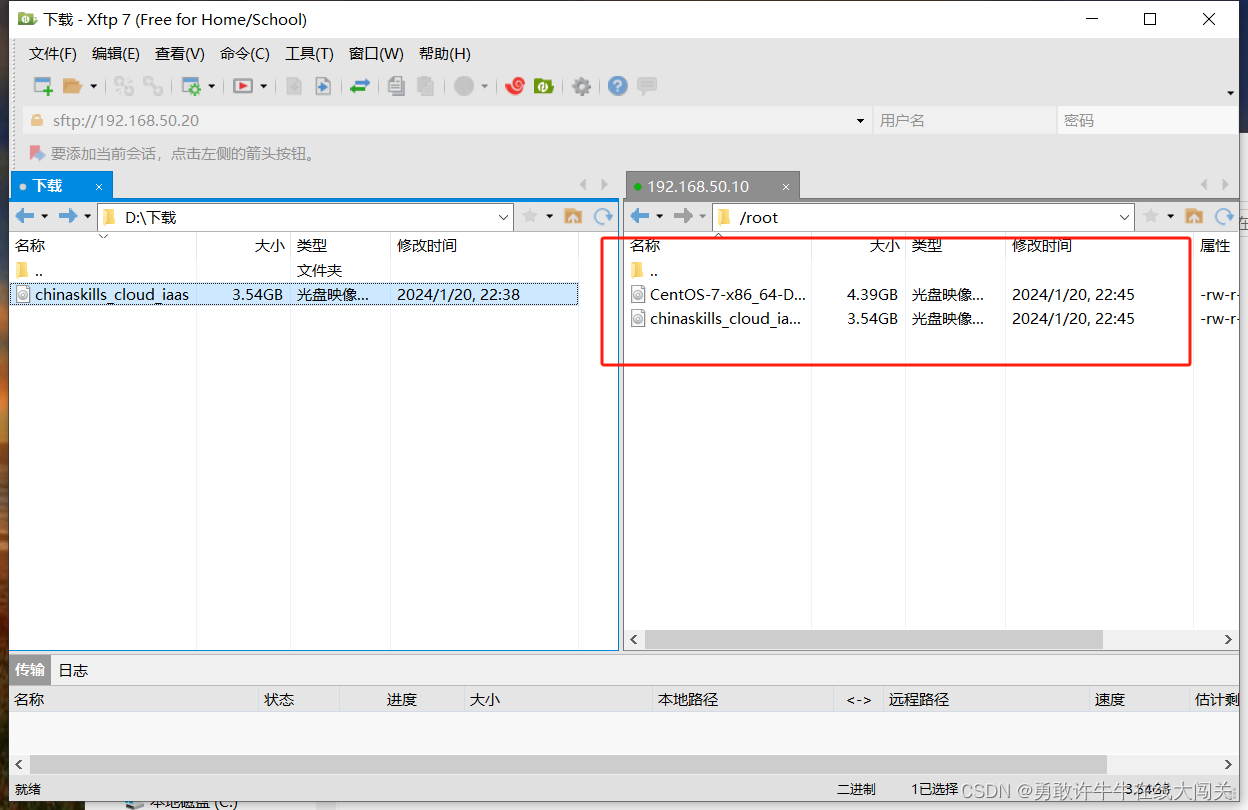
1.上传镜像文件
使用终端工具连接controller节点和compute节点
上传镜像文件chinaskills_cloud_iaas.iso和CentOS-7-x86_64-DVD-2009

2.yum源配置👍
配置Centos文件
1.进入/opt目录下
创建Centos文件夹和IAAS文件夹,这两个是留放本地yum源的
mkdir Centos
mkdir IAAS
2.将Centos7.iso 挂载到 /mnt下
[root@controller ~]# mount /root/Centos7.iso  /mnt/  #挂在到/mnt目录下
mount: /dev/loop0 写保护,将以只读方式挂载
3.复制mnt目录下的文件到/opt/Centos中
将安装镜像文件的内容复制到/opt/Centos下
[root@controller ~]# cp -r /mnt/* /opt/Centos/
4.解挂
解除/mnt下的挂载
这个时候我们再进入到mnt目录下查看,会发现里面什么都没有。
[root@controller ~]# umount /mnt/
配置IAAS文件
跟配置cnetos镜像文件一样的步骤
1.将iaas.iso挂载到/mnt下
[root@controller ~]# mount /root/iaas.iso /mnt/
mount: /dev/loop0 写保护,将以只读方式挂载
2.将/mnt目录下的文件复制到/opt/IAAS中
[root@controller opt]# cp -r /mnt/* /opt/IAAS/
3.解挂
[root@controller opt]# umount /mnt/
3.配置controller节点yum安装源文件👍
1.备份本地yum源文件
后面这些用不到,也可以直接删除,保险起见我们将它移到其他目录下
[root@controller /]# mv /etc/yum.repos.d/* /repo.bak/
2.配置yum源
新建一个后缀为.repo的文件,名字随意
配置如下内容
[root@controller yum.repos.d]# vim localyum.repo
[Centos] #名字自己决定
name=centos
baseurl=file:///opt/Centos
gpgcheck=0
enabled=1
[IAAS]
name=iaas
baseurl=file:///opt/IAAS/iaas-repo
gpgcheck=0
enabled=1
3.挂载(每次重启后需要重新配置)
将yum源挂载到/dev/sr0/目录下
[root@controller yum.repos.d]# mount /dev/sr0/ /opt/Centos/
4.清除缓存
[root@controller yum.repos.d]# yum clean all
已加载插件:fastestmirror
正在清理软件源: Centos IAAS
5.创建缓存
[root@controller yum.repos.d]# yum makecache
已加载插件:fastestmirror
Determining fastest mirrors
Centos                                                                                                                                                               | 3.6 kB  00:00:00
IAAS                                                                                                                                                                 | 2.9 kB  00:00:00
(1/7): Centos/group_gz                                                                                                                                               | 153 kB  00:00:00
(2/7): Centos/primary_db                                                                                                                                             | 3.3 MB  00:00:00
(3/7): Centos/filelists_db                                                                                                                                           | 3.3 MB  00:00:00
(4/7): Centos/other_db                                                                                                                                               | 1.3 MB  00:00:00
(5/7): IAAS/primary_db                                                                                                                                               | 1.4 MB  00:00:00
(6/7): IAAS/filelists_db                                                                                                                                             | 3.2 MB  00:00:00
(7/7): IAAS/other_db                                                                                                                                                 | 618 kB  00:00:00
元数据缓存已建立
出现上面那样配置成功了,我们可以用yum repolist验证一下
[root@controller yum.repos.d]# yum repolist
已加载插件:fastestmirror
Loading mirror speeds from cached hostfile
源标识                                                                                     源名称                                                                                      状态
Centos                                                                                     centos                                                                                      4,070
IAAS                                                                                       iaas                                                                                        3,232
repolist: 7,302
到这步,本地yum源就配置成功了。接下来,我们可以安装一些服务
安装vsftpd服务⭐
配置compute节点yum安装源文件yum.repo,指向controller节点的共享文件目录路径。
[root@controller yum.repos.d]# yum install vsftpd y
已加载插件:fastestmirror
Loading mirror speeds from cached hostfile
没有可用软件包 y。
正在解决依赖关系
--> 正在检查事务
---> 软件包 vsftpd.x86_64.0.3.0.2-28.el7 将被 安装
--> 解决依赖关系完成

依赖关系解决

============================================================================================================================================================================================
 Package                                    架构                                       版本                                                源                                          大小
============================================================================================================================================================================================
正在安装:
 vsftpd                                     x86_64                                     3.0.2-28.el7                                        Centos                                     172 k

事务概要
============================================================================================================================================================================================
安装  1 软件包

总下载量:172 k
安装大小:353 k
Is this ok [y/d/N]: y
Downloading packages:
Running transaction check
Running transaction test
Transaction test succeeded
Running transaction
  正在安装    : vsftpd-3.0.2-28.el7.x86_64                                                                                                                                              1/1
  验证中      : vsftpd-3.0.2-28.el7.x86_64                                                                                                                                              1/1

已安装:
  vsftpd.x86_64 0:3.0.2-28.el7

完毕!
vsftp成功安装!
配置vsftpd服务
1.指定用户访问主目录
[root@controller yum.repos.d]# vi /etc/vsftpd/vsftpd.conf
anon_root=/opt #在文尾添加
2.重启并设置vsftpd服务开机自启
[root@controller yum.repos.d]# systemctl restart vsftpd #重启
compute节点挂载本地yum源
1.备份本地yum文件,这一步跟controller节点第三步差不多
mv /etc/yum.repos.d/* /repo.bak/
2.将controller节点中/etc/yum.repos.d/下的配置文件信息复制到同样路径目录下
[Centos]
name=centos
baseurl=ftp://controller/Centos #因为在上面配置了vsftpd服务,这里直接使用配置好的文件即可
gpgcheck=0
enabled=1
[IAAS]
name=iaas
baseurl=ftp://controller/IAAS/iaas-repo #同理
gpgcheck=0
enabled=1
3.清除缓存
yum clean all
4.创建缓存
yum makecache
5.查看yum列表
yum repolist
到这里,我们的本地yum源就已经配置完成啦!👍
更多推荐
 已为社区贡献11条内容


所有评论(0)