OpenAttestation对VM的证实
可信计算的远程证实功能使得挑战者能够判断证实平台的可信性。本文将qemu的虚拟机作为client端,额外的host作为server端,利用OpenAttestation(oat)实现的远程证实功能,对VM的可信性进行度量与报告,以判断VM的可信性。
OpenAttestation对VM的证实
实验前
可信计算的远程证实功能使得挑战者能够判断证实平台的可信性。具体流程为挑战者向证实平台提出证实请求(称为一次挑战),证实平台在收到挑战请求后,首先与隐私签证机构(PCA)交互,PCA验证证实平台TPM的有效性,此后证实平台搜集平台摘要信息(如下图),并使用TPM的身份证明密钥(AIK)进行签名,由密码学机制确保证实信息真实地报告给挑战者,挑战者将平台信息与预期值进行比对,若一致则认为证实平台可信。
上篇文章在centos上成功搭建了vTPM的qemu-kvm环境,本篇博文在这基础上将qemu的虚拟机作为client端,额外的host作为server端,利用OpenAttestation(oat)实现的远程证实功能,对VM的可信性进行度量与报告,以判断VM的可信性。
实验环境说明
本次实验环境如下:
- oat-server: ubuntu14.04
- oat-client:
- host: ubuntu15.10
- vm: ubuntu15.10-server
其中,在使用ubuntu系统安装qemu-kvm tpm的过程中出现的找不到AES_CreateContext的错,可以通过在configure时增加–with-openssl解决。
运行IMA
在client上vm启动并能够成功看到/dev/tpm*后,首先确保用于搜集平台信息的完整性度量架构(IMA)成功运行。方法为修改/boot/grub/grub.cfg,在对应的grub启动项的linux参数后增加
ima_tcb ima_template="ima" ima_hash="sha1"重启之后,输入
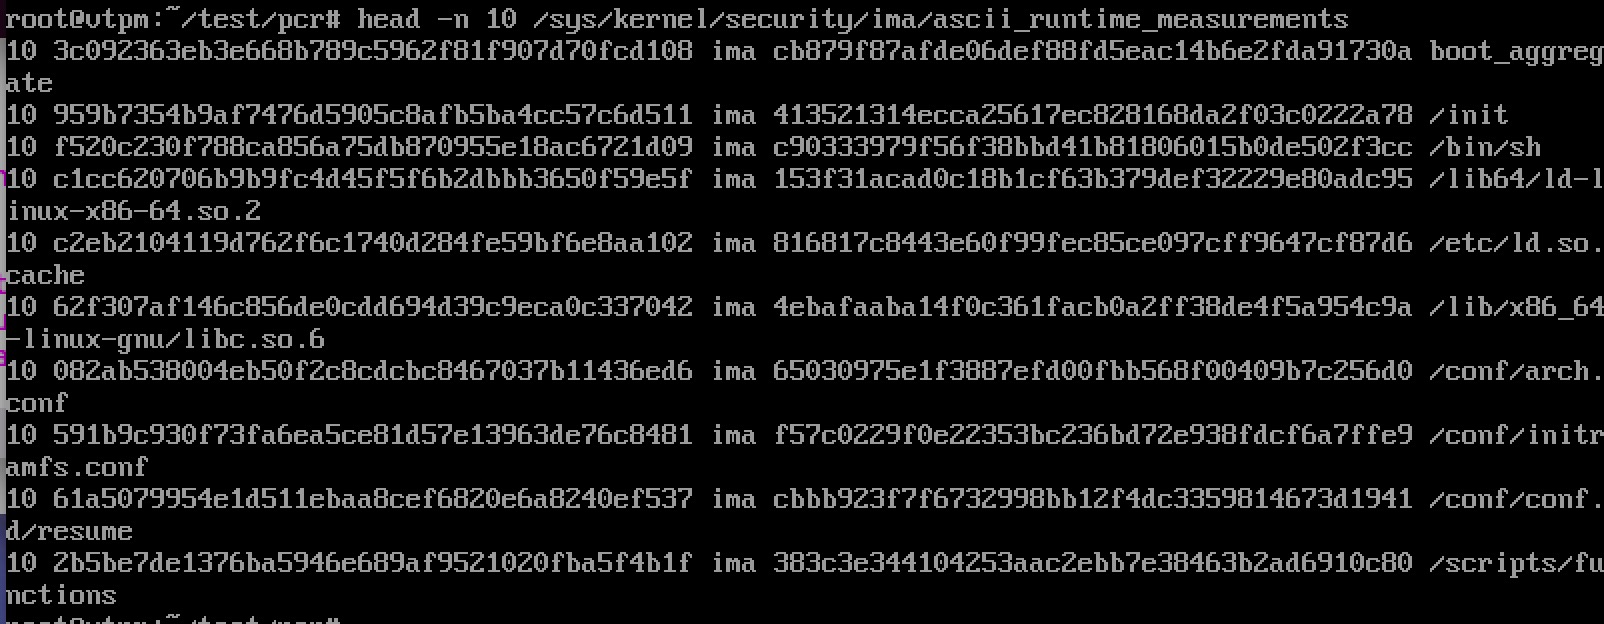
head -n 10 /sys/kernel/security/ima/ascii_runtime_measurements 得到下图:
其中每条记录的格式为:使用的TPM寄存器编号——template摘要值——template名——文件摘要值——文件路径。IMA的详细信息见:http://sourceforge.net/p/linux-ima/wiki/Home/
配置qemu网络
qemu的网络有user mode network、tap/tun network 等几种方式,前者为默认方式,相当于vmware中的NAT,因而oat-server无法ping通vm,后者相当于vmware中的桥接模式,使得vm如同host一样接入oat-server、oat-client的局域网中,从而三者均能够ping通。为了使用tap模式,可执行以下命令:
apt-get install openvpn bridge-utils
sh /qemu/vtpm-boot.sh create-vtpm0
sh /qemu/xup tap0
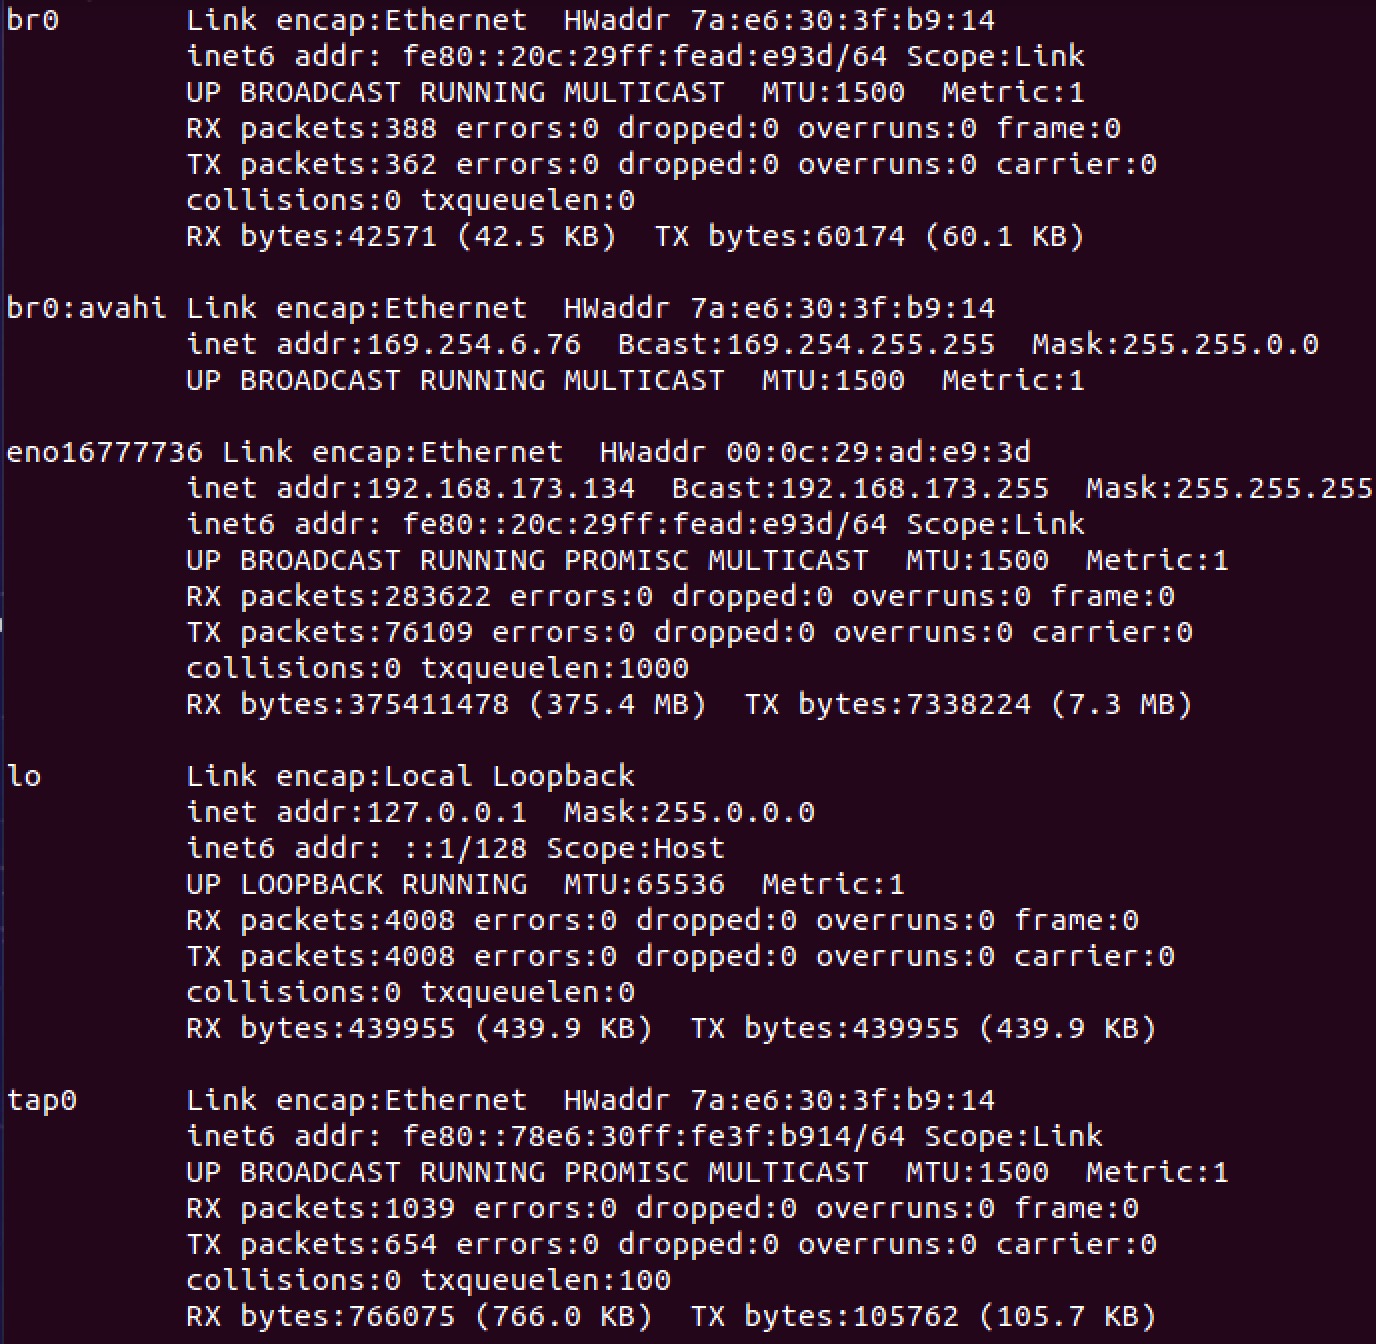
注意此后输入ifconfig命令的结果应该类似:
然后开启虚拟机吧~
sh /qemu/vtpm-boot.sh qemu-start-ubuntu其中用到的几个shell脚本文件如下:
- vtpm-boot.sh
 #!/bin/sh
SEABIOS=/root/vtpm/seabios-tpm/out
SH_UP=/qemu/xup
SH_DOWN=/qemu/xdown
case $1 in
"qemu-boot-ubuntu")
    qemu-system-x86_64 -display sdl -enable-kvm -cdrom /qemu/iso/ubuntu-15.10-server-amd64.iso \
    -m 1024 -boot d -bios $SEABIOS/bios.bin -boot menu=on -tpmdev \
    cuse-tpm,id=tpm0,path=/dev/vtpm0 \
    -device tpm-tis,tpmdev=tpm0 /qemu/image/ubuntu.img
    ;;
"qemu-start-ubuntu")
    brctl show
    qemu-system-x86_64 -display sdl -enable-kvm \
    -m 1024 -net nic,vlan=0 -net tap,vlan=0,ifname=tap0,script=no,downscript=no \
    -boot c -bios $SEABIOS/bios.bin -boot menu=on -tpmdev \
    cuse-tpm,id=tpm0,path=/dev/vtpm0 \
    -device tpm-tis,tpmdev=tpm0 /qemu/image/ubuntu.img
    ;;
"create-vtpm0")
    rm /tmp/myvtpm0
    mkdir /tmp/myvtpm0
    chown -R tss:root  /tmp/myvtpm0
    swtpm_setup --tpm-state /tmp/myvtpm0  --createek
    export TPM_PATH=/tmp/myvtpm0
    swtpm_cuse -n vtpm0 --log file=/tmp/myvtpm0/out.log
    ;;
"create-vtpm1")
        mkdir /tmp/myvtpm1
        chown -R tss:root  /tmp/myvtpm1
        swtpm_setup --tpm-state /tmp/myvtpm1  --createek
        export TPM_PATH=/tmp/myvtpm1
        swtpm_cuse -n vtpm1 --log file=/tmp/myvtpm1/out.log
        ;;

esac- xup.sh
#!/bin/sh
#
# script to bring up the tun device in QEMU in bridged mode
# first parameter is name of tap device (e.g. tap0)
#
# some constants specific to the local host - change to suit your host
#
ETH0IPADDR=192.168.173.132
MASK=255.255.255.0
GATEWAY=192.168.173.1
BROADCAST=192.168.173.255

IFNAME=eno16777736
#
# First take eth0 down, then bring it up with IP address 0.0.0.0
#
/sbin/ifdown $IFNAME
/sbin/ifconfig $IFNAME 0.0.0.0 promisc up
#
# Bring up the tap device (name specified as first argument, by QEMU)
#
res=`ifconfig | grep $1`

if test -z "$res"
then
    /usr/sbin/openvpn --mktun --dev $1 --user `id -un`
fi

/sbin/ifconfig $1 0.0.0.0 promisc up
#
# create the bridge between eth0 and the tap device
#
res=`ifconfig | grep br0`
if test -n "$res"
then
    /sbin/ifdown br0
    /sbin/ifconfig br0 down
    /sbin/brctl delbr br0
fi
echo "addbr br0..." $IFNAME $1
/sbin/brctl addbr br0
sleep 1
/sbin/brctl addif br0 $IFNAME
/sbin/brctl addif br0 $1
#
# only a single bridge so loops are not possible, turn off spanning tree protocol
#
/sbin/brctl stp br0 off
#
# Bring up the bridge with ETH0IPADDR and add the default route
#
echo "ifconfig br0..."
dhclient br0
#/sbin/ifconfig br0 $ETH0IPADDR netmask $MASK broadcast $BROADCAST
#/sbin/route add default gw $GATEWAY

#
# stop firewall - comment this out if you don't use Firestarter
#
# /sbin/service firestarter stop - xdown.sh
#!/bin/sh
#
# Script to bring down and delete bridge br0 when QEMU exits
#
# Bring down $IFNAME and br0
#

ETH0IPADDR=192.168.173.132
MASK=255.255.255.0
GATEWAY=192.168.173.1
BROADCAST=192.168.173.255

IFNAME=eno16777736

/sbin/ifdown $IFNAME
/sbin/ifdown br0
/sbin/ifconfig br0 down
#
# Delete the bridge
#
/sbin/brctl delbr br0
#
# bring up $IFNAME in "normal" mode
#
/sbin/ifconfig $IFNAME -promisc
/sbin/ifup $IFNAME
#
# delete the tap device
#
/usr/sbin/openvpn --rmtun --dev $1
#
# start firewall again
#
# /sbin/service firestarter start

dhclient $1
#/sbin/ifconfig $IFNAME $ETH0IPADDR netmask $MASK broadcast $BROADCAST
#/sbin/route add default gw $GATEWAY
oat的安装
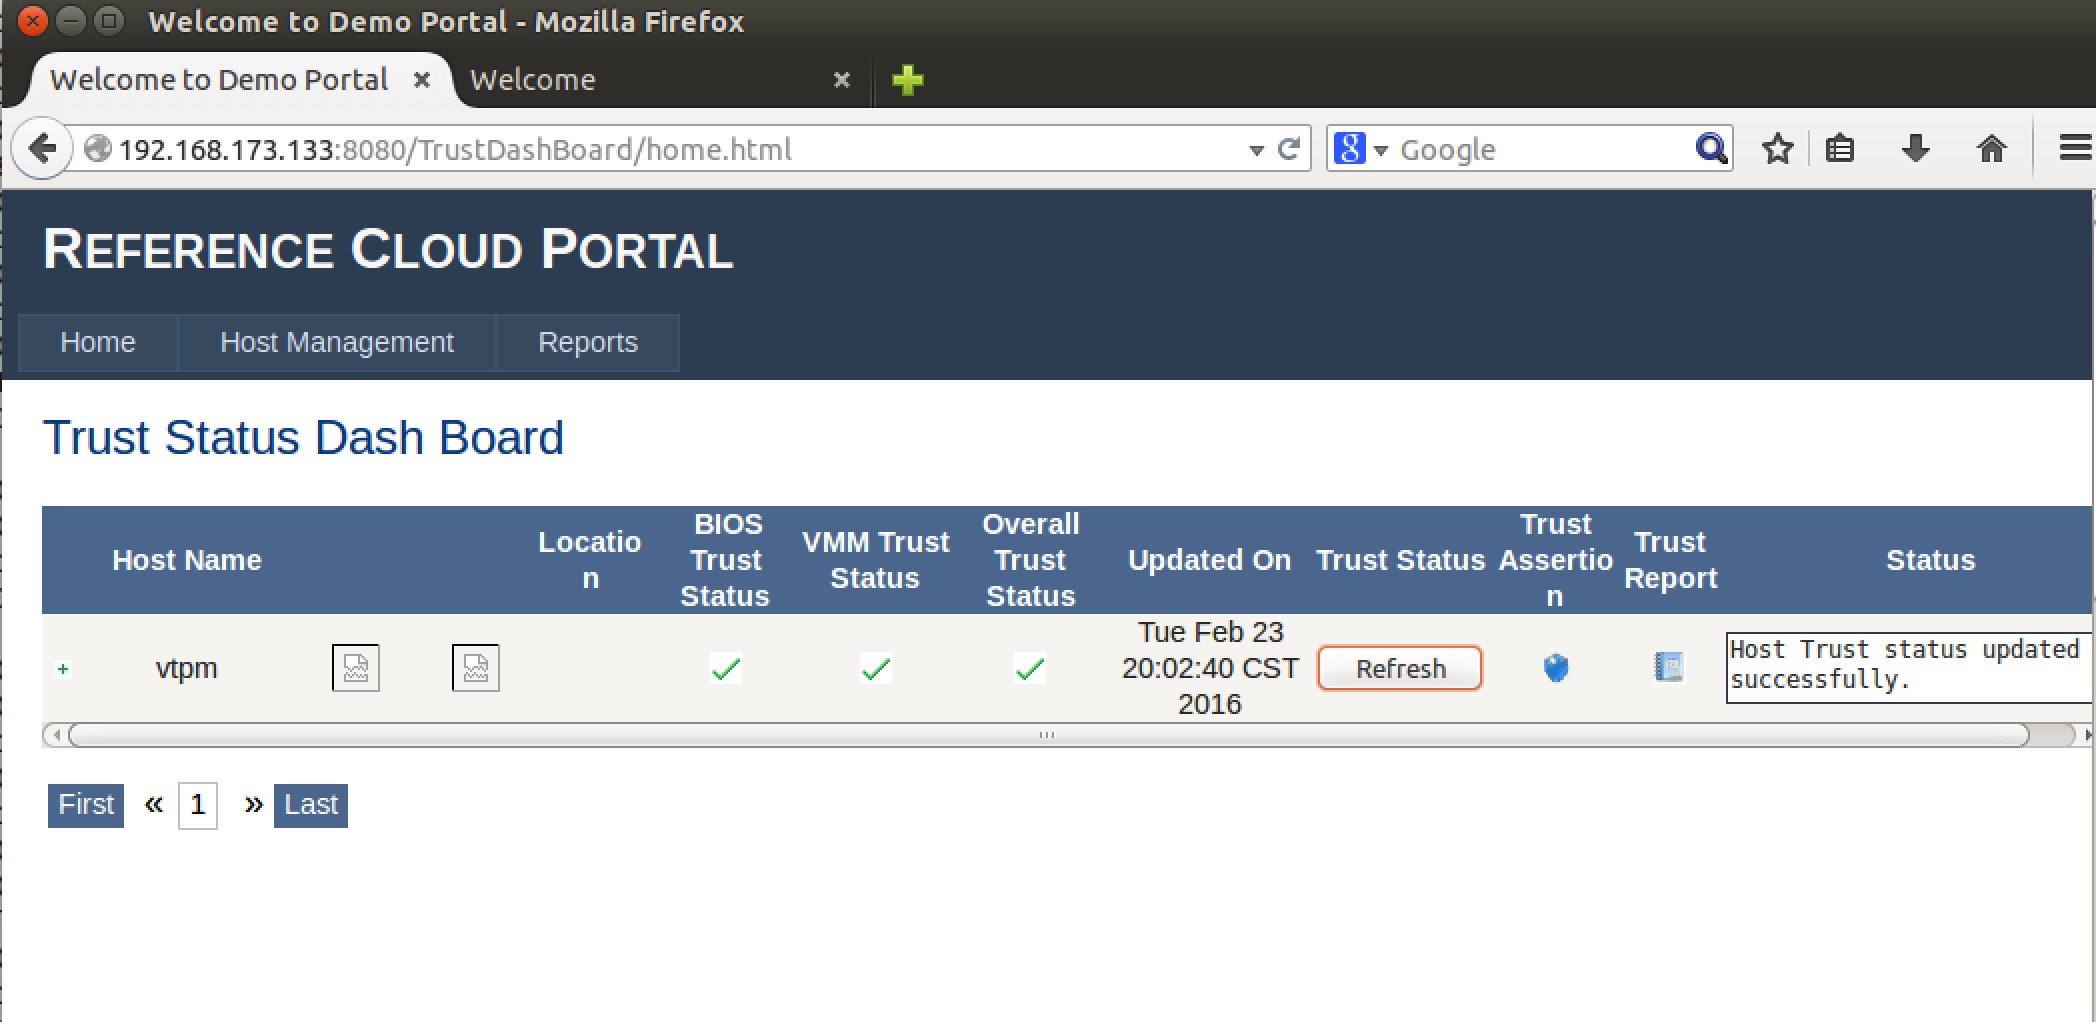
OpenAttestation(OAT)是Intel实现远程证实的开放源码,下载地址为: https://github.com/OpenAttestation/OpenAttestation.git。安装步骤比较多,readme写的十分详细,这里不再赘述。实验时在14.04上安装oat-server,把上述步骤中启动的vm作为client,成功安装后能够看到:
并且每次点击refresh时相当于一次挑战,report能够看到证实平台的平台信息。
更多推荐
 已为社区贡献2条内容


所有评论(0)