RabbitMq学习笔记之一
RabbitMq学习笔记之一准备工作:(1)虚拟机开启rabbitmq的web端管理界面(2)账号密码:admin/123(3)相关步骤:vm打开“1-CentOS 7 64位”的虚拟机(ip:192.168.32.129),(4)用WinSCP启动命令界面,相关命令看上一篇博客Linux安装RabbitMq并且初始化启动全局配置参数application.propertiesspring.rab
·
准备工作:
(1)虚拟机开启rabbitmq的web端管理界面
(2)账号密码:admin/123
(3)相关步骤:vm打开“1-CentOS 7 64位”的虚拟机(ip:192.168.32.129),
(4)用WinSCP启动命令界面,相关命令看上一篇博客Linux安装RabbitMq并且初始化启动
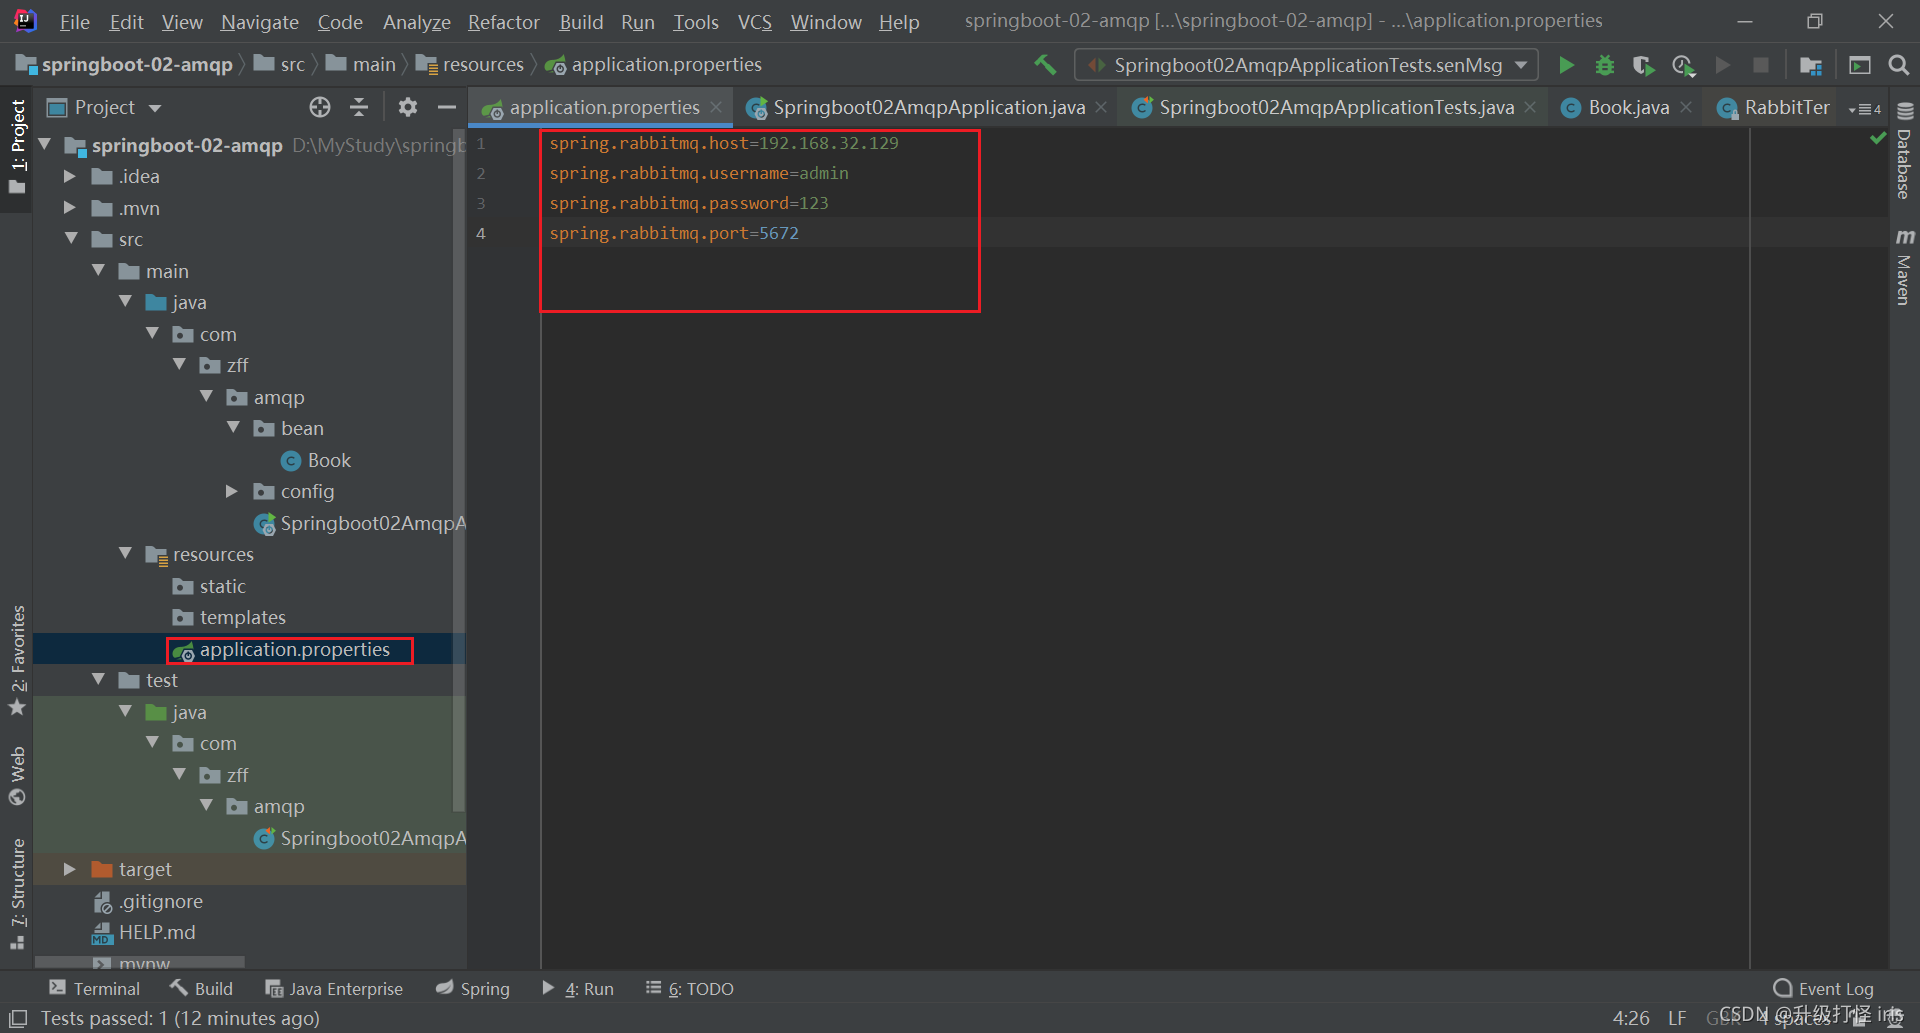
全局配置参数
application.properties
spring.rabbitmq.host=192.168.32.129
spring.rabbitmq.username=admin
spring.rabbitmq.password=123
spring.rabbitmq.port=5672
编写测试方法
一、单播
package com.zff.amqp;

import com.zff.amqp.bean.Book;
import org.junit.jupiter.api.Test;
import org.springframework.amqp.rabbit.core.RabbitTemplate;
import org.springframework.beans.factory.annotation.Autowired;
import org.springframework.boot.test.context.SpringBootTest;

import java.util.Arrays;
import java.util.HashMap;
import java.util.Map;

@SpringBootTest
class Springboot02AmqpApplicationTests {
    @Autowired
    RabbitTemplate rabbitTemplate;
    /**
     * 1、单播(点对点) 发送消息
     * */
    @Test
    void contextLoads() {
        //message 需要自己构造一个;定义消息体内容和消息头
        //rabbitTemplate.send(exchange, routKey, message);
        //object默认当成消息体,只需要传入要发送的对象,自动序列化发送给rabbitmq;
        // rabbitTemplate.convertAndSend(exchange, routKey, object);
        Map<String, Object> map = new HashMap<>();
        map.put("msg", "这是第一个消息");
        map.put("data", Arrays.asList("helloworld", 123, true) );
        //对象被默认序列化以后发送出去
        rabbitTemplate.convertAndSend("exchange.direct", "atguigu.news", map);
    }

    /** 接收消息*/
    @Test
    public void receive(){
        Object o = rabbitTemplate.receiveAndConvert("atguigu.news");
        System.out.println(o);
        System.out.println(o.getClass());
    }
}
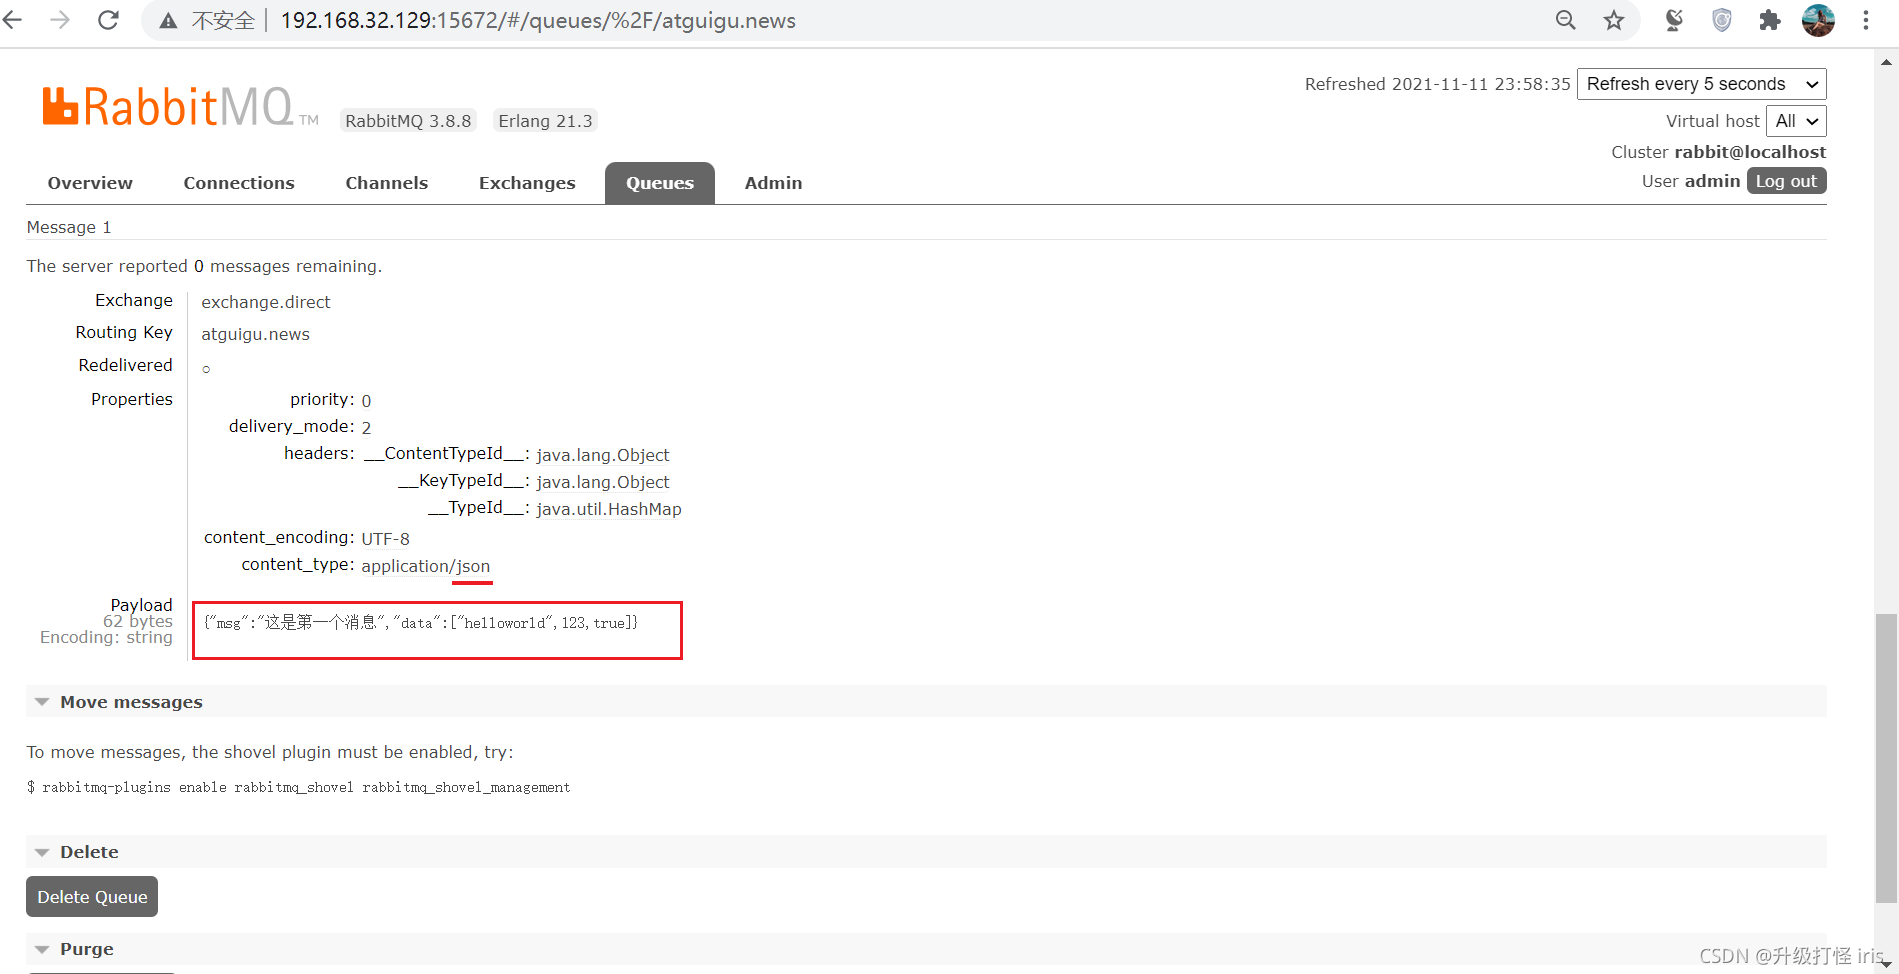
web端接收到的消息被序列化了: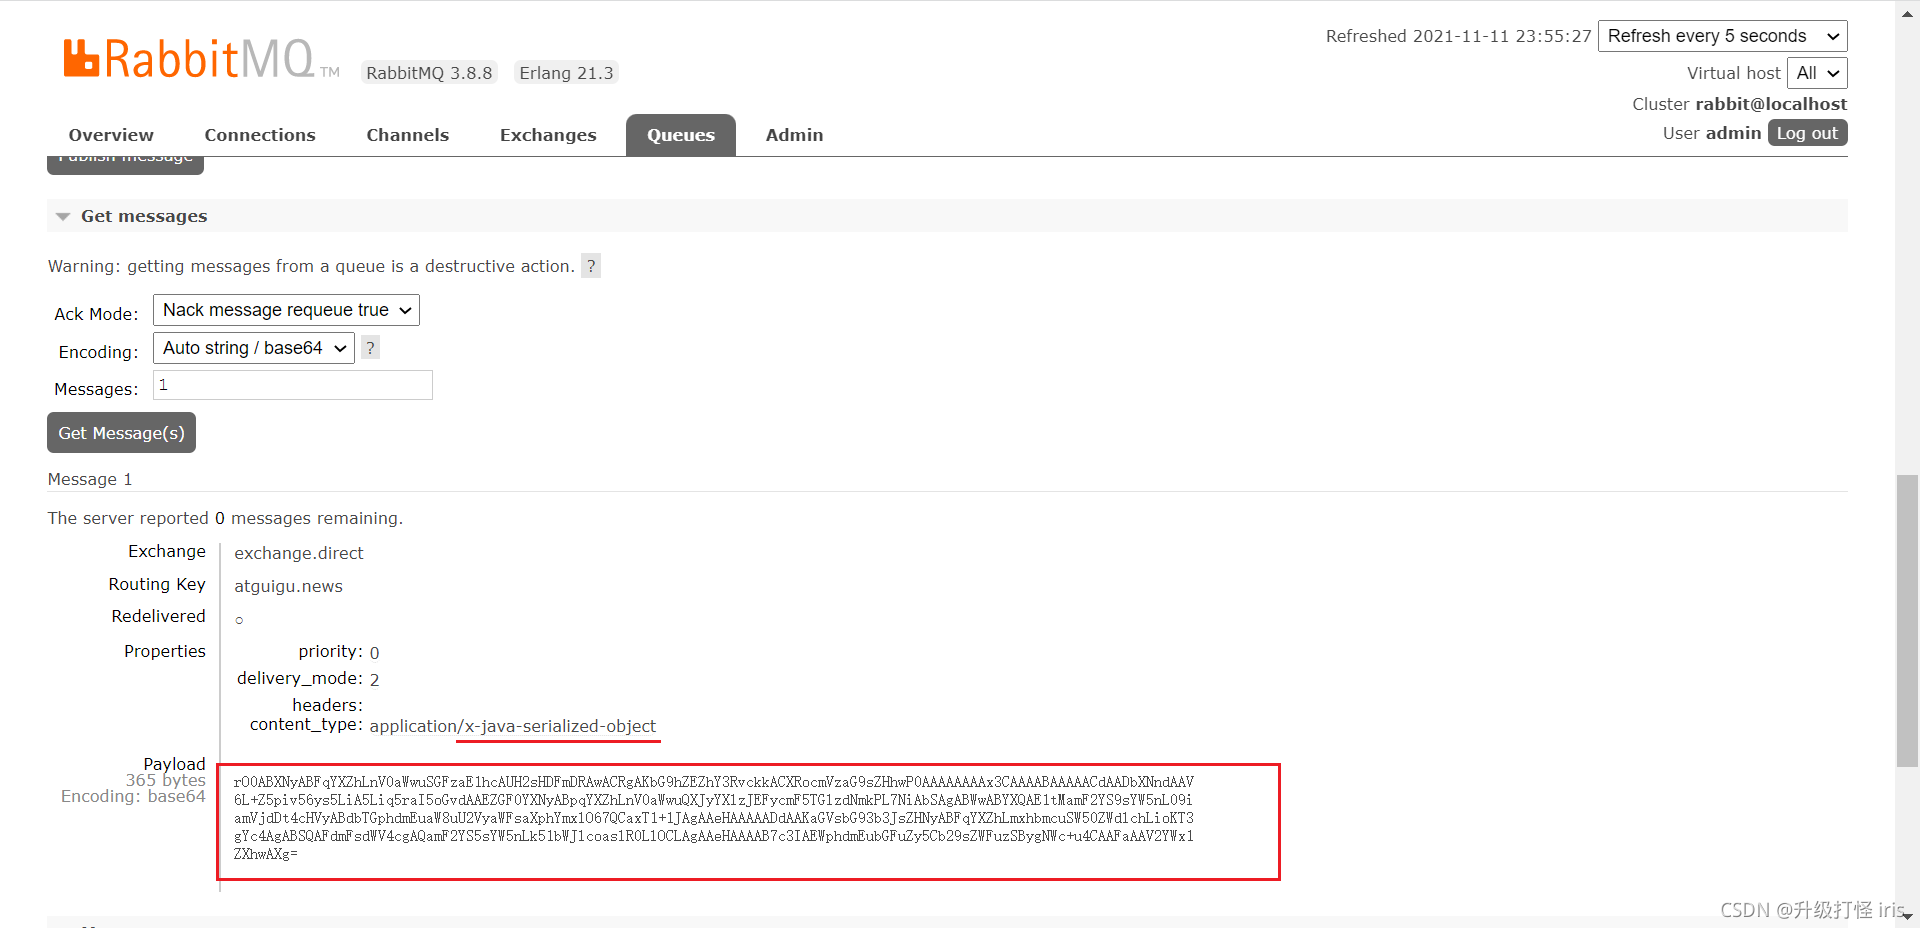
但是用RabbitM在代码里面接收到的消息是正常的: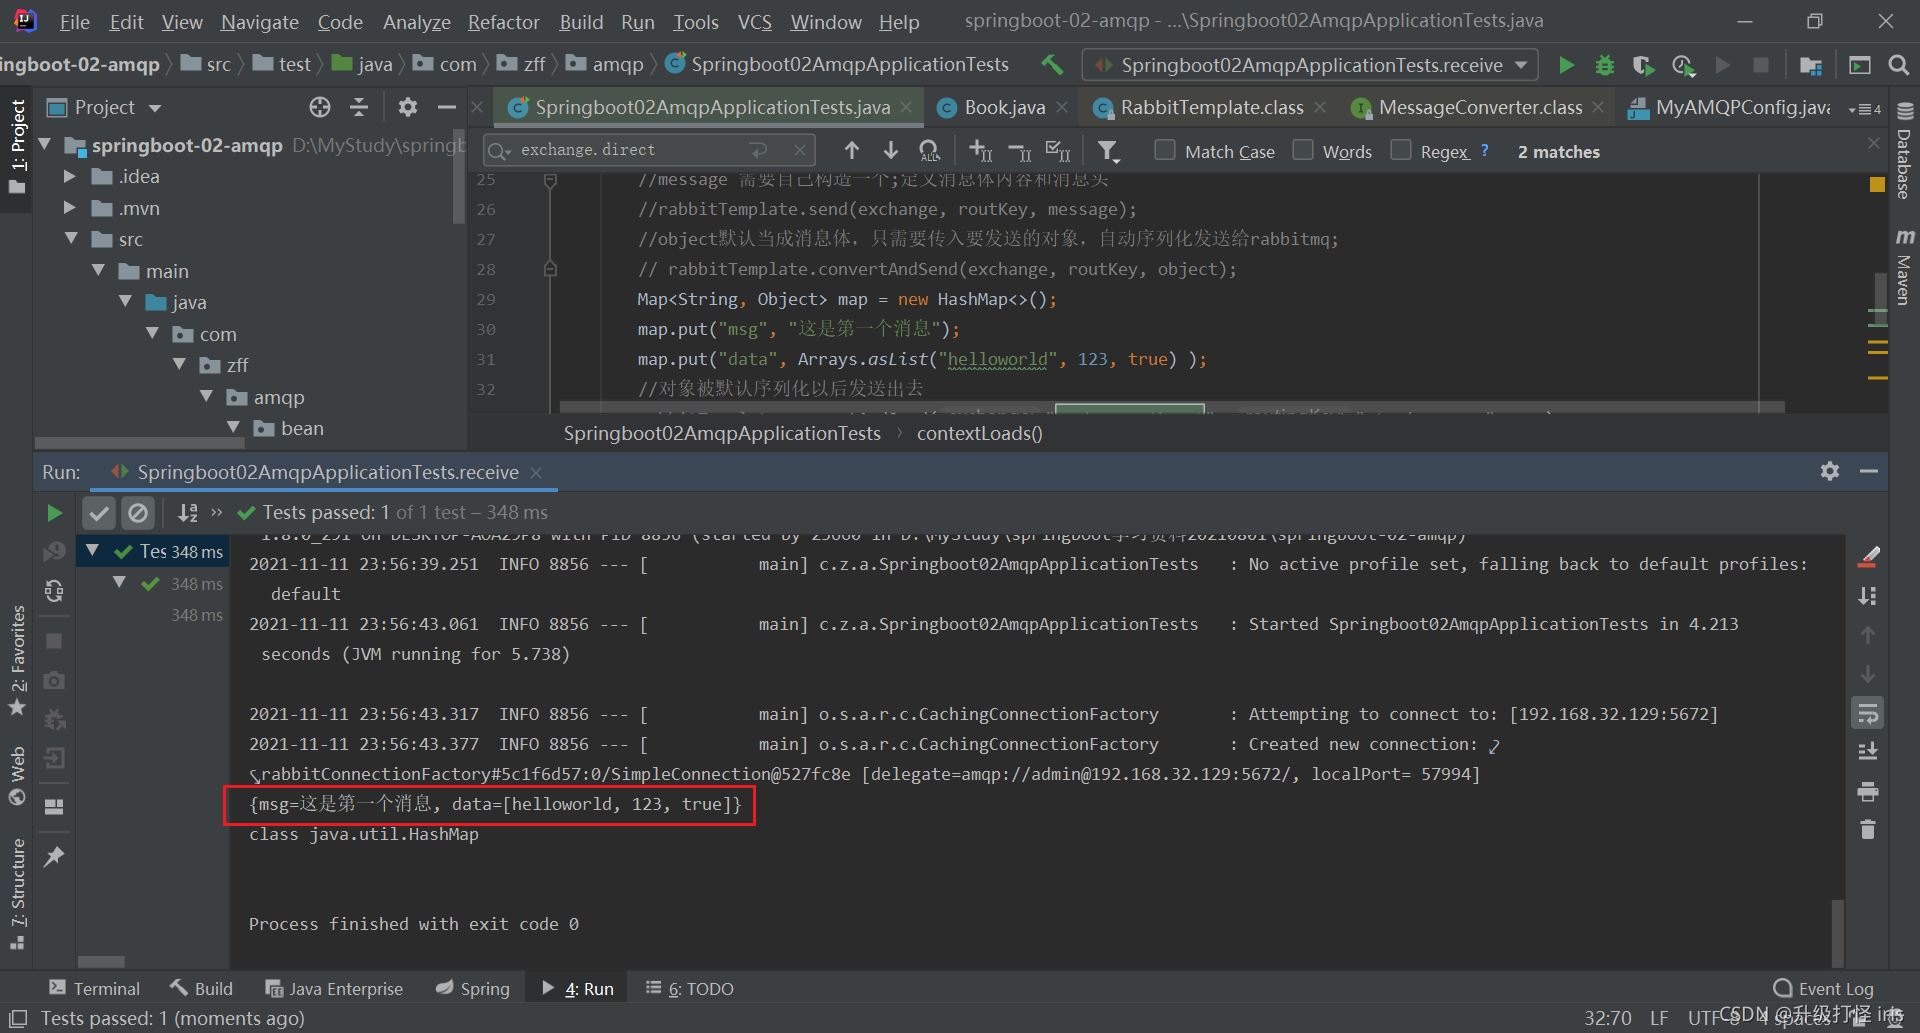
这样在rabbitmq的web管理界面收到的消息是被序列化的,但是,上面测试方法receive是可以正常接收到消息并且反序列化过的,为了web端也能够看到正常消息内容,所以写一个可以反序列化的配置类让数据正常在web端显示
package com.zff.amqp.config;

import org.springframework.amqp.support.converter.Jackson2JsonMessageConverter;
import org.springframework.amqp.support.converter.MessageConverter;
import org.springframework.context.annotation.Bean;
import org.springframework.context.annotation.Configuration;

@Configuration
public class MyAMQPConfig {

    @Bean
    public MessageConverter messageConverter(){
        return new Jackson2JsonMessageConverter();
    }
}
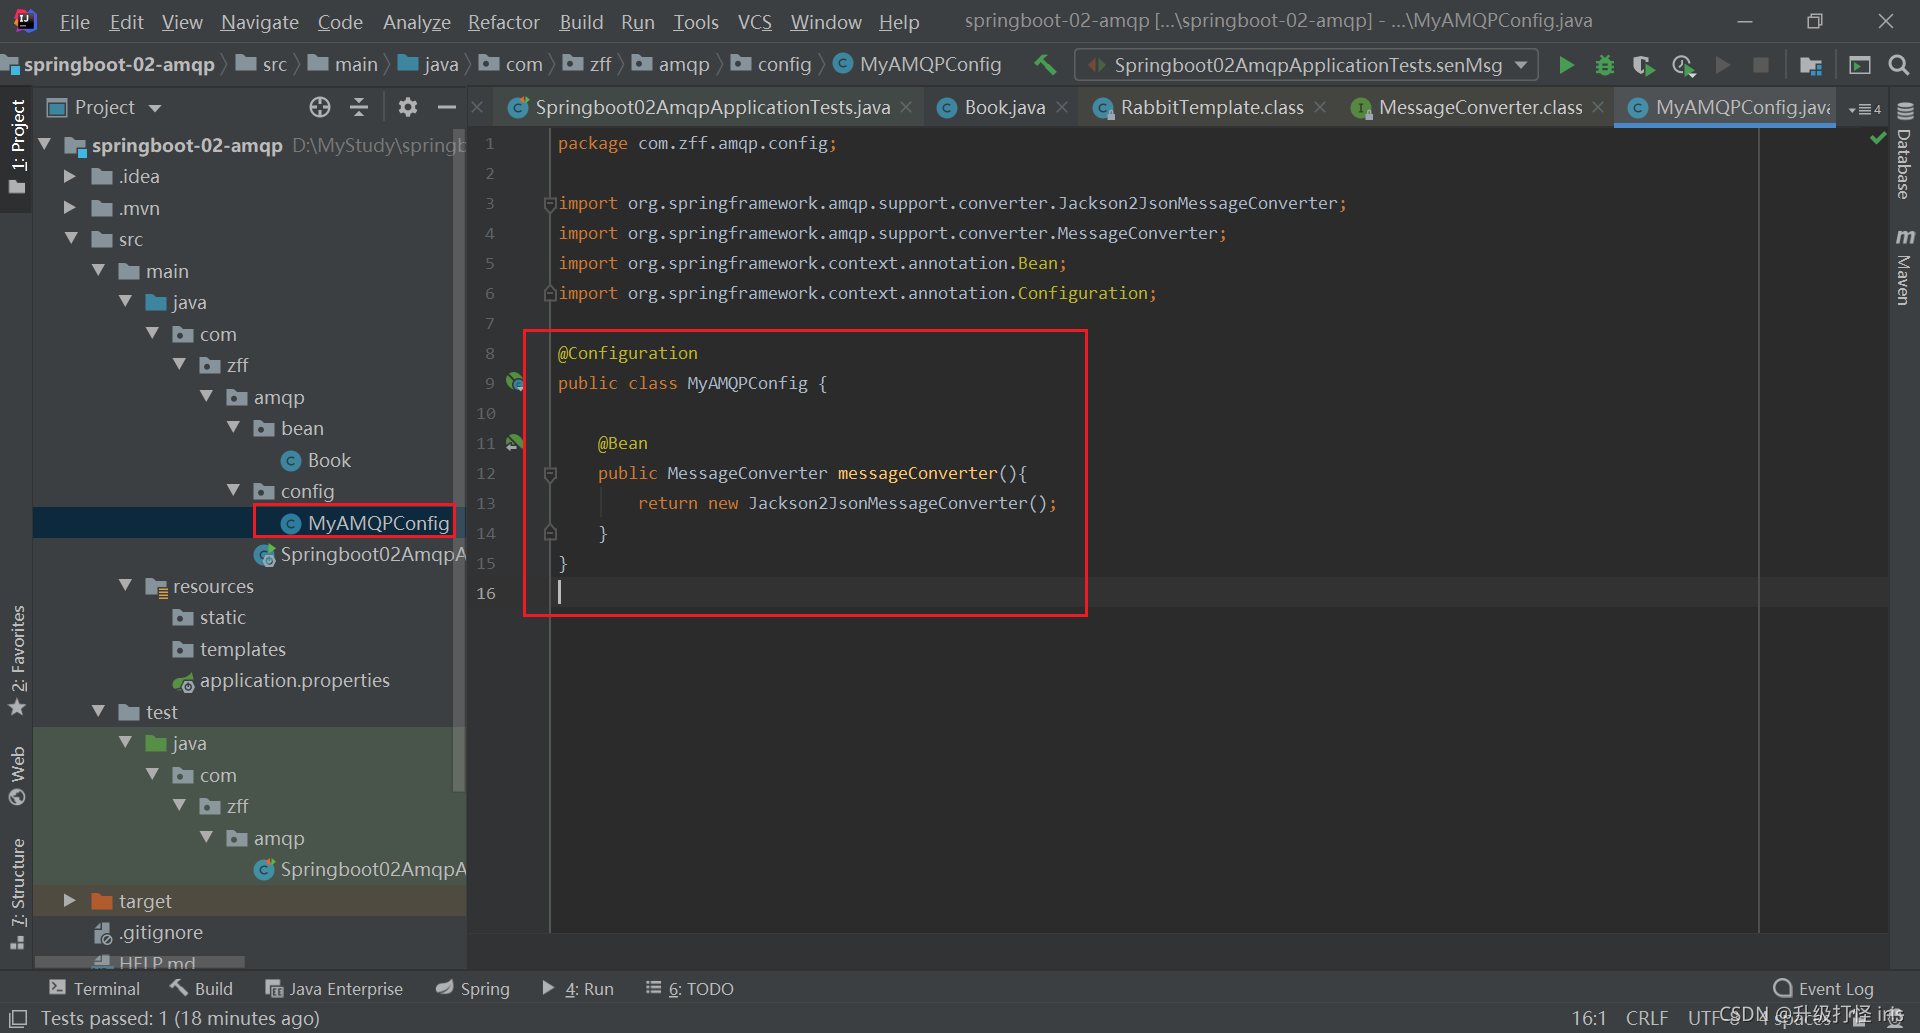
再去web端就可以看到正常数据了
当然,发送消息也可以是自定义的类
// 我这里自定义了一个类
public class Book {
    private String bookName;
    private String author;
...
}
发送一条消息
 /**
     * 1、单播(点对点) 发送消息
     * */
    @Test
    void contextLoads() {
        Map<String, Object> map = new HashMap<>();
        Book book = new Book("《西游记》", "吴承恩");
        rabbitTemplate.convertAndSend("exchange.direct", "atguigu.news", book);
    }
接收到自定义的消息:

二、广播
/**
     * 广播  发送消息
     * */
    @Test
    public void senMsg(){
        rabbitTemplate.convertAndSend("exchange.fanout", "", new Book("三国演义", "罗贯中"));
    }
这种方式发送的消息,各个都能接收到,自行到web管理器查看

华为开发者空间,是为全球开发者打造的专属开发空间,汇聚了华为优质开发资源及工具,致力于让每一位开发者拥有一台云主机,基于华为根生态开发、创新。
更多推荐

 0
0 0
0- 0


 已为社区贡献2条内容

所有评论(0)