vite+Vue3+ts之框架搭建过程与踩坑记录(持续补充)
_dirname 在 vscode 提示语法问题(如下图),是因为 ts 配置不支持 node,安装 @types/node, 并将 tsconfig.json 中的 compilerOptions.module 从 commonjs 改成 esnext。可以使用npm创建新项目,也可以使用yarn创建新项目,如果没有yarn环境,需要npm install yarn,然后进入环境变量中将bin文
一、序言
和 Webpack相比,Vite 具有以下特点: 快速的冷启动,不需要等待打包 即时的热模块更新 真正的按需编译,不用等待整个项目编译完成
| Vite 优点 | Vite 缺点 |
|---|---|
| 开发服务器比 Webpack 快 10-100 倍 | 只能针对现代浏览器(ES2015+) |
| 将 code-splitting 作为优先事项 | 与 CommonJS 模块不完全兼容 |
| 处于测试阶段,仅支持 Vue 3 | |
| 最小的脚手架不包括 Vuex、路由器等 | |
| 不同的开发服务器与构建工具 |
二、创建项目
- 创建运行
# npm 6.x
npm init vite@latest my-vue-app --template vue

# npm 7+, 需要额外的双横线:
npm init vite@latest my-vue-app -- --template vue

# yarn
yarn create vite my-vue-app --template vue

# pnpm
pnpm create vite my-vue-app -- --template vue
可以使用npm创建新项目,也可以使用yarn创建新项目,如果没有yarn环境,需要npm install yarn,然后进入环境变量中将bin文件目录引入在系统文件中的path路径。
npm install/install yarn
安装完成后运行项目
npm run dev/yarn dev
- 进入html中修改尾缀将js改成ts
然后在script 里添加 lang=“ts”
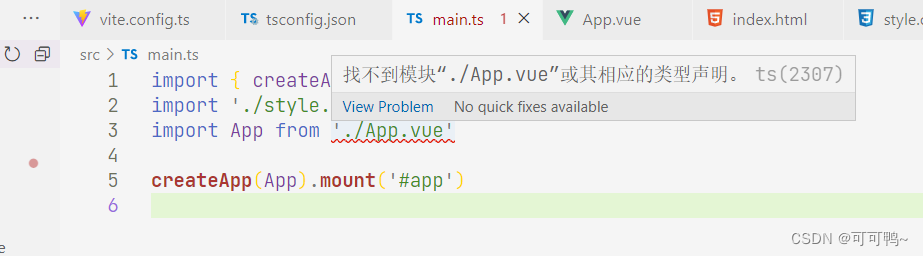
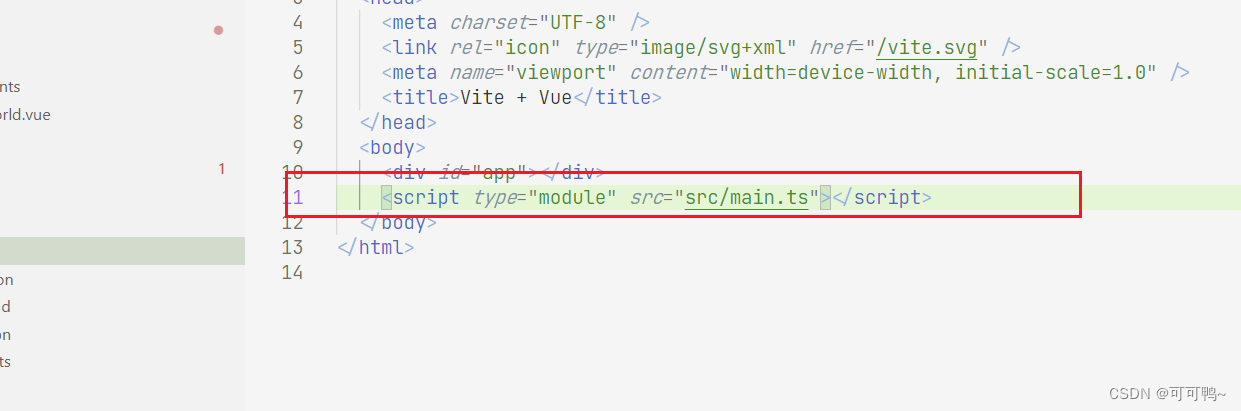 修改完之后,重启就可以访问项目了。虽然这样配置是可以了,但是打开main.ts会发现import App from App.vue会报错:Cannot find module ‘./App.vue’ or its corresponding type declarations.,这是因为现在ts还没有识别vue文件,需要进行下面步骤8
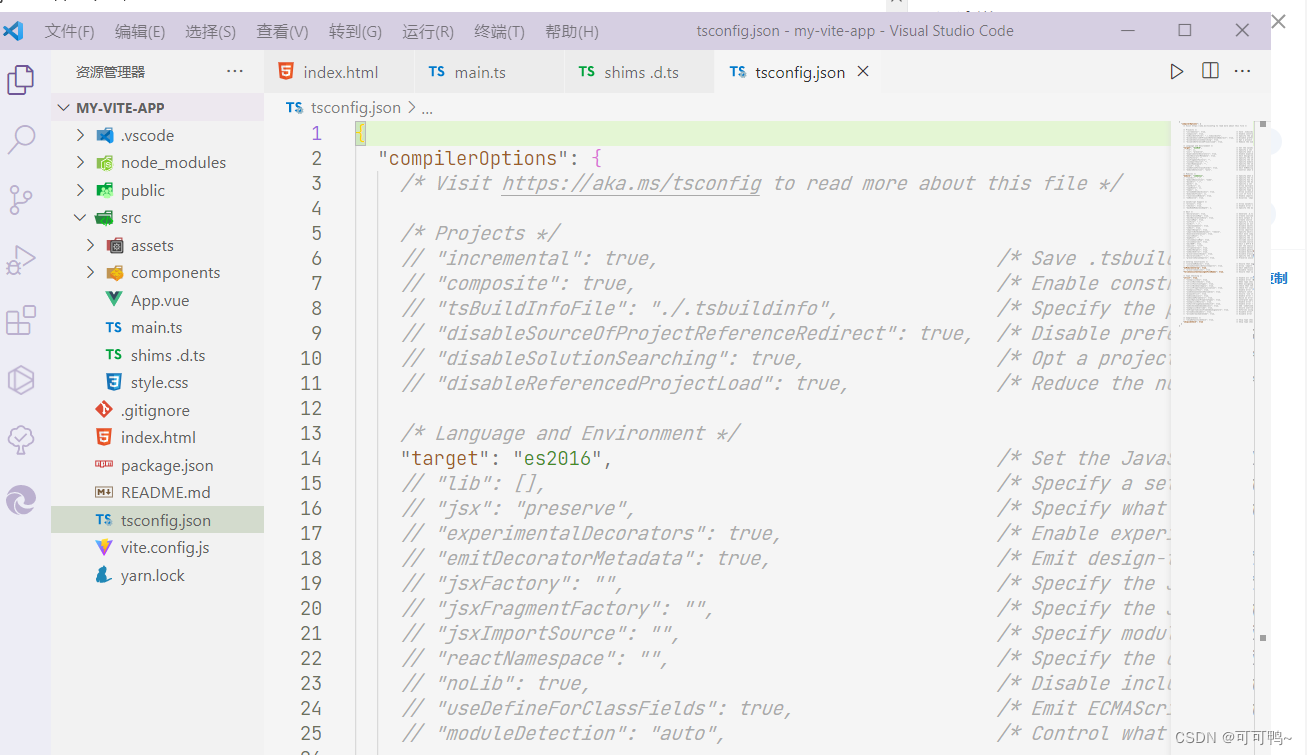
- 生成tsconfig.json或者手动新建
yarn add typescript -D
npx tsc --init  #生成tsconfig.json
手动添加

tsconfig.json文件信息
{
  "compilerOptions": {
    /* 访问 https://aka.ms/tsconfig.json 以阅读有关此文件的更多信息 */


    /* 基本选项 */
    "incremental": true,                   /* 启用增量编译 */
    "target": "ESNEXT",                    /* 指定 ECMAScript 目标版本:'ES3'、'ES5'(默认)、'ES2015'、'ES2016'、'ES2017'、'ES2018'、'ES2019'、'ES2020' 或 'ESNEXT'。 */
    "module": "commonjs",                  /* 指定模块代码生成:“none”、“commonjs”、“amd”、“system”、“umd”、“es2015”、“es2020”或“ESNext”。 */
    "lib": [],                             /* 指定要包含在编译中的库文件。 */
    "allowJs": true,                       /* 允许编译 javascript 文件。 */
    "checkJs": true,                       /* 报告 .js 文件中的错误。 */
    "jsx": "preserve",                     /* 指定 JSX 代码生成:'preserve'、'react-native' 或 'react'。 */
    "declaration": true,                   /* 生成相应的“.d.ts”文件。 */
    "declarationMap": true,                /* 为每个对应的“.d.ts”文件生成一个源映射。 */
    "sourceMap": true,                     /* 生成相应的“.map”文件。 */
    "outFile": "./",                       /* 连接输出到单个文件。 */
    "outDir": "./",                        /* 将输出结构重定向到目录。 */
    "rootDir": "./",                       /* 指定输入文件的根目录。用于通过 --outDir 控制输出目录结构。 */
    "composite": true,                     /* 启用项目编译 */
    "tsBuildInfoFile": "./",               /* 指定文件存放增量编译信息 */
    "removeComments": true,                /* 不要向输出发出注释(删除除代码注释)。 */
    "noEmit": true,                        /* 不发出输出(不生成编译后的文件)。 */
    "noEmitOnError": true,                 /* 在输出js代码时,如果有错将不编译文件。 */
    "importHelpers": true,                 /* 从 'tslib' 导入发射助手。 */
    "downlevelIteration": true,            /* 以“ES5”或“ES3”为目标时,为“for-of”、展开和解构中的迭代提供全面支持。 */
    "isolatedModules": true,               /* 将每个文件转换为一个单独的模块(类似于 'ts.transpileModule')。 */


    /* 严格的类型检查选项 */
    "strict": true,                        /* 启用所有严格的类型检查选项。 在开发中,建议将stricet这类选项都开启。 */
    "strictNullChecks": true,              /* 启用严格的空(undefined、null)检查,可以防止“未定义不是对象”。 建议开启*/
    "strictFunctionTypes": true,           /* 启用函数类型的严格检查。 */
    "strictBindCallApply": true,           /* 在函数上启用严格的“绑定”、“调用”、应用”方法。 */
    "strictPropertyInitialization": true,  /* 启用对类中属性初始化的严格检查。 */
    "noImplicitThis": true,                /* 使用隐含的“any”类型在“this”表达式上引发错误。 */
    "noImplicitAny": true,                 /* 使用隐含的“any”类型在表达式和声明上引发错误(主要用于控制变量、参数是否必须知道它们的类型【类型检查】),如果是将JavaScript迁移到TypeScript时,可以关闭此项,但不建议这样做。 */
    "alwaysStrict": true,                  /* 以严格模式解析并为每个源文件发出“使用严格”。 */


    /* 额外检查 */
    "noUnusedLocals": true,                /* 报告未使用的本地人的错误。 */
    "noUnusedParameters": true,            /* 报告未使用参数的错误。 */
    "noImplicitReturns": true,             /* 不是函数中的所有代码路径都返回值时报告错误。 */
    "noFallthroughCasesInSwitch": true,    /* 在 switch 语句中报告失败情况的错误。 */


    /* 模块分辨率选项 */
    "moduleResolution": "node",            /* 指定模块解析策略:'node' (Node.js) 或 'classic' (TypeScript pre-1.6)。 */
    "baseUrl": "./",                       /* 解析非绝对模块名称的基目录。 */
    "paths": {},                           /* 一系列将导入重新映射到相对于“baseUrl”的查找位置的条目。 */
    "rootDirs": [],                        /* 根文件夹列表,其组合内容代表运行时项目的结构。 */
    "typeRoots": [],                       /* 包含类型定义的文件夹列表。 */
    "types": [],                           /* 类型声明文件要包含在编译中。 */
    "allowSyntheticDefaultImports": true,  /* 允许从没有默认导出的模块中默认导入。 这不会影响代码发出,只是类型检查。 */
    "esModuleInterop": true,               /* 通过为所有导入创建命名空间对象,在 CommonJS 和 ES 模块之间启用发射互操作性。 暗示“allowSyntheticDefaultImports”。 */
    "preserveSymlinks": true,              /* 不解析符号链接的真实路径。 */
    "allowUmdGlobalAccess": true,          /* 允许从模块访问 UMD 全局变量。 */


    /* 源映射选项 */
    "sourceRoot": "",                      /* 指定调试器应该定位 TypeScript 文件而不是源位置的位置。 */
    "mapRoot": "",                         /* 指定调试器应该定位映射文件而不是生成位置的位置。 */
    "inlineSourceMap": true,               /* 发出带有源映射的单个文件而不是单独的文件。 */
    "inlineSources": true,                 /* 在单个文件中与源映射一起发出源; 需要设置“--inlineSourceMap”或“--sourceMap”。 */


    /* 实验选项 */
    "experimentalDecorators": true,        /* 启用对 ES7 装饰器的实验性支持。 */
    "emitDecoratorMetadata": true,         /* 为装饰器的发射类型元数据启用实验性支持。 */


    /* 高级选项 */
    "skipLibCheck": true,                     /* 跳过声明文件的类型检查。 */
    "forceConsistentCasingInFileNames": true  /* 禁止对同一文件的大小写不一致的引用。 */
  }
}
- 配置 vite.config.ts
如果是vite.config.js 就修改成ts
import { defineConfig, loadEnv, UserConfig, UserConfigExport } from "vite";
import vue from '@vitejs/plugin-vue'
// https://vitejs.dev/config/
export default (config: UserConfig): UserConfigExport => {
  const mode = config.mode as string;
  const isEnvProd = ['production', 'test'].includes(mode)
  return defineConfig({})
}
- 如果没有vite.config.ts没有配置默认处理.vue 文件
yarn add @vitejs/plugin-vue -D
配置 vite.config.ts
import vue from "@vitejs/plugin-vue";
...
export default ({ commond, mode }: ConfigEnv): UserConfigExport => {
    return defineConfig({
        plugins: [
            vue()
        ]
    })
}
- 设置别名
在tsconfig.json中添加下面的配置即可 vue3+ts vscode中@注解不识别
import { defineConfig, loadEnv, UserConfig, UserConfigExport } from "vite";
import vue from '@vitejs/plugin-vue'
// https://vitejs.dev/config/
export default (config: UserConfig): UserConfigExport => {
  const mode = config.mode as string;
  const isEnvProd = ['production', 'test'].includes(mode)
  return defineConfig({
    plugins: [
      vue()
  ],
  resolve: {
    alias: [
      {
        find: '@/',
        replacement: resolve(__dirname, 'src')
      }
    ]
  },
  })
}
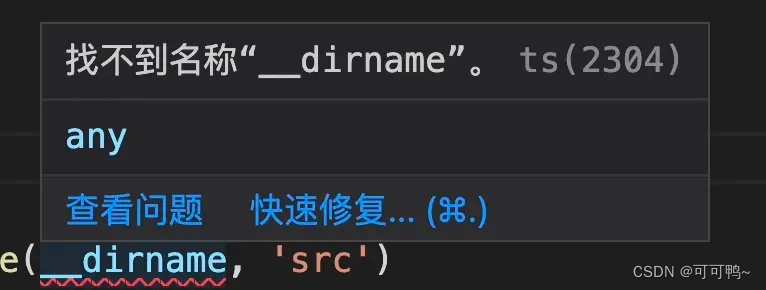
__dirname 在 vscode 提示语法问题(如下图),是因为 ts 配置不支持 node,安装 @types/node, 并将 tsconfig.json 中的 compilerOptions.module 从 commonjs 改成 esnext。
yarn add @types/node -D
//导入path包
import { resolve } from "path";
导入path包出错的话是因为node安装失败,再次执行命令

原因分析:path模块是node.js内置的功能,但是node.js本身并不支持typescript,所以直接在typescript项目里使用是不行的
解决方法:安装@types/node
npm install @types/node --save-dev
在tsconfig.json中配置
{
  "compilerOptions": {
    "target": "esnext",
    "useDefineForClassFields": true,
    "module": "esnext",
    "moduleResolution": "node",
    "strict": true,
    "jsx": "preserve",
    "sourceMap": true,
    "resolveJsonModule": true,
    "isolatedModules": true,
    "esModuleInterop": true,
    "lib": ["esnext", "dom"],
    "skipLibCheck": true,
    "types": ["element-plus/global"],
    "baseUrl": ".",
    "paths": {
      "@/*":["./src/*"]
    }
  },
  "include": ["src/**/*.ts", "src/**/*.d.ts", "src/**/*.tsx", "src/**/*.vue"],
  "references": [{ "path": "./tsconfig.node.json" }]
}
- 处理css
安装less
yarn add less less-loader --dev
或者安装
yarn add sass saa-loader -D
- 添加类型声明文件
src 下添加 shims-vue.d.ts 文件
declare module '*.vue' {
    // Vue 3
    import { defineComponent } from 'vue';
    const Component: ReturnType<typeof defineComponent>;
    export default Component;
}
参考信息
错误原因:找不到模块“./app.vue”或其相应的类型声明。
在src目录下新建type文件夹,新建一个 vue.d.ts ,添加代码:

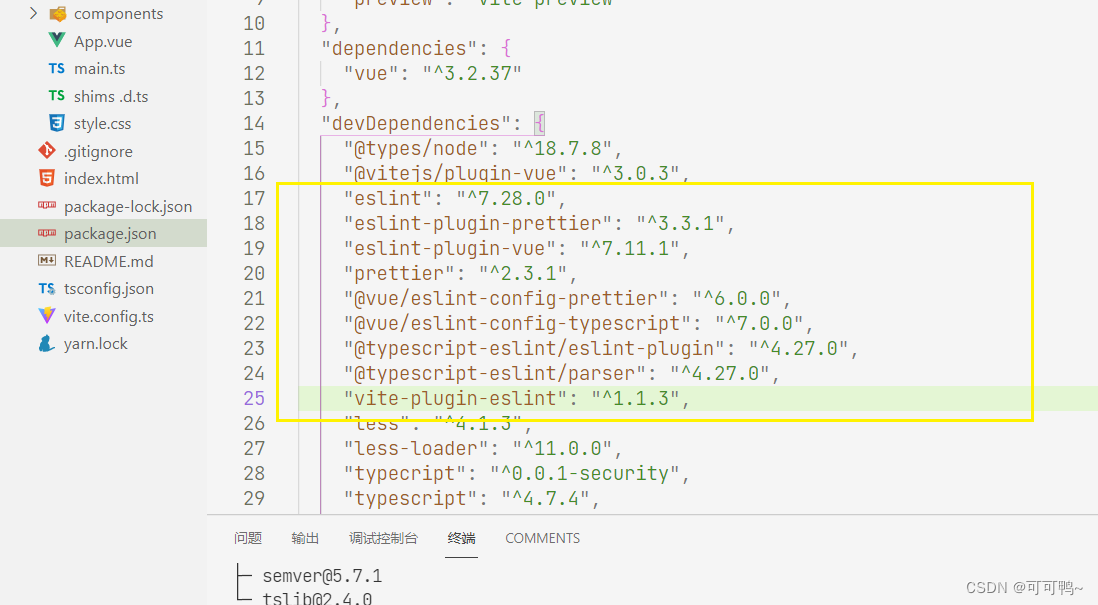
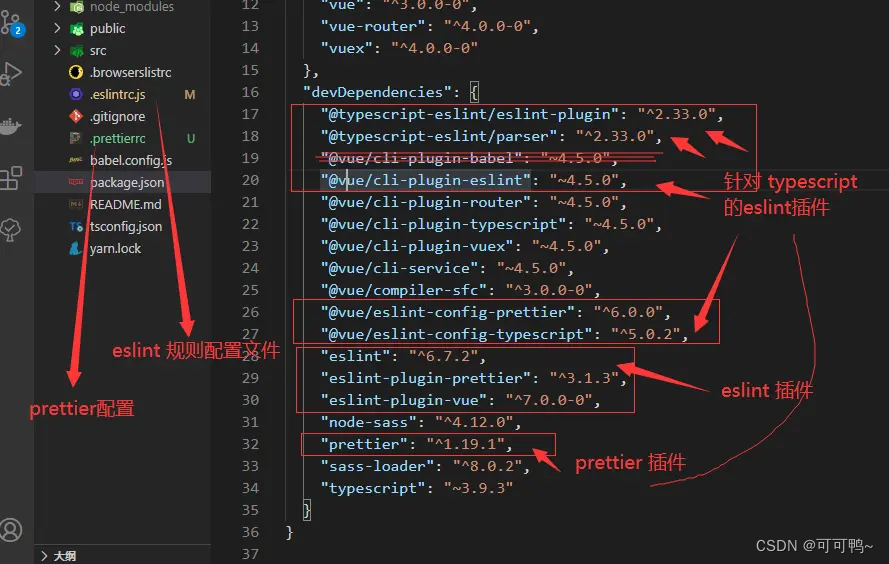
- 配置 eslint 和 prettier
直接卸载依赖里npm install
 "eslint": "^7.28.0",
 "eslint-plugin-prettier": "^3.3.1",
 "eslint-plugin-vue": "^7.11.1",
 "prettier": "^2.3.1",
 "@vue/eslint-config-prettier": "^6.0.0",
 "@vue/eslint-config-typescript": "^7.0.0",
 "@typescript-eslint/eslint-plugin": "^4.27.0",
 "@typescript-eslint/parser": "^4.27.0",
 "vite-plugin-eslint": "^1.1.3",
用 vite 创建的 vue-ts 项目,初始化后,安装 Eslint 和 Prettier 依赖,然后执行
npx eslint --init
也可以手动创建,在根目录下创建.eslintrc.js
配置eslint如下
主要是根据公司或者个人开发习惯定制规则
// eslint-disable-next-line no-undef
module.exports = {
  'env': {
    'browser': true,
    'es2021': true,
    'vue/setup-compiler-macros': true
  },
  'parser': 'vue-eslint-parser',
  'extends': [
    'eslint:recommended',
    'plugin:vue/vue3-essential',
    'plugin:@typescript-eslint/recommended'
  ],
  'parserOptions': {
    'ecmaVersion': 'latest',
    'parser': '@typescript-eslint/parser',
    'sourceType': 'module'
  },
  'plugins': [
    'vue',
    '@typescript-eslint'
  ],
  // rules配置文档http://eslint.cn/docs/rules/
  'rules': {
    // --以下是Possible Errors JS代码中的逻辑错误相关
    'no-extra-parens': 'error', // 禁止不必要的括号
    // "no-console": "error" // 不允许打印console.log
    'no-template-curly-in-string': 'error', // 禁止在常规字符串中出现模板字符串语法${xxx}
    // --以下是Best Practices 最佳实践
    'default-case': 'error', // 强制switch要有default分支
    'dot-location': ['error', 'property'], // 要求对象的点要跟属性同一行
    'eqeqeq': 'error', // 要求使用 === 和 !==
    'no-else-return': 'error', // 禁止在else前有return,return和else不能同时存在
    'no-empty-function': 'error', // 禁止出现空函数,有意而为之的可以在函数内部加条注释
    'no-multi-spaces': 'error', // 禁止出现多个空格,如===前后可以有一个空格,但是不能有多个空格
    'no-multi-str': 'error', // 禁止出现多行字符串,可以使用模板字符串换行
    'no-self-compare': 'error', // 禁止自身比较
    'no-unmodified-loop-condition': 'error', // 禁止一成不变的循环条件,如while条件,防止死循环
    'no-useless-concat': 'error', // 禁止没有必要的字符串拼接,如'a'+'b'应该写成'ab'
    'require-await': 'error', // 禁止使用不带await的async表达式
    // --以下是Stylistic Issues 主观的代码风格
    'array-element-newline': ['error', 'consistent'], // 数组元素要一致的换行或者不换行
    'block-spacing': 'error', // 强制函数/循环等块级作用域中的花括号内前后有一个空格(对象除外)
    'brace-style': ['error', '1tbs', { 'allowSingleLine': true }], // if/elseif/else左花括号要跟if..同行,右花括号要换行;或者全部同一行
    'comma-dangle': ['error', 'only-multiline'], // 允许在对象或数组的最后一项(不与结束括号同行)加个逗号
    'comma-spacing': 'error', // 要求在逗号后面加个空格,禁止在逗号前面加一个空格
    'comma-style': 'error', // 要求逗号放在数组元素、对象属性或变量声明之后,且在同一行
    'computed-property-spacing': 'error', // 禁止在计算属性中出现空格,如obj[ 'a' ]是错的,obj['a']是对的
    'eol-last': 'error', // 强制文件的末尾有一个空行
    'func-call-spacing': 'error', // 禁止函数名和括号之间有个空格
    'function-paren-newline': 'error', // 强制函数括号内的参数一致换行或一致不换行
    'implicit-arrow-linebreak': 'error', // 禁止箭头函数的隐式返回 在箭头函数体之前出现换行
    'indent': ['error', 2], // 使用一致的缩进,2个空格
    'jsx-quotes': 'error', // 强制在jsx中使用双引号
    'key-spacing': 'error', // 强制对象键值冒号后面有一个空格
    'lines-around-comment': 'error', // 要求在块级注释/**/之前有一个空行
    'multiline-comment-style': 'error', // 多行注释同一个风格,每一行前面都要有*
    'new-cap': 'error', // 要求构造函数首字母大写
    'newline-per-chained-call': ['error', { 'ignoreChainWithDepth': 2 }], // 链式调用长度超过2时,强制要求换行
    'no-lonely-if': 'error', // 禁止else中出现单独的if
    'no-multiple-empty-lines': 'error', // 限制最多出现两个空行
    'no-trailing-spaces': 'error', // 禁止在空行使用空白字符
    'no-unneeded-ternary': 'error', // 禁止多余的三元表达式,如a === 1 ? true : false应缩写为a === 1
    'no-whitespace-before-property': 'error', // 禁止属性前有空白,如console. log(obj['a']),log前面的空白有问题
    'nonblock-statement-body-position': 'error', // 强制单行语句不换行
    'object-curly-newline': ['error', { 'multiline': true }], // 对象数属性要有一致的换行,都换行或都不换行
    'object-curly-spacing': ['error', 'always'], // 强制对象/解构赋值/import等花括号前后有空格
    'object-property-newline': ['error', { 'allowAllPropertiesOnSameLine': true }], // 强制对象的属性在同一行或全换行
    'one-var-declaration-per-line': 'error', // 强制变量初始化语句换行
    'operator-assignment': 'error', // 尽可能的简化赋值操作,如x=x+1 应简化为x+=1
    'quotes': ['error', 'single'], // 要求字符串尽可能的使用单引号
    'semi': ['error', 'never'], // 不要分号
    'semi-spacing': 'error', // 强制分号后面有空格,如for (let i=0; i<20; i++)
    'semi-style': 'error', // 强制分号出现在句末
    'space-before-blocks': 'error', // 强制块(for循环/if/函数等)前面有一个空格,如for(...){}是错的,花括号前面要空格:for(...) {}
    'space-infix-ops': 'error', // 强制操作符(+-/*)前后有一个空格
    'spaced-comment': 'error', // 强制注释(//或/*)后面要有一个空格
    // --以下是ECMAScript 6 ES6相关的
    'arrow-body-style': 'error', // 当前头函数体的花括号可以省略时,不允许出现花括号
    'arrow-parens': ['error', 'as-needed'], // 箭头函数参数只有一个时,不允许写圆括号
    'arrow-spacing': 'error', // 要求箭头函数的=>前后有空格
    'no-confusing-arrow': 'error', // 禁止在可能与比较操作符混淆的地方使用箭头函数
    'no-duplicate-imports': 'error', // 禁止重复导入
    'no-useless-computed-key': 'error', // 禁止不必要的计算属性,如obj3={['a']: 1},其中['a']是不必要的,直接写'a'
    'no-var': 'error', // 要求使用let或const,而不是var
    'object-shorthand': 'error', // 要求对象字面量使用简写
    'prefer-const': 'error', // 要求使用const声明不会被修改的变量
    'prefer-destructuring': ['error', {
      'array': false,
      'object': true
    }, { 'enforceForRenamedProperties': true }], // 要求优先使用结构赋值,enforceForRenamedProperties为true将规则应用于重命名的变量
    'prefer-template': 'error', // 使用模板字符串,而不是字符串拼接
    'rest-spread-spacing': 'error', // 扩展运算符...和表达式之间不允许有空格,如... re1错误,应该是...re1
    'template-curly-spacing': 'error', // 禁止模板字符串${}内前后有空格
  }
}
基本
module.exports = {
 env: {
   browser: true,
   es2021: true,
   node: true,
 },
 extends: [
   'plugin:vue/essential' /*引入eslint-plugin-vue插件,并开启essential类别中的一系列规则。*/,
   'plugin:@typescript-eslint/recommended',
   'eslint:recommended' /* 启用一些列核心规则,eslint应用在vue中的必须配置*/,
   '@vue/prettier' /*使用prettier*/,
 ],
 parserOptions: {
   ecmaVersion: 13,
   parser: '@typescript-eslint/parser',
   sourceType: 'module',
 },
 plugins: ['vue', '@typescript-eslint'],
 rules: {
   'prettier/prettier': 'error',
   'no-console': process.env.NODE_ENV === 'production' ? 'error' : 'off',
   'no-debugger': process.env.NODE_ENV === 'production' ? 'error' : 'off',
 },
}
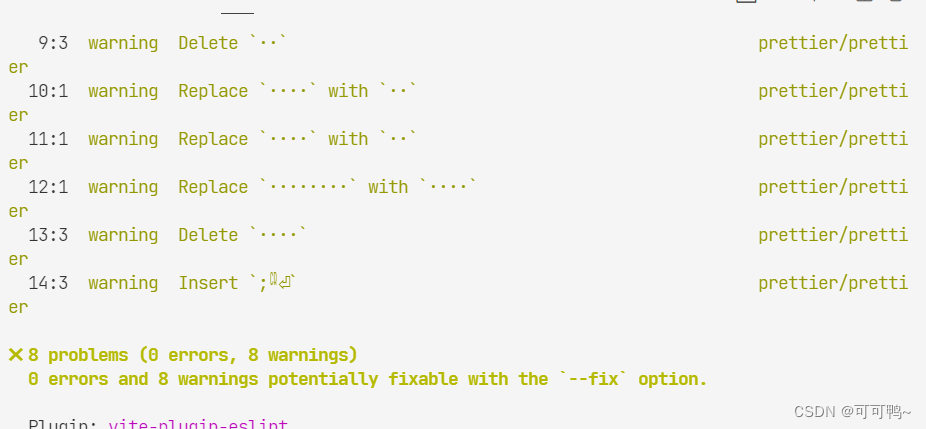
之后开发时有eslint报错时,使用shift+alt+f格式化,可以解决大部分报错,个别无法格式化的就手动解决吧~
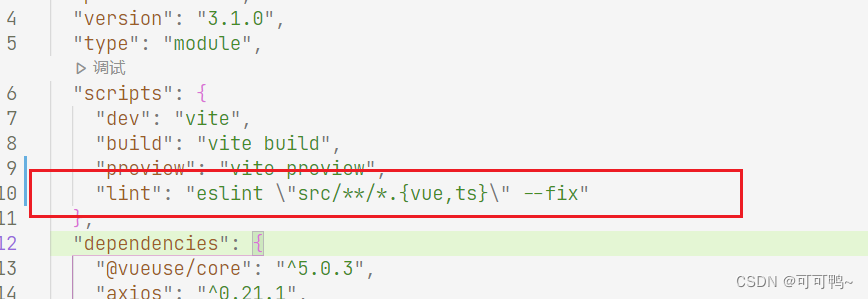
配置lint指令
在package.json的scripts添加指令"lint":"eslint src/**/*.{js,jsx,vue,ts,tsx} --fix",之后执行npm run lint 也可以自动修复eslint报错。
配置 prettier
在根目录下创建
.prettierrc
{
  "singleQuote": false,
  "semi": true,// 结尾加分号
  "trailingComma": "none",// 将多行JSX元素放在最后一行的末尾
  "printWidth": 100,
  "arrowParens": "always",
  "tabWidth": 2,// 指定每个缩进级别的空格数字
  "endOfLine": "auto",
  "overrides": [
    {
      "files": ".prettierrc",
      "options": { "parser": "json" }
    },
    {
      "files": "*.vue",
      "options": {
        "parser": "vue",
        "printWidth": 300
      }
    }
  ]
}
- 安装router
yarn add vue-router@4.0.1
在项目src目录下面新建router目录,然后添加index.ts文件,在文件中添加以下内容
import {createRouter, createWebHashHistory} from 'vue-router'

// 在 Vue-router新版本中,需要使用createRouter来创建路由
export default createRouter({
  // 指定路由的模式,此处使用的是hash模式
  history: createWebHashHistory(),
  // 路由地址
  routes: []
})

或者使用

import { createRouter, createWebHashHistory, RouteRecordRaw } from 'vue-router'

const routes: Array<RouteRecordRaw> = []

const router = createRouter({
  history: createWebHashHistory(), //createWebHashHistory() hash模式
  routes
})

export default router
RouteRecordRaw类型校验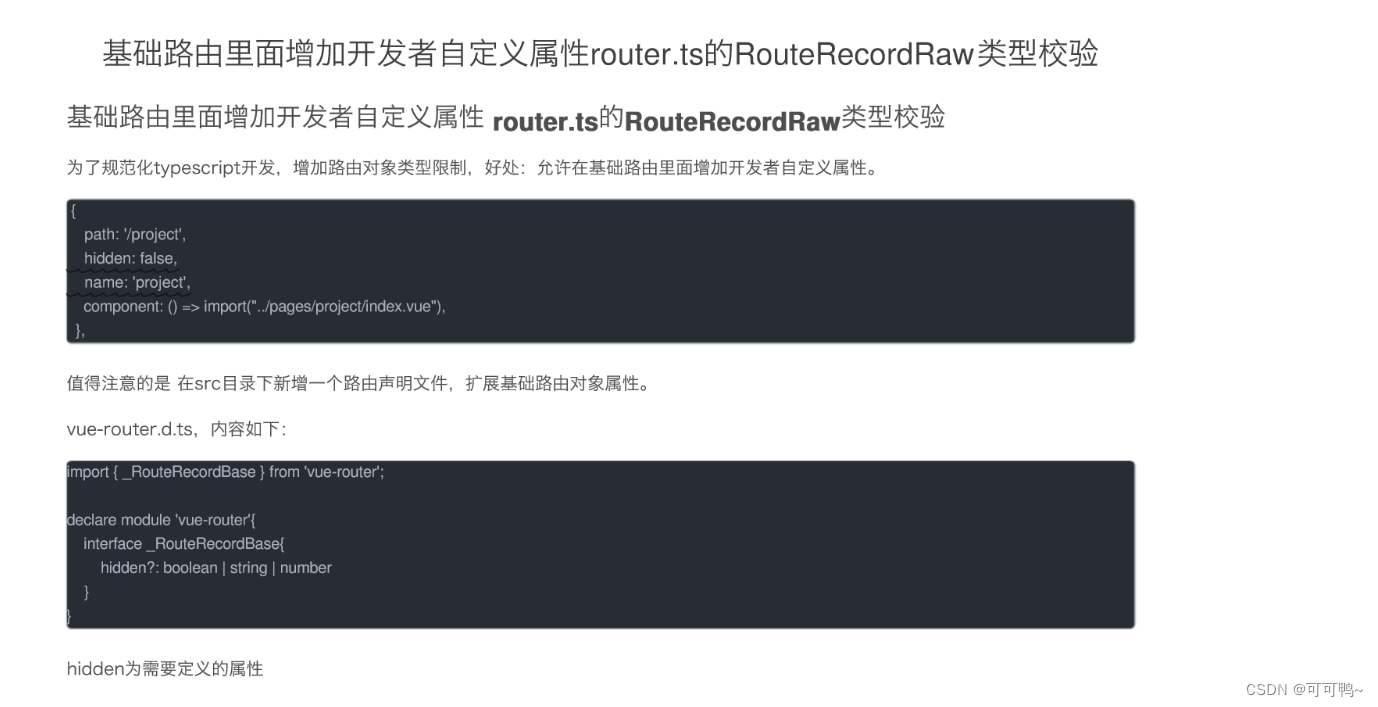
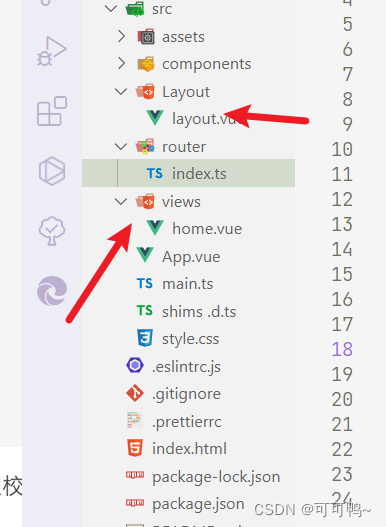
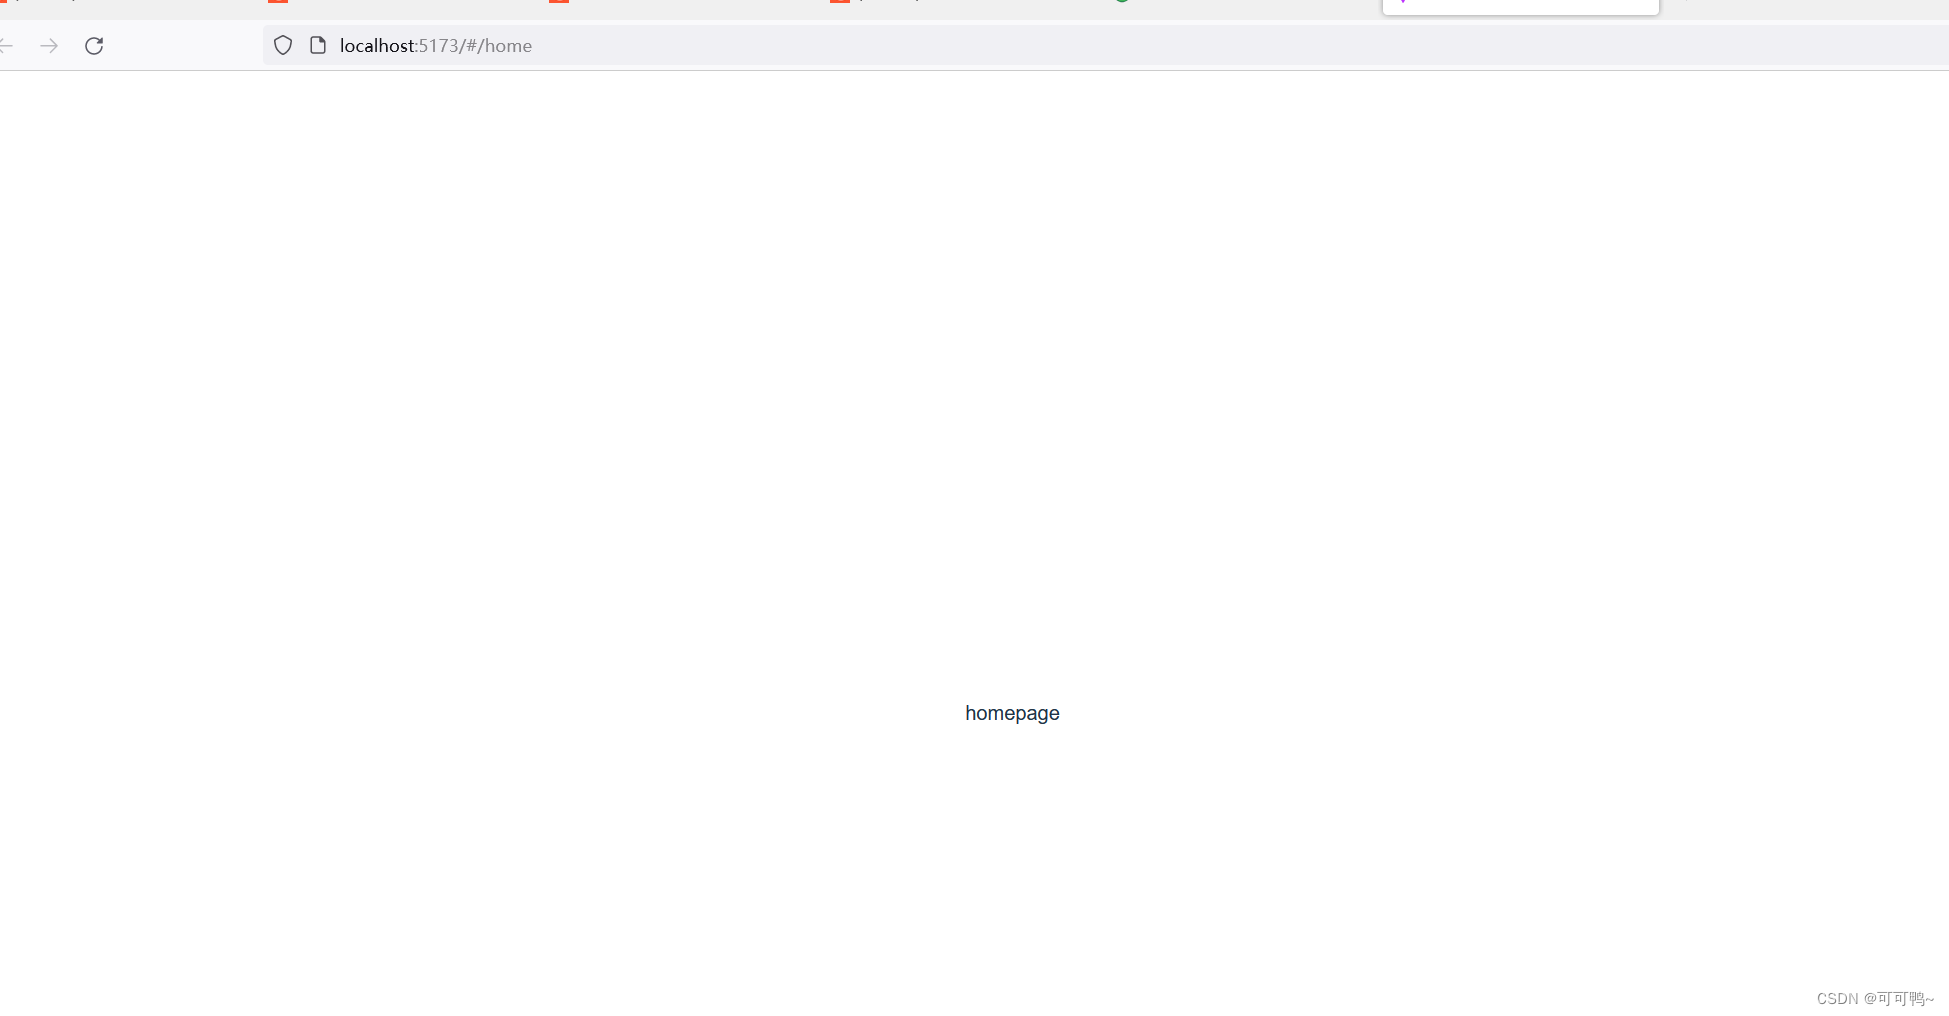
创建views和layout文件夹创建home和layout文件
在路由中引入页面文件
import { createRouter, createWebHashHistory, RouteRecordRaw } from 'vue-router'
import Layout from "../Layout/layout.vue";
const routes: Array<RouteRecordRaw> = [
    {
        path: "/",
        component: Layout,
        redirect: "/home",
        meta: { title: "ui.router.pageWorkbench", icon: "icon-desktop" },
        children: [
            {
                path: "/home",
                component: () => import("../views/home.vue"),
                meta: { title: "ui.router.pageHome", icon: "icon-home" }
            }
        ]
    },
]

const router = createRouter({
    history: createWebHashHistory(), //createWebHashHistory() hash模式
    routes
})
export default router
引入到全局
import { createApp } from 'vue'
import './style.css'
import App from './App.vue'
import router from "./router";
const app = createApp(App);
app
    .use(router)
    .mount('#app');
- 添加Element Plus组件库
# Yarn
$ yarn add element-plus

# NPM
$ npm install element-plus --save
或者安装固定版本
安装
"element-plus": "1.0.2-beta.71"
发现有冲突
npm ERR! code ERESOLVE
npm ERR! ERESOLVE unable to resolve dependency tree
npm ERR!
npm ERR! While resolving: my-vue-app@0.0.0
npm ERR! Found: vue@3.2.37
npm ERR! node_modules/vue
npm ERR!   vue@"^3.2.37" from the root project
npm ERR!
npm ERR! Could not resolve dependency:
npm ERR! peer vue@"3.1.x" from element-plus@1.0.2-beta.71
npm ERR! node_modules/element-plus
npm ERR!   element-plus@"1.0.2-beta.71" from the root project
npm ERR!
npm ERR! Fix the upstream dependency conflict, or retry
npm ERR! this command with --force, or --legacy-peer-deps
npm ERR! to accept an incorrect (and potentially broken) dependency resolution.
版本冲突解决
npm i --legacy-peer-deps
重新执行npm install
挂在main中
import { createApp } from 'vue'
import './style.css'
import App from './App.vue'
import router from "./router";
import ElementPlus from "element-plus";
const app = createApp(App);
app
    .use(router)
    .use(ElementPlus, { size: "mini" })
    .mount('#app');
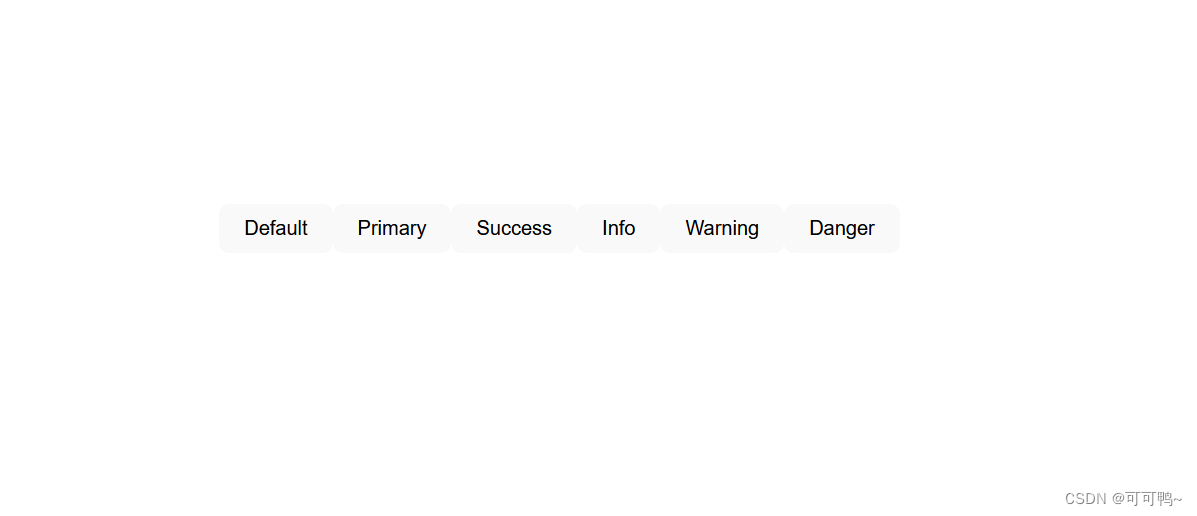
测试一下是否起作用,从网页上随便复制代码
element3
  <el-row class="mb-4">
    <el-button>Default</el-button>
    <el-button type="primary">Primary</el-button>
    <el-button type="success">Success</el-button>
    <el-button type="info">Info</el-button>
    <el-button type="warning">Warning</el-button>
    <el-button type="danger">Danger</el-button>
  </el-row>
- 安装vuex
npm install vuex@next --save

// yarn
yarn add vuex@next --save
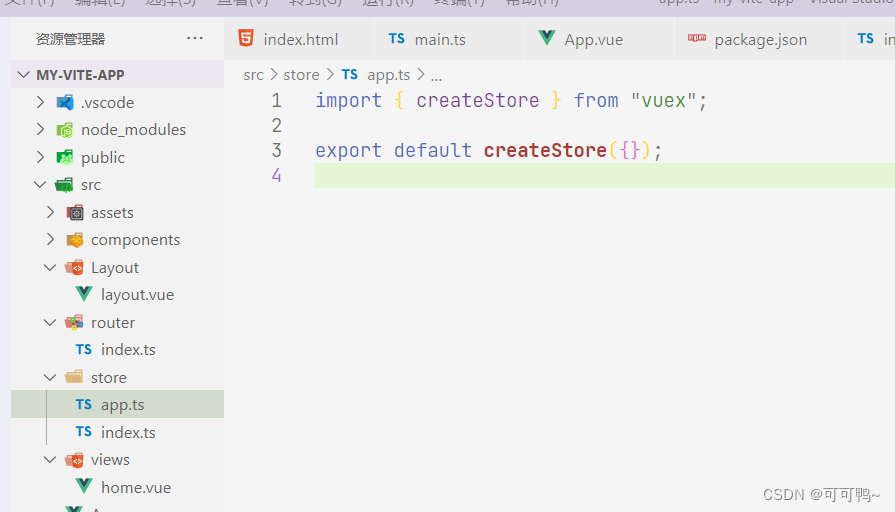
在src目录下面创建store文件夹,创建文件index.ts
import { createStore } from "vuex";
export default createStore({
    state: {
    },
    mutations: {

    },
    actions: {},
    getters: {},
    modules: {
      }
})
如果要引入模块,新建模块引入到主文件中即可
import { createStore } from "vuex";
import app from "./app";
export default createStore({
    state: {
    },
    mutations: {

    },
    actions: {},
    getters: {},
    modules: {
        app: app
      }
})
import { createStore } from "vuex";

export default createStore({});
挂在全局
import { createApp } from 'vue'
import './style.css'
import App from './App.vue'
import router from "./router";
import ElementPlus from "element-plus";
import store from "./store";
const app = createApp(App);
app
    .use(store)
    .use(router)
    .use(ElementPlus, { size: "mini" })
    .mount('#app');
总的来说引入了这几个依赖
  "dependencies": {
    "element-plus": "1.0.2-beta.71",
    "vue": "3.2.0",
    "vue-router": "4.0.1",
    "vuex": "^4.0.2"
  },
- 安装axios
npm install axios --save

// yarn
yarn add axios
指定安装
"axios": "^0.21.1",
- 配置端口
vite.config.ts加入
  server: {
    open: true, // 自动启动浏览器
    host: "0.0.0.0", // localhost
    port: 8001, // 端口号
    https: false
  }
三、vue3知识点
export default 和 export 使用
//export default只能暴露一次

// var info = {
//   name: 'zs',
//   age: 20
// }
// export default info


//export 可以暴露多次 使用时用{title as title123}
// import { title as title123 } from '../src/i18n/zh-TW'
// console.log(title123 )
// export var title = '呵呵呵'
// export var content = '哈哈哈'
globalProperties
// 之前 (Vue 2.x)
Vue.prototype.$http = () => {}
// 之后 (Vue 3.x)
const app = createApp({})
app.config.globalProperties.$http = () => {}
setup两种声明形式
单引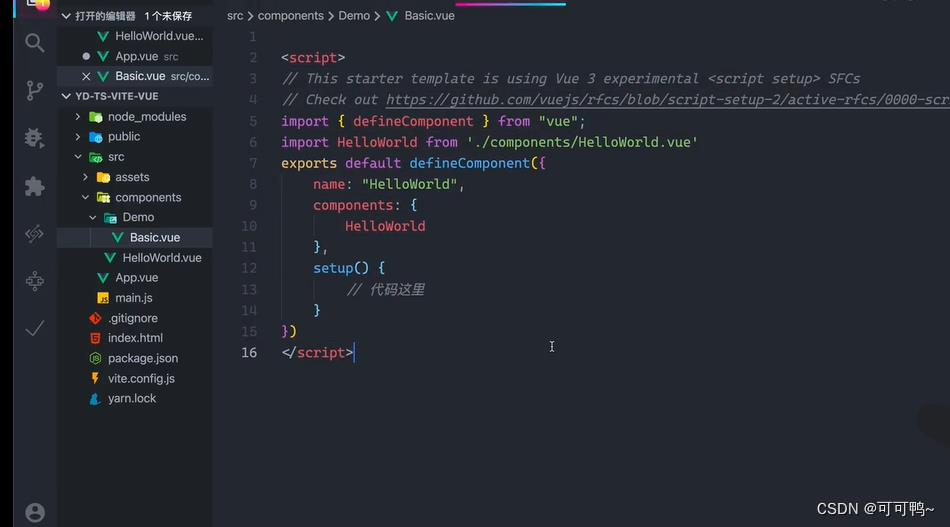
直接抛出
demo1
<script setup lang="ts">
import { computed, reactive } from "vue";
type DState = {
  count: number,
  double:number,
};
const state:DState = reactive({
  count: 0,
  double: computed(() => state.count * 2),
});


function increment(){
  state.count++;
}
</script>

<template>
  <h1>{{ msg }}</h1>
  <div>{{state.count }}</div>
  <button @click="increment">++</button>
</template>

<style scoped  >

.logo {
  height: 6em;
  padding: 1.5em;
  will-change: filter;
}
.logo:hover {
  filter: drop-shadow(0 0 2em #646cffaa);
}
.logo.vue:hover {
  filter: drop-shadow(0 0 2em #42b883aa);
}
</style>
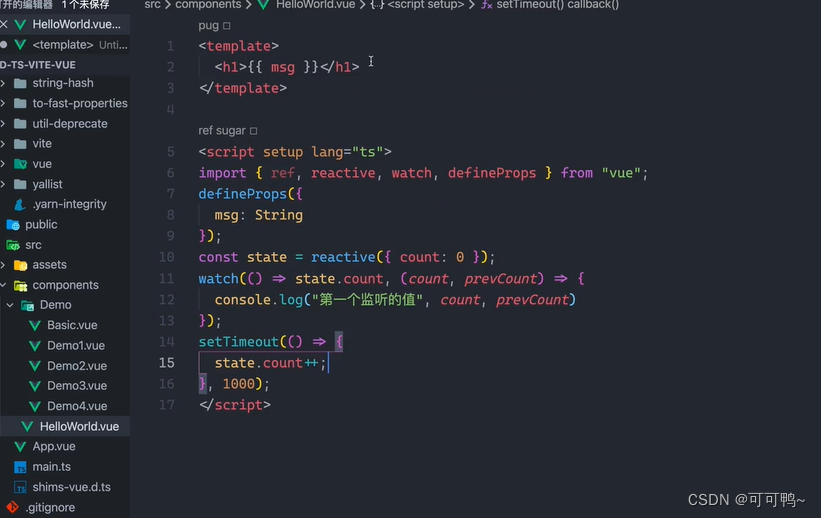
区别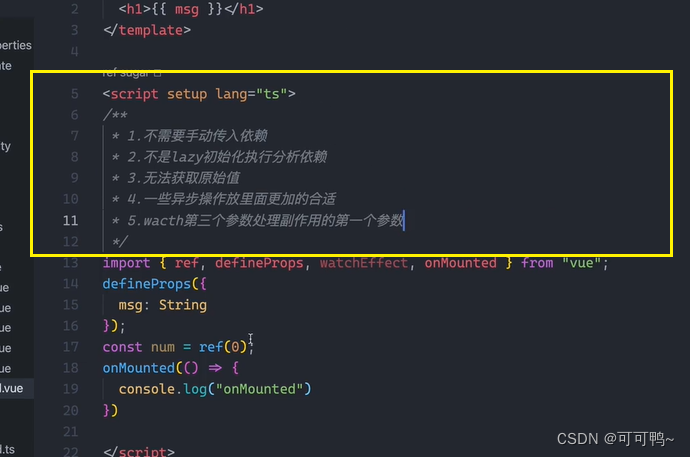
ref等使用方式
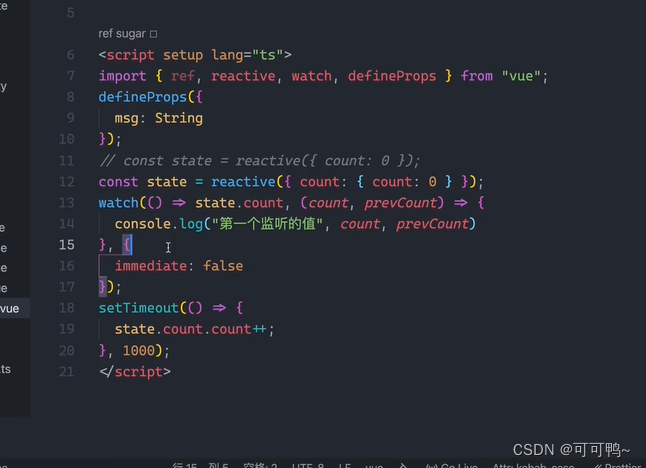
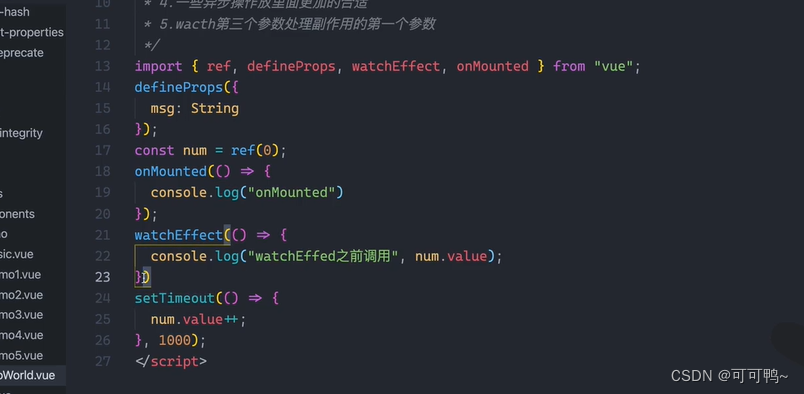
增加watchEffect
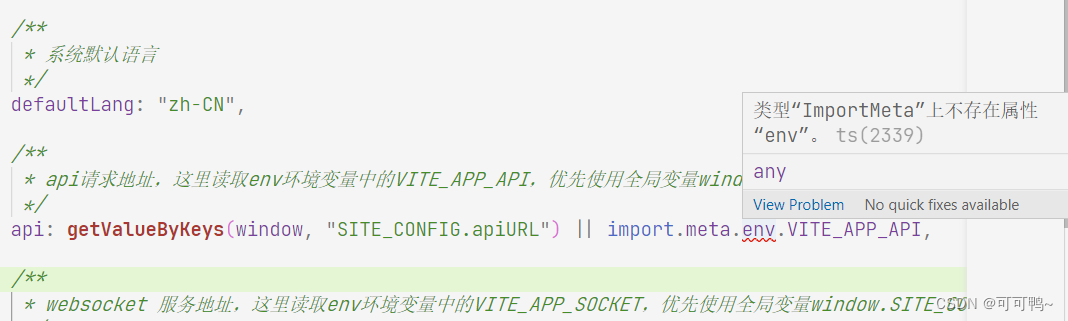
关于 config 文件和 env 文件的区别
env 可以理解为系统环境变量,是不跟随代码一起存在代码仓库的,便于线上环境配置的管理和权限分配。 config
是配置在项目代码中的,跟随代码一起存在代码仓库的,任何开发者都有权限看到。 线上数据库用户名密码等关键配置信息完全暴露还是不太好的
使用时机:
config配置文件中用 env() 方法,其他地方一律用 config() 方法!
声明文件
type Filter = {
    format: <T extends any>(str: T) => T
  }
// 声明要扩充@vue/runtime-core包的声明.
// 这里扩充"ComponentCustomProperties"接口, 因为他是vue3中实例的属性的类型.
  declare module '@vue/runtime-core' {
    export interface ComponentCustomProperties {
        $filters: Filter
    }
  }
与使用JavaScript不同的是,用Typescript写vue程序要需要了解vue的相关类型。Vue核心的类型,大部分写在@vue/runtime-core包中。
Component
Vue页面是由一个个组件组成的,组件在Vue中的类是Component,继承了ComponentOptions、FunctionalComponent和ComponentPublicInstanceconstructor。
其中,ComponentOptions继承了ComponentOptionsBase,就是是我们经常写的声明式的包含data、methods等属性的选项组件:
FunctionalComponent是函数式组件,ComponentPublicInstanceconstructor是实例构造器(构造函数)。
ComponentOptions继承了ComponentCustomOptions,这个接口在Vue源码中是空的,我们可以借助它了自定义Vue组件选项中的属性,比如源码中的例子:
import { Router } from 'vue-router'
declare module '@vue/runtime-core' {  interface ComponentCustomProperties {    $router: Router  }}
概念:可以用来约束一个函数,对象,以及类的结构和类型
//定义接口
interface ListItem{
    id:number;
    name:string
}
interface List {
    data:ListItem[]
}
function getListId(list:List) {
    list.data.forEach(item=>{
        console.log(item.id,item.name)
    })
}

//允许传入的list有除了接口定义的其他值,但接口中规定的值必须要有
let list = {
    data:[
        {id:1,name:'hemff',age:13}
    ]
}
/*若直接传人对象内容(对象字面量),ts会对其余的值进行类型检查,解决方法1:将内容赋值给一个变量  2.添加类型断言 as+对象类型 3.给接口添加[x:string]:any  */
getListId({
    data:[
        {id:1,name:'hemff',age:13}
    ]
} as List)
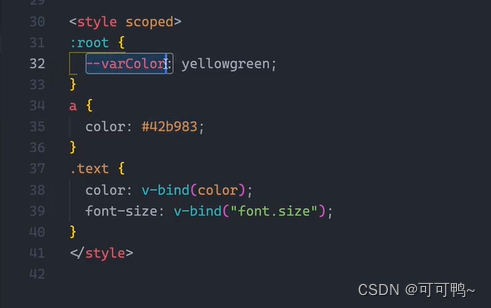
css中的:root
:root是一个伪类,表示文档根元素,所有主流浏览器均支持 :root 选择器,除了 IE8 及更早的版本。在:root中声明相当于全局属性,只要当前页面引用了:root segment所在文件,都可以使用var()来引用。
var()函数可以代替元素中任何属性中的值的任何部分。var()函数不能作为属性名、选择器或者其他除了属性值之外的值。(这样做通常会产生无效的语法或者一个没有关联到变量的值。)
body {
background-color: var(–blue); /* 设置背景颜色为蓝色 */
}
子组件可以通过 expose 暴露自身的方法和数据。
父组件通过 ref 获取到子组件并调用其方法或访问数据。
expose
{
  "scripts": {
    "dev": "vite", // 启动开发服务器,别名:`vite dev`,`vite serve`
    "build": "vite build", // 为生产环境构建产物
    "preview": "vite preview" // 本地预览生产构建产物
  }
}
三、报错记录

在项目的根目录中找到的tsconfig.json文件,然后添加一个新行:“resolveJsonModule”:true,
需要在tsconfig.json文件,然后添加:“esModuleInterop”: true,就没有问题了。
    //推荐配置
    "compilerOptions": {
        "target": "esnext",
        "module": "esnext",
        //是否开启严格模式
        "strict": false,
        //不能随便使用this
        "noImplicitThis": true,
        //默认
        "jsx": "preserve",
        "importHelpers": true,
        //默认
        "moduleResolution": "node",
        "resolveJsonModule": true,
        "allowSyntheticDefaultImports": true,
    },

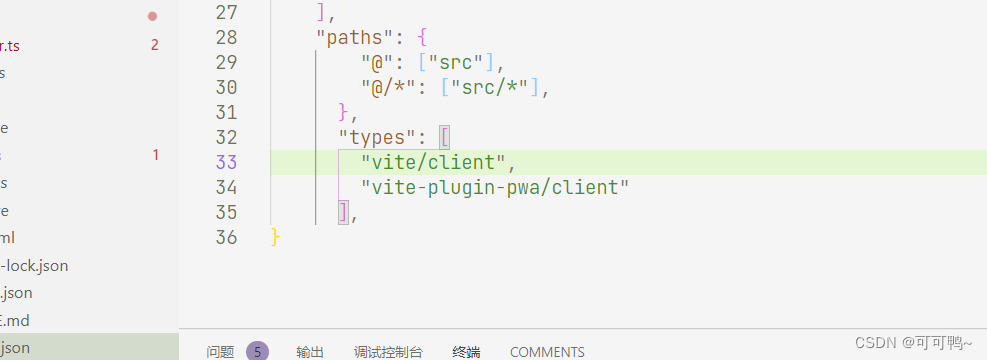
 在 tsconfig.json 文件中添加如下配置即可
“types”: [ “vite/client” ]
使用到了异步加载的组建@vueuse/core实现懒加载功能
import { useMediaQuery } from "@vueuse/core";
//yarn 安装
yarn add @vueuse/core
//或者npm
npm install @vueuse/core
vite 项目index.html中使用env环境变量
vite-plugin-html 插件
在 index.html 中增加 EJS 标签,例如
<!DOCTYPE html>
<html lang="en">
  <head>
    <title><%- title %></title>
  </head>
  <body>
    <div id="app"></div>
    <script type="module" src="/src/main.js"></script>
    <%- injectAMapScript %>
  </body>
</html>
    html({
      inject: {
        injectData: {
          // apiURL: loadEnv(mode, process.cwd()).VITE_APP_API,
          // socketURL: loadEnv(mode, process.cwd()).VITE_APP_SOCKET,
          title: "可可"
        }
      },
      minify: true
    }),
建议按照如下步骤尝试解决问题:
不要使用C盘目录,使用D盘或者其他盘
尝试使用npm install 进行安装,如果使用npm可以安装,那么yarn也应该是可以安装的。
确定一下C:\Users\Administrator\Desktop\demo2这个目录下有没有package.json文件,确定一下有没有lincense属性。
使用管理员终端命令尝试安装
npm ERR! code ERESOLVE
npm ERR! ERESOLVE unable to resolve dependency tree
npm ERR!
npm ERR! While resolving: my-vite-app@0.0.0
npm ERR! Found: vite@3.0.9
npm ERR! node_modules/vite
npm ERR!   dev vite@"^3.0.7" from the root project
npm ERR!
npm ERR! Could not resolve dependency:
npm ERR! peer vite@"^2.5.10" from @vitejs/plugin-vue@1.10.2
npm ERR! node_modules/@vitejs/plugin-vue
npm ERR!   dev @vitejs/plugin-vue@"^1.9.4" from the root project
npm ERR!
npm ERR! Fix the upstream dependency conflict, or retry
npm ERR! this command with --force, or --legacy-peer-deps
npm ERR! to accept an incorrect (and potentially broken) dependency resolution.
npm ERR!
npm ERR! See C:\wangxue\node\node_cache\eresolve-report.txt for a full report.
解决方法:终端输入:
npx -p npm@6 npm i --legacy-peer-deps
目的:使用npx指定npm的版本
然后npm install即可 ,
如果不起作用,可以先删除node_modules和package-lock.json,再重新尝试。
“type”: “module”,
html使用type = ‘module’ 默认会产生跨域请求,本地打开的文件,file协议不支持
四、配置参考
Vite 通过在一开始将应用中的模块区分为 依赖 和 源码 两类,改进了开发服务器启动时间
	依赖:大多为在开发时不会变动的纯 JavaScript。一些较大的依赖(例如有上百个模块的组件库)处理的代价也很高。依赖也通常会存在多种模块化格式(例如 ESM 或者 CommonJS)。Vite 将会使用 esbuild 预构建依赖。Esbuild 使用 Go 编写,并且比以 JavaScript 编写的打包器预构建依赖快 10-100 倍。
	源码:通常包含一些并非直接是 JavaScript 的文件,需要转换(例如 JSX,CSS 或者 Vue/Svelte 组件),时常会被编辑。同时,并不是所有的源码都需要同时被加载(例如基于路由拆分的代码模块)

	开发环境:ESM+HMR
	生产环境:Rollup

0、配置文件
	默认为根目录下的vite.config.js
	显示指定文件:vite --config my-config.js

1、命令相关:
	打包构建:
		npm run build
		npm run preview 当上一步构建完成后,运行该命令测试应用
			命令会在本地启动一个静态 Web 服务器,将 dist 文件夹运行在 http://localhost:4173
			"preview": "vite preview --port 8080" 指定端口号

	自动打开浏览器:
		"dev": "vite --open",
	    "build": "vue-tsc --noEmit && vite build",
	    "preview": "vite preview --open"

2、暴露的环境变量
	import.meta.env.MODE: 应用运行的模式。
	import.meta.env.BASE_URL:部署应用时的基本URL。他由base配置项决定。
	import.meta.env.PROD: 应用是否运行在生产环境。
	import.meta.env.DEV:  应用是否运行在开发环境

	自定义环境变量:
		(1)创建文件:已存在的环境变量不会被以下文件中的覆盖
			.env                # 所有情况下都会加载
			.env.local          # 所有情况下都会加载,但会被 git 忽略
			.env.[mode]         # 只在指定模式下加载,如.env.production的优先级比.env高
			.env.[mode].local   # 只在指定模式下加载,但会被 git 忽略

			VITE_SOME_KEY=123	import.meta.env.VITE_SOME_KEY访问
				只有以VITE_为前缀的变量才会暴露给经过vite处理的代码

		(2)添加类型声明
			/// <reference types="vite/client" />

			interface ImportMetaEnv {
			  readonly VITE_APP_TITLE: string
			  // 更多环境变量...
			}

			interface ImportMeta {
			  readonly env: ImportMetaEnv
			}

3、自定义开发模式
	除了默认的developmen和production还可以自定义模式,如可能希望有一个 “staging” (预发布|预上线) 模式,它应该具有类似于生产的行为,但环境变量与生产环境略有不同

	vite build --mode staging
	.env.staging文件存放相关模式下的环境变量

4、兼容老浏览器
	默认情况下 Vite 只处理语法转译,且默认不包含任何 polyfill。
	通过引入polyfill
		可以前往 Polyfill.io 查看,这是一个基于用户浏览器 User-Agent 字符串自动生成 polyfill 包的服务
	通过插件支持:
		通过插件@vitejs/plugin-legacy来支持,它将自动生成传统版本的 chunk 及与其相对应 ES 语言特性方面的 polyfill
		兼容版的chunk只会在不支持原生 ESM 的浏览器中进行按需加载

5、typescript相关
	(1)esbuild下不支持功能编辑时报错
		配置类型导入导出、enum、没有import、export导入导出的非模块文件报错
		tsconfig.json
		{
			"compilerOptions": {
				"isolatedModules":true 上述特性会在编辑时报错,否则会在运行时报错
			}
		}

	(2)导入vite内置的一些类型定义
		.资源导入 (例如:导入一个 .svg 文件)
		.import.meta.env 上 Vite 注入的环境变量的类型定义
		.import.meta.hot 上的 HMR API 类型定义

		方式一:在.d.ts文件中
			/// <reference types="vite/client" />
		方式二:在tsconfig.json中
			{
			  "compilerOptions": {
			    "types": ["vite/client"]
			  }
			}


多页面配置
	├── package.json
	├── vite.config.js
	├── index.html
	├── main.js
	└── nested
	    ├── index.html
	    └── nested.js

	  build: {
	    rollupOptions: {
	      input: {
	        main: resolve(__dirname, 'index.html'),
	        nested: resolve(__dirname, 'nested/index.html')
	      }
	    }
	  }

基本配置
	(1)区分不同环境配置
		command:根据运行的命令区分配置,serve为开发环境,否则为build生产环境
		mode:根据环境区分配置
		export default defineConfig(async ({ command, mode }) => {

		  const config=await fn();	支持使用Promise

		  if (command === 'serve') {
		    return {

		    }
		  } else if(command='build'){
			return {

		    }
		  }
		})

	(2)选项配置
		export default defineConfig({
			root:默认process.cwd(),	index.html所在的位置,绝对位置或相对位置
			base:开发或生产环境服务的公共基础路径
				绝对 URL 路径名,例如 /foo/
				完整的 URL,例如 https://foo.com/
				空字符串或 ./(用于开发环境)
				通过命令指定:vite build --base=/my/public/path/
				代码中获取base:import.meta.env.BASE_URL全局变量在代码中使用,原样出现(例如import.meta.env['BASE_URL']是无效的)
			mode:将会把serve和build时的模式都覆盖掉。也可以通过命令行 --mode 选项来重写
				'development'(serve)
				'production'(build)
			define:定义全局常量替换方式。其中每项在开发环境下会被定义在全局,而在构建时被静态替换
				{
					__DEV__: 'dev',
				}
			plugins:[]	插件数组
			publicDir:作为静态资源服务的文件夹。该目录中的文件在开发期间在 / 处提供,并在构建期间复制到 outDir 的根目录,并且始终按原样提供或复制而无需进行转换。该值可以是文件系统的绝对路径,也可以是相对于项目的根目录的相对路径。
				默认'public'
			cacheDir:存储缓存文件的目录。此目录下会存储预打包的依赖项或 vite 生成的某些缓存文件,使用缓存可以提高性能。如需重新生成缓存文件,你可以使用 --force 命令行选项或手动删除目录。此选项的值可以是文件的绝对路径,也可以是以项目根目录为基准的相对路径。当没有检测到 package.json 时,则默认为 .vite。
				默认"node_modules/.vite"
			assetsInclude:解析额外的定义内置type以外的静态导入资源
				['**/*.gltf']
			logLevel:调整控制台输出的级别,默认为 'info'
				'info' | 'warn' | 'error' | 'silent'
			clearScreen:设为 false 可以避免 Vite 清屏而错过在终端中打印某些关键信息。命令行模式下可以通过 --clearScreen false 设置。
				默认:true
			envDir:用于加载 .env 文件的目录。可以是一个绝对路径,也可以是相对于项目根的路径
				默认:根路径
			envPrefix:自定义环境变量前缀,以 envPrefix 开头的环境变量会通过 import.meta.env 暴露在你的客户端源码中
				默认:VITE_


			解析相关
			resolve:{
				alias:路径别名
					{
						"@": path.resolve(__dirname, "src"),
					}
					或
					[{
						find: '@',  字符串|正则
    					replacement: path.resolve(__dirname, 'src')
					}]
				dedupe:使用此选项强制 Vite 始终将列出的依赖项解析为同一副本
					比如当安装了两个不同版本的依赖,如vue2和vue3,通过这个声明最终引入的版本
					[]
				condition:情景导出
					[{
					  "exports": {
					    ".": {
					      "import": "./index.esm.js",
					      "require": "./index.cjs.js"
					    }
					  }
					}]
				mainFields:根据package.json中的字段,在不同环境中导入库的入口文件位置
					import引入的文件对应module中的路径
					require引入的文件对应main中的路径
					默认:['module', 'jsnext:main', 'jsnext','main']
				extensions导入时想要省略的扩展名列表。不建议忽略自定义导入类型的扩展名(例如:.vue),因为它会影响 IDE 和类型支持
					默认:['.mjs', '.js', '.ts', '.jsx', '.tsx', '.json']
				preserveSymlinks:启用此选项会使 Vite 通过原始文件路径(即不跟随符号链接的路径)而不是真正的文件路径(即跟随符号链接后的路径)确定文件身份
					默认:false

			}

			css相关
			css:{
				modules:配置 CSS modules 的行为。选项将被传递给 postcss-modules。
				postcss:内联的 PostCSS 配置(格式同 postcss.config.js),或者一个(默认基于项目根目录的)自定义的 PostCSS 配置路径
				preprocessorOptions:指定传递给 CSS 预处理器的选项。
					{
				      scss: {
				        additionalData: `$injectedColor: orange;`
				      }
				    }
			}

			JSON相关
			json:{
				namedExports:是否支持从 .json 文件中进行按名导入。
					默认:true
				stringify:若设置为 true,导入的 JSON 会被转换为 export default JSON.parse("...")
					默认:false

			}

			esbuild相关
			esbuild:{
			    jsxFactory: 'h',
			    jsxFragment: 'Fragment' 以上为自定义JSX

			    ESbuild会被应用在 ts、jsx、tsx 文件,以下选项对要处理的文件类型进行配置
			    include:string | RegExp | (string | RegExp)[]
			    exclude:string | RegExp | (string | RegExp)[]

			    jsxInject:自动为每一个被 ESbuild 转换的文件注入内容
			    	`import React from 'react'`
			}

			server相关
			server:{
				host:指定服务器应该监听哪个 IP 地址, 如果将此设置为 0.0.0.0 或者 true 将监听所有地址,包括局域网和公网地址
					默认:'127.0.0.1'
					命令设置:--host 0.0.0.0 或 --host
				port:指定开发服务器端口。注意:如果端口已经被使用,Vite 会自动尝试下一个可用的端口,所以这可能不是开发服务器最终监听的实际端口
					默认:3000
				strictPort:设为true时若端口已被占用则会直接退出,而不是尝试下一个可用端口
					默认:false
				https:启用 TLS + HTTP/2。注意:当 server.proxy 选项 也被使用时,将会仅使用 TLS。
					当为true:启用 TLS + HTTP/2。注意:当 server.proxy 选项 也被使用时,将会仅使用 TLS。
					这个值也可以是一个传递给 https.createServer() 的 选项对象
						https://nodejs.org/api/https.html#httpscreateserveroptions-requestlistener
				open:在开发服务器启动时自动在浏览器中打开应用程序。
					'/docs/index.html'
					设置打开的浏览器:设置环境变量 process.env.BROWSER='firefox'
					open其他配置:https://github.com/sindresorhus/open#app
				proxy:服务器代理
					{
						'/foo': 'http://localhost:4567',	字符串简写写法
						'/api': { 以 ^ 开头,将会被解释为正则,如:'^/fallback/.*'
					        target: 'http://jsonplaceholder.typicode.com',
					        changeOrigin: true,
					        rewrite: (path) => path.replace(/^\/api/, ''),
					        configure: (proxy, options) => {
					          // proxy 是 'http-proxy' 的实例
					        }
					    },
				      '/socket.io': { 代理 websockets or socket.io
				        target: 'ws://localhost:3000',
				        ws: true
				      }
					}
				cors:为开发服务器配置 CORS。默认启用并允许任何源
					传递一个 选项对象 来调整行为,https://github.com/expressjs/cors#configuration-options
					设置false表示禁用
				force:依赖预构建
					设置为 true 强制使依赖预构建。
				hmr:热更新相关
					false禁用
					{
						protocol?: string,  协议
						host?: string,
						port?: number,
						path?: string,
						timeout?: number,
						overlay?: boolean, 为 false 可以禁用开发服务器错误的屏蔽
						clientPort?: number, 只在客户端的情况下覆盖端口,这允许你为 websocket 提供不同的端口,而并非在客户端代码中查找。如果需要在 dev-server 情况下使用 SSL 代理,这非常有用。
						server?: Server, 当使用 server.middlewareMode 或 server.https 时,你需将 server.hmr.server 指定为你 HTTP(S) 的服务器,这将通过你的服务器来处理 HMR 的安全连接请求。这在使用自签证书或想通过网络在某端口暴露 Vite 的情况下,非常有用。
					}
				middlewareMode:以中间件模式创建 Vite 服务器
					'ssr' | 'html'	在SSR中使用
				fs.strict:限制为工作区 root 路径以外的文件的访问
					默认:true
				fs.allow:限制哪些文件可以通过 /@fs/ 路径提供服务,Vite 将会搜索此根目录下潜在工作空间并作默认使用
				fs.deny:用于限制 Vite 开发服务器提供敏感文件的黑名单。
					默认为 ['.env', '.env.*', '*.{pem,crt}']
				watch:监听文件改变
					通过命令:vite build --watch
					{
						ignored: ['!**/node_modules/your-package-name/**']		默认会忽略对 .git/ 和 node_modules/ 目录的监听,如果需要对 node_modules/ 内的包进行监听,可以为 server.watch.ignored 赋值一个取反的 glob 模式
						其他选项:使用的是rollup的选项配置:https://rollupjs.org/guide/en/#watch-options
					}
			}

			optimizeDeps依赖优化相关
			optimizeDeps:{
				entries:依赖入口点
					默认情况下,Vite 会抓取你的 index.html 来检测需要预构建的依赖项
					如果指定了 build.rollupOptions.input,Vite 将转而去抓取这些入口点
					string | string[]:指定自定义条目,该值需要遵循 fast-glob 模式
		    	exclude:['your-package-name'] 被watch中手动设置监听的包必须被排除在优化之外,以便它能出现在依赖关系图中并触发热更新
		    	include:默认情况下,不在 node_modules 中的,链接的包不会被预构建。使用此选项可强制预构建链接的包。
		    		[]
		    		应用场景:一些第三方插件中的依赖不是node_modules中的并且也不是es module的格式
		    	esbuildOptions:在部署扫描和优化过程中传递给 esbuild 的选项。


		    }

			build构建相关
			build:{
				target:设置最终构建的浏览器兼容目标
					默认:'modules'	指支持原生 ES 模块的浏览器。
					"esnext" :即假设有原生动态导入支持,并且将会转译得尽可能小:
						如果 build.minify 选项为 'terser', 'esnext' 将会强制降级为 'es2019'。
						其他情况下将完全不会执行转译。
					'es2015':自定义目标也可以是一个 ES 版本
					["chrome58",...]:一个浏览器版本或是多个目标组成的一个数组
				polyfillModulePreload:用于决定是否自动注入 module preload 的 polyfill.
					true:此 polyfill 会被自动注入到每个 index.html 入口的 proxy 模块中
				outDir:指定输出路径(相对于 项目根目录).
					默认:dist
				assetsDir:指定生成静态资源的存放路径(相对于 build.outDir)
					默认:assets
				assetsInlineLimit:小于此阈值的导入或引用资源将内联为 base64 编码,以避免额外的 http 请求。
					默认:4096 (4kb)
					设置为 0 可以完全禁用此项。
				cssCodeSplit:css代码分割
					默认:true,在异步 chunk 中导入的 CSS 将内联到异步 chunk 本身,并在其被加载时插入。
					false:整个项目中的所有 CSS 将被提取到一个 CSS 文件中
				cssTarget:允许用户为 CSS 的压缩设置一个不同的浏览器 target
					默认值和配置与target一致
				sourcemap:构建后是否生成 source map 文件
					默认:false
					true:创建一个独立的 source map 文件
					'inline':source map 将作为一个 data URI 附加在输出文件中
					'hidden':与 'true' 相似,只是 bundle 文件中相应的注释将不被保留
				rollupOptions:自定义的 Rollup 打包配置,并将与 Vite 的内部 Rollup 选项合并
					https://rollupjs.org/guide/en/#big-list-of-options
				commonjsOptions:传递给 @rollup/plugin-commonjs 插件的选项。
				dynamicImportVarsOptions:传递给 @rollup/plugin-dynamic-import-vars 的选项。
				lib:打包库
					{
						entry: string,
						name?: string, 	暴露的全局变量
						formats?: ('es' | 'cjs' | 'umd' | 'iife')[], 	包含 'umd' 或 'iife' 时是必须的。默认 formats 是 ['es', 'umd']
						fileName?: string | ((format: ModuleFormat) => string) 	输出的包文件名
							默认 fileName 是 package.json 的 name 选项
					}
				manifest:包含了没有被 hash 过的资源文件名和 hash 后版本的映射。
					true:包含了没有被 hash 过的资源文件名和 hash 后版本的映射。
					字符串:作为 manifest 文件的名字
				ssrManifest:生成 SSR 的 manifest 文件,以确定生产中的样式链接与资产预加载指令
					配置和manifest一致
				ssr:生成面向 SSR 的构建
					默认:undefined
					字符串:用于直接定义 SSR 的入口
					true:需要通过设置 rollupOptions.input 来指定 SSR 的入口
				minify:压缩相关
					默认:'esbuild'
					false:禁用
					'terser'
					在lib模式下使用 'es' 时,build.minify 选项将失效
				terserOptions:传递给 Terser 的更多 minify 选项。
				write:磁盘写入相关
					默认:true
					false:禁用将构建后的文件写入磁盘
				emptyOutDir:关闭警告
					默认:若 outDir 在 root 目录下,则为 true,Vite 会在构建时清空该目录
					outDir在根目录之外:会抛出一个警告避免意外删除掉重要的文件。可以设置该选项来关闭这个警告
					通过命令: --emptyOutDir 来使用
				reportCompressedSize:启用/禁用 gzip 压缩大小报告。压缩大型输出文件可能会很慢,因此禁用该功能可能会提高大型项目的构建性能。
					默认:true
				chunkSizeWarningLimit:chunk 大小警告的限制(以 kbs 为单位)
					默认:500
				watch:构建监听器
					默认:null
					{}:启用 rollup 的监听器。在涉及只用在构建时的插件时和集成开发流程中很常用。

			}

			构建预览preview相关
			preview:{
				host:为开发服务器指定 ip 地址,默认取server.host
					0.0.0.0 或 true:监听所有地址,包括局域网和公共地址。
					通过命令:--host 0.0.0.0 或 --host
				port:指定开发服务器端口
					默认:4173
				strictPort:默认取server.strictPort
				https:默认取server.https
				open:默认取server.openy
				proxy:默认取server.proxy
				cors:默认取server.cors

			}

			SSR相关
			ssr:{
				external:为 SSR 强制外部化的依赖。
					[]
				noExternal:防止被 SSR 外部化依赖项
					string | RegExp | (string | RegExp)[]
					true:将没有依赖被外部化
				target:SSR 服务器的构建目标。
					默认:'node'
					'webworker'

			}

			Worker相关
			worker:{
				format:worker bundle 的输出类型。
					默认:'iife'
					'es'
				plugins:适用于 worker bundle 的 Vite 插件。
					[]
				rollupOptions:用于构建 worker bundle 的 Rollup 配置项
			}


		})

华为开发者空间,是为全球开发者打造的专属开发空间,汇聚了华为优质开发资源及工具,致力于让每一位开发者拥有一台云主机,基于华为根生态开发、创新。
更多推荐


 3
3 1
1- 0


 已为社区贡献3条内容

所有评论(0)