Thymeleaf基础语法
Thymeleaf基础语法今天学习一下Thymeleaf的基础语法1-引入Thymeleaf首先,将view层页面中的html2-输出内容3-基本表达式4-引入URL5-访问WebContext对象中的属性6-运算符7-条件判断8-循环9-内置对象
Thymeleaf基础语法
今天学习一下Thymeleaf的基础语法。
1-引入Thymeleaf
首先,将view层页面中的html标签进行修改,然后在View层页面文件的其它标签里使用th:*动态处理页面。
2-输出内容
使用th:text和th:utext将文本输出道到所在标签的body中。
3-基本表达式
1-变量表达式:$ {…}
变量表达式用于访问容器上下文环境中的变量
2-选择变量表达式:*{…}
选择变量表达式计算的是选定的对象(th:object属性绑定的对象)
3-信息表达式:#{…}
信息表达式一般用于显示静态文本,也可能需要根据需求而整体变动的静态文本放在properties文件以便维护,通过与th:text属性一起使用。
4-引入URL
Thymeleaf模板通过@{…}表达式引入URL
5-访问WebContext对象中的属性
Thymeleaf模板通过一些专门的表达式从模板的WebContext获取请求参数,请求,会话和应用程序中的属性,具体如下:
${xxx}将返回存储在Thymeleaf模板上下文中的变量xxx或者request请求域的属性xxx。
${param.xxx}返回一个名为xxx的请求参数值,可能是多个值。
${session.xxx}返回一个名为xxx的HttpSession作用域中的属性。
${application.xxx}将返回一个名为xxx的全局ServletContext上下文作用中的属性。
与EL表达式一样,使用${xxx}获取变量值,使用 ${对象变量名.属性名}获取JavaBean属性值。
6-运算符
Thymeleaf模板表达式中可以使用各种算数运算符和逻辑运算符。
7-条件判断
1)if和unless
只有在th:if标签成立才会显示标签内容,th:unless只有在条件不成立才显示标签内容。
2)switch语句
Thymeleaf模板也支持多路选择的switch语句结构,默认属性default可用*表示。
8-循环
Thymeleaf模板使用th:each="obj,iterStat:${objList}"标签进行迭代循环,迭代对象可以是List,Map或者数组等。
循环状态的使用
在th:each标签中可以使用循环状态变量,该变量有如下属性:
1-index:当前迭代对象的索引,从0开始
2-count:当前迭代对象的索引,从1开始
3-size:迭代器对象的大小
4-current当前迭代变量
5-even/odd:布尔值,当前对象是否是偶数/奇数
6-first:当前循环是否是第一个
7-last:当前循环是否是最后一个
9-内置对象
在实际Web项目开发中,经常传递列表,日期等数据,所以Thymeleaf模板提供了很多内置对象,通过#直接访问,这些内置对象一般都通过s结尾,如dates,lists,numbers,strings等。
10-Thymeleaf的常用属性
其实Thymeleaf语法的使用都是通过在html页面的标签中添加th:xxx关键字首先模板套用,其属性与html标签基本相似。
常用属性有以下几种:
1-th:action
定义后台控制路径,类似于form标签的action属性
2-th:each
用于集合对象的遍历,功能类似于JSTL标签<for:Each >
3-th:field
常用于表单参数的绑定,通常与th:object一起使用。
4-th:href
用于定义超链接,类似于< a >标签的href属性
5-th:id
用于id的声明,类似于html中的id属性。
6-th:if
用于添加判断,如果为否,标签不显示
7-th:fragment
声明定义该属性的div为模板片段,常用于头文件,尾文件的引入,常与th:include,th:replace一起使用。
8-th:object
用于表单数据对象的绑定,将表单绑定到后台controller的一个JavaBean参数,长于th:field一起使用,进行表单数据的绑定,
9-th:src
用于外部资源的引入,类似script标签的src属性
10-th:text
用于文本显示,将文本内容显示到所在标签的body中。
11-th:value
用于标签赋值,类似于标签的value属性。
12-th:style
用于修改标签的style
13-th:onclick
th:onclick用于修改单击事件
下面学习一下表单提交及数据绑定的过程。
准备:
创建Maven项目并在pom.xml文件中添加依赖。
<?xml version="1.0" encoding="UTF-8"?>
<project xmlns="http://maven.apache.org/POM/4.0.0"
         xmlns:xsi="http://www.w3.org/2001/XMLSchema-instance"
         xsi:schemaLocation="http://maven.apache.org/POM/4.0.0 http://maven.apache.org/xsd/maven-4.0.0.xsd">
    <modelVersion>4.0.0</modelVersion>

    <groupId>org.example</groupId>
    <artifactId>Thymeleaf</artifactId>
    <version>1.0-SNAPSHOT</version>
    <parent>
        <!--配置SpringBoot的核心启动器-->
        <groupId>org.springframework.boot</groupId>
        <artifactId>spring-boot-starter-parent</artifactId>
        <version>2.1.4.RELEASE</version>
    </parent>
    <dependencies>
    <dependency>
        <!--添加starter模块-->
        <groupId>org.springframework.boot</groupId>
        <artifactId>spring-boot-starter-web</artifactId>
    </dependency>

    <dependency>
        <groupId>org.springframework.boot</groupId>
        <artifactId>spring-boot-starter-thymeleaf</artifactId>
    </dependency>
    </dependencies>

</project>
1-创建实体类
在Web应用的src/main/java目录下,创建com.model包,并在该包中创建实体类LoginBean。
public class LoginBean {
    String uname ;
    String urole ;

    public String getUname() {
        return uname;
    }

    public void setUname(String uname) {
        this.uname = uname;
    }

    public String getUrole() {
        return urole;
    }

    public void setUrole(String urole) {
        this.urole = urole;
    }
}
2-创建控制类
在Web应用的src/main/java目录下,创建com.controller包,并在该包中创建控制器类LoginController
import com.model.LoginBean;
import org.springframework.stereotype.Controller;
import org.springframework.ui.Model;
import org.springframework.web.bind.annotation.ModelAttribute;
import org.springframework.web.bind.annotation.RequestMapping;

@Controller
public class LoginController {
    @RequestMapping("/toLogin")
    public String toLogin(Model model){
        //表单标签的绑定
        model.addAttribute("loginBean", new LoginBean()) ;
        return "login" ;
    }
    @RequestMapping("/login")
    public String greetingSubmit(@ModelAttribute LoginBean loginBean){
        System.out.println("测试提交的数据: " + loginBean.getUname());
        return "result" ;
    }
}
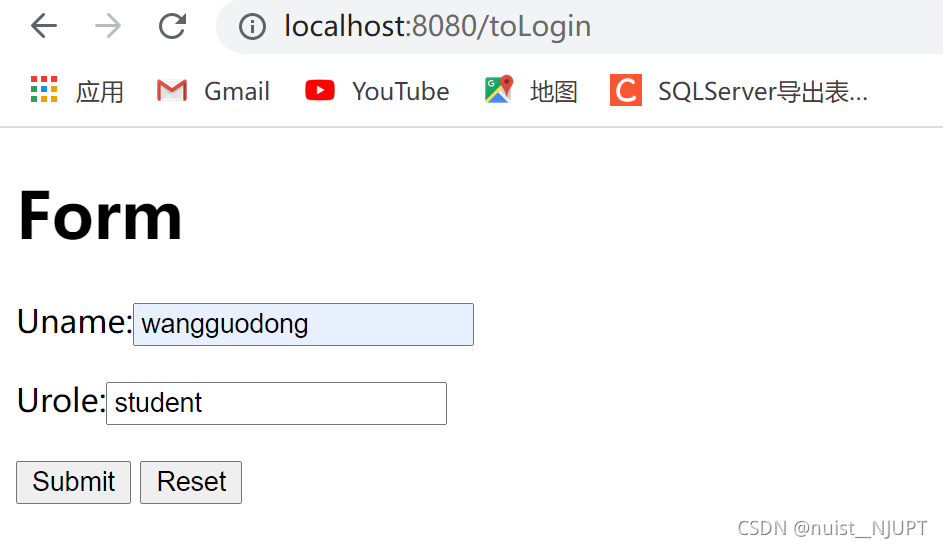
3-创建页面表示层,在src/main/resources/templates目录下下创建信息采集页面login.html和信息展示页面result.html
<!DOCTYPE html>
<html lang="en" xmlns:th="http://www.w3.org/1999/xhtml">
<head>
    <meta charset="UTF-8">
    <title>Title</title>
</head>
<body>
<h1>Form</h1>
<form action="#" th:action = "@{/login}" th:object = "${loginBean}" method="post">
    <p>Uname:<input type = "text" th:field = "*{uname}" th:placeholder="请输入用户名"/></p>
    <p>Urole:<input type="text" th:field = "*{urole}" th:placeholder="请输入角色"/> </p>
    <p><input type="submit" value = "Submit"/> <input type="reset" value="Reset"/> </p>
</form>
</body>
</html>
<html lang="en" xmlns:th="http://www.w3.org/1999/xhtml">
<head>
    <meta charset="UTF-8">
    <title>Title</title>
</head>
<body>
<h1>Result</h1>
<p th:text = "'Uname:' + ${loginBean.uname}"/>
<p th:text = "'Urole:' + ${loginBean.urole}"/>
<a href = "/toLogin">继续提交</a>
</body>
</html>
4-在src/main/java目录下创建com.test包,在该包中创建启动类
import org.springframework.boot.SpringApplication;
import org.springframework.boot.autoconfigure.SpringBootApplication;

@SpringBootApplication(scanBasePackages = {"com"})
public class TestApplication {
    public static void main(String[] args) {
        SpringApplication.run(TestApplication.class, args) ;
    }
}
5-运行启动类,然后访问http://localhost:8080/toLogin


为开发者提供学习成长、分享交流、生态实践、资源工具等服务,帮助开发者快速成长。
更多推荐


 0
0 0
0- 0


 已为社区贡献4条内容

所有评论(0)