layui富文本编辑器(layedit)的使用
1.html页面使用文本域标签承载富文本编辑器<textarea></textarea><div class="layui-form-item"><label class="layui-form-label required" >内容</label><div class="layui-input-inline" style="wid
·
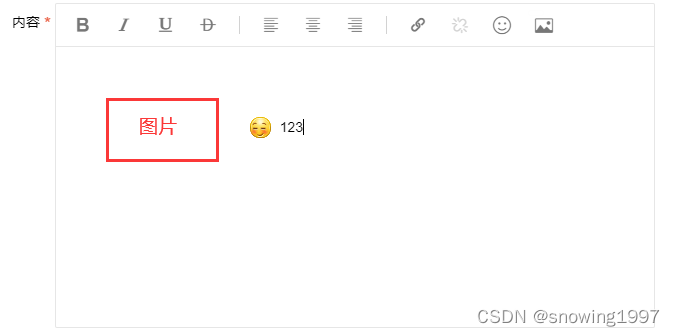
效果图:
1.html页面
使用文本域标签承载富文本编辑器<textarea></textarea>

<div class="layui-form-item">
    <label class="layui-form-label required" >内容</label>
    <div class="layui-input-inline" style="width: 600px">
        <textarea class="layui-textarea" id="content" placeholder="请输入内容"  style="display: none"  name="content" autocomplete="off"></textarea>
    </div>
</div>
通过按钮进行内容绑定,将富文本编辑器中的内容绑定到表单form中并提交
<div class="layui-form-item">
    <button style="margin:0 auto;
display:block;" class="layui-btn" type="button" data-type="text"  id="fileNotifySubmit"><i
            class="fa fa-check-circle"></i> 发布
    </button>
</div>
2.JS代码
<!--富文本编辑器-->
<script>
    layui.use(['layedit','form'], function(){
        var layedit = layui.layedit
            ,$ = layui.jquery
            ,form = layui.form;
        //设置图片上传
        layedit.set({
            uploadImage: {
                url: '/uplaod/uploadFile' //图片上传方法的接口url
                ,type: 'post' //默认post
            }
        });
        //构建富文本编辑器,构建方法一定要写在set方法下边
        var index = layedit.build('content');

       //校验表单的方法,并将富文本编辑器中的内容同步到文本域中
        form.verify({
            content : function(value) {
                return layedit.sync(index); //同步语句
            }
        });

       //保存表单内容提交的方法
        $('#fileNotifySubmit').on('click', function(){
            var active = {
               //获取纯文本内容: 111
               //如果要获取样式,将text替换成 content: <p>111</p>
               //如果要获取选中的文字,将text替换成selected:111
                text: function(){
                     //获取富文本编辑器值的语句并赋值到文本域中
                    document.getElementById("content").innerText = layedit
                        .getContent(index);
                }
            };

            var type = $(this).data('type');
            active[type] ? active[type].call(this) : '';
            var form = new FormData(document.getElementById("formFile"));

            //保存表单内容的请求,此处为文件通知对象
            $.ajax({
                url:"/fileNotification/insert",
                type:"post",
                data:form,
                processData:false,
                contentType:false,
                success: function (result) {
                    if (result.status ===true) {
                        var index = parent.layer.getFrameIndex(window.name);
                        parent.layer.close(index);
                        parent.window.location.reload()
                    }else {
                        layer.msg(result.msg, { icon: 2, time: 1000 });
                    }
                }
            });
        });
    });
    //重新加载的方法
    layui.use(['table', 'laydate','element'], function () {
        var table = layui.table, form = layui.form, $ = layui.jquery;
    });
</script>
3.图片上传后台方法
返回的结果必须为下图格式:
package com.hl.controller;

import java.io.File;
import java.io.FileOutputStream;
import java.io.IOException;
import java.text.SimpleDateFormat;
import java.util.Calendar;
import java.util.Date;
import java.util.HashMap;
import java.util.Map;
import javax.servlet.http.HttpServletRequest;
import org.apache.ibatis.annotations.Param;
import org.json.JSONObject;
import org.springframework.beans.factory.annotation.Value;
import org.springframework.stereotype.Controller;
import org.springframework.util.FileCopyUtils;
import org.springframework.web.bind.annotation.RequestMapping;
import org.springframework.web.bind.annotation.ResponseBody;
import org.springframework.web.multipart.MultipartFile;

@Controller
@RequestMapping("/upload")
public class LayEditController {
   //配置文件中配置本地映射路径/服务器路径
    @Value("${file.rootPath}")
    private String rootPath;


    //上传文件
    @ResponseBody
    @RequestMapping(value = "/uploadFile")
    public String uploadFile(HttpServletRequest request,@Param("file") MultipartFile file) throws IOException{
        SimpleDateFormat sdf = new SimpleDateFormat("yyyyMMddHHmmssSS");
        String res = sdf.format(new Date());
        //服务器上使用

//如果在配置文件中已经配置,可以不用写
//        String rootPath =request.getServletContext().getRealPath("/upload/");//target的目录
        //本地使用
//        String rootPath ="/C:/upload/";
        //原始名称
        String originalFilename = file.getOriginalFilename();
        //新的文件名称
        String newFileName = res+originalFilename.substring(originalFilename.lastIndexOf("."));
        //创建年月文件夹
        Calendar date = Calendar.getInstance();
        File dateDirs = new File(date.get(Calendar.YEAR)
                + File.separator + (date.get(Calendar.MONTH)+1));
        //新文件
        File newFile = new File(rootPath+File.separator+dateDirs+File.separator+newFileName);
        //判断目标文件所在的目录是否存在
        if(!newFile.getParentFile().exists()) {
            //如果目标文件所在的目录不存在,则创建父目录
            newFile.getParentFile().mkdirs();
        }
        System.out.println(newFile); //可打印出文件路径
        //将内存中的数据写入磁盘
        file.transferTo(newFile);

        //完整的url
        String fileUrl =  "/upload/"+date.get(Calendar.YEAR)+ "/"+(date.get(Calendar.MONTH)+1)+ "/"+ newFileName;
        Map<String,Object> map = new HashMap<String,Object>();
        Map<String,Object> map2 = new HashMap<String,Object>();
        //0表示成功,1失败
        map.put("code",0);
        //提示消息
        map.put("msg","上传成功");
        map.put("data",map2);
        //图片url
        map2.put("src",fileUrl);
        //图片名称,这个会显示在输入框里
        map2.put("title",newFileName);
        String result = new JSONObject(map).toString();
        return result;
    }
}
4.表单提交之后内容保存方法:
@ResponseBody
@RequestMapping("/insert")
@RequiresPermissions("文件通知新增")
public ResponseMsg insert(@RequestParam("file") MultipartFile [] file, @Valid FileNotification fileNotification, BindingResult bindingResult){
    for (ObjectError error : bindingResult.getAllErrors()) {
        return new ResponseMsg(false,error.getDefaultMessage());
    }

    if (file.length > 0){
        Map<String,String> map = new LinkedHashMap<>();
        Arrays.stream(file).forEach(a->{
            String alyFileName = ToolUtil.generateShortUuid();
            ALYUtil.uploadFile(a, alyFileName);
            map.put(a.getOriginalFilename(),alyFileName);
        });

        fileNotification.setFileName(JSONObject.toJSONString(map));
    }
    fileNotification.setSendRole(fileNotification.getSendRole() + ",2");
    fileNotificationService.save(fileNotification);
    return new ResponseMsg(true,"发送成功");
}
5.配置文件中配置本地路径或服务器路径:注意缩进【rootPath在file下一级】
file:
  #本地路径
  rootPath: C://upload/
  #服务器路径  :获取方式request.getServletContext().getRealPath("/upload/");
#  rootPath: 服务器路径
这里的路径还需要在配置类中去指定:
/**
 * 资源映射路径
 */
@Configuration
public class ImgConfigurer implements WebMvcConfigurer {
    @Override
    public void addResourceHandlers(ResourceHandlerRegistry registry) {
        registry.addResourceHandler("/upload/**").
                addResourceLocations("file:/" + "C://upload/");
    }
}

华为开发者空间,是为全球开发者打造的专属开发空间,汇聚了华为优质开发资源及工具,致力于让每一位开发者拥有一台云主机,基于华为根生态开发、创新。
更多推荐


 5
5 0
0- 0


 已为社区贡献1条内容

所有评论(0)