js来控制、修改CSS伪元素的方法
添加字符串使用引号包括一段字符串,将会向元素内容中添加字符串。}}}
·
例如,我的样式表有以下规则,需要把伪元素的content内容进行修改
<style>
    p:after{content:'after伪元素'}
</style>
<p id="dome">正文内容</p>
一、解决方法
方法一:样式覆盖
<script>
document.onclick=function(){
	var sty=document.createElement('style');
	sty.innerText='p:after{content:\'修改一下\'}';
	document.body.appendChild(sty);
};
</script>
方法二:class名重写
添加一个重写的样式:
p.special:after {content: "修改一下";}
然后在js中这样操作它:
<script>
document.onclick=function(){
	var p=document.getElementById('dome');
	p.setAttribute("class","special");
};
</script>
方法三:使用css中attr()
我们可以在css中使用sttr()来读取一个特定的DOM属性,如果你浏览器支持伪元素就会支持css中使用attr()。
<style>
p:after {
	content: attr(data-after);
}
</style>

<p id="dome">正文内容</p>

<script>
var p=document.getElementById('dome');
p.setAttribute("data-after","我是后缀");//初始值
document.onclick=function(){
	p.setAttribute("data-after","修改一下");
};
</script>
二、:before和:after伪元素的常见用法总结
1. 利用content属性,为元素添加内容修饰:
添加字符串
使用引号包括一段字符串,将会向元素内容中添加字符串。
a:after { content: “after content”; }
使用attr()方法,调用当前元素的属性的值:
a::before { content: url(logo.png); }
使用url()方法,引用多媒体文件:
a::before { content: url(logo.png); }
使用counter()方法,调用计时器:
h:before { counter-increment: chapter; cotent: "Chapter " counter(chapter) ". " }
2.清除浮动
.clear-fix { *overflow: hidden; *zoom: 1; }
.clear-fix:after { display: table; content: ""; width: 0; clear: both; }
3.特效妙用
// CSS代码
a {
position: relative;
display: inline-block;
text-decoration: none;
color: #000;
font-size: 32px;
padding: 5px 10px;
}
a::before, a::after {
content: "";
transition: all 0.2s;
}
a::before {
left: 0;
}
a::after {
right: 0;
}
a:hover::before, a:hover::after {
position: absolute;
}
a:hover::before { content: "\5B"; left: -20px; }
a:hover::after { content: "\5D"; right: -20px; }
// HTML代码
<a href="#">我是个超链接</a>
4.特殊形状的实现
如对话气泡
// CSS代码
.tooltip {
position: relative;
display: inline-block;
padding: 5px 10px;
background: #80D4C8;
}
.tooltip:before {
content: "";
display: block;
position: absolute;
left: 50%;
margin-left: -5px;
bottom: -5px;
width: 0;
height: 0;
border-left: 5px solid transparent;
border-right: 5px solid transparent;
border-top: 5px solid #80D4C8;
}
// HTML代码
<div class="tooltip">I'm a tooltip.</div>
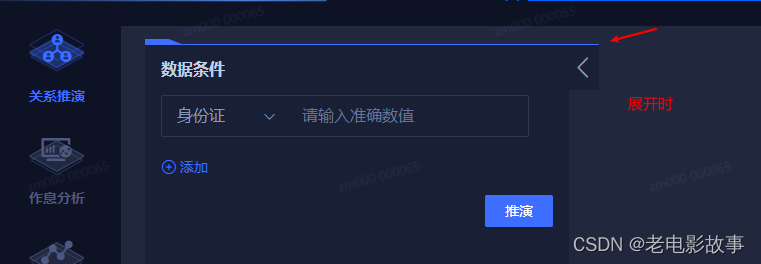
三、我的案例

这么一个需求
话
不
多
说
直
接
上
代
码
<div class="drawerBoxOpen">
methods: {
    handleClick () {
      if (this.drawer.isShow) {
        let sty = document.getElementsByClassName('drawerBoxOpen')[0]
        sty.setAttribute("class","drawerBox")
      } else {
        let sty = document.getElementsByClassName('drawerBox')[0]
        sty.setAttribute("class","drawerBoxOpen")
      }
      this.$emit('handleClick')
    }
  }
.drawerBox{
    position: relative;
    display:flex;
    &::before {
      display: none;
    }
  }
  .drawerBoxOpen{
    position: relative;
    display:flex;
    &::before {
      position: absolute;
      left: 0;
      display: block;
      content: '';
      width: 100%;
      height: 6px;
      top: -6px;
      background-image: url("~@/assets/img/drawer-top.png");
      background-size: 100% 100%;
    }
  }

为开发者提供学习成长、分享交流、生态实践、资源工具等服务,帮助开发者快速成长。
更多推荐


 5
5 0
0- 0


 已为社区贡献14条内容

所有评论(0)