优雅的实现微信小程序动态tabBar及组件中实现动态数据
3、重点是在对应导航的JS文件中找到onShow方法,写上tabService.updateIndex(this,0),其中tabService就是我们写的全局tab-service.js,引入一下。要实现动态导航首先要考虑的是如何把小程序中的原生导航更改为自定义导航。重点在实现自定义tabbar的时候,会出现点击导航,高亮状态及跳转链接出现混乱的现象,这是因为使用Component组件是不允许设
这段时间在开发一个微信小程序,有个需求是,小程序底部的tabBar导航实现动态化。就是根据用户角色不同,显示不同的导航。要实现动态导航首先要考虑的是如何把小程序中的原生导航更改为自定义导航。
一、根据官方文档所说,实现自定义导航首先要在app.js中配置好tabBar项;
"tabBar": {
    "custom": true,
    "color": "#7A7E83",
    "selectedColor": "#2a83f7",
    "backgroundColor": "#ffffff",
    "list": [{
      "iconPath": "images/icon/home.png",
      "selectedIconPath": "images/icon/home-a.png",
      "pagePath": "pages/index/index",
      "text": "首页"
    }, {
      "iconPath": "images/icon/classify.png",
      "selectedIconPath": "images/icon/classify-a.png",
      "pagePath": "pages/picSort/index",
      "text": "全部分类"
    }, {
      "iconPath": "images/icon/chat.png",
      "selectedIconPath": "images/icon/chat-a.png",
      "pagePath": "pages/chat/index",
      "text": "聊一聊"
    }, {
      "iconPath": "images/icon/user.png",
      "selectedIconPath": "images/icon/user-a.png",
      "pagePath": "pages/myCentre/index",
      "text": "我的"
    }]
  }
注意:"custom": true是重点,默认是没有这个字段的,在配置项中新增即可;
二、在项目的根目录创建“custom-tab-bar”组件;
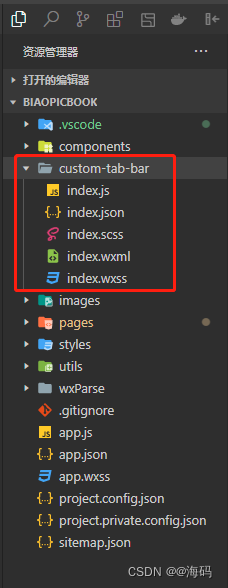
三、编写custom-tab-bar组件的导航页面布局、样式表及JS;
index.wxml
<view class="tab-bar">
  <view class="tab-bar-item"
    wx:for="{{list}}"
    wx:key="index"
    data-path="{{item.pagePath}}"
    data-index="{{index}}"
    bindtap="switchTab"
  >
    <view class="tab-bar-item-img">
      <image class="itemImage" src="{{tabIndex === index ? item.selectedIconPath : item.iconPath}}"></image>
    </view>
    <view class="tab-bar-item-title">
      <view class="itemTitle" style="color: {{tabIndex === index ? selectedColor : color}}">{{item.text}}</view>
    </view>
  </view>
</view>
说明:以上代码中
index.wxss
.tab-bar {
  position: fixed;
  bottom: 0;
  left: 0;
  right: 0;
  height: 96rpx;
  background: white;
  display: flex;
  padding-bottom: env(safe-area-inset-bottom);
  border-top: 2rpx solid #dddddd;
}

.tab-bar .tab-bar-item {
  flex: 1;
  text-align: center;
  display: flex;
  justify-content: center;
  align-items: center;
  flex-direction: column;
  height: 100%;
}

.tab-bar .tab-bar-item .tab-bar-item-img .itemImage {
  width: 54rpx;
  height: 54rpx;
}

.tab-bar .tab-bar-item .tab-bar-item-title .itemTitle {
  font-size: 20rpx;
}
index.js
Component({
  data: {
    tabIndex: 0
    custom: true,
    color: "#7A7E83",
    selectedColor: "#2a83f7",
    backgroundColor: "#ffffff",
    list: [{
      iconPath: "images/icon/home.png",
      selectedIconPath: "images/icon/home-a.png",
      pagePath: "pages/index/index",
      text: "首页"
    }, {
      iconPath: "images/icon/classify.png",
      selectedIconPath: "images/icon/classify-a.png",
      pagePath: "pages/picSort/index",
      text: "全部分类"
    }, {
      iconPath: "images/icon/chat.png",
      selectedIconPath: "images/icon/chat-a.png",
      pagePath: "pages/chat/index",
      text: "聊一聊"
    }, {
      iconPath: "images/icon/user.png",
      selectedIconPath: "images/icon/user-a.png",
      pagePath: "pages/myCentre/index",
      text: "我的"
    }]
  },
  methods: {
    switchTab(e) {
      const data = e.currentTarget.dataset
      // console.log('currentTarget:', data.index)
      const url = data.path
      wx.switchTab({url})
      this.setData({
        selected: data.index
      })
    }
  }
})
重点:在实现自定义tabbar的时候,会出现点击导航,高亮状态及跳转链接出现混乱的现象, 这是因为使用Component组件是不允许设置动态数据的。下面会一并解决如何解决这些问题。
四、上面部分不是重点,在任何地方都能搜索。而实现动态 tabbar是写这边文章的重点
1、我们先在utils目录中创建tab-service.js文件,写上全局的数据及方法;
// Tab页的data
let tabData = {
  tabIndex: 0,
  tabBar: {
      showplate: '',
      custom: true,
      color: "#7A7E83",
      selectedColor: "#2a83f7",
      backgroundColor: "#ffffff",
      list: [{
        iconPath: "/images/icon/home.png",
        selectedIconPath: "/images/icon/home-a.png",
        pagePath: "/pages/index/index",
        text: "首页"
      }, {
        iconPath: "/images/icon/classify.png",
        selectedIconPath: "/images/icon/classify-a.png",
        pagePath: "/pages/picSort/index",
        text: "全部分类"
      }, {
        iconPath: "/images/icon/chat.png",
        selectedIconPath: "/images/icon/chat-a.png",
        pagePath: "/pages/chat/index",
        text: "聊一聊"
      }, {
        iconPath: "/images/icon/user.png",
        selectedIconPath: "/images/icon/user-a.png",
        pagePath: "/pages/myCentre/index",
        text: "我的"
      }]
  }
}

// 更新菜单
const updateRole = (that, type) => {
  if (type === '0') {
    tabData.tabBar.list.forEach((item, i) => {
      if (item.text === '我的') {
        tabData.tabBar.list.splice(i, 1)
      }
    })
  } else if (type === '1') {
    const num = tabData.tabBar.list.length
    if (num === 3) {
      tabData.tabBar.list.push({
        iconPath: "/images/icon/user.png",
        selectedIconPath: "/images/icon/user-a.png",
        pagePath: "/pages/myCentre/index",
        text: "我的"
      })
    }
  }
  // console.log('tabData:', tabData)
  updateTab(that);
}

// 更新底部高亮
const updateIndex = (that, index) => {
  tabData.tabIndex = index;
  updateTab(that);
}

// 更新Tab状态
const updateTab = (that) => {
  if (typeof that.getTabBar === 'function' && that.getTabBar()) {
      that.getTabBar().setData(tabData);
  }
}

// 将可调用的方法抛出让外面调用
module.exports = {
  updateRole, updateTab, updateIndex
}
2、把custom-tab-bar目录中的index.wxml修改为下面这段
<view class="tab-bar">
  <view class="tab-bar-item"
    wx:for="{{tabBar.list}}"
    wx:key="index"
    data-path="{{item.pagePath}}"
    data-index="{{index}}"
    bindtap="switchTab"
  >
    <view class="tab-bar-item-img">
      <image class="itemImage" src="{{tabIndex === index ? item.selectedIconPath : item.iconPath}}"></image>
    </view>
    <view class="tab-bar-item-title">
      <view class="itemTitle" style="color: {{tabIndex === index ? tabBar.selectedColor : tabBar.color}}">{{item.text}}</view>
    </view>
  </view>
</view>
其中tabBar就是在tab-service.js文件中写的公共数据。
2、把index.js修改为下面这段
Component({
  data: {

  },
  methods: {
    switchTab(e) {
      const data = e.currentTarget.dataset
      // console.log('currentTarget:', data.index)
      const url = data.path
      wx.switchTab({url})
      this.setData({
        selected: data.index
      })
    }
  }
})
3、重点是在对应导航的JS文件中找到onShow方法,写上tabService.updateIndex(this, 0),其中tabService就是我们写的全局tab-service.js,引入一下
const tabService = require("../../utils/tab-service")在js,onShow方法写上tabService.updateIndex(this, 0),这是因为需要调用一次刷新事件。如果导航有4个,每个导航对一个页面,0,1,2,3以此类推即可;
onShow: function () {
    tabService.updateIndex(this, 0)
}
4、 因为我要实现页面加载时判断用户,根据用户的不同改变导航的。所以我在onLand方法中去判断调用tabService.updateRole(this, res.data.showplate)这个公共的方法;
这样就完全解决了动态tabbar的效果;

为开发者提供学习成长、分享交流、生态实践、资源工具等服务,帮助开发者快速成长。
更多推荐


 10
10 0
0- 0


 已为社区贡献1条内容

所有评论(0)