手把手教你用原生js实现无缝滚动
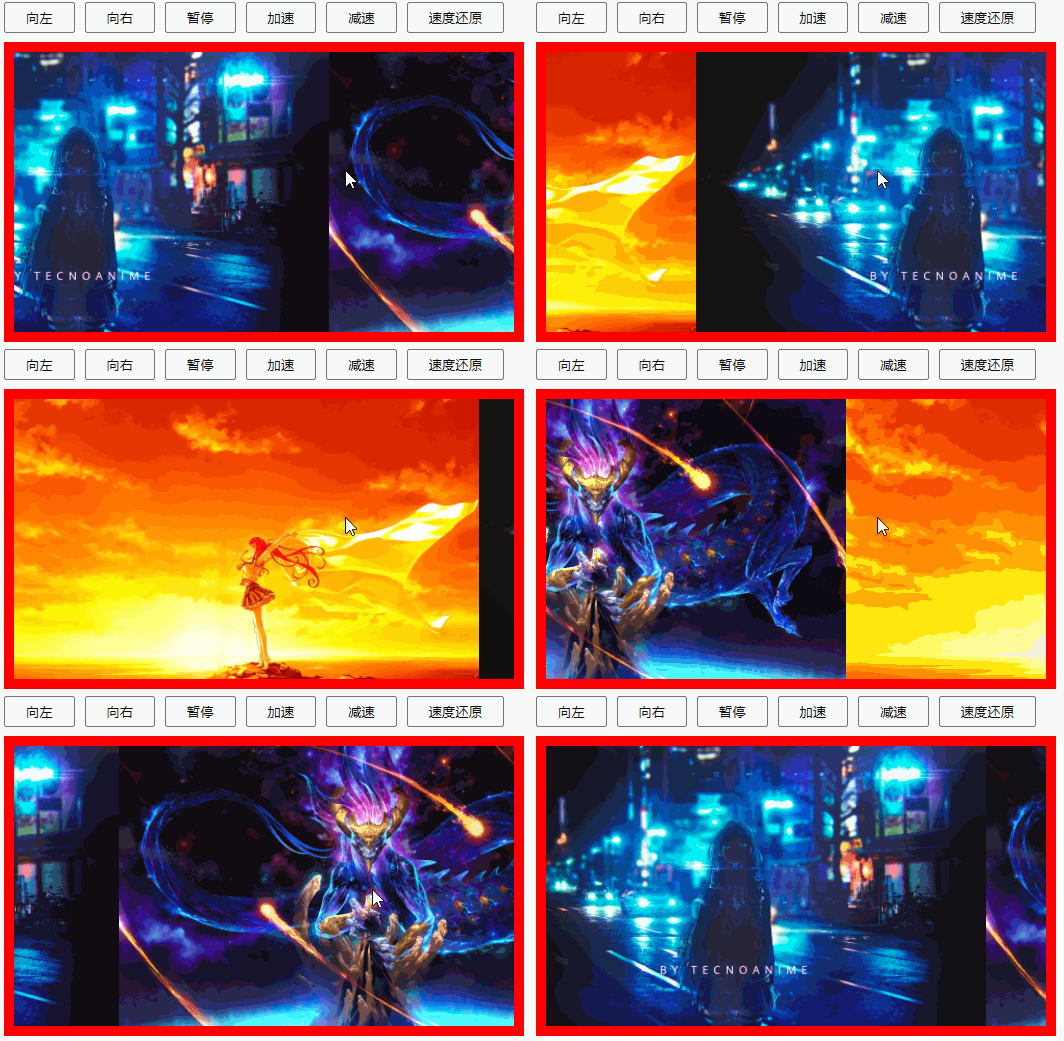
效果展示上图就是我们要实现的无缝滚动效果。整体思路按照惯例我们先来说一下思路,一开始图片静止,点击各个按钮,顾名思义都有相应的效果,无缝滚动最主要的效果就是图片一直保持匀速运动。 点击向右按钮(点击事件),红色框框内(框框相对定位)的图片(图片绝对定位)开始滚动,不停止(定时器),这里所有图片应该用一个容器包裹起来绝对定位给到这个图片的父级容器,然后,设置一个定时器,获取图片父级容器的left,每
目录
效果展示

上图就是我们要实现的无缝滚动效果。
整体思路
按照惯例我们先来说一下思路,一开始图片静止,点击各个按钮,顾名思义都有相应的效果,无缝滚动最主要的效果就是图片一直保持匀速运动。 点击向右按钮(点击事件),红色框框内(框框相对定位)的图片(图片绝对定位)开始滚动,不停止(定时器),这里所有图片应该用一个容器包裹起来绝对定位给到这个图片的父级容器,然后,设置一个定时器,获取图片父级容器的left,每运行一次定时器,增加一次或减少一次left,这样就可以做出向左或向右移动。
HTML布局思路与实现
用一个大盒子包裹上面的按钮容器和下面的图片滚动容器,然后在按钮容器里面写按钮,
图片滚动容器里面又包裹着包裹着图片的容器。
    <div class="box">
        <div class="box_btnBox">
            <button class="leftBtn">向左</button>
            <button class="rightBtn">向右</button>
            <button class="stopBtn">暂停</button>
            <button class="addSpeedBtn">加速</button>
            <button class="subSpeedBtn">减速</button>
            <button class="restoreBtn">速度还原</button>
        </div>
        <div class="box_imgBox">
            <div class="imgsBox">
                <img src="./images/img (1).png" alt="">
                <img src="./images/img (2).png" alt="">
                <img src="./images/img (3).png" alt="">
            </div>
        </div>
    </div>
CSS样式思路与实现
这里有个小技巧,为了不让我1920*1080的壁纸图片缩小后畸形,我先给imgsBox下的图片给个max-width:500px;
    .box .imgsBox img{
         max-width: 500px;
    }
然后在谷歌浏览器中按f12打开开发者工具,然后再按ctrl+shift+c打开元素检查工具,把光标放在图片上面,就会出现下图的图片宽高,然后我们后面根据缩小后的图片,来定义图片和容器的宽高,这样图片就不会畸形了。

我们先不写最大那个盒子的样式,我们先定义他下面两个容器的样式,下面我用class名代替盒子的名字。
我们先定义box_imgBox,这个容器是用来给imgsBox图片容器定位用的,我们先给他500像素的宽,280像素的高,10像素的边距,来个超过边框的内容隐藏,在加个相对定位。
        .box_imgBox {
            width: 500px;
            height: 280px;
            border: 10px solid red;
            overflow: hidden;
            position: relative;
        }
然后就是box_btnBox定义520像素的宽50像素的高,然后给个display:flex弹性布局(我超喜欢用弹性布局,很好用!!!),让按钮在box_btnBox中水平均匀分布(justify-content:space-between;)垂直居中(align-items:center;),然后随便写写按钮的样式,给个内边距就好了(padding:5px 20px;上下5像素,左右20像素)。
        .box_btnBox {
            width: 520px;
            height: 50px;
            display: flex;
            justify-content: space-between;
            align-items: center;
        }

        .box_btnBox button {
            padding: 5px 20px;
        }
然后给imsBox和img图片设置样式,这里得让图片横向一排显示(这里也可以用浮动来做),于是我就给imgsBox设置了一个弹性布局,弹性布局默认是不换行的,然后我们给他水平和垂直都设置一下flex-start,让图片紧凑起来,再给imgsBox加个绝对定位。图片的话就给个宽高就行了,宽500px,高280px。
        .imgsBox {
            display: flex;
            justify-content: flex-start;
            align-items: flex-start;
            position: absolute;
        }

        .box_imgBox img {
            width: 500px;
            height: 280px;
        }
js部分
这里我用了面向对象的思想来写的这个无缝滚动,我们先定义一个构造函数。然后添加我们需要的属性。
        function ImgRoll(ele) {
            this.box = document.querySelector('.' + ele)
            // 获取按钮信息
            this.leftBtn = this.box.querySelector('.leftBtn')
            this.rightBtn = this.box.querySelector('.rightBtn')
            this.stopBtn = this.box.querySelector('.stopBtn')
            this.addBtn = this.box.querySelector('.addSpeedBtn')
            this.subBtn = this.box.querySelector('.subSpeedBtn')
            this.resBtn = this.box.querySelector('.restoreBtn')
            // 获取图片容器
            this.imgsBox = this.box.querySelector('.imgsBox')
            // 获取图片宽
            this.imgWidth = this.imgsBox.clientWidth / this.imgsBox.children.length
            // 初始速度
            this.speed = 5
            // 添加移动方向
            this.direction = 'right'
            // 添加定时器
            this.timer = null
            // 初始化无缝滚动
            this.init()
        }
然后初始化一下我们的无缝滚动。
        ImgRoll.prototype.init = function () {
            // 增加图片
            this.addImg()
            // 矫正图片位置
            this.imgsBox.style.left = -this.imgWidth + 'px'
            // 给按钮添加点击事件
            // 向右移动
            this.rightBtn.onclick = () => {
                clearInterval(this.timer)
                this.direction = 'right'
                this.imgRun()
            }
            // 暂停
            this.stopBtn.onclick = () => {
                clearInterval(this.timer)
            }
            // 向左移动
            this.leftBtn.onclick = () => {
                clearInterval(this.timer)
                this.direction = 'left'
                this.imgRun()
            }
            // 速度增加
            this.addBtn.onclick = () => {
                this.speed++
                if (this.speed >= 15) this.speed = 15
            }
            // 速度还原
            this.resBtn.onclick = () => {
                this.speed = 5
            }
            // 速度减慢
            this.subBtn.onclick = () => {
                this.speed--
                if (this.speed <= 1) this.speed = 1
            }
        }

这里增加图片,我是把第一张图片放在了最后一张后面,最后一张图片放在了第一张前面。
代码如下
        ImgRoll.prototype.addImg = function () {
            // 克隆第一张和最后一张图片
            const firstImg = this.imgsBox.children[0].cloneNode(true)
            const lastImg = this.imgsBox.children[2].cloneNode(true)
            // 将图片插入图片容器最前面和最后面
            this.imgsBox.insertBefore(lastImg, this.imgsBox.children[0])
            this.imgsBox.appendChild(firstImg)
        }
这里还有一个图片运动的方法,代码如下
        ImgRoll.prototype.imgRun = function () {
            this.timer = setInterval(() => {
                //  获取当前left
                let l = this.imgsBox.offsetLeft
                if (this.direction === 'right') l += this.speed
                else l -= this.speed
                // 判断是否到第一张或最后一张

                if (l <= -(this.imgsBox.children.length - 1) * this.imgWidth) {
                    this.imgsBox.style.left = -this.imgWidth + 'px'
                    return
                } else {
                    this.imgsBox.style.left = l + 'px'
                }
                if (l >= 0) {
                    this.imgsBox.style.left = -(this.imgsBox.children.length - 2) * this.imgWidth + 'px'
                    return
                } else {
                    this.imgsBox.style.left = l + 'px'
                }
            }, 20)
        }
这里控制速度是控制定时器每次移动的距离,建议不要去控制定时器的时间,控制定时器的时间的话,每次改变时间要清除上一个定时器,挺麻烦的。
整体代码
<!DOCTYPE html>
<html lang="en">

<head>
    <meta charset="UTF-8">
    <meta http-equiv="X-UA-Compatible" content="IE=edge">
    <meta name="viewport" content="width=device-width, initial-scale=1.0">
    <title>Document</title>
    <style>
        .box {
            width: 520px;
            margin: 50px auto;
        }

        .box_btnBox {
            width: 520px;
            height: 50px;
            display: flex;
            justify-content: space-between;
            align-items: center;
        }

        .box_btnBox button {
            padding: 5px 20px;
        }

        .box_imgBox {
            width: 500px;
            height: 280px;
            border: 10px solid red;
            overflow: hidden;
            position: relative;
        }

        .imgsBox {
            display: flex;
            justify-content: flex-start;
            align-items: flex-start;
            position: absolute;
        }

        .box_imgBox img {
            width: 500px;
            height: 280px;
        }
    </style>
</head>

<body>
    <div class="box">
        <div class="box_btnBox">
            <button class="leftBtn">向左</button>
            <button class="rightBtn">向右</button>
            <button class="stopBtn">暂停</button>
            <button class="addSpeedBtn">加速</button>
            <button class="subSpeedBtn">减速</button>
            <button class="restoreBtn">速度还原</button>
        </div>
        <div class="box_imgBox">
            <div class="imgsBox">
                <img src="./images/img (1).png" alt="">
                <img src="./images/img (2).png" alt="">
                <img src="./images/img (3).png" alt="">
            </div>
        </div>
    </div>
    <script>
        function ImgRoll(ele) {
            this.box = document.querySelector('.' + ele)
            // 获取按钮信息
            this.leftBtn = this.box.querySelector('.leftBtn')
            this.rightBtn = this.box.querySelector('.rightBtn')
            this.stopBtn = this.box.querySelector('.stopBtn')
            this.addBtn = this.box.querySelector('.addSpeedBtn')
            this.subBtn = this.box.querySelector('.subSpeedBtn')
            this.resBtn = this.box.querySelector('.restoreBtn')
            // 获取图片容器
            this.imgsBox = this.box.querySelector('.imgsBox')
            // 获取图片宽
            this.imgWidth = this.imgsBox.clientWidth / this.imgsBox.children.length
            // 初始速度
            this.speed = 5
            // 添加移动方向
            this.direction = 'right'
            // 添加定时器
            this.timer = null
            // 初始化无缝滚动
            this.init()
        }
        ImgRoll.prototype.init = function () {
            // 增加图片
            this.addImg()
            // 矫正图片位置
            this.imgsBox.style.left = -this.imgWidth + 'px'
            // 给按钮添加点击事件
            // 向右移动
            this.rightBtn.onclick = () => {
                clearInterval(this.timer)
                this.direction = 'right'
                this.imgRun()
            }
            // 暂停
            this.stopBtn.onclick = () => {
                clearInterval(this.timer)
            }
            // 向左移动
            this.leftBtn.onclick = () => {
                clearInterval(this.timer)
                this.direction = 'left'
                this.imgRun()
            }
            // 速度增加
            this.addBtn.onclick = () => {
                this.speed++
                if (this.speed >= 15) this.speed = 15
            }
            // 速度还原
            this.resBtn.onclick = () => {
                this.speed = 5
            }
            // 速度减慢
            this.subBtn.onclick = () => {
                this.speed--
                if (this.speed <= 1) this.speed = 1
            }
        }
        ImgRoll.prototype.addImg = function () {
            // 克隆第一张和最后一张图片
            const firstImg = this.imgsBox.children[0].cloneNode(true)
            const lastImg = this.imgsBox.children[2].cloneNode(true)
            // 将图片插入图片容器最前面和最后面
            this.imgsBox.insertBefore(lastImg, this.imgsBox.children[0])
            this.imgsBox.appendChild(firstImg)
        }
        ImgRoll.prototype.imgRun = function () {
            this.timer = setInterval(() => {
                //  获取当前left
                let l = this.imgsBox.offsetLeft
                if (this.direction === 'right') l += this.speed
                else l -= this.speed
                // 判断是否到第一张或最后一张

                if (l <= -(this.imgsBox.children.length - 1) * this.imgWidth) {
                    this.imgsBox.style.left = -this.imgWidth + 'px'
                    return
                } else {
                    this.imgsBox.style.left = l + 'px'
                }
                if (l >= 0) {
                    this.imgsBox.style.left = -(this.imgsBox.children.length - 2) * this.imgWidth + 'px'
                    return
                } else {
                    this.imgsBox.style.left = l + 'px'
                }
            }, 20)
        }

        const imgRoll = new ImgRoll('box')
    </script>
</body>

</html>
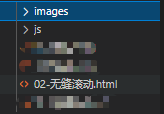
文件路径

更多推荐
 已为社区贡献2条内容


所有评论(0)