vue项目部署以及解决代码部署后浏览器存在缓存问题
开发完的vue项目,需要部署到Nginx/Tomcat服务器上运行,作为一个前端小白,刚接触vue不久,研究了一番,于是写下这篇文章,记录下来便于今后部署。1.router(history)模式vue项目部署到nginx1)修改router模式为history(默认为hash)const router = new VueRouter({routes,mode: 'history'});对路由模式不
一.项目部署
1.router(history)模式vue项目部署到nginx
(1)部署在根目录
1)修改router模式为history(默认为hash)
const router = new VueRouter({
  routes,
  mode: 'history'
});对路由模式不清楚的小伙伴,可以看这篇vue-router路由模式详解
2)修改config/index.js,build下静态资源路径,完成后执行npm run build打包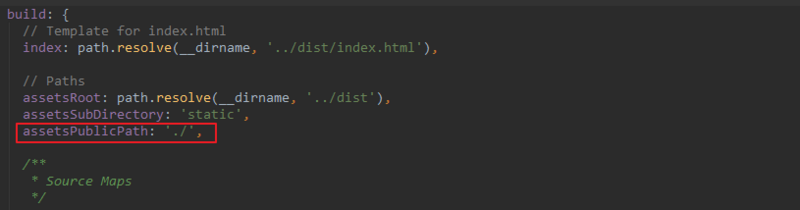
3)修改nginx配置
server {
    listen       80;//代理端口
    server_name  192.168.0.152;//代理名称(域名、ip)
    #charset koi8-r;

    #access_log  logs/host.access.log  main;

    location / {
        root test; //项目存放的地址(当前服务器位置)
        index /index.html;
        try_files $uri $uri/ @router; //一个覆盖所有情况的候选资源:如果 URL 匹配不到任何静态资源,返回同一个 index.html 页面
    }
    location @router {
        rewrite ^.*$ /index.html last;
    }
}
运行结果
(2)含上下文(二级目录)
1)项目中配置上下文 .env.staging(测试环境)
# 上下文
VUE_APP_BASE_CONTEXT ='zzzd2'
2)router.js 配置
export default new Router({
mode: 'history', // 去掉url中的#
base: process.env.VUE_APP_BASE_CONTEXT,
routes: constantRoutes
});
3)如果有登录的模块时
在utils/request.js 以及退出登录接口 要增加
location.href = process.env.VUE_APP_BASE_CONTEXT;
如下:
MessageBox.confirm(
'登录状态已过期,您可以继续留在该页面,或者重新登录',
'系统提示',
{
confirmButtonText: '重新登录',
cancelButtonText: '取消',
type: 'warning'
}
)
.then(() => {
store.dispatch('LogOut').then(() => {
location.href = process.env.VUE_APP_BASE_CONTEXT;
});
})
.catch(() => {});
4) vue.config.js 配置
module.exports = {
publicPath: process.env.NODE_ENV === "production" ?`/${process.env.VUE_APP_BASE_CONTEXT}/`:'/',
//打包成dist/zzzd2的路径
outputDir: process.env.NODE_ENV === "production" ?`dist/${process.env.VUE_APP_BASE_CONTEXT}/`:''dist'
}
5)部署在nginx 时把打包dist 放在html下

6)nginx/conf/nginx.conf
server {
    listen       80;
    server_name  localhost;
	#access_log logs/host.access_log main;

    location /zzzd2 {//二级目录
        root html/dist/;// zzzd2放置的路径
        try_files $uri $uri/zzzd2 /zzzd2/index.html;
        index index.html index.htm;
    }

    location @router {
        rewrite ^.*$ /zzzd2/index.html last;
    }
}
注意如果不要dits 这一层的话, 打包的去掉dist,然后nginx 上
server {
    listen       80;
    server_name  localhost;
	#access_log logs/host.access_log main;

    location /zzzd2 {//二级目录
        root html/;// zzzd2放置的路径
        try_files $uri $uri/zzzd2 /zzzd2/index.html;
        index index.html index.htm;
    }

    location @router {
        rewrite ^.*$ /zzzd2/index.html last;
    }
}
2.vue项目部署到tomcat
1)项目上线,一般需要添加项目名,并且消去vue-router产生的#号,需要在router配置
const router = new VueRouter({
  routes,
  mode: 'history',
  base: '/test/'//项目名称 访问路由页面都需要加上这个,访问的根路径为http://ip:port/test
});
2)修改vue.config.js

3)tomcat的配置
在tomcat的webapps新建文件夹,文件夹名称和上面配置的根路径一致,即为test,然后将打包生成的dist文件夹里面的文件复制到test下,并且新建文件WEB-INF/web.xml。
项目结构为:
WEB-INF目录下新增web.xml内容为:
//覆盖所有情况的候选资源:如果 URL 匹配不到任何静态资源,返回同一个 index.html页面
<?xml version="1.0" encoding="UTF-8"?>
<web-app xmlns="http://xmlns.jcp.org/xml/ns/javaee" xmlns:xsi="http://www.w3.org/2001/XMLSchema-instance"
    xsi:schemaLocation="http://xmlns.jcp.org/xml/ns/javaee
                      http://xmlns.jcp.org/xml/ns/javaee/web-app_3_1.xsd"
    version="3.1" metadata-complete="true">
    <display-name>Router for Tomcat</display-name>
    <error-page>
        <error-code>404</error-code>
        <location>/index.html</location>
    </error-page>
</web-app>详细了解可看vue官方文档后端配置HTML5 History 模式
4)重新启动tomcat
http://192.168.1.104:8088/test/test 或是http://192.168.1.104:8088/test
3.nginx部署多个vue项目
需要在同一域名端口下,部署两个项目
1)准备两个项目
2)vue-test不用修改配置,直接build,vue-admin需要修改下配置
修改config/index.js

build: {
    ...
    assetsPublicPath: '/admin/',
    ...
}

修改router/index.js
const createRouter = () => new Router({
  ...
  base: 'admin',
  ...
});
完成后重新build打包
3)修改nginx/conf/nginx.conf
server {
    listen       9090;
    server_name  192.168.0.153;

    location / {
        root vue-test;
        try_files $uri $uri/ @router;
        index index.html index.htm;
    }

    location /admin {//二级目录
        alias vue-admin;
        try_files $uri $uri/ /admin/index.html;
        index index.html index.htm;
    }

    location @router {
        rewrite ^.*$ /index.html last;
    }

    location /xxx {//跨域代理
        add_header 'Access-Control-Allow-Origin' '*';
        proxy_pass http://ip:port/xxx;
    }

    error_page   500 502 503 504  /50x.html;

    location = /50x.html {
        root   html;
    }
}
重新加载nginx配置 nginx -s reload
二.解决代码部署后浏览器存在缓存问题
vue项目代码部署之后,如何解决浏览器存在缓存问题
1)在index.html头部添加如下代码:
<meta http-equiv="pragram" content="no-cache">
<meta http-equiv="cache-control" content="no-cache, no-store, must-revalidate">
2) 打包的js要hash的,如没有则如下配置
在vue.config.js中添加如下代码:
const Timestamp = new Date().getTime();
module.exports = {
configureWebpack: { // webpack 配置
output: { // 输出重构 打包编译后的 文件名称 【模块名称.版本号.时间戳】
filename: `static/js/[name].${process.env.VUE_APP_Version}.${Timestamp}.js`,
chunkFilename: `static/js/[name].${process.env.VUE_APP_Version}.${Timestamp}.js`
},
},
...
}
3)在nginx.conf配置(最重要)
server {
listen 80;
server_name localhost;
#access_log logs/host.access_log main;location /index.html {
root html/dist/;//项目html放置的路径
index index.html index.htm;
add_header Cache-Control "no-cache, no-store";
}...
}
三. 基于vue-cli一套代码要打包多个项目
webpack打包配置
最简单的方式,设置多个环境变量
1)根据项目多个配置相应的(开发环境,测试环境,生产环境)

比如:
.env.staging
# 页面标题
VUE_APP_TITLE = '管理平台'

# 项目版本号
VUE_APP_VERSION = V1.0

# 生产环境配置
NODE_ENV = production

# 测试环境配置
ENV = 'staging'

# 项目名称 大屏
VUE_APP_NAME ='largescreen'

# 上下文
VUE_APP_BASE_CONTEXT =''

# 接口 测试环境
VUE_APP_BASE_SCREEN= '/stage-api'

# 接口地址

VUE_APP_SCREEN = 'http://198.168.1.114:8080'
.env.zrProd
# 页面标题
VUE_APP_TITLE =  '管理平台'

# 项目版本号
VUE_APP_VERSION = V1.0


# 生产环境配置
ENV = 'production'

# 项目名称
VUE_APP_NAME ='zr'

# 上下文
VUE_APP_BASE_CONTEXT ='tamAccess'

# 接口开发环境

VUE_APP_BASE_URL = ''

# 接口地址

VUE_APP_URL = 'http://169.76.49.184:8080'


# httpServer的接口

VUE_APP_HTTPSERVER = 'http://127.0.0.1:8080/server'
2)package.json 配置
"scripts": {
"serve": "vue-cli-service serve",
"build:prod": "vue-cli-service build",
"build:stage": "vue-cli-service build --mode staging",
"build:pre": "vue-cli-service build --mode pre",
"serve:zrDev": "vue-cli-service serve --mode zrDev",
"build:zrProd": "vue-cli-service build --mode zrProd",
"build:zrStage": "vue-cli-service build --mode zrStage",
"test:unit": "vue-cli-service test:unit",
"lint": "vue-cli-service lint"
},

为开发者提供学习成长、分享交流、生态实践、资源工具等服务,帮助开发者快速成长。
更多推荐


 1
1 0
0- 0


 已为社区贡献3条内容

所有评论(0)