Vue 3结合element plus(问题总结二)之 table组件实现多选和清除选中(在vue3中获取ref 的Dom)
Vue 3结合element plus(问题总结二)之 table组件实现多选和清除选中前言问题描述和原因问题解决小案例前言由于element plus组件里面使用的ts来写的,在用的时候属实有点小麻烦。最后有个小案例,实现了多选和清除选中。希望对大家有帮助先看官网Table组件的多选代码和效果。<template><el-tableref="multipleTableRef":
前言
由于element plus组件里面使用的ts来写的,在用的时候属实有点小麻烦。
最后有个小案例,实现了多选和清除选中。希望对大家有帮助
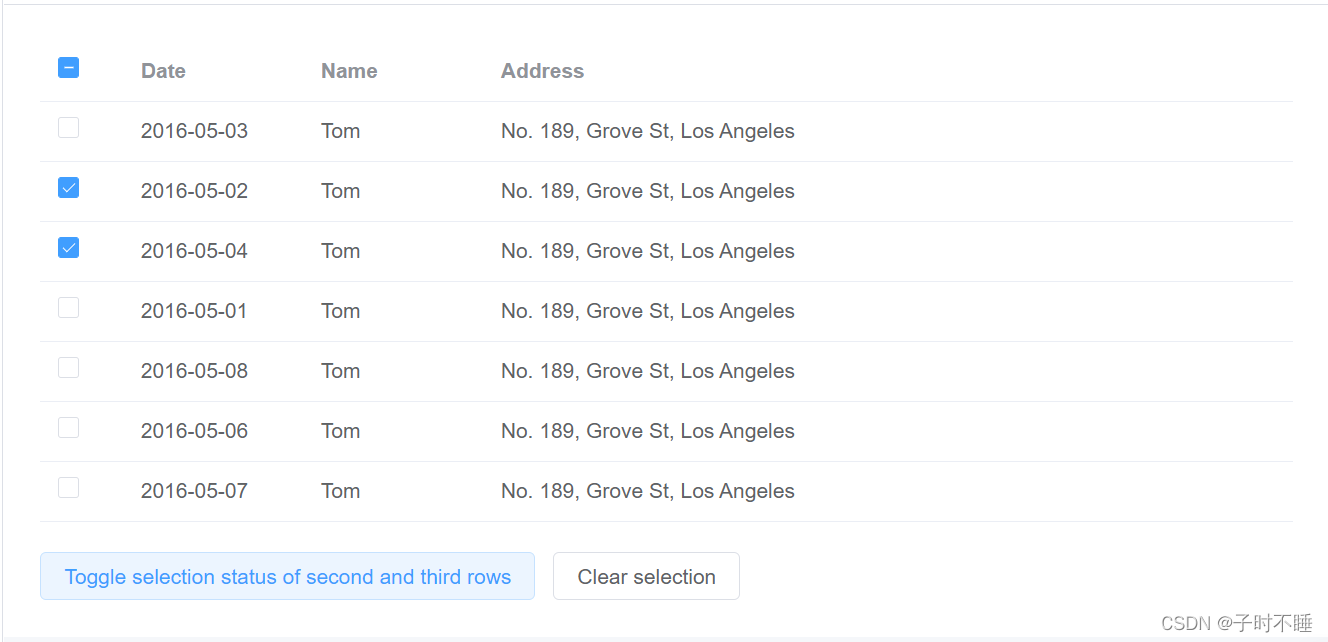
先看官网Table组件的多选代码和效果。
<template>
  <el-table
    ref="multipleTableRef"
    :data="tableData"
    style="width: 100%"
    @selection-change="handleSelectionChange"
  >
    <el-table-column type="selection" width="55" />
    <el-table-column label="Date" width="120">
      <template #default="scope">{{ scope.row.date }}</template>
    </el-table-column>
    <el-table-column property="name" label="Name" width="120" />
    <el-table-column property="address" label="Address" show-overflow-tooltip />
  </el-table>
  <div style="margin-top: 20px">
    <el-button @click="toggleSelection([tableData[1], tableData[2]])"
      >Toggle selection status of second and third rows</el-button
    >
    <el-button @click="toggleSelection()">Clear selection</el-button>
  </div>
</template>

<script lang="ts" setup>
import { ref } from 'vue'
import type { ElTable } from 'element-plus'

interface User {
  date: string
  name: string
  address: string
}

const multipleTableRef = ref<InstanceType<typeof ElTable>>()
const multipleSelection = ref<User[]>([])
const toggleSelection = (rows?: User[]) => {
  if (rows) {
    rows.forEach((row) => {
      // TODO: improvement typing when refactor table
      // eslint-disable-next-line @typescript-eslint/ban-ts-comment
      // @ts-expect-error
      multipleTableRef.value!.toggleRowSelection(row, undefined)
    })
  } else {
    multipleTableRef.value!.clearSelection()
  }
}
const handleSelectionChange = (val: User[]) => {
  multipleSelection.value = val
}

const tableData: User[] = [
  {
    date: '2016-05-03',
    name: 'Tom',
    address: 'No. 189, Grove St, Los Angeles',
  },
  {
    date: '2016-05-02',
    name: 'Tom',
    address: 'No. 189, Grove St, Los Angeles',
  },
  {
    date: '2016-05-04',
    name: 'Tom',
    address: 'No. 189, Grove St, Los Angeles',
  },
  {
    date: '2016-05-01',
    name: 'Tom',
    address: 'No. 189, Grove St, Los Angeles',
  },
  {
    date: '2016-05-08',
    name: 'Tom',
    address: 'No. 189, Grove St, Los Angeles',
  },
  {
    date: '2016-05-06',
    name: 'Tom',
    address: 'No. 189, Grove St, Los Angeles',
  },
  {
    date: '2016-05-07',
    name: 'Tom',
    address: 'No. 189, Grove St, Los Angeles',
  },
]
</script>
但是我改成js后却出现了问题
问题描述和原因
一直出现toggleRowSelection和clearSelection不是方法,真的蚌埠住了。后来查资料终于搞明白了。首先多选的情况下,ref绑定了元素,以为上述的两个方法都是从multipleTableRef里面出来的,那么就是获取的这个dom有问题了。所以可能是Vue3 获取ref注册的dom元素失败了。因为在挂载之前,dom还没创建,那就要onMounted里面获取吗?那这不是废话吗,要是能在onMounted里面实现这个功能就早实现了。
问题解决
后来发现getCurrentInstance支持访问内部组件实例。
getCurrentInstance 只能在 setup 或生命周期钩子中调用。
如需在 setup 或生命周期钩子外使用,请先在 setup 中调用 getCurrentInstance() 获取该实例然后再使用。
const MyComponent = {
  setup() {
    const internalInstance = getCurrentInstance() // 有效

    const id = useComponentId() // 有效

    const handleClick = () => {
      getCurrentInstance() // 无效
      useComponentId() // 无效

      internalInstance // 有效
    }

    onMounted(() => {
      getCurrentInstance() // 有效
    })

    return () =>
      h(
        'button',
        {
          onClick: handleClick
        },
        `uid: ${id}`
      )
  }
}

// 在组合式函数中调用也可以正常执行
function useComponentId() {
  return getCurrentInstance().uid
}
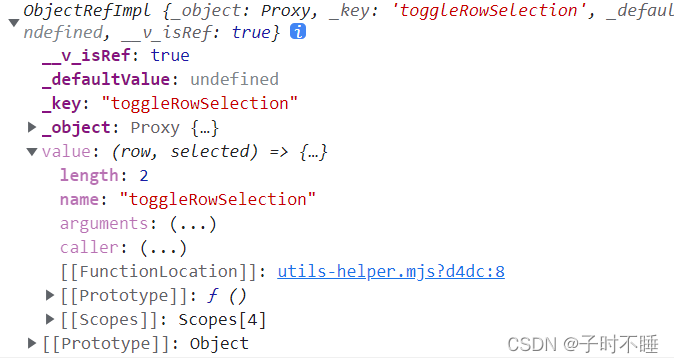
所以我通过在 const instance = getCurrentInstance(); 获取组件的实例
并且发现了ref注册的Table dom。但是这又是个代理对象,为了获取代理对象中的方法,使用toRefs ——将响应式对象转换为普通对象,其中结果对象的每个 property 都是指向原始对象相应 property 的 ref。
var ultipleTabInstance = toRefs(instance.refs.multipleTableRef)
输出ultipleTabInstance 看一看,
然后就可以找到toggleRowSelection方法了
最终可以实现了table组件的多选和清除选中了
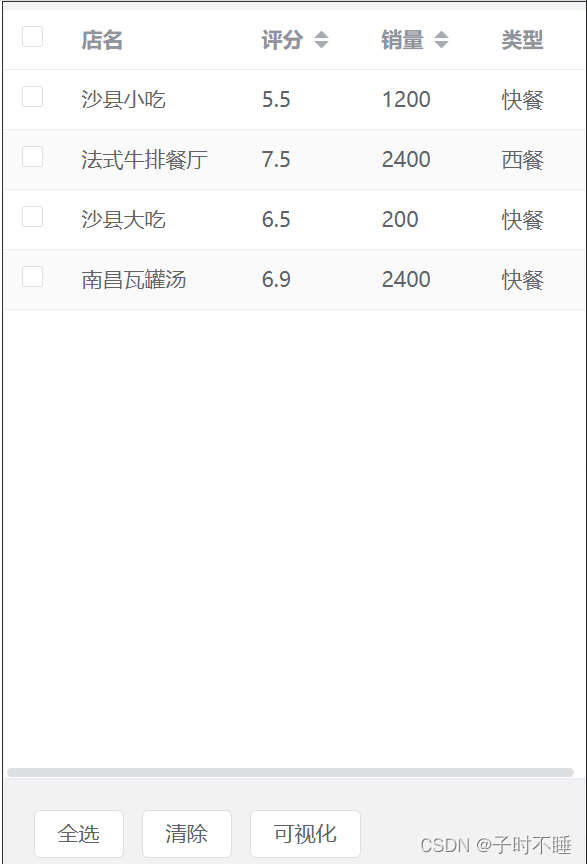
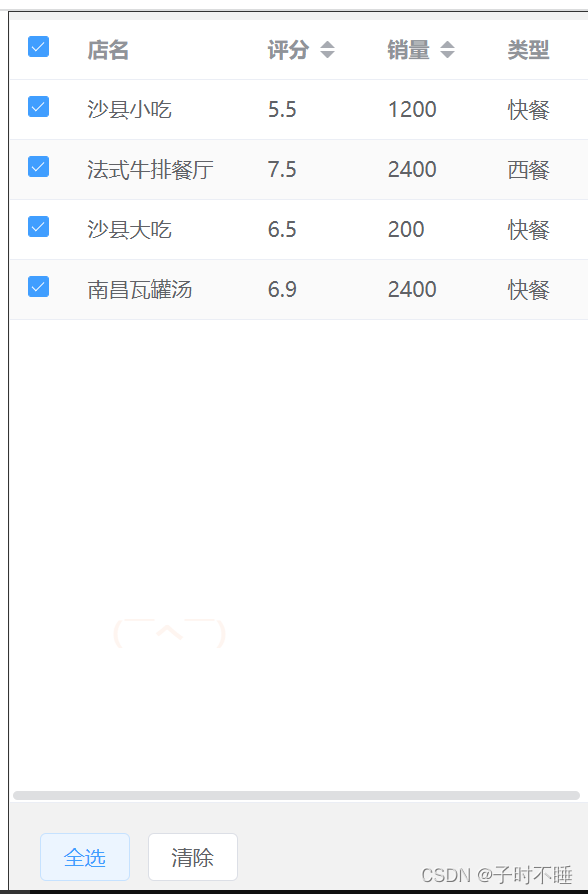
小案例
代码
<template >
  <div id="shoplist">
 <el-table
    ref="multipleTableRef"
    :data="data.arr"
    style="width: 100%"
    height="90%"
    stripe
    @selection-change="handleSelectionChange"
  >
     <el-table-column type="selection" width="40" />
     <el-table-column property="shopname" label="店名" width="120" show-overflow-tooltip/>
    <el-table-column property="score" label="评分" sortable width="80" />
     <el-table-column property="sales" label="销量" sortable width="80" />
      <el-table-column property="type" label="类型" width="70" />

   </el-table>

  <div style="margin-top: 20px; margin-left:20px">
    <el-button @click="toggleSelection(data.arr)">全选</el-button>
    <el-button @click="toggleSelection()">清除</el-button>
  </div>
  </div>
</template>

<script>
import { onMounted, ref, watch } from 'vue' ;
import { getCurrentInstance } from 'vue'
import {ElTable} from 'element-plus'
import { reactive, toRaw, toRefs } from '@vue/reactivity';
export default {
  setup () {
   const  instance = getCurrentInstance();
    const multipleTableRef = ref(null);
    const multipleSelection  = ref([]);
    var toggleSelection =(rows)=>{
       var ultipleTabInstance = toRefs(instance.refs.multipleTableRef)
       console.log(ultipleTabInstance.toggleRowSelection);
        if(rows){
          rows.forEach(row => {
           ultipleTabInstance.toggleRowSelection.value(row, undefined)
          });
        }else{
          ultipleTabInstance.clearSelection.value()
        }
      }
    onMounted(()=>{
      // console.log(multipleTableRef);

    })
    var handleSelectionChange =(val)=>{

      multipleSelection.value = val;

    }


   var data = reactive({
     arr:[ {
          id:1,
          shopname:"沙县小吃",
          score:5.5,
          sales:1200,
          hh:12,
          type:"快餐"
        },
      {
          id:2,
          shopname:"法式牛排餐厅",
          score:7.5,
          sales:2400,
          hh:12,
          type:"西餐"
        },
        {
          id:3,
          shopname:"沙县大吃",
          score:6.5,
          sales:200,
          hh:12,
          type:"快餐"
        },
        {
          id:4,
          shopname:"南昌瓦罐汤",
          score:6.9,
          sales:2400,
          hh:12,
          type:"快餐"
        },
      ]
   })

    return {
      data,
      multipleTableRef,
     toggleSelection,
     handleSelectionChange,
    }
  },
}
</script>

<style>
 #shoplist{
      position: fixed;
      z-index: 1001;
      width: 390px;
      height: 100%;
      min-height: 100vh;
      right: 0px;
      bottom: 0px;
      padding-top: 5px;
      background-color: #f2f2f2;
      transition: 1s;
      /* overflow: hidden; */
      border: 1px solid #333;
  }
</style>
效果

为开发者提供学习成长、分享交流、生态实践、资源工具等服务,帮助开发者快速成长。
更多推荐


 13
13 0
0- 0


 已为社区贡献7条内容

所有评论(0)