vue+element:current-node-key和setCurrentKey设置默认选中并高亮节点,附带全部展开,全部关闭,重新渲染树结构函数render-content
根据接口获取树结构后,设置默认选中的节点,并高亮效果图:官网中对于这两个节点的解释如下代码如下<el-tree v-loading="loading":data="treeData"node-key="value":props="defaultProps"default-expand-all
·
根据接口获取树结构后,设置默认选中的节点,并高亮
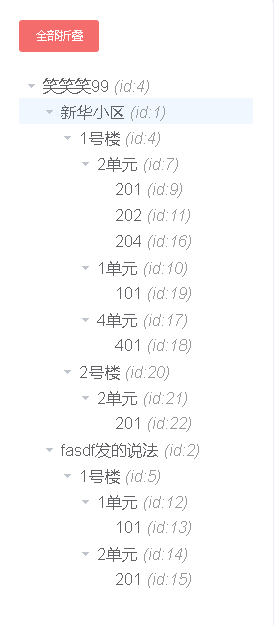
效果图:
官网中对于这两个节点的解释如下


代码如下
<el-tree v-loading="loading"
                   :data="treeData"
                   node-key="value"
                   :props="defaultProps"
                   default-expand-all
                   :expand-on-click-node="false"
                   :current-node-key="currentLivingId"
                   ref="popularTree"
                   highlight-current
                   @node-click="nodeClick"
                   :render-content="renderContent">
            <span class="custom-tree-node"
                  slot-scope="{ node, data }">
              <span>
                <i :class="data.icon"></i>{{ node.label }}
              </span>
            </span>
          </el-tree>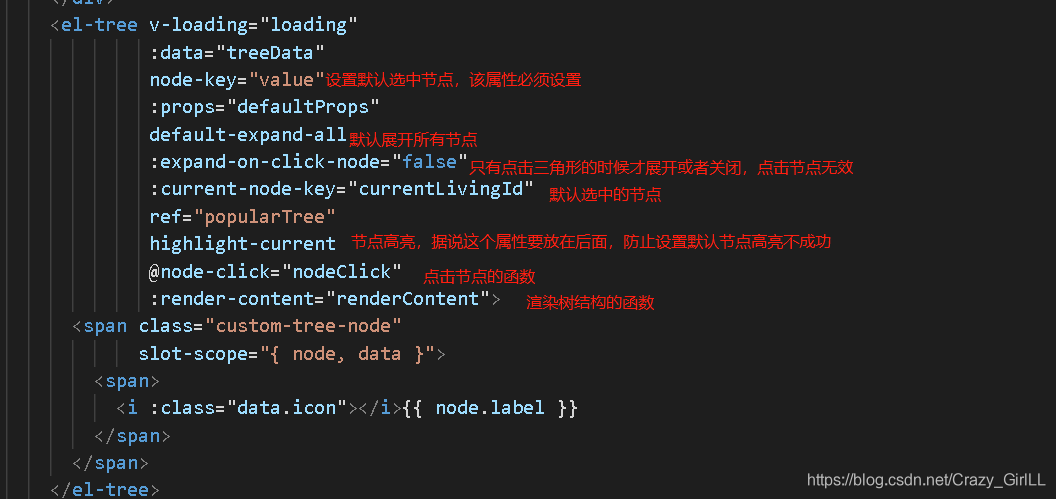
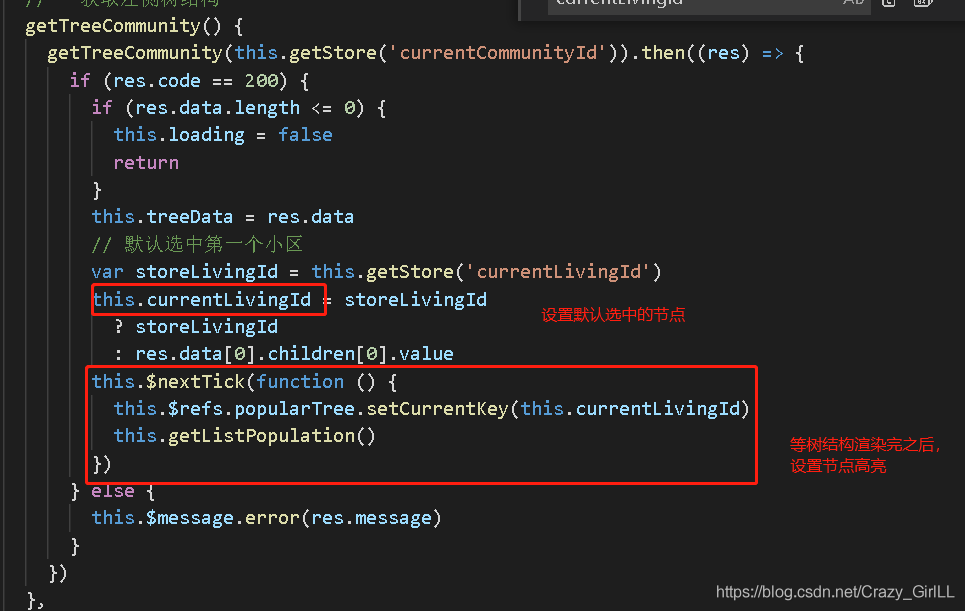
主要就是这两行代码,需要注意的是setCurrentKey函数必须要放到$nextTick里面,要不然tree还未渲染上,是找不到popularTree的
          this.currentLivingId = res.data[0].children[0].value
          this.$nextTick(function () {
            this.$refs.popularTree.setCurrentKey(this.currentLivingId)
          })
然后下面是树结构全部展开,全部收起的函数
template:
//设置一个按钮,点击它,全部收起,或者全部展开
<el-button type="danger"
                       size="small"
                       class="collapseBtn"
                       @click="setAllExpand">{{btnText}}</el-button>
js:
setAllExpand() {
      this.loading = true
      var nodes = this.$refs.popularTree.store.nodesMap
      if (this.btnText == '全部展开') {
        this.btnText = '全部折叠'
        for (var i in nodes) {
          nodes[i].expanded = true
        }
      } else {
        this.btnText = '全部展开'
        for (var i in nodes) {
          nodes[i].expanded = false
        }
      }
      this.loading = false
    },
下面是树结构,重新渲染的函数render-content,比如效果图中每个节点的id展示
renderContent(h, { node, data, store }) {
      return (
        <span class="custom-tree-node">
          <span>
            {node.label}
            <i style="color:#999;margin-left:5px">(id:{node.key})</i>
          </span>
        </span>
      )
    },

为开发者提供学习成长、分享交流、生态实践、资源工具等服务,帮助开发者快速成长。
更多推荐


 14
14 0
0- 0


 已为社区贡献6条内容

所有评论(0)