Vue中extend基本用法
1.Vue.extend(options)参数:{Object} options用法:使用基础Vue构造器,创建一个"子类"。参数是一个包含组件选项的对象。data选项是特例,需要注意,在Vue.extend()中它必须是函数。<html><head><title>Vue.extend 用法</title><script src="https:
·
1.Vue.extend(options)
- 参数:
{Object} options - 用法:
使用基础Vue构造器,创建一个"子类"。参数是一个包含组件选项的对象。
data选项是特例,需要注意,在Vue.extend()中它必须是函数。
<html>
  <head>
    <title>Vue.extend 用法</title>
    <script src="https://cdn.jsdelivr.net/npm/vue/dist/vue.js"></script>
  </head>
  <body>
    <div id="mount-point"></div>
    <script>
      // 创建构造器
      var Profile = Vue.extend({
        template: '<p>{{firstName}} {{lastName}} aka {{alias}}</p>',
        data: function () {
          return {
            firstName: 'Walter',
            lastName: 'White',
            alias: 'Heisenberg'
          }
        }
      })
      // 创建 Profile 实例,并挂载到一个元素上。
      new Profile().$mount('#mount-point')
    </script>
  </body>
</html>
结果显示如下:

可以看到,extend 创建的是 Vue 构造器,而不是我们平时常写的组件实例,所以不可以通过 new Vue({ components: testExtend }) 来直接使用,需要通过 new Profile().$mount(’#mount-point’) 来挂载到指定的元素上。
我个人的理解来看,extend提供了一个能够构造组件的函数(也就是构造器)。在一些特定的应用场景(如自己构建一个复杂弹窗)下,我们使用这种函数式的构造组件的方法,会更灵活一些。
2.Vue.extend实现加载效果
<html>
  <head>
    <title>Vue.extend 用法2</title>
    <script src="https://cdn.jsdelivr.net/npm/vue/dist/vue.js"></script>
    <style>
      #loading-wrapper {
        position: fixed;
        top: 0;
        left: 0;
        display: flex;
        justify-content: center;
        align-items: center;
        width: 100%;
        height: 100%;
        background: rgba(0,0,0,.7);
        color: #fff;
      }
    </style>
  </head>
  <body>
    <div id="root">
      <button @click="showLoading">显示Loading</button>
    </div>
    <script>
      function Loading(msg) {
        const LoadingComponent = Vue.extend({
          template: '<div id="loading-wrapper">{{msg}}</div>',
          props: {
            msg: {
              type: String,
              default: msg
            }
          },
          name: 'LoadingComponent'
        })
        const div = document.createElement('div')
        div.setAttribute('id', 'loading-wrapper')
        document.body.append(div)
        new LoadingComponent().$mount('#loading-wrapper')
        return () => {
          document.body.removeChild(document.getElementById('loading-wrapper'))
        }
      }
      Vue.prototype.$loading = Loading
      new Vue({
        el: '#root',
        methods: {
          showLoading() {
            const hide = this.$loading('正在加载,请稍等...')
            setTimeout(() => {
              hide()
            }, 2000)
          }
        }
      })
    </script>
  </body>
</html>
3.Vue.extend()实现MessageBox弹窗
(1)新建一个messageBox.vue
<template>
  <div id="confirm" v-if='flag'>
    <div class="contents" >
      <div class="content-top">{{text.title}}</div>
      <div class="content-center">{{text.msg}}</div>
      <div class="content-bottom">
        <button type='primary' @click='ok' class="left">{{text.btn.ok}}</button>
        <button type='info' @click='no' class="right">{{text.btn.no}}</button>
      </div>
    </div>
  </div>
</template>

<script>
export default {
  data () {
    return {
      flag:true,
      text:{
          title:'标题',
          msg:'这是一个弹出框组件',
          btn:{
              ok:'确定',
              no:'取消'
          }
      }
    }
  },
  methods: {
    ok(){
      this.flag=false;
    },
    no(){
      this.flag=false;
    }
  }
}
</script>

<style scoped>
 #confirm{
     position:fixed;
     left:0;
     top:0;
     right:0;
     bottom:0;
     background:rgba(0,0,0,0.3);
 }
 .contents{
    width:250px;
    height:180px;
    border:1px solid #ccc;
    border-radius:10px;
    background-color:#fff;
    position:fixed;
    top:50%;
    left:50%;
    margin-top:-90px;
    margin-left:-125px;
}
.content-top{
    width:100%;
    height:40px;
    border-bottom:1px solid #ccc;
    text-align: center;
    font-size:20px;
    font-weight: 700;
    line-height:40px;
}
.content-center{
    width:90%;
    height:80px;
    margin:5px auto;
}
.content-bottom{
    width:85%;
    height:40px;
    margin:0 auto;
    /* border:1px solid red; */
    position:relative;
}
.left{
    position:absolute;
    left:0;
    width:40%;
}
.right{
    position:absolute;
    right:0;
    width:40%;
}
</style>
(2) 新建messageBox.js
import Vue from 'vue'
import Confirm from './MessageBox.vue'

let confirmStructor=Vue.extend(Confirm)   //返回一个实例创建的构造器,但实例构造器需要进行挂载到页面中

let theConfirm=function(text){
    return new Promise((res,rej)=>{       //返回一个promise,进行异步操作,成功时返回,失败时返回
        let confirmDom=new confirmStructor({
            el:document.createElement('div')
        })
        //在body中动态创建一个div元素,之后此div将会替换成整个vue文件的内容
        //此时的confirmDom通俗讲就是相当于是整个组件对象,通过对象调用属性的方法来进行组件中数据的使用
        //可以通过$el属性来访问创建的组件实例
        document.body.appendChild(confirmDom.$el)

        //此时进行创建组件的逻辑处理
        confirmDom.text=text       //将需要传入的文本内容传给组件实例
        confirmDom.ok=()=>{     //箭头函数,在()和{}之间增加=>,且去掉function
            res()   //正确时返回的操作
            confirmDom.flag=false;
        }
        confirmDom.no=()=>{
            rej()   //失败时返回的操作
            confirmDom.flag=false;
        }
    })
}

//将逻辑函数进行导出和暴露
export default theConfirm
(3)mian.js引入挂载到全局
import Vue from 'vue';
import store from './store/index'
import App from './App.vue';
import router from './router';
import theConfirm from './components/messageBox.js'
Vue.config.productionTip = false;

Vue.prototype.$Myconfirm=theConfirm


new Vue({
  router,
  store,
  render: h => h(App),
}).$mount('#app')
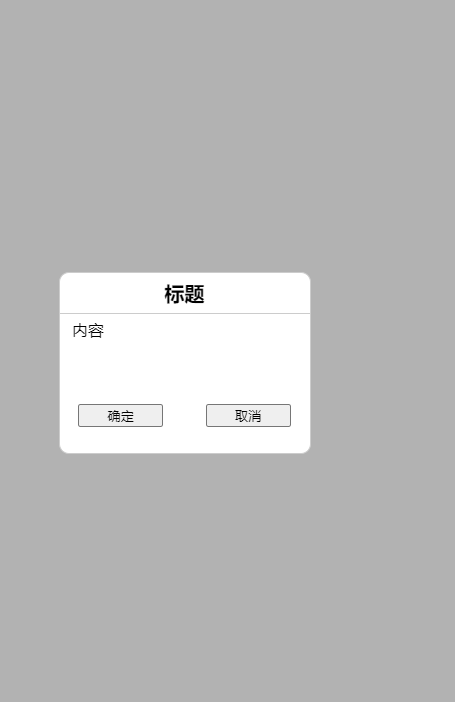
(4)页面使用
    this.$Myconfirm({
      title:'标题',
      msg:'内容',
      btn:{ ok:'确定', no:'取消'}
    }).then(()=>{
      console.log('ok')
    }).catch(()=>{
      console.log('no')
    })
(5)效果如下:

为开发者提供学习成长、分享交流、生态实践、资源工具等服务,帮助开发者快速成长。
更多推荐


 28
28 0
0- 0


 已为社区贡献3条内容

所有评论(0)