学习Vue3 第十五章(全局组件,局部组件,递归组件)
配置全局组件例如组件使用频率非常高(table,Input,button,等)这些组件 几乎每个页面都在使用便可以封装成全局组件案例------我这儿封装一个Card组件想在任何地方去使用<template><div class="card"><div class="card-header"><div>标题</div><div>
视频教程小满Vue3(第十五章 全局组件,局部组件,递归组件)_哔哩哔哩_bilibili
配置全局组件
例如组件使用频率非常高(table,Input,button,等)这些组件 几乎每个页面都在使用便可以封装成全局组件
案例------我这儿封装一个Card组件想在任何地方去使用
<template>
  <div class="card">
     <div class="card-header">
         <div>标题</div>
         <div>副标题</div>
     </div>
     <div v-if='content' class="card-content">
         {{content}}
     </div>
  </div>
</template>

<script setup lang="ts">
type Props = {
    content:string
}
defineProps<Props>()

</script>

<style scoped lang='less'>
@border:#ccc;
.card{
    width: 300px;
    border: 1px solid @border;
    border-radius: 3px;
    &:hover{
        box-shadow:0 0 10px @border;
    }

    &-content{
        padding: 10px;
    }
    &-header{
        display: flex;
        justify-content: space-between;
        padding: 10px;
        border-bottom: 1px solid @border;
    }
}
</style>
使用方法
在main.ts 引入我们的组件跟随在createApp(App) 后面 切记不能放到mount 后面这是一个链式调用用
其次调用 component 第一个参数组件名称 第二个参数组件实例
import { createApp } from 'vue'
import App from './App.vue'
import './assets/css/reset/index.less'
import Card from './components/Card/index.vue'


createApp(App).component('Card',Card).mount('#app')
使用方法
直接在其他vue页面 立即使用即可 无需引入
<template>
 <Card></Card>
</template>
批量注册全局组件
可以参考element ui 其实就是遍历一下然后通过 app.component 注册

配置局部组件
<template>
  <div class="wraps">
    <layout-menu :flag="flag" @on-click="getMenu" @on-toogle="getMenuItem" :data="menuList" class="wraps-left"></layout-menu>
    <div class="wraps-right">
      <layout-header> </layout-header>
      <layout-main class="wraps-right-main"></layout-main>
    </div>
  </div>
</template>

<script setup lang="ts">
import { reactive,ref } from "vue";
import layoutHeader from "./Header.vue";
import layoutMenu from "./Menu.vue";
import layoutMain from "./Content.vue";
就是在一个组件内(A) 通过import 去引入别的组件(B) 称之为局部组件
应为B组件只能在A组件内使用 所以是局部组件
如果C组件想用B组件 就需要C组件也手动import 引入 B 组件
配置递归组件
原理跟我们写js递归是一样的 自己调用自己 通过一个条件来结束递归 否则导致内存泄漏
案例递归树
在父组件配置数据结构 数组对象格式 传给子组件
type TreeList = {
  name: string;
  icon?: string;
  children?: TreeList[] | [];
};
const data = reactive<TreeList[]>([
  {
    name: "no.1",
    children: [
      {
        name: "no.1-1",
        children: [
          {
            name: "no.1-1-1",
          },
        ],
      },
    ],
  },
  {
    name: "no.2",
    children: [
      {
        name: "no.2-1",
      },
    ],
  },
  {
    name: "no.3",
  },
]);
子组件接收值 第一个script
type TreeList = {
  name: string;
  icon?: string;
  children?: TreeList[] | [];
};

type Props<T> = {
  data?: T[] | [];
};

defineProps<Props<TreeList>>();

const clickItem = (item: TreeList) => {
  console.log(item)
}
子组件增加一个script 定义组件名称为了 递归用
给我们的组件定义名称有好几种方式
1.在增加一个script 通过 export 添加name
<script lang="ts">
export default {
name:"TreeItem"
}
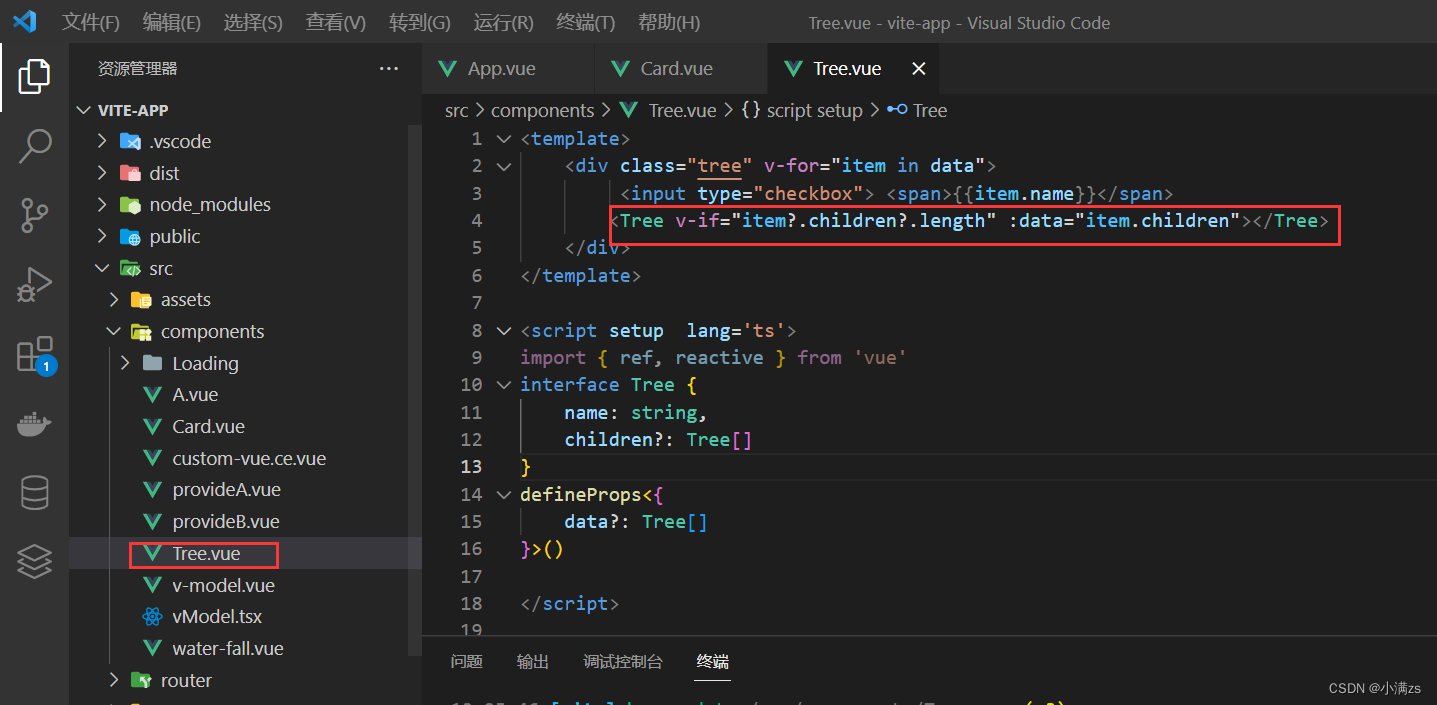
</script>2.直接使用文件名当组件名
3.使用插件
unplugin-vue-define-options
import DefineOptions from 'unplugin-vue-define-options/vite'
import Vue from '@vitejs/plugin-vue'

export default defineConfig({
  plugins: [Vue(), DefineOptions()],
})
ts支持
"types": ["unplugin-vue-define-options/macros-global"],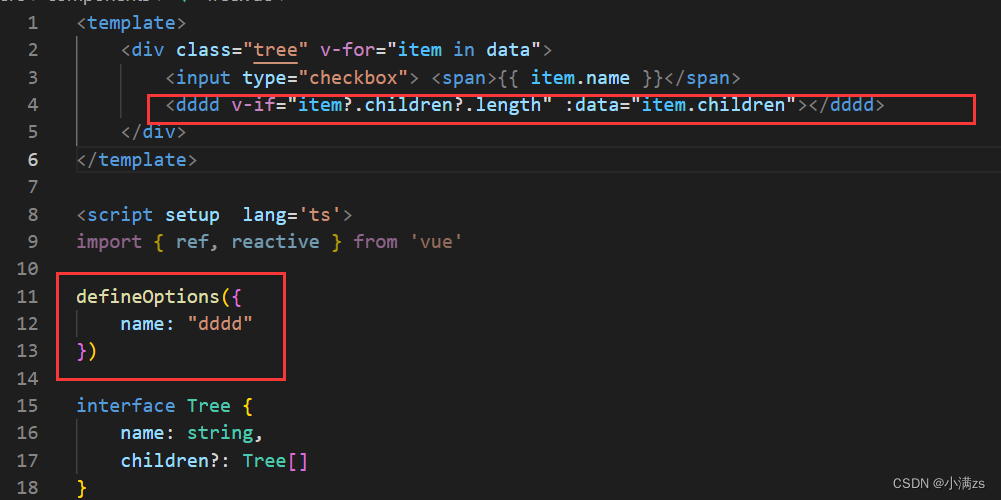
template
TreeItem 其实就是当前组件 通过import 把自身又引入了一遍 如果他没有children 了就结束
  <div style="margin-left:10px;" class="tree">
    <div :key="index" v-for="(item,index) in data">
      <div @click='clickItem(item)'>{{item.name}}
    </div>
    <TreeItem @on-click='clickItem' v-if='item?.children?.length' :data="item.children"></TreeItem>
  </div>
</div> 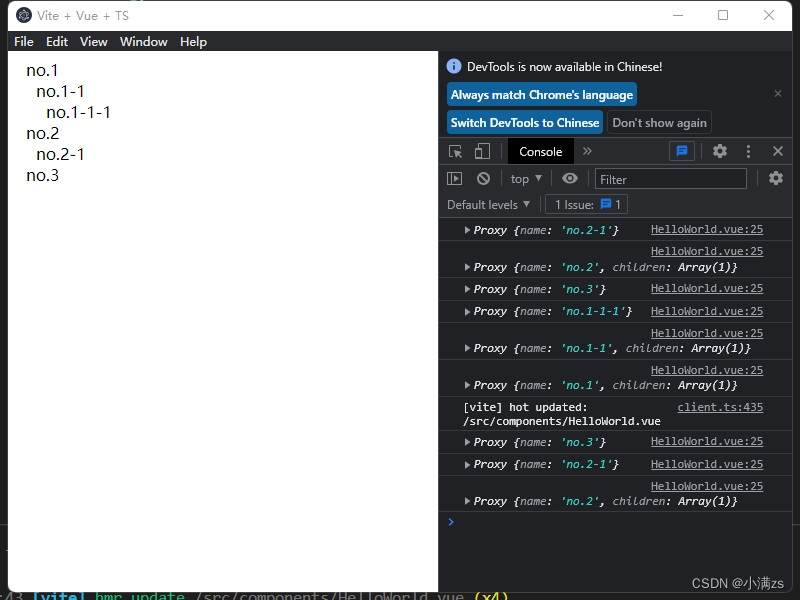

为开发者提供学习成长、分享交流、生态实践、资源工具等服务,帮助开发者快速成长。
更多推荐


 39
39 0
0- 0


 已为社区贡献46条内容

所有评论(0)