Vue 项目实战
前言为了练习Vue,写了一个小项目,主要内容是答题。项目简介ElementUI框架无后端,数据来源为本地JSON文件也可以改造成有后端的,查找题目种类就在后端完成比较原生,适合刚刚接触Vue,想做练习的同学笔者水平有限,如有不严谨之处请多多批评预览图主页/开始页答题页正文1. 初始化项目使用脚手架创建项目,cli3.x,选择router即可添加element,详见在vue中使用elementUI安
·
前言
为了练习Vue,写了一个小项目,主要内容是答题。
项目简介
- ElementUI框架
- 无后端,数据来源为本地JSON文件
- 也可以改造成有后端的,查找题目种类就在后端完成
- 比较原生,适合刚刚接触Vue,想做练习的同学
- 笔者水平有限,如有不严谨之处请多多批评
预览图
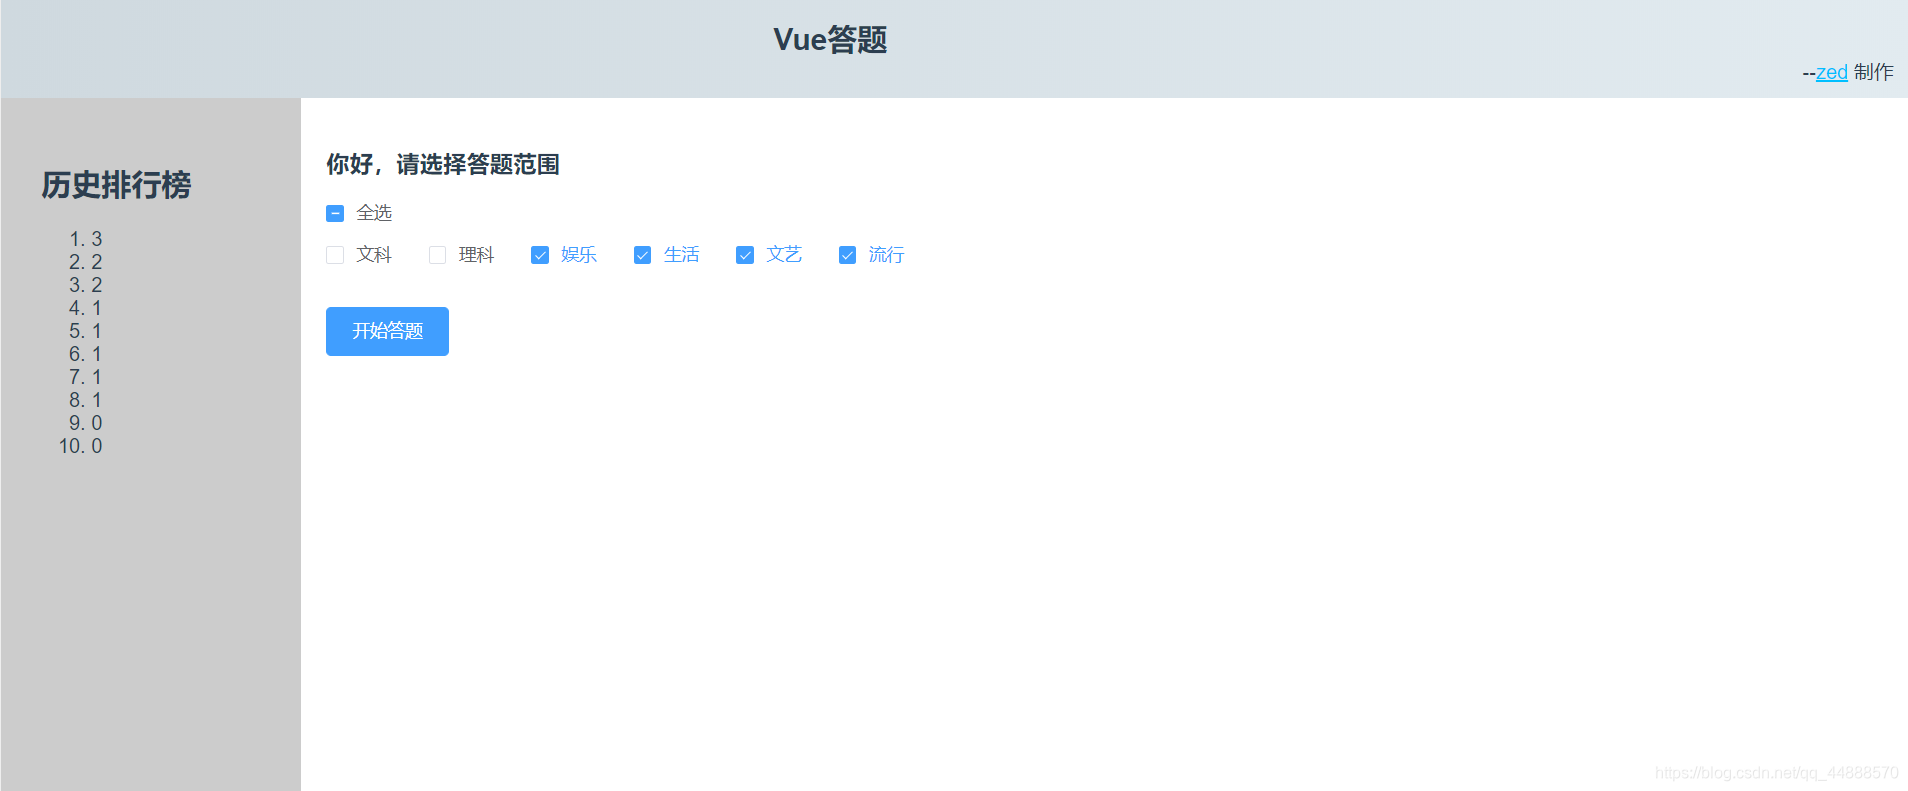
主页/开始页
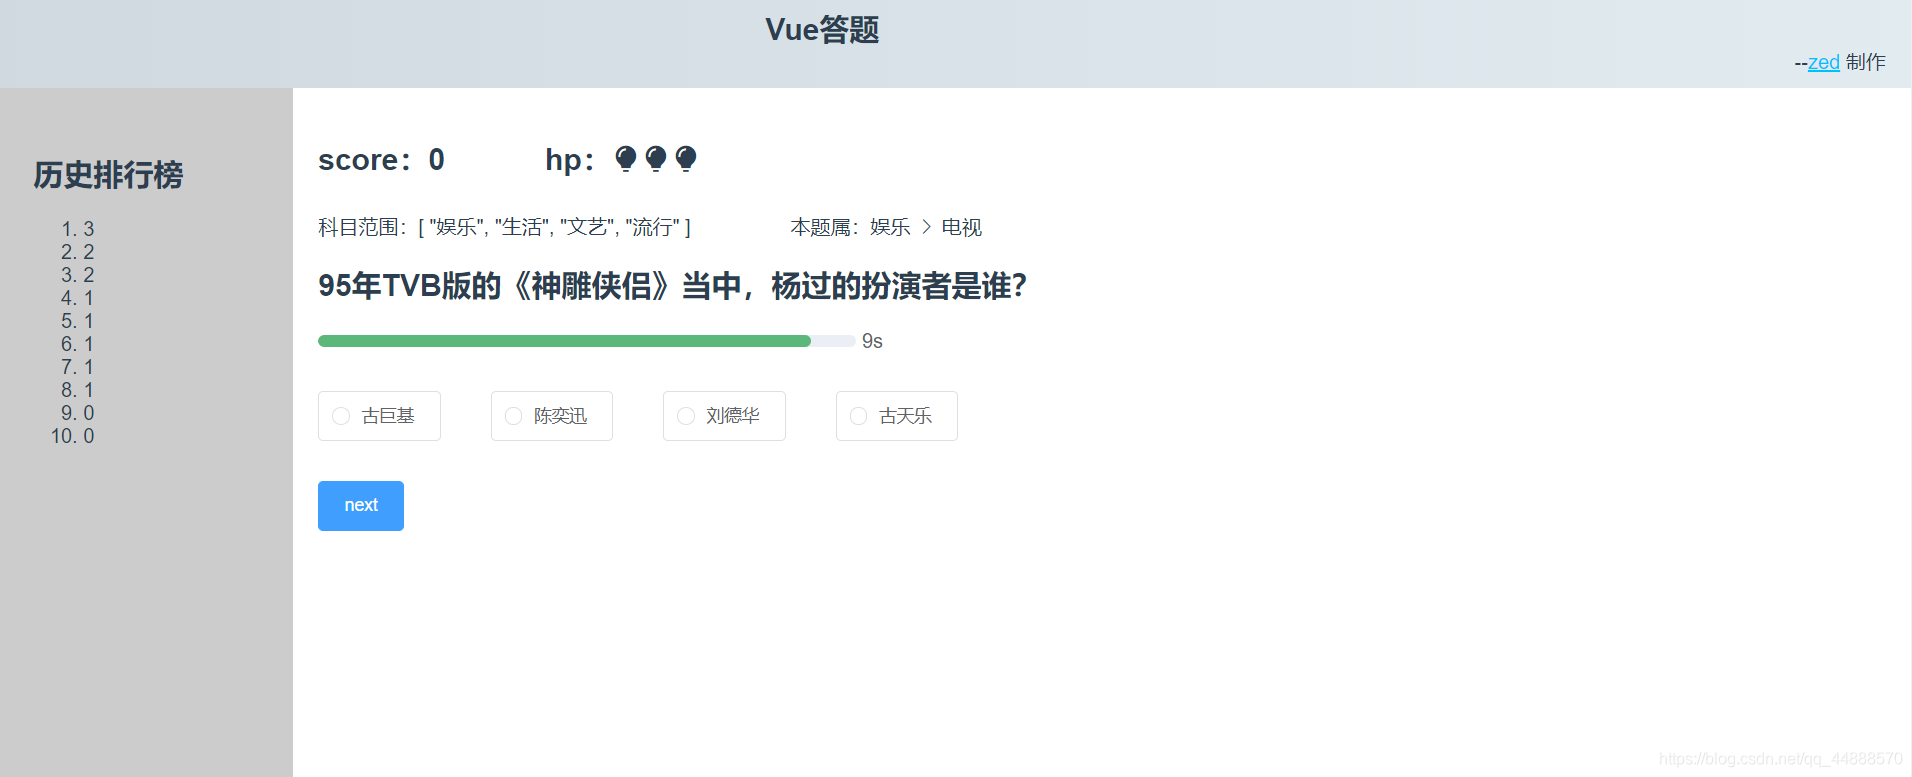
答题页
正文
1. 初始化项目
- 使用脚手架创建项目,
cli3.x,选择router即可 - 添加
element,详见在vue中使用elementUI - 安装
axios
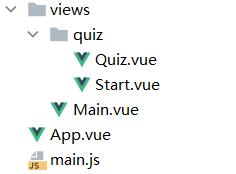
2. 在views文件夹中创建如下目录
3. 写路由
import Vue from 'vue'
import VueRouter from 'vue-router'

Vue.use(VueRouter)

const Main = () => import('@/views/Main')
const Quiz = () => import('@/views/quiz/Quiz')
const Start = () => import('@/views/quiz/Start')

const routes = [
    {
        path: '/',
        redirect: '/index',
        component: Main,
        children: [
            {
                path: '/index',
                component: Start
            },
            {
                path: '/quiz',
                component: Quiz
            },
        ]
    },
]

const router = new VueRouter({
    mode: 'history',
    base: process.env.BASE_URL,
    routes
})

export default router
非常简单的路由设计,其中的路由的加载方式为懒加载。
4. 主页
4.1 布局
  <div>
    <h3>你好,请选择答题范围</h3>
    <el-checkbox :indeterminate="isIndeterminate" v-model="checkAll" @change="handleCheckAllChange">全选</el-checkbox>
    <div style="margin: 15px 0;"></div>
    <el-checkbox-group v-model="checkedCities" @change="handleCheckedCitiesChange">
      <el-checkbox @change="isDisabled" v-for="city in cities" :label="city" :key="city">{{ city }}</el-checkbox>
    </el-checkbox-group>
    <el-button type="primary" @click="start" :disabled="btnDisabled" style="margin-top: 2rem;">
      开始答题
    </el-button>
  </div>
4.2 逻辑
export default {
  name: "Start",
  data() {
    return {
      checkAll: false,
      btnDisabled: false,
      checkedCities: ['文科', '理科'],
      cities: ['文科', '理科', '娱乐', '生活', '文艺', '流行'],
      isIndeterminate: true
    };
  },
  created() {
    this.checkedCities = localStorage.checkedWords ? localStorage.checkedWords.split(',') : this.checkedCities
  },
  methods: {
    isDisabled() {
      this.btnDisabled = this.checkedCities.length === 0
    },
    handleCheckAllChange(val) {
      this.checkedCities = val ? this.cities : [];
      this.isIndeterminate = false;
      this.isDisabled()
    },
    handleCheckedCitiesChange(value) {
      let checkedCount = value.length;
      this.checkAll = checkedCount === this.cities.length;
      this.isIndeterminate = checkedCount > 0 && checkedCount < this.cities.length;
    },
    start() {
      this.$set(localStorage, 'checkedWords', this.checkedCities)
      this.$router.push('/quiz')
      this.$emit('checked', this.checkedCities, true)
    }
  }
}
created函数,在创建组件完成后,检查浏览器缓存localStorage中是否已经存在选择的题目范围。如果有则直接使用,没有就使用默认选择的。- 注意,数组储存到
localStorage中,是以,隔开的字符串形式,所以要用split函数来分割一下。用法详见字符串方法
- 注意,数组储存到
isDisabled函数是用来判断选中题目种类的个数是否为0,如果是则按钮不可点击。start函数按钮点击后触发,目的是跳转路由至/quiz答题页,并将题目种类数组传给父组件Main- 传给父组件的目的是,通过父组件再传给兄弟组件
Quiz,即子传父,父传其他子,也可以用过vuex实现。
- 传给父组件的目的是,通过父组件再传给兄弟组件
5. Main主框架
5.1 布局
<el-container style="height: 40rem; border: 1px solid #eee;">
    <el-header style="background:linear-gradient(to right,#cfd9df,#e2ebf0); height:5rem;">
      <div>
        <h2 style="margin: 1rem 0 0 40%">Vue答题</h2>
        <span style="float: right;">--<a style="color: deepskyblue;"
                                         href="https://blog.csdn.net/qq_44888570">zed</a> 制作</span>
      </div>
    </el-header>
    <el-container style="height: 100%;">
      <el-aside width="15rem" style="background-color: #ccc;height: 100%; padding: 2rem;">
        <h2>历史排行榜</h2>
        <ol>
          <li v-for="item in scores">{{ item }}</li>
        </ol>
      </el-aside>
      <el-main>
        <router-view @checked="setInfo" @score="setScore" :info="info"></router-view>
      </el-main>
    </el-container>
  </el-container>
布局采用ElementUI中如下布局
<el-container>
  <el-header>Header</el-header>
  <el-container>
    <el-aside width="200px">Aside</el-aside>
    <el-main>Main</el-main>
  </el-container>
</el-container>
5.2 逻辑
export default {
  name: "Main",
  data() {
    return {
      info: [],
      scores: localStorage.scores ? localStorage.scores.split(',') : []
    }
  },
  methods: {
    setInfo(data) {
      this.info = data
    },
    setScore(data) {
      this.scores.push(data)
      this.sortArr(this.scores)

      if (this.scores.length > 10) {
        this.scores.splice(10)
      }
      localStorage.scores = this.scores
    },
    sortArr(arr) {
      return arr.sort((x, y) => y - x)
    }
  }
}
data中的info数组,就是前面Start组件传过来的数据data中的scores,每次打完题之后,Quiz数组都会将分数传过来。然后将这些分数压入数组,存储到localStorage中setInfo函数捕获子组件Start传过来的数据,并赋值给该组件setScore函数捕获子组件Quiz传过来的数据,并压入分数数组,且要排序。如果分数数组的长度超过10,则只截取分数最高的十项sort函数为数组排序,用法详见数组方法
6. 答题页
6.1 布局
 <div>
    <div style="height: 5rem;">
      <h2 style="float: left;">score:{{ score }}</h2>
      <h2 style="float: left;margin-left: 5rem;">hp:<i class="el-icon-s-opportunity" v-for="value in hp"></i></h2>
    </div>
    <div>
      <span>科目范围:{{ info }}</span>
      <span style="margin-left: 5rem;">本题属:{{ currentQuiz.school }} <i
          class="el-icon-arrow-right"></i> {{ currentQuiz.type }}</span>
    </div>
    <h2>{{ currentQuiz.quiz }}</h2>
    <div style="width: 30rem;">
      <el-progress :percentage="progress.percentage" :format="format" :stroke-width="10"
                   :color="progress.customColors"></el-progress>
    </div>
    <div>
      <el-radio v-for="(item,index) in currentQuiz.options" v-model="answer"
                style="margin-top: 2rem"
                :label="currentQuiz._id + index"
                :class="{'isAnswer' : isAnswer[index]}"
                border>{{ item }}
      </el-radio>
    </div>
    <el-button type="primary" @click="nextBtn" :disabled="btnDisabled" style="margin-top: 2rem">next</el-button>
  </div>
6.2 逻辑
<template>
  <div>
    <div style="height: 5rem;">
      <h2 style="float: left;">score:{{ score }}</h2>
      <h2 style="float: left;margin-left: 5rem;">hp:<i class="el-icon-s-opportunity" v-for="value in hp"></i></h2>
    </div>
    <div>
      <span>科目范围:{{ info }}</span>
      <span style="margin-left: 5rem;">本题属:{{ currentQuiz.school }} <i
          class="el-icon-arrow-right"></i> {{ currentQuiz.type }}</span>
    </div>
    <h2>{{ currentQuiz.quiz }}</h2>
    <div style="width: 30rem;">
      <el-progress :percentage="progress.percentage" :format="format" :stroke-width="10"
                   :color="progress.customColors"></el-progress>
    </div>
    <div>
      <el-radio v-for="(item,index) in currentQuiz.options" v-model="answer"
                style="margin-top: 2rem"
                :label="currentQuiz._id + index"
                :class="{'isAnswer' : isAnswer[index]}"
                border>{{ item }}
      </el-radio>
    </div>
    <el-button type="primary" @click="nextBtn" :disabled="btnDisabled" style="margin-top: 2rem">next</el-button>
  </div>
</template>

<script>

export default {
  name: "Quiz",
  props: {
    info: {
      type: Array
    }
  },
  data() {
    return {
      hp: [1, 1, 1],
      quizzes: [],
      currentQuiz: {},
      answer: 0,
      score: 0,
      btnDisabled: false,
      isAnswer: [false, false, false, false],
      progress: {
        percentage: 100,
        cdTimer: null,
        customColors: [
          {color: '#f56c6c', percentage: 30},
          {color: '#e6a23c', percentage: 60},
          {color: '#5cb87a', percentage: 100}
        ],
      }
    }
  },
  async created() {
    if (this.info.length === 0) {
      this.$message({
        type: 'error',
        message: '请先选择答题范围'
      })
      return this.$router.replace('/index')
    }

    await this.fetch()
    this.filter()
    this.renderQuiz()
  },
  methods: {
    async fetch() {
      const res = await this.$http.get('/quizzes.json')
      this.quizzes = res.data
    },
    format(per) {
      return `${Math.round(per * 0.1)}s`
    },
    filter() {
      //一共六种题目,如果全选则不需要筛选
      if (this.info.length === 6) {
        return
      }
      const newList = this.quizzes.filter(item => {
        return this.info.includes(item.school)
      })
      this.quizzes = newList
    },
    randomQuiz() {
      const currentIndex = Math.round(this.quizzes.length * Math.random())
      this.currentQuiz = this.quizzes[currentIndex]
      this.quizzes.splice(currentIndex, 1)
    },
    renderQuiz() {
      this.randomQuiz()
      this.killProgress()
    },
    killProgress() {
      this.progress.cdTimer && clearInterval(this.progress.cdTimer)
      this.progress.percentage = 100
      this.answer = 0
      this.progress.cdTimer = setInterval(() => {
        if (--this.progress.percentage <= 0) {
          this.nextBtn()
        }
      }, 100)
    },
    //点击next或者到时间
    checkAnswer() {
      return new Promise(resolve => {
        //如果答案正确,则直接下一题,不正确1s延迟后跳转,并且标记出正确答案
        if (this.currentQuiz.answer - 1 + '' === this.answer[this.answer.length - 1]) {
          this.score++
          resolve(true)
        } else {
          this.$set(this.isAnswer, this.currentQuiz.answer - 1, true)
          setTimeout(() => {
            this.$set(this.isAnswer, this.currentQuiz.answer - 1, false)
            this.hp.pop()
            resolve(this.hp.length > 0)
          }, 1000)
        }
      })
    },
    async nextBtn() {
      this.btnDisabled = true
      clearInterval(this.progress.cdTimer)
      if (await this.checkAnswer()) {
        this.renderQuiz()
        this.btnDisabled = false
      } else {
        this.$emit('score', this.score, true)
        this.$router.push('/index')
      }
    }
  }
}
</script>

<style scoped>
.isAnswer {
  border: 2px solid #0f0;
}
</style>
created函数- 检查父组件传过来的
info,即题目种类数组是否为空,如果是空则返回到首页,重新选择。 - 在组件创建完毕后,就要获取JSON文件的内容了,也就是题目列表。
- 接下来要根据题目种类数组,来筛选题目
- 然后开始出题
- 检查父组件传过来的
fetch函数用来发送axios请求,这里的axios被笔者挂载到Vue 的原型上,这样便可全局使用。也可以只在该组件中引入axiosasync && await用法详见轻松理解 async 与 await- 在
main.js文件中书写
import axios from "axios"
Vue.prototype.$http = axios
filter函数用来过滤题目列表,如果题目列表的长度为6,也就意味着全选,则不用筛选,直接返回。randomQuiz函数用于随机出题,出题之后,为了防止重复,直接在题目列表中删除此题killProgress用于管理进度条计时器- 做一些初始化工作。如果计时器已经存在,则先删除;每次都要恢复选中的答案
answer值,因为answer只有1,2,3,4,所以恢复为0是可以的;恢复进度条百分比 - 添加定时器,100ms意味着进度条会在10s后走完。
- 如果走完,则触发判定答案和重新渲染题目等一系列工作,这些工作都在
nextBtn函数中完成。也就是说,进度条走完和点击下一题按钮的效果相同
- 做一些初始化工作。如果计时器已经存在,则先删除;每次都要恢复选中的答案
checkAnswer函数用于判定答案的对与错Promise用法详见Promise详解- 由于JSON文件中,每一道题的答案都是根据索引值来判断,且四个选项的索引为
1,2,3,4。咱们选择的答案是0,1,2,3,所以要在题目正确答案-1或者再咱们的答案+1,都是可以的。 - 这里也解释一下,渲染4个选项时,为何
label值不直接绑定索引,而是题目的_id再加索引值。这是因为vue读取缓存的机制,这道题的选项的label值如果绑定了1,2,3,4,下道题也是1,2,3,4,这样vue会直接将缓存中的四个选项捞出来,而不是重新创建。这就意味着,咱们上一题的选中效果,切换到下一题的时候,依旧存在。 - 为何用
this.$set赋值,可见vue响应式详解 - 回到这个函数的业务,如果说用户答对了此道题,则直接切换到下一题;如果没有答对,则过一秒再切换,为的是让用户看一眼正确答案。返回值是布尔类型,但并不意味着
true代表答对了,而是代表hp还是有的,也就是说可以继续出题;false代表hp用完了,不能再继续出题
nextBtn函数,一旦点击按钮或者进度条结束,就把按钮变为不可点击,这是为了屏蔽用户的无效操作,而且多次点击有可能导致计时器的混乱。一旦点击按钮或者进度条结束,就要判定是否继续出题;如果继续,则需要把按钮恢复可点击,调用出题函数;如果结束了,则把分数传给父组件Main,并且跳转路由至/index- 数据
this.hp为何是一个数组呢?这个数组是用来渲染那个灯泡图标的。
- 数据
isAnswer,配合选项v-for渲染来绑定样式类。初始该数组里有4个false,一旦进度条结束或点击按钮,则会将正确的那个选项绑定样式类。什么?你说选正确了就不用绑定了是吧?不错,但是正确没有延迟1s切换下一题,用户也就看不到这个效果了。
.isAnswer {
  border: 2px solid #0f0;
}
结语
总的来说,这个项目难度不大,但是一些基础琐碎的知识挺多的,适合练手。
源码
链接:https://pan.baidu.com/s/1HKvGly1H2lpQCkxfm2Onlw
提取码:z1ed
求赞!!!

华为开发者空间,是为全球开发者打造的专属开发空间,汇聚了华为优质开发资源及工具,致力于让每一位开发者拥有一台云主机,基于华为根生态开发、创新。
更多推荐


 72
72 0
0- 0


 已为社区贡献2条内容

所有评论(0)