Vue中解读关于this.$emit()的用法
@[TOC](关于Vue中this.$emit() 方法)解读this.$emit()的用法,小案例this.$emit()主要用于子组件像父组件传值,接下来已模拟删除数据为例来进行深度刨析,话不多说上代码。首先定义组件和插槽//slot:定义插槽Vue.component("today",{template: '<div>' +'<div>' +'<slot nam
解读this.$emit()的用法,小案例
this.$emit()主要用于子组件像父组件传值,接下来已模拟删除数据为例来进行深度刨析,话不多说上代码。
首先定义组件和插槽
//slot:定义插槽
   Vue.component("today",{
            template: '<div>' +
                '<div>' +
                '<slot name="today-title"></slot>' +
                '<ul>' +
                '<slot name="today-items"></slot>' +
                '</ul>' +
                '</div>'
   });
   Vue.component("today-title",{
       props:['title'],
       template: '<div>{{title}}</div>'
   })
    Vue.component("today-items",{
        props: ['item'],
        //只能绑定当前的组件方法
        template: '<li>{{item}}</li>',

    })
将定义好的组件放在视图层
<div id="app">
<today>

    <today-title slot="today-title" > </today-title>
    <today-items slot="today-items"  ></today-items>
</today>

</div>
在定义一个对象并给组件赋值
  var vm = new Vue({
        el:"#app",
        data:{
            title:"如下所示",
            todayitems:['zx','d2','21']
        },

    })
通过双向绑定将组件与值绑定起来(v-for中需要给每个元素一个索引,因为此案例需要根据索引来删除元素,下面会具体描述)
<div id="app">
<today>

    <today-title slot="today-title" :title="title"> </today-title>
    <today-items slot="today-items" v-for="(item,index) in todayitems"  :item="item" ></today-items>
</today>

</div>
在组件里定义一个删除事件。
   Vue.component("today-items",{
        props: ['item'],
        //只能绑定当前的组件方法
        template: '<li>{{item}}   <button @click="remove">删除</button></li>',
        methods:{
            remove:function () {
                //this.$emit 自定义事件分发
                 this.$emit('remove')
            }
        }
    })
然后在已经定义的vue对象里定义一个删除方法(通过元素的index来进行删除且一次只删除一个)
 var vm = new Vue({
        el:"#app",
        data:{
            title:"666",
            todayitems:['zx','d2','21']
        },
        methods:{
            removeitems:function (index) {
                console.log("删除了"+this.todayitems[index]+"OK");
                this.todayitems.splice(index,1);//一次删除一个
            }
        }
    })
在视图层里通过v-on来进行绑定,
   <today-title slot="today-title" :title="title"> </today-title>
    <today-items slot="today-items" v-for="(item,index) in todayitems" v-on:remove="removeitems(index)"
                :item="item" ></today-items>
效果如下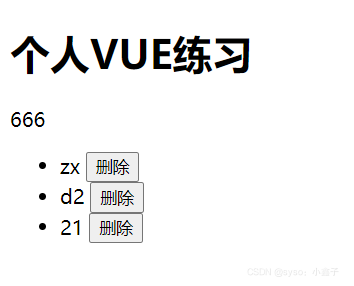
点击删除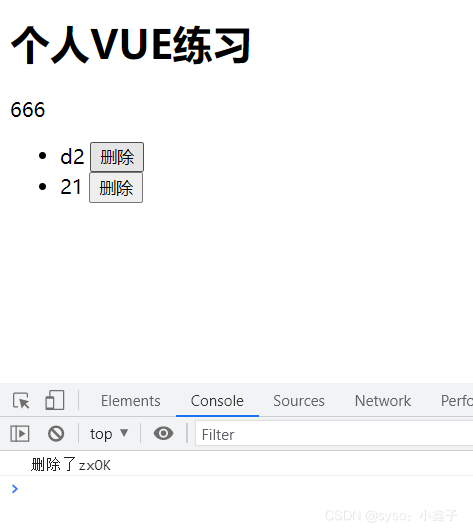
根据控制台看出我们已经成功删除了’zx’这个元素也就是第一个元素。
下面我们来对代码进行刨析: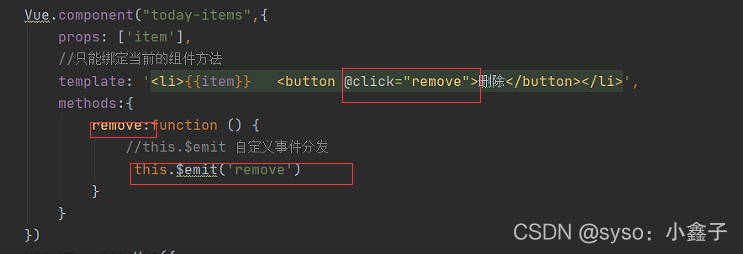
我们在这里定义了一个按钮和remove事件,通过@click绑定,我们通过this.$emit(‘remove’)来实现子组件与父组件之间的交互,此时我们需要一个具体的删除方法,所以在定义的vue对象里再定义一个具体的实现方法来删除元素,这里用到了,splice方法(具体使用这里先不做详细分析)。
v-on中左边绑定的是子组件里所定义的事件,右边绑定的是我们具体实现的方法且方法中传输index参数。
稍微梳理一下逻辑关系
- 首先我们需要在已经显示的数据里实现删除方法;
- 我们在定义的插槽里定义个删除按钮,这就相当于给每个元素后面都加了删除按钮;
- 在组件里定义一个事件通过删除来触发此事件,然后我们需要删除元素,
- 可是元素在哪呢?在我们之前定义好的对象里,所以我们在对象里定义个删除方法;
- 这样大体就是:我们通过子组件里的删除事件来触发vue对象里的删除方法,但是无法直接操作,所以我们通过在父组件里的v-on来搭建起一座桥梁,父组件通过v-on来监听子组件触发的事件,再传给vue实例化对象里的方法一个index进而实现模拟删除。
以上为个人学习的小总结,喜欢且对您有帮助的请您支持一下。

华为开发者空间,是为全球开发者打造的专属开发空间,汇聚了华为优质开发资源及工具,致力于让每一位开发者拥有一台云主机,基于华为根生态开发、创新。
更多推荐


 25
25 0
0- 0


 已为社区贡献1条内容

所有评论(0)