18 --> 详细讲解如何制作 openWRT 的docker 镜像
本文记录 制作openWRT 的 docker 镜像,自动化启动 docker 镜像开启 zabbix-agent 批量监控线路状态。本文使用的环境:主机: ubuntu 16.04openWRT版本: 19.07镜像类型: x86-64分为如下步骤:第一步安装 dockersudo apt-get install docker.io第二步 编译 openwrt 镜像make menuconfig
·
本文记录 制作openWRT 的 docker 镜像,自动化启动 docker 镜像开启 zabbix-agent 批量监控线路状态。
本文使用的环境:
主机: ubuntu 16.04
openWRT版本: 19.07
镜像类型: x86-64
分为如下步骤:
第一步 安装 docker
sudo apt-get install docker.io
第二步 编译 openwrt 镜像
make menuconfig
> Target Images
> [*] tar.gz
x86-openWrt-19.07$ make -j4 V=sc
x86-openWrt-19.07$ ll bin/targets/x86/64-glibc/

total 1268288
drwxr-xr-x 3 robot robot      4096 Jun  1 17:19 ./
drwxr-xr-x 3 robot robot      4096 Feb 23 16:55 ../
-rw-r--r-- 1 robot robot     40690 Jun  1 17:08 config.buildinfo
-rw-r--r-- 1 robot robot       263 Jun  1 17:08 feeds.buildinfo
-rw-r--r-- 1 root  root  285736960 Jun  1 17:19 ixecloud-vrouter-ver0.1-x86-64-combined-ext4.img
-rw-r--r-- 1 robot robot 188745728 Apr 26 18:28 ixecloud-vrouter-ver0.1-x86-64-combined-ext4.vdi
-rw-r--r-- 1 root  root  175767552 Jun  1 17:19 ixecloud-vrouter-ver0.1-x86-64-combined-ext4.vmdk
-rw-r--r-- 1 root  root  285736960 Jun  1 17:18 ixecloud-vrouter-ver0.1-x86-64-combined-squashfs.img
-rw-r--r-- 1 root  root   44105728 Jun  1 17:18 ixecloud-vrouter-ver0.1-x86-64-combined-squashfs.vmdk
-rw-r--r-- 1 robot robot     15339 Jun  1 17:19 ixecloud-vrouter-ver0.1-x86-64-generic.manifest
-rw-r--r-- 1 robot robot  48465349 Jun  1 17:16 ixecloud-vrouter-ver0.1-x86-64-generic-rootfs.tar.gz
-rw-r--r-- 1 robot robot  52564032 Jun  1 17:16 ixecloud-vrouter-ver0.1-x86-64-ramfs.bzImage
-rw-r--r-- 1 robot robot 268435456 Jun  1 17:16 ixecloud-vrouter-ver0.1-x86-64-rootfs-ext4.img
-rw-r--r-- 1 robot robot  39288154 Jun  1 17:18 ixecloud-vrouter-ver0.1-x86-64-rootfs-squashfs.img
-rw-r--r-- 1 robot robot   4448320 Apr 25 13:49 ixecloud-vrouter-ver0.1-x86-64-vmlinuz
drwxr-xr-x 2 robot robot     36864 Jun  1 17:11 packages/
-rw-r--r-- 1 robot robot     52928 Jun  1 17:20 sha256sums
-rw-r--r-- 1 robot robot         8 Jun  1 17:08 version.buildinfo
镜像输出 vrouter-ver0.1-x86-64-generic-rootfs.tar.gz 压缩包
第三步 制作docker镜像
(1)、 新建文件夹
$ mkdir docker-openwrt
$ cd docker-openwrt && cp /home/镜像文件 ./
(2)、 编写 Dockerfile 配置文件
FROM scratch  		# 空白镜像
ADD ixecloud-vrouter-ver0.1-x86-64-generic-rootfs.tar.gz /
CMD ["/sbin/ash"]   # 系统 shell 命令入口
(3)、 制作 docker 镜像
docker-openwrt# docker build -t vrouter:test .

Sending build context to Docker daemon  13.82kB
Step 1/3 : FROM vrouter:v1
 ---> 12fa2a566678
Step 2/3 : RUN chown zabbix:zabbix /usr/bin/ping && chown zabbix:zabbix /usr/bin/fping
 ---> Using cache
 ---> 1e4709caf690
Step 3/3 : CMD [/usr/sbin/zabbix_agentd -c /etc/zabbix_agentd.conf -f]
 ---> Using cache
 ---> f75b210b8382
Successfully built f75b210b8382
Successfully tagged vrouter:test
制作 docker 镜像中报 cannot connect to the docker daemon at unix:///var/run/docker.sock. is the docker daemon running? 错误,查看docker 服务是否正常启动。
~/docker-openwrt# docker version
Client:
 Version:           20.10.2
 API version:       1.41
 Go version:        go1.13.8
 Git commit:        20.10.2-0ubuntu1~18.04.2
 Built:             Tue Mar 30 21:24:16 2021
 OS/Arch:           linux/amd64
 Context:           default
 Experimental:      true

Server:
 Engine:
  Version:          20.10.2
  API version:      1.41 (minimum version 1.12)
  Go version:       go1.13.8
  Git commit:       20.10.2-0ubuntu1~18.04.2
  Built:            Mon Mar 29 19:27:41 2021
  OS/Arch:          linux/amd64
  Experimental:     false
 containerd:
  Version:          1.3.3-0ubuntu1~18.04.4
  GitCommit:
 runc:
  Version:          spec: 1.0.2-dev
  GitCommit:
 docker-init:
  Version:          0.19.0
  GitCommit:
如果启动不正常,重启docker、命令: systemctl restart docker .
 systemctl status docker
● docker.service - Docker Application Container Engine
   Loaded: loaded (/lib/systemd/system/docker.service; enabled; vendor preset: enabled)
   Active: active (running) since Tue 2021-06-01 16:01:57 CST; 2h 31min ago
     Docs: https://docs.docker.com
 Main PID: 14411 (dockerd)
    Tasks: 72
   Memory: 324.4M
      CPU: 33.118s
   CGroup: /system.slice/docker.service
           ├─14411 /usr/bin/dockerd -H fd:// --containerd=/run/containerd/containerd.sock
           ├─15558 /usr/bin/unpigz -d -c
           ├─16987 /usr/bin/unpigz -d -c
           ├─18970 /usr/bin/docker-proxy -proto tcp -host-ip 0.0.0.0 -host-port 10004 -container-ip 172.17.0.5 -container-port 10050
           ├─19199 /usr/bin/docker-proxy -proto tcp -host-ip 0.0.0.0 -host-port 10003 -container-ip 172.17.0.4 -container-port 10050
           ├─19261 /usr/bin/docker-proxy -proto tcp -host-ip 0.0.0.0 -host-port 10001 -container-ip 172.17.0.2 -container-port 10050
           ├─19411 /usr/bin/docker-proxy -proto tcp -host-ip 0.0.0.0 -host-port 10002 -container-ip 172.17.0.3 -container-port 10050
           ├─23147 /usr/bin/docker-proxy -proto tcp -host-ip 0.0.0.0 -host-port 10005 -container-ip 172.17.0.6 -container-port 10050
           └─25401 /usr/bin/docker-proxy -proto tcp -host-ip 0.0.0.0 -host-port 10006 -container-ip 172.17.0.7 -container-port 10050
第三步 配置 zabbix-agent 参数如下
############ GENERAL PARAMETERS #################

# We do not need PidFile with procd
# PidFile=/var/run/zabbix_agentd.pid

# use syslog  日志文件
LogType=system

### Option: Server  服务器 ip 信息
#       List of comma delimited IP addresses, optionally in CIDR notation, or DNS names of Zabbix servers and Zabbix proxies.
#       Incoming connections will be accepted only from the hosts listed here.
#       If IPv6 support is enabled then '127.0.0.1', '::127.0.0.1', '::ffff:127.0.0.1' are treated equally
#       and '::/0' will allow any IPv4 or IPv6 address.
#       '0.0.0.0/0' can be used to allow any IPv4 address.
#       Example: Server=127.0.0.1,192.168.1.0/24,::1,2001:db8::/32,zabbix.example.com
#
# Mandatory: yes, if StartAgents is not explicitly set to 0
# Default:
# Server=
Server=172.16.29.171

### Option: StartAgents  启动 agent
#       Number of pre-forked instances of zabbix_agentd that process passive checks.
#       If set to 0, disables passive checks and the agent will not listen on any TCP port.
# Mandatory: no
# Range: 0-100
# Default:
# StartAgents=3
StartAgents=1

### Option: ServerActive
#       List of comma delimited IP:port (or DNS name:port) pairs of Zabbix servers and Zabbix proxies for active checks.
#       If port is not specified, default port is used.
#       IPv6 addresses must be enclosed in square brackets if port for that host is specified.
#       If port is not specified, square brackets for IPv6 addresses are optional.
#       If this parameter is not specified, active checks are disabled.
#       Example: ServerActive=127.0.0.1:20051,zabbix.domain,[::1]:30051,::1,[12fc::1]
#
# Mandatory: no
# Default:
ServerActive=172.16.29.171

### Option: AllowRoot  开启权限
#       Allow the agent to run as 'root'. If disabled and the agent is started by 'root', the agent
#       will try to switch to the user specified by the User configuration option instead.
#       Has no effect if started under a regular user.
#       0 - do not allow
#       1 - allow
#
# Mandatory: no
# Default:
AllowRoot=1

### Option: Include 包含配置文件路径
#       You may include individual files or all files in a directory in the configuration file.
#       Installing Zabbix will create include directory in /usr/local/etc, unless modified during the compile time.
#
# Mandatory: no
# Default:
# Include=
# Include=/usr/local/etc/zabbix_agentd.userparams.conf
# Include=/usr/local/etc/zabbix_agentd.conf.d/*.conf
Include=/etc/zabbix_agentd.conf.d/

# 用户自定义脚本参数
UserParameter=pingtime[*], ping "$1" -c 1 | grep avg | awk -F '[/]' '{print $$5}'
UserParameter=pingloss[*], ping "$1" -c 1 | grep avg | awk -F '[/]' '{print $$7}' | awk -F '[ ]' '{print $$1}'
第四步 启动docker 镜像
docker run -tid \
-v /root/docker-openwrt/zabbix_agentd.conf:/etc/zabbix_agentd.conf  \
-p 10001:10050 \
vrouter:v1 \
/usr/sbin/zabbix_agentd -c /etc/zabbix_agentd.conf -f
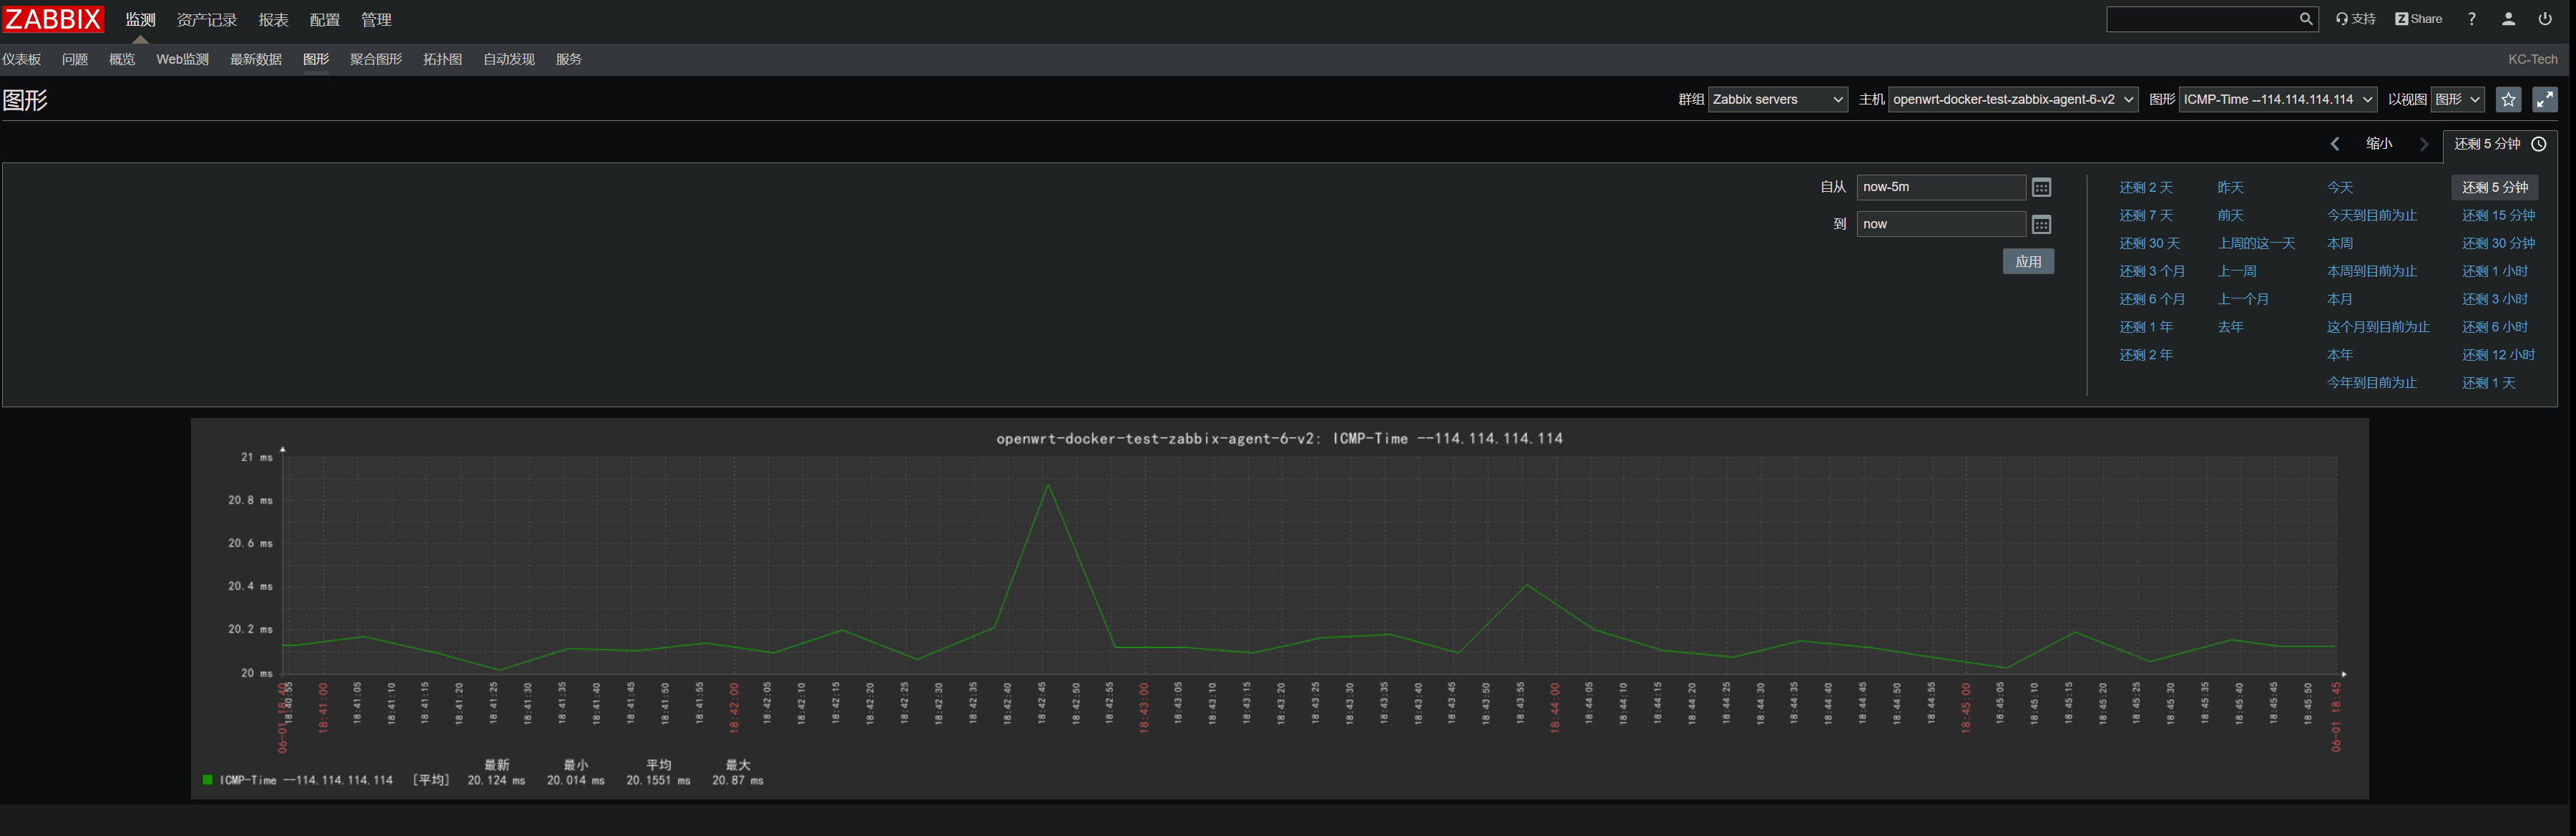
第五步 验证服务器监控结果

为开发者提供学习成长、分享交流、生态实践、资源工具等服务,帮助开发者快速成长。
更多推荐


 2
2 0
0- 0


 已为社区贡献10条内容

所有评论(0)