Jeecg-boot项目前后端jar部署
一、后台项目jeecg-boot打jar包单机版(官网提供的打包方式)通过jeecg-boot-parent打包项目。jeecg-boot-module-system作为启动项目。1、修改数据库连接 application-prod.yml2、修改缓存redis配置 application-prod.yml3、修改上传附件配置 application-prod.yml4、切换配置为发布模式打包5、
一、后台项目jeecg-boot打jar包
单机版(官网提供的打包方式)
通过jeecg-boot-parent打包项目。
jeecg-boot-module-system作为启动项目。
1、修改数据库连接 application-prod.yml
2、修改缓存redis配置 application-prod.yml
3、修改上传附件配置 application-prod.yml

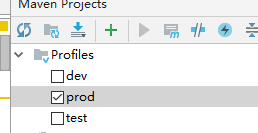
4、切换配置为发布模式打包
5、修改pom.xml加上打包插件(如果已经有了,就不需要加了)
<build>
  <plugins>
  <plugin>
      <groupId>org.springframework.boot</groupId>
      <artifactId>spring-boot-maven-plugin</artifactId>
  </plugin>
 </plugins>
</build>
首先执行下jeecg-boot-parent的install 操作然后 maven package 打jar包

找到jeecg-boot-module-system-2.0.0.jarJAR包

后台通过命令Java -jar启动项目,如果启动报错请看这篇文章
https://blog.csdn.net/weixin_47996698/article/details/115896726?spm=1001.2014.3001.5501
集群版
直接用dev模式打包
第一步 build Project (ctrl+9)

第二步 找到jeecg-boot的父类jeecg-boot-parent(root) 先clean然后再install

第三步 选中自己的项目、jeecg-cloud-system-start、jeecg-cloud-gateway分别打包
注意:如果项目中存在依赖比如A项目导入了B项目的api,那么就直接打包A项目
其中A项目的pom
    <dependency>
        <groupId>org.jeecgframework.boot</groupId>
        <artifactId>jeecg-cloud-A项目</artifactId>
        <version>2.4.0</version>
        <scope>compile</scope>
    </dependency>

<build>
    <plugins>
        <plugin>
            <groupId>org.springframework.boot</groupId>
            <artifactId>spring-boot-maven-plugin</artifactId>
        </plugin>
    </plugins>
</build>
B项目的pom
<build>
    <plugins>
        <plugin>
            <groupId>org.springframework.boot</groupId>
            <artifactId>spring-boot-maven-plugin</artifactId>
            <configuration>
                <skip>true</skip>
            </configuration>
        </plugin>
    </plugins>
</build>
二、后台项目jeecg-boot启动
通过命令启动项目
Window启动命令:
java -jar D:\jeecg-boot-module-system-2.0.0.jar
Linux下后台进程启动命令:
nohup java -jar jeecg-boot-module-system-2.0.0.jar >catalina.out 2>&1 &
关掉项目:
ps -ef|grep java
kill 进程号
三、前台项目build
1、修改后台接口服务地址 .env.production
NODE_ENV=production
VUE_APP_API_BASE_URL=https://bootapi.jeecg.com
VUE_APP_CAS_BASE_URL=http://localhost:8888/cas
VUE_APP_ONLINE_BASE_URL=http://fileview.jeecg.com/onlinePreview
2、build项目
使用build命令打包项目

build完成后台会生成一个dist的目录该目录下即为build后的文件。

3、nginx部署前端项目
将Dist中的文件打开复制到Nginx的html文件下

四、nginx配置(conf/nginx.conf)
单机版(官网提供的配置方式)
注意:一般来说nginx代理前端应该直接代理jeecg-boot项目中的gateway网关,但是官方给的配置中是直接代理的8080端口,也就是前端发送消息后,要先从8080端口中进行读取gateway的配置信息。才能通过gateway分发请求。
nginx监听80端口
server {
		listen       80;
		server_name  你的域名;

		#后台服务配置,配置了这个location便可以通过http://域名/jeecg-boot/xxxx 访问
		location ^~ /jeecg-boot {
			proxy_pass              http://127.0.0.1:8080/jeecg-boot/;
			proxy_set_header        Host 127.0.0.1;
			proxy_set_header        X-Real-IP $remote_addr;
			proxy_set_header        X-Forwarded-For $proxy_add_x_forwarded_for;
		}
		#解决Router(mode: 'history')模式下,刷新路由地址不能找到页面的问题
		location / {
			root   html;
			index  index.html index.htm;
			if (!-e $request_filename) {
				rewrite ^(.*)$ /index.html?s=$1 last;
				break;
			}
		}
	}
提醒: 有的版本nginx配置需要加上 Upgrade 和Connection 协议头,不然WebSocket会404
五、nginx 开启压缩,提高首页访问效率
nginx.conf 的 http 中加入以下片断
# gzip config
gzip on;
gzip_min_length 1k;
gzip_comp_level 9;
gzip_types text/plain application/javascript application/x-javascript text/css application/xml text/javascript application/x-httpd-php image/jpeg image/gif image/png;
gzip_vary on;
gzip_disable "MSIE [1-6]\.";
配置后启动nginx
通过:http://你的域名 访问项目,出现如下页面,使用账户/密码:admin/123456 登录成功即可
我的配置
worker_processes  1;

events {
    	worker_connections  1024;
}
http {
    	include       mime.types;
    	default_type  application/octet-stream;
   	sendfile        on;
    	keepalive_timeout  65;

    	gzip on;
    	gzip_min_length 1k;
    	gzip_comp_level 9;
    	gzip_types text/plain application/javascript application/x-javascript text/css application/xml text/javascript application/x-httpd-php image/jpeg image/gif image/png;
    	gzip_vary on;
    	gzip_disable "MSIE [1-6]\.";

	server {
		listen       80;
		server_name  localhost;

		#后台服务配置,配置了这个location便可以通过http://域名/jeecg-boot/xxxx 访问
		location ^~ /jeecg-boot {
    			root   html;
   			index  index.html index.htm;
   			proxy_pass  	  http://127.0.0.1:7001/jeecg-boot/;
			proxy_set_header        Host 127.0.0.1;
			proxy_set_header        X-Real-IP $remote_addr;
			proxy_set_header        X-Forwarded-For $proxy_add_x_forwarded_for;
		}
		#解决Router(mode: 'history')模式下,刷新路由地址不能找到页面的问题
		location / {
			root   html;
			index  index.html index.htm;
			if (!-e $request_filename) {
				rewrite ^(.*)$ /index.html?s=$1 last;
				break;
			}
		}
	}

}
直接开启项目访问当前localhost即可

为开发者提供学习成长、分享交流、生态实践、资源工具等服务,帮助开发者快速成长。
更多推荐


 0
0 0
0- 0


 已为社区贡献2条内容

所有评论(0)