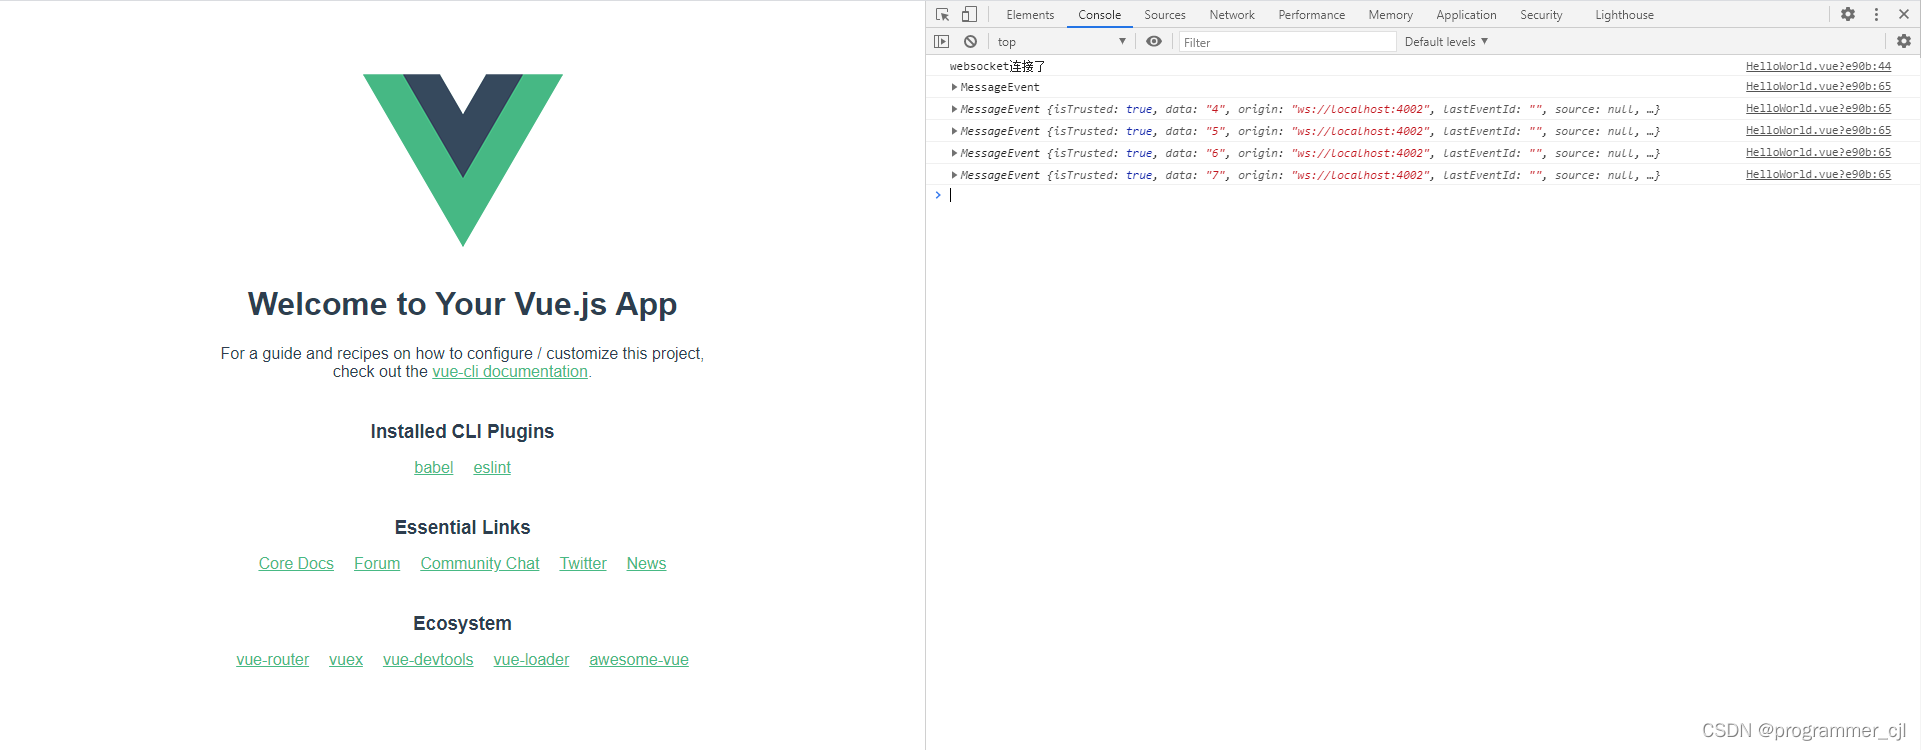
后端springboot主动推送消息给前端vue
基于vue+springboot使用websocket实现后端主动推送消息给前端
·
1.搭建vue环境并快速构建一个简单的vue项目可以参考这个博客
如何搭建一个vue项目(完整步骤)_a大白的博客-CSDN博客_创建vue项目
2.在基础项目上添加websocket连接

<script>
export default {
  name: 'HelloWorld',
  props: {
    msg: String
  },
  mounted() {
    this.initWebSocket()
  },
  methods: {
    initWebSocket(){
      console.log('websocket连接了');
      //初始化weosocket
      //这里的wsuri是根据服务端的ip进行配置(开发环境),生产环境的话可以使用上面的Ip或者是nginx做代理
      const wsuri = `ws://localhost:4002/websocket`;      //协议标识符是ws(如果加密,则为wss),服务器网址就是 URL。
      // const wsuri = `ws://${Ip}/ws/${localStorage.getItem('name')}`;
      this.websock = new WebSocket(wsuri);
      this.websock.onmessage = this.websocketonmessage;
      this.websock.onopen = this.websocketonopen;
      this.websock.onerror = this.websocketonerror;
      this.websock.onclose = this.websocketclose;
    },
    websocketsend(){//数据发送
      // let msg=JSON.stringify(111111);
      // this.websock.send(msg);
    },
    websocketonopen(){ //连接建立之后执行send方法发送数据
    },
    websocketonerror(){//连接建立失败重连
      this.initWebSocket();
    },
    websocketonmessage(e){ //数据接收
      console.log(e);
    },
    websocketclose(){  //关闭
      this.websock.close()
    },
  }

}

</script>
其中注意localhost:4002是后端服务地址跟端口号,/websocket是后端@ServerEndpoint的value值
3.后端配置
引入依赖
         <dependency>
            <groupId>org.springframework.boot</groupId>
            <artifactId>spring-boot-starter-websocket</artifactId>
            <version>2.1.0.RELEASE</version>
         </dependency>
新增websocket配置类
import org.springframework.context.annotation.Bean;
import org.springframework.context.annotation.Configuration;
import org.springframework.web.socket.server.standard.ServerEndpointExporter;

@Configuration
public class WebSocketConfig {
    @Bean
    public ServerEndpointExporter serverEndpointExporter(){
        return new ServerEndpointExporter();
    }
}
新增websocket客户端
import java.io.IOException;
import java.util.concurrent.CopyOnWriteArraySet;
import javax.websocket.OnClose;
import javax.websocket.OnError;
import javax.websocket.OnMessage;
import javax.websocket.OnOpen;
import javax.websocket.Session;
import javax.websocket.server.ServerEndpoint;
import org.slf4j.Logger;
import org.slf4j.LoggerFactory;
import org.springframework.stereotype.Component;

@ServerEndpoint(value = "/websocket")
@Component
public class WebSocketServer {
    private final static Logger log = LoggerFactory.getLogger(WebSocketServer.class);

    //静态变量,用来记录当前在线连接数。应该把它设计成线程安全的。
    private static int onlineCount = 0;
    //concurrent包的线程安全Set,用来存放每个客户端对应的MyWebSocket对象。
    private static CopyOnWriteArraySet<WebSocketServer> webSocketSet = new CopyOnWriteArraySet<WebSocketServer>();

    //与某个客户端的连接会话,需要通过它来给客户端发送数据
    private Session session;

    /**
     * 连接建立成功调用的方法
     */
    @OnOpen
    public void onOpen(Session session) {
        this.session = session;
        //加入set中
        webSocketSet.add(this);
        //在线数加1
        addOnlineCount();
        log.info("有新连接加入!当前在线人数为" + getOnlineCount());
        try {
            sendMessage("连接成功");
        } catch (IOException e) {
            log.error("websocket IO异常");
        }
    }

    /**
     * 连接关闭调用的方法
     */
    @OnClose
    public void onClose() {
        //从set中删除
        webSocketSet.remove(this);
        //在线数减1
        subOnlineCount();
        log.info("有一连接关闭!当前在线人数为" + getOnlineCount());
    }

    /**
     * 收到客户端消息后调用的方法
     *
     * @param message 客户端发送过来的消息
     */
    @OnMessage
    public void onMessage(String message, Session session) {
        log.info("来自客户端的消息:" + message);

        //群发消息
        for (WebSocketServer item : webSocketSet) {
            try {
                item.sendMessage(message);
            } catch (IOException e) {
                e.printStackTrace();
            }
        }
    }

    /**
     * @param session
     * @param error
     */
    @OnError
    public void onError(Session session, Throwable error) {
        log.error("发生错误");
        error.printStackTrace();
    }

    public void sendMessage(String message) throws IOException {
        this.session.getBasicRemote().sendText(message);
    }

    /**
     * 群发自定义消息
     */
    public static void sendInfo(String message) throws IOException {
        log.info(message);
        for (WebSocketServer item : webSocketSet) {
            try {
                item.sendMessage(message);
            } catch (IOException e) {
                continue;
            }
        }
    }

    public static synchronized int getOnlineCount() {
        return onlineCount;
    }

    public static synchronized void addOnlineCount() {
        WebSocketServer.onlineCount++;
    }

    public static synchronized void subOnlineCount() {
        WebSocketServer.onlineCount--;
    }
}
以上全部完成,为了测试,新增一个接口,调用一下即可查看效果


成功。
更多推荐
 已为社区贡献1条内容


所有评论(0)