实用水文篇--SpringBoot整合Netty实现消息推送服务器
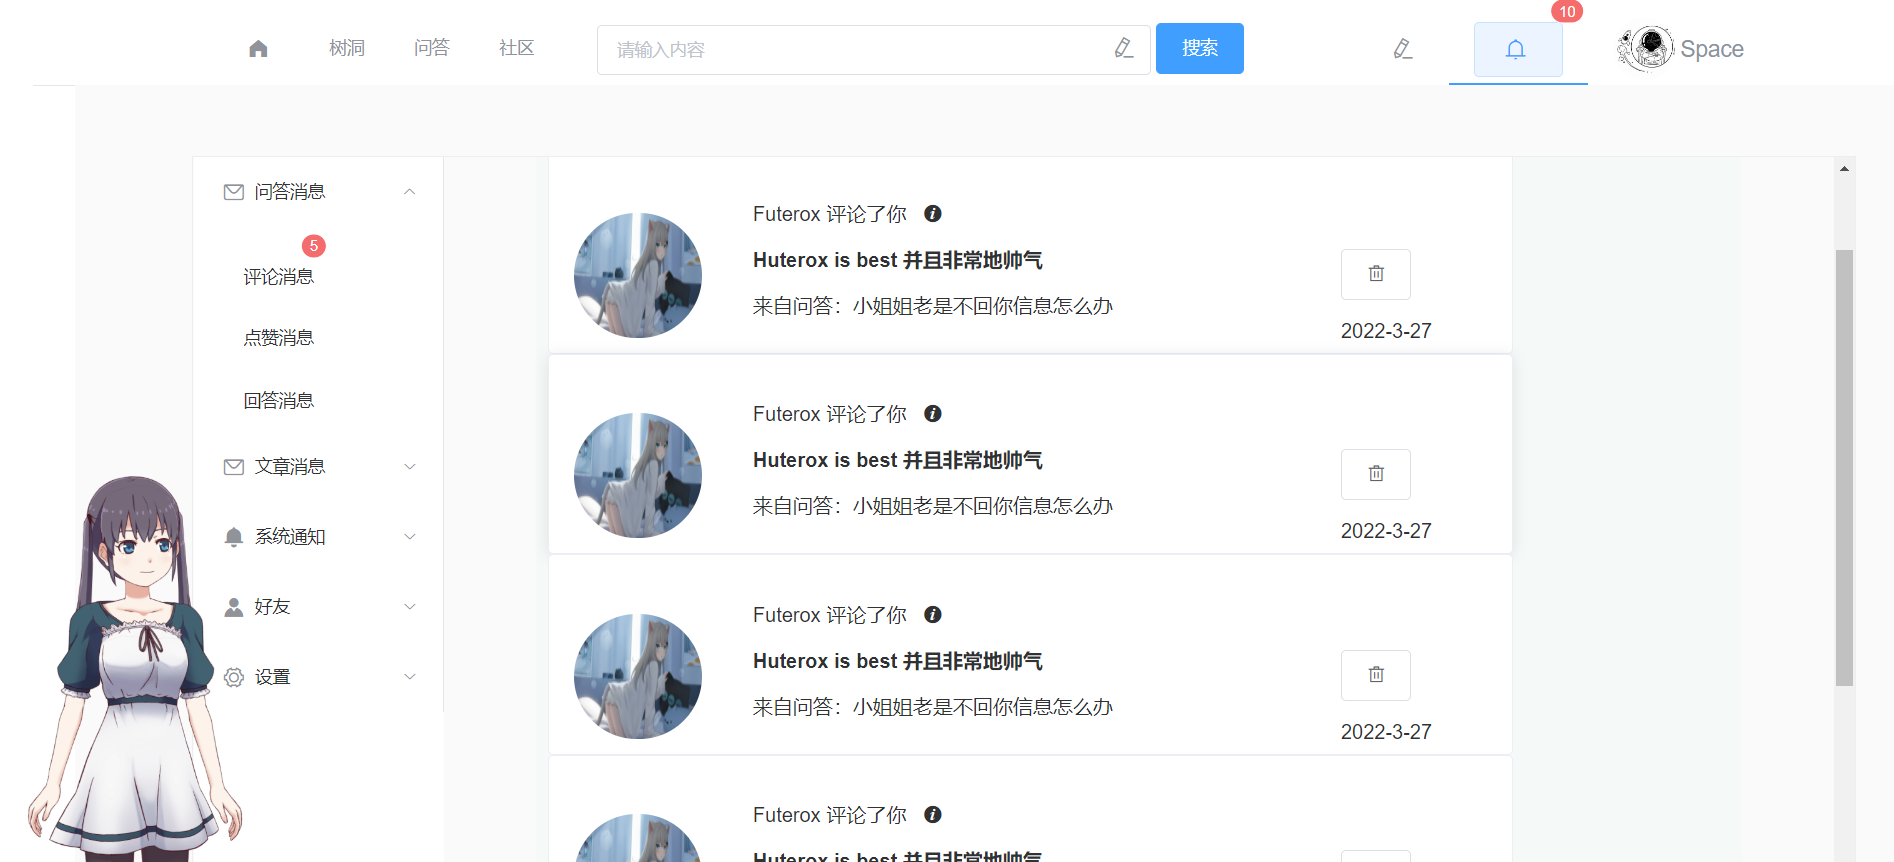
由于今天是要练车的,所以的话只能写一点简单的东西了,做一个整合吧,刚好先前随便说了一下Netty是吧,那么我们就直接实战吧,我们来整合一下Netty。我的设想是使用Netty来实现客户端消息的实时推送,就是这个破玩意:当然还有咱们的聊天,用户聊天,反正都做推送了,再加一个用户聊天有何不可。都TM是一个玩意。那么既然咱们是使用SpringBoot或者是Spring的话,那么我们就刚好直接使用IOC来
文章目录
前言
由于今天是要练车的,所以的话只能写一点简单的东西了,做一个整合吧,刚好先前随便说了一下Netty是吧,那么我们就直接实战吧,我们来整合一下Netty。我的设想是使用Netty来实现客户端消息的实时推送,就是这个破玩意:
当然还有咱们的聊天,用户聊天,反正都做推送了,再加一个用户聊天有何不可。都TM是一个玩意。
那么既然咱们是使用SpringBoot或者是Spring的话,那么我们就刚好直接使用IOC来实例化咱们的Netty。那么这样的话,我们可以使用Netty来实现实时的消息推送,以及在线用户聊天功能,同时的话,对于咱们后台的管理系统也刚好有这个需求,有新的博文审核消息啥的这个要推送给后台的。那么同时为了提高整个实时在线的工作效率,数据的存储直接进行异步处理,这个方案很多,那么最省事的就是搞个线程池+异步任务就完了,或者直接MQ过去,然后存储,反正这种数据丢了也没事。像博文,问答之类的数据,这些注意一点就完了。
那么本文的话,两个目标,第一个是怎么整合,服务端和客户端怎么整合。第二个就是我们实际上就是说,创建一个服务端,可以完成websock协议。
项目创建
首先我们创建一个新的项目。
在我这里的话是已经创建好了:
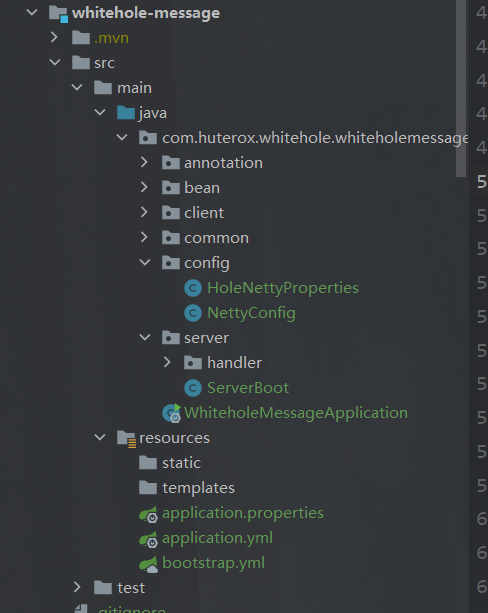
可以看到,我这里的话,做戏做全套,那么这里有两个端,一个是Server,还有是Client,什么意思,就是说,你使用Netty做服务端可以,做客户端链接其他的服务器也可以,rpc嘛。
例如:

整合
导入依赖
首先是导入依赖,这里的话是SpringBoot,那么直接导入这个就完了:
<!--        导入Netty的依赖-->
        <dependency>
            <groupId>io.netty</groupId>
            <artifactId>netty-all</artifactId>
        </dependency>
编写相关配置
既然是用到了SpringBoot,那么我们直接把对应的配置给提取出来:
#Netty的一些配置
netty:
  boss: 4
  worker: 2
  timeout: 6000
  port: 9000
  #多端口绑定
  portSalve: 9001
  host: 127.0.0.1
这个看你自己,我这里演示就是多端口的。值得一提的是这个演示的,演示完就删了哈,所以这篇博文会尽可能详细。毕竟,我以后搞不好还会回来copy。
服务端创建
首先是我们的服务端,那么在这里的话,我们想要创建一个Netty服务,基本上就三个东西,一个是我们选择哪一个线程模型,这里我们显然选择主从模型。所以的话,那么我们就需要准备两个线程组,之后的话是我们的初始化器,用来初始化Handler,之后是我们自定义的Handler。这里为了更好地演示,我们这里以创建Http处理的为例子。之后的话我们以创建websocket为例子。
ok,既然如此我们知道了需要那些东西,那么我们直接去搞就好了。
读取配置
首先要做的就是读取配置,我这里准备了专门的配置类。
import lombok.Data;
import org.springframework.boot.context.properties.ConfigurationProperties;
import org.springframework.context.annotation.Configuration;

@ConfigurationProperties(prefix = "netty")
@Data
@Configuration
public class HoleNettyProperties {

    // boss线程数量 默认为cpu线程数*4

    private Integer boss;

   	// worker线程数量 默认为cpu线程数*2

    private Integer worker;

    // 连接超时时间 默认为30s

    private Integer timeout = 30000;

    // 服务器主端口 默认9000

    private Integer port = 9000;
	// 服务器备用端口

    private Integer portSalve = 9001;

   	// 服务器地址 默认为本地

    private String host = "127.0.0.1";
}
配置类
之后的话,是我们的一个配置:
这个配置主要就是声明一个Bootstrap开启服务,之后绑定我们设定的配置和处理器。
@Configuration
@EnableConfigurationProperties
public class NettyConfig {
    @Autowired
    HoleNettyProperties holeNettyProperties;

    /**
     * boss 线程池
     * 负责客户端连接
     * @return
     */
    @Bean
    public NioEventLoopGroup boosGroup(){
        return new NioEventLoopGroup(holeNettyProperties.getBoss());
    }

    /**
     * worker线程池
     * 负责业务处理
     * @return
     */
    @Bean
    public NioEventLoopGroup workerGroup(){
        return  new NioEventLoopGroup(holeNettyProperties.getWorker());
    }
    /**
     * 服务器启动器
     * @return
     */
    @Bean
    public ServerBootstrap serverBootstrap(){
        ServerBootstrap serverBootstrap  = new ServerBootstrap();
        serverBootstrap
                .group(boosGroup(),workerGroup())   // 指定使用的线程组
                .channel(NioServerSocketChannel.class) // 指定使用的通道
                .option(ChannelOption.CONNECT_TIMEOUT_MILLIS,holeNettyProperties.getTimeout()) // 指定连接超时时间
                .childHandler(new ServerHandler()); // 指定worker处理器
        return serverBootstrap;
    }

    /**
     * 客户端启动器
     * @return
     */
    @Bean
    public Bootstrap bootstrap(){
        // 新建一组线程池
        NioEventLoopGroup eventExecutors = new NioEventLoopGroup(holeNettyProperties.getBoss());
        Bootstrap bootstrap = new Bootstrap();
        bootstrap
                .group(eventExecutors)   // 指定线程组
                .option(ChannelOption.SO_KEEPALIVE, true)
                .channel(NioSocketChannel.class) // 指定通道
                .handler(new ClientHandler()); // 指定处理器
        return bootstrap;
    }
}
可以看到的话,我们这里是有两个的,一个是用来创建服务端的,还有一个是用来创建客户端的。在这里的话,我们主要还是做声明。
区别是 在于指定线程组。以及在我们后面真正实例化的时候,前者是监听,后者是连接。
服务处理器 ServerHandler
这个玩意其实就是用来做初始化的。
public class ServerHandler extends ChannelInitializer<SocketChannel> {
    /**
     * 初始化通道以及配置对应管道的处理器
     * @param socketChannel
     * @throws Exception
     */
    @Override
    protected void initChannel(SocketChannel socketChannel) throws Exception {
        ChannelPipeline pipeline = socketChannel.pipeline();
        pipeline.addLast(new MessageDecodeHandler());
        pipeline.addLast(new MessageEncodeHandler());
        pipeline.addLast(new ServerListenerHandler());
    }
}
同时在这里指定了两个消息的编解码器。
public class MessageDecodeHandler extends ByteToMessageDecoder {


    @Override
    protected void decode(ChannelHandlerContext channelHandlerContext, ByteBuf byteBuf, List<Object> list) throws Exception {
        int len = byteBuf.readInt();
        byte[] content = new byte[len];
        byteBuf.readBytes(content);
        MessageBean messageBean = new MessageBean();
        messageBean.setContent(content);
        messageBean.setLen(len);
        list.add(messageBean);
    }
}
public class MessageEncodeHandler extends MessageToByteEncoder<MessageBean> {

    @Override
    protected void encode(ChannelHandlerContext channelHandlerContext, MessageBean messageBean, ByteBuf byteBuf) throws Exception {
        byteBuf.writeInt(messageBean.getLen());
        byteBuf.writeBytes(messageBean.getContent());
    }
}
那么同样的,我们声明了一个Bean,专门用来承载消息的,主要是转JSON用的。
@Data
@AllArgsConstructor
@NoArgsConstructor
public class MessageBean {
    /**
     * 数据长度
     */
    private Integer len;
    /**
     * 通讯数据
     */
    private byte[] content;

    public MessageBean(Object object) {
        content = JSONUtil.toJsonStr(object).getBytes(StandardCharsets.UTF_8);
        len = content.length;
    }
}
这里的话还是用到了JSONUtil,所以的话,还需要导入依赖:
        <dependency>
            <groupId>cn.hutool</groupId>
            <artifactId>hutool-all</artifactId>
            <version>${hutool.version}</version>
<!--        <hutool.version>5.5.4</hutool.version>-->
        </dependency>
注意自己对应的版本号,我这里是5.5.4
自定义处理器
最后是我们的自定义处理器,这个东西就是我们实现业务的核心。但是我们这边只是演示,所以的话就随便一点了。
@Slf4j
@ChannelHandler.Sharable
public class ClientListenerHandler extends SimpleChannelInboundHandler<MessageBean> {
    /**
     * 服务端上线的时候调用
     * @param ctx
     * @throws Exception
     */
    @Override
    public void channelActive(ChannelHandlerContext ctx) throws Exception {
        log.info("{}连上了服务器",ctx.channel().remoteAddress());
    }

    /**
     * 服务端掉线的时候调用
     * @param ctx
     * @throws Exception
     */
    @Override
    public void channelInactive(ChannelHandlerContext ctx) throws Exception {
        log.info("{}断开了服务器",ctx.channel().remoteAddress());
        ctx.fireChannelInactive();
    }


    /**
     * 读取服务端消息
     * @param channelHandlerContext
     * @param messageBean
     * @throws Exception
     */
    @Override
    protected void channelRead0(ChannelHandlerContext channelHandlerContext, MessageBean messageBean) throws Exception {
        log.info("来自服务端的消息:{}",new String(messageBean.getContent(), CharsetUtil.UTF_8));
        channelHandlerContext.channel().close();
    }

    /**
     * 异常发生时候调用
     * @param ctx
     * @param cause
     * @throws Exception
     */
    @Override
    public void exceptionCaught(ChannelHandlerContext ctx, Throwable cause) throws Exception {
        log.error("{}连接出异常了",ctx.channel().remoteAddress());
        log.error(ExceptionUtil.printStackTrace((Exception) cause));
        ctx.close();
    }
}
同时这块也有一个异常写入类,用来返回这个错误的,这个看你自己,不要也罢
public class ExceptionUtil {

    public static String printStackTrace(Exception e){
        Writer writer = new StringWriter();
        PrintWriter printWriter = new PrintWriter(writer);
        e.printStackTrace(printWriter);
        printWriter.close();
        return writer.toString();
    }
}
自定义启动类
ok,现在的话我们已经准备好了我们需要的东西(基本上),配置,处理器,线程组,用来开启服务的Bootstrap。那么既然是做SpringBoot的整合,那么我们就在更进一步,待会的的话,我们再搞一个注解。
@Component
@Slf4j
public class ServerBoot {
    @Autowired
    ServerBootstrap serverBootstrap;
    @Resource
    NioEventLoopGroup boosGroup;
    @Resource
    NioEventLoopGroup workerGroup;
    @Autowired
    HoleNettyProperties holeNettyProperties;

    /**
     * 开机启动
     * @throws InterruptedException
     */
    @PostConstruct
    public void start() throws InterruptedException {
        // 绑定端口启动
        serverBootstrap.bind(holeNettyProperties.getPort()).sync();
        serverBootstrap.bind(holeNettyProperties.getPortSalve()).sync();
        log.info("启动Netty多端口服务器: {},{}",holeNettyProperties.getPort(),holeNettyProperties.getPortSalve());
    }

    /**
     * 关闭线程池
     */
    @PreDestroy
    public void close() throws InterruptedException {
        log.info("关闭Netty服务器");
        boosGroup.shutdownGracefully();
        workerGroup.shutdownGracefully();
    }
}
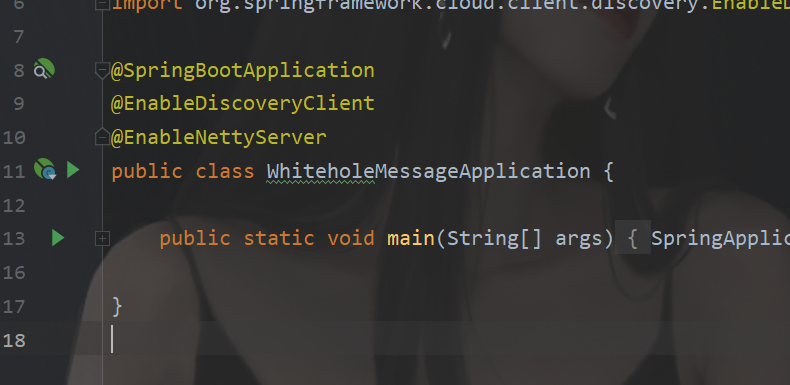
之后,我们创建一个启动注解。
@Import(ServerBoot.class)
@Target(ElementType.TYPE)
@Retention(RetentionPolicy.RUNTIME)
@Documented
public @interface EnableNettyServer {
}
之后要用的时候就直接:
客户端
之后的话,就是我们的客户端的处理。首先配置类俺已经给出来了。区别呢就是咱们的处理器和启动类。
处理器 ClientHandler
首先一样的编解码处理
public class ClientHandler extends ChannelInitializer<SocketChannel> {
    @Override
    protected void initChannel(SocketChannel socketChannel) throws Exception {
        ChannelPipeline pipeline = socketChannel.pipeline();
        pipeline.addLast(new MessageEncodeHandler());
        pipeline.addLast(new MessageDecodeHandler());
        pipeline.addLast(new ClientListenerHandler());
    }
}
之后的话是我们具体的业务逻辑:
@Slf4j
@ChannelHandler.Sharable
public class ClientListenerHandler extends SimpleChannelInboundHandler<MessageBean> {
    /**
     * 服务端上线的时候调用
     * @param ctx
     * @throws Exception
     */
    @Override
    public void channelActive(ChannelHandlerContext ctx) throws Exception {
        log.info("{}连上了服务器",ctx.channel().remoteAddress());
    }

    /**
     * 服务端掉线的时候调用
     * @param ctx
     * @throws Exception
     */
    @Override
    public void channelInactive(ChannelHandlerContext ctx) throws Exception {
        log.info("{}断开了服务器",ctx.channel().remoteAddress());
        ctx.fireChannelInactive();
    }


    /**
     * 读取服务端消息
     * @param channelHandlerContext
     * @param messageBean
     * @throws Exception
     */
    @Override
    protected void channelRead0(ChannelHandlerContext channelHandlerContext, MessageBean messageBean) throws Exception {
        log.info("来自服务端的消息:{}",new String(messageBean.getContent(), CharsetUtil.UTF_8));
        channelHandlerContext.channel().close();
    }

    /**
     * 异常发生时候调用
     * @param ctx
     * @param cause
     * @throws Exception
     */
    @Override
    public void exceptionCaught(ChannelHandlerContext ctx, Throwable cause) throws Exception {
        log.error("{}连接出异常了",ctx.channel().remoteAddress());
        log.error(ExceptionUtil.printStackTrace((Exception) cause));
        ctx.close();
    }
}
启动类
之后还是我们的启动类,这个就是和服务的不一样的玩意:
@Component
public class ClientBoot {
    @Autowired
    Bootstrap bootstrap;
    @Autowired
    HoleNettyProperties holeNettyProperties;

    /**
     * 主端口连接
     * @return
     * @throws InterruptedException
     */
    public Channel connect() throws InterruptedException {
        // 连接服务器
        ChannelFuture channelFuture = bootstrap.connect(holeNettyProperties.getHost(), holeNettyProperties.getPort()).sync();
        // 监听关闭
        Channel channel = channelFuture.channel();
        return channel;
    }
    /**
     * 备用端口连接
     * @return
     * @throws InterruptedException
     */
    public Channel connectSlave() throws InterruptedException {
        // 连接服务器
        ChannelFuture channelFuture = bootstrap.connect(holeNettyProperties.getHost(), holeNettyProperties.getPort()).sync();
        // 监听关闭
        Channel channel = channelFuture.channel();
        channel.closeFuture().sync();
        return channel;
    }

    /**
     * 发送消息到服务器端
     * @return
     */
    public void sendMsg(MessageBean messageBean) throws InterruptedException {
        connect().writeAndFlush(messageBean);
    }
}
之后也是我们的启动注解
@Target(ElementType.TYPE)
@Retention(RetentionPolicy.RUNTIME)
@Documented
@Import(ClientBoot.class)
public @interface EnableNettyClient {
}
如果你想要同时开启也是可以的,但是注意改一下配置,否则的话,串了。
@Target(ElementType.TYPE)
@Retention(RetentionPolicy.RUNTIME)
@Documented
@EnableNettyClient
@EnableNettyServer
public @interface EnableNetty {
}
ok,那么这块的就是最基本的整合。
聊天服务器创建实例
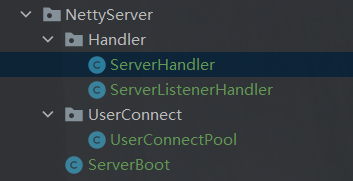
ok,那么现在的话,我们就来创建一下聊天服务器,我们使用的websocket 也就是ws协议。
首先还是我们的配置,这里的话,我就使用单端口了。
那么我们修改完成后一个样子是这样的:
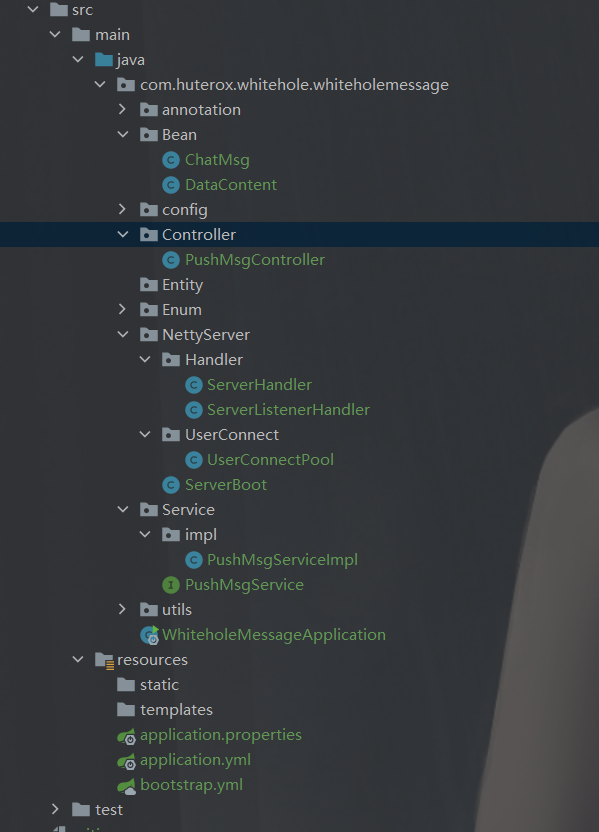
我们甚至提取出了一个Controller。
这个Controller的作用很大,我们可以直接通过Controller对客户端进行消息推送,例如你的博文审核通过了,我们可以通过这个在线通知你(前提是你在线)。而且这里的话也有个好处嘛,就是说,我们的客户端只需要进行监听,发送消息可以通过正常的http请求,这样的话最起码作为一个分布式的项目,请求还是到了网关的,我们还是可以进行监控的,同时也可确保安全,因为我们对于很多的一些处理可以在Controller进行操作,只是用Netty进行消息转发。
工具类
这里的话,我们使用到这几个工具类:
/**
 * 异常打印工具类
 */
public class ExceptionUtil {

    public static String printStackTrace(Exception e){
        Writer writer = new StringWriter();
        PrintWriter printWriter = new PrintWriter(writer);
        e.printStackTrace(printWriter);
        printWriter.close();
        return writer.toString();
    }
}
/**
 * @Description: 自定义响应结构, 转换类
 */
public class JsonUtils {

    // 定义jackson对象
    private static final ObjectMapper MAPPER = new ObjectMapper();

    /**
     * 将对象转换成json字符串。
     * <p>Title: pojoToJson</p>
     * <p>Description: </p>
     * @param data
     * @return
     */
    public static String objectToJson(Object data) {
        try {
            String string = MAPPER.writeValueAsString(data);
            return string;
        } catch (JsonProcessingException e) {
            e.printStackTrace();
        }
        return null;
    }

    /**
     * 将json结果集转化为对象
     *
     * @param jsonData json数据
     * @param beanType 对象类型
     * @return
     */
    public static <T> T jsonToPojo(String jsonData, Class<T> beanType) {
        try {
            T t = MAPPER.readValue(jsonData, beanType);
            return t;
        } catch (Exception e) {
            e.printStackTrace();
        }
        return null;
    }

    /**
     * 将json数据转换成pojo对象list
     * <p>Title: jsonToList</p>
     * <p>Description: </p>
     * @param jsonData
     * @param beanType
     * @return
     */
    public static <T>List<T> jsonToList(String jsonData, Class<T> beanType) {
        JavaType javaType = MAPPER.getTypeFactory().constructParametricType(List.class, beanType);
        try {
            List<T> list = MAPPER.readValue(jsonData, javaType);
            return list;
        } catch (Exception e) {
            e.printStackTrace();
        }

        return null;
    }

}
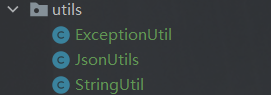
那个StringUtils老朋友,一大把,我这里就不粘贴了,实际上我也没用到那个玩意。
消息转换
首先我们这个是直接基于websocket协议来的,因为要实现这个长连接监听嘛。
所以在消息转换这里略有不同:
这里的话和先前的区别就是这个:
/**
 * 定义worker端的处理器
 */
public class ServerHandler extends ChannelInitializer<SocketChannel> {

    /**
     * 初始化通道以及配置对应管道的处理器
     * @param socketChannel
     * @throws Exception
     */
    @Override
    protected void initChannel(SocketChannel socketChannel) throws Exception {
        ChannelPipeline pipeline = socketChannel.pipeline();
        // 流水线管理通道中的处理程序(Handler),用来处理业务
        // webSocket协议本身是基于http协议的,所以这边也要使用http编解码器
        pipeline.addLast(new HttpServerCodec());
        pipeline.addLast(new ChunkedWriteHandler());
        pipeline.addLast(new HttpObjectAggregator(1024*64));
        pipeline.addLast(new WebSocketServerProtocolHandler("/ws"));
        pipeline.addLast(new ServerListenerHandler());
    }
}
这个玩意我们改变了,同时我们也没有先前的编解码器了。
配置
这个配置的话,和先前一样,区别就是咱们是单接口嘛:
#Netty的一些配置
netty:
  boss: 1
  worker: 4
  timeout: 6000
  port: 9000
  host: 127.0.0.1
@ConfigurationProperties(prefix = "netty")
@Data
@Configuration
public class HoleNettyProperties {
    /**
     * boss线程数量 默认为cpu线程数*2
     */
    private Integer boss;
    /**
     * worker线程数量 默认为cpu线程数*2
     */
    private Integer worker;
    /**
     * 连接超时时间 默认为30s
     */
    private Integer timeout = 30000;
    /**
     * 服务器主端口 默认9000
     */
    private Integer port = 9000;

    private String host = "127.0.0.1";
}
然后咱们的配置类就是这样了:
@Configuration
@EnableConfigurationProperties
public class NettyConfig {
    @Autowired
    HoleNettyProperties holeNettyProperties;

    /**
     * boss 线程池
     * 负责客户端连接
     * @return
     */
    @Bean
    public NioEventLoopGroup boosGroup(){
        return new NioEventLoopGroup(holeNettyProperties.getBoss());
    }

    /**
     * worker线程池
     * 负责业务处理
     * @return
     */
    @Bean
    public NioEventLoopGroup workerGroup(){
        return  new NioEventLoopGroup(holeNettyProperties.getWorker());
    }
    /**
     * 服务器启动器
     * @return
     */
    @Bean
    public ServerBootstrap serverBootstrap(){
        ServerBootstrap serverBootstrap  = new ServerBootstrap();
        serverBootstrap
                .group(boosGroup(),workerGroup())   // 指定使用的线程组
                .channel(NioServerSocketChannel.class) // 指定使用的通道
                .option(ChannelOption.CONNECT_TIMEOUT_MILLIS,holeNettyProperties.getTimeout()) // 指定连接超时时间
                .childHandler(new ServerHandler()); // 指定worker处理器
        return serverBootstrap;
    }
}
消息封装
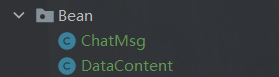
为了这个更好的处理,咱们就把这个String转化为一个标准的Bean,也方便后面转化为Entity,也就是实体嘛。
@Data
@AllArgsConstructor
@NoArgsConstructor
public class ChatMsg implements Serializable {
    private String senderId;
    private String receiverId;
    private String msg;
    private String msgId;
}
@Data
@AllArgsConstructor
@NoArgsConstructor
public class DataContent implements Serializable {
    private Integer action;
    private ChatMsg chatMsg;
    private String extend;
}
这个的话,你可以自己看着改。
反正我这个样例就是这样的,后面我也要改。
消息处理
之后就是我们的服务处理的Handler了。
在这里的话,我这里还定义了一个枚举类,主要是用来这样的:
public enum MessageActionEnum {

    //定义消息类型

    CONNECT(1,"第一次(或重连)初始化连接"),
    CHAT(2,"聊天消息"),
    SIGNED(3,"消息签收"),
    KEEPALIVE(4,"客户端保持心跳"),
    PULL_FRIEND(5, "拉取好友");

    public final Integer type;
    public final String content;
    MessageActionEnum(Integer type,String content) {
        this.type = type;
        this.content = content;
    }
}
定义消息的类型。这个在Controller可以用,在Netty的服务里面也可以使用,看你自己,这里咱们演示的话就,还是和正常的一样。全部在Netty的服务里面用的,后面怎么玩其实很好想像,待会看到Controller的代码就懂了。
那么这里还是看到这个代码
@Component
@ChannelHandler.Sharable
public class ServerListenerHandler extends SimpleChannelInboundHandler<TextWebSocketFrame> {
    private static final Logger log = LoggerFactory.getLogger(ServerBoot.class);

    /**
     * 当建立链接时将Channel放置在Group当中
     */
    @Override
    public void handlerAdded(ChannelHandlerContext ctx) throws Exception {
        log.info("有新的客户端链接:[{}]", ctx.channel().id().asLongText());
        // 添加到channelGroup 通道组
        UserConnectPool.getChannelGroup().add(ctx.channel());
    }

    /**
     * 读取数据
     */
    @Override
    protected void channelRead0(ChannelHandlerContext ctx, TextWebSocketFrame msg) throws Exception {
        /**
         * 1.接受到msg
         * 2.将msg转化为实体类
         * 3.解析消息类型
         * 将实体类当中的userid和连接的Channel进行对应
         * */
        String content = msg.text();
        Channel channel = ctx.channel();
        DataContent dataContent = JsonUtils.jsonToPojo(content, DataContent.class);
        assert dataContent != null;
        Integer action = dataContent.getAction();
        if(Objects.equals(action, MessageActionEnum.CONNECT.type)){
            //进行关联注册
            String senderId = dataContent.getChatMsg().getSenderId();
            UserConnectPool.getChannelMap().put(senderId,channel);

            // 将用户ID作为自定义属性加入到channel中,方便随时channel中获取用户ID
            AttributeKey<String> key = AttributeKey.valueOf("userId");
            ctx.channel().attr(key).setIfAbsent(senderId);

        }else if(Objects.equals(action, MessageActionEnum.CHAT.type)){
            /**
             * 解析你的消息,然后进行持久化,或者其他的操作,看你自己
             * */
            ChatMsg chatMsg = dataContent.getChatMsg();

            //发送消息
            Channel receiverChannel = UserConnectPool.getChannel(chatMsg.getReceiverId());
            if(receiverChannel==null){
                //用户不在线
            }else {
                //为了保险起见你还可以在你的Group里面去查看有没有这样的Channel
                //毕竟不太能够保证原子性操作嘛,反正底层也是CurrentMap
                Channel findChannel = UserConnectPool.getChannelGroup().find(ctx.channel().id());
                if(findChannel!=null){
                    receiverChannel.writeAndFlush(
                            new TextWebSocketFrame(
                                    JsonUtils.objectToJson(chatMsg)
                            )
                    );
                }else {
                    //离线
                }
            }

        }else if (Objects.equals(action, MessageActionEnum.SIGNED.type)){

        }else if (Objects.equals(action, MessageActionEnum.KEEPALIVE.type)){

        }else if(Objects.equals(action, MessageActionEnum.PULL_FRIEND.type)){

        }


    }

    @Override
    public void handlerRemoved(ChannelHandlerContext ctx) throws Exception {
        log.info("用户下线了:{}", ctx.channel().id().asLongText());
        // 删除通道
        UserConnectPool.getChannelGroup().remove(ctx.channel());
        removeUserId(ctx);
    }

    @Override
    public void exceptionCaught(ChannelHandlerContext ctx, Throwable cause) throws Exception {
        //打印异常
        log.info("异常:{}", cause.getMessage());
        // 删除通道
        UserConnectPool.getChannelGroup().remove(ctx.channel());
        removeUserId(ctx);
        ctx.close();
    }

    /**
     * 删除用户与channel的对应关系
     */
    private void removeUserId(ChannelHandlerContext ctx) {
        AttributeKey<String> key = AttributeKey.valueOf("userId");
        String userId = ctx.channel().attr(key).get();
        UserConnectPool.getChannelMap().remove(userId);
    }
}
同时在这里的话,我们还有这个玩意:

然后这个玩意是这样的,有一个存储Channel的列表,还有一个MAP。
public class UserConnectPool {

    //主要是为了广播消息
    private static volatile ChannelGroup channelGroup = null;

    /**
     * 存放请求ID与channel的对应关系
     */
    private static volatile ConcurrentHashMap<String, Channel> channelMap = null;


    /**
     * 定义两把锁
     */
    private static final Object lock1 = new Object();
    private static final Object lock2 = new Object();


    public static ChannelGroup getChannelGroup() {
        if (null == channelGroup) {
            synchronized (lock1) {
                if (null == channelGroup) {
                    channelGroup = new DefaultChannelGroup(GlobalEventExecutor.INSTANCE);
                }
            }
        }
        return channelGroup;
    }

    public static ConcurrentHashMap<String, Channel> getChannelMap() {
        if (null == channelMap) {
            synchronized (lock2) {
                if (null == channelMap) {
                    channelMap = new ConcurrentHashMap<>();
                }
            }
        }
        return channelMap;
    }

    public static Channel getChannel(String userId) {
        if (null == channelMap) {
            return getChannelMap().get(userId);
        }
        return channelMap.get(userId);
    }

}
之后的话,我们这个就ok了。
同时这块咱们在做一个Controller,我们可以直接处理消息:
Controller处理
我们直接看到实现类
@Service
public class PushMsgServiceImpl implements PushMsgService {

    @Override
    public void pushMsgToOne(DataContent dataContent) {
        ChatMsg chatMsg = dataContent.getChatMsg();
        Channel channel = UserConnectPool.getChannel(chatMsg.getReceiverId());
        if (Objects.isNull(channel)) {
            throw new RuntimeException("未连接socket服务器");
        }

        channel.writeAndFlush(
                new TextWebSocketFrame(
                        JsonUtils.objectToJson(chatMsg)
                )
        );
    }

    @Override
    public void pushMsgToAll(DataContent dataContent) {
        ChatMsg chatMsg = dataContent.getChatMsg();
        Channel channel = UserConnectPool.getChannel(chatMsg.getReceiverId());
        UserConnectPool.getChannelGroup().writeAndFlush(
                new TextWebSocketFrame(
                        JsonUtils.objectToJson(chatMsg)
                )
        );
    }
}
之后是这个:
@RestController
@RequestMapping("/push")
public class PushMsgController {

    /**
     * 同时为了方便操作,我们还可以提取出
     * Controller
     * */

    @Autowired
    PushMsgService pushMsgService;

    @RequestMapping("/pushOne")
    public void pushOne(DataContent dataContent){
        pushMsgService.pushMsgToOne(dataContent);
    }
    @RequestMapping("/pushAll")
    public void pushAll(DataContent dataContent){
        pushMsgService.pushMsgToAll(dataContent);
    }
}
看到了吧,我们可以直接通过Controller去进行客户端的消息的推送。好处就是我们可以通过Controller做很多处理,同时方便实现一些功能,例如刚刚的那个消息类型判断,全部写在一块,显然是不太好的,当然这样有一定的性能损耗,看你的需求,要安全就走这个比如一些重要消息的推送啥的,不太需要,例如用户聊天就直接走Netty的。
总结
差不多就这样了,因为练车嘛,没有什么新东西,浅浅水一篇博文~

为开发者提供学习成长、分享交流、生态实践、资源工具等服务,帮助开发者快速成长。
更多推荐


 8
8 0
0- 0


 已为社区贡献8条内容

所有评论(0)