springboot中各模块间实现bean之间互相调用(service以及自定义的bean)
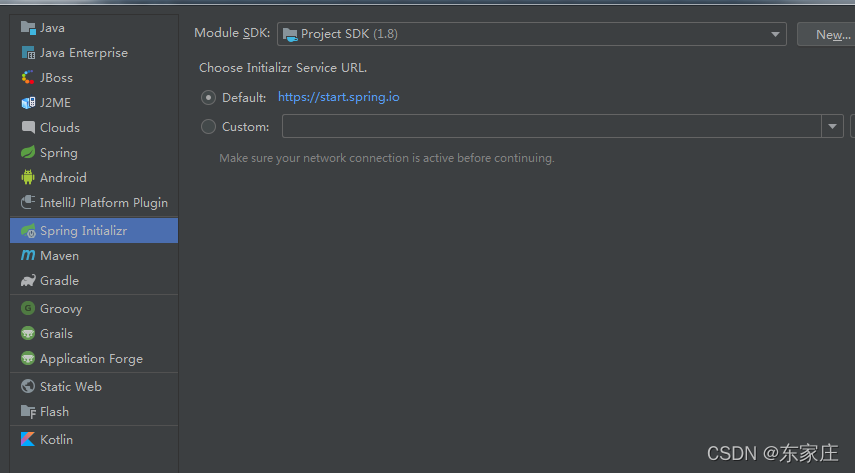
1.建一个项目,两个module(注意项目和module都是创建类型如下图)2. 新建module1: demo1 ; module2: demo3,实现demo3 调用 demo1 的service建好如图:3.在demo3中引入demo1的依赖,demo3的pom文件中加入:<dependency><groupId>com.example</groupId>
·
1.建一个项目,两个module(注意项目和module都是创建类型如下图)
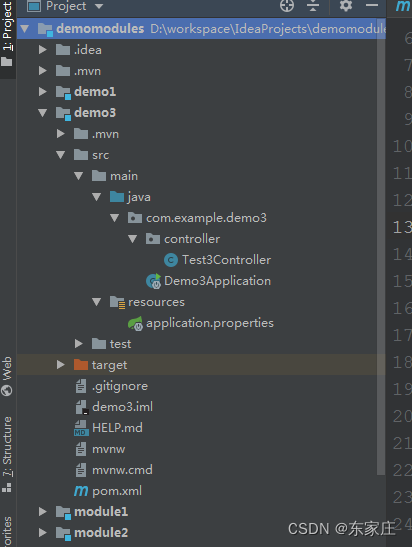
2. 新建module1: demo1 ; module2: demo3,实现demo3 调用 demo1 的service
建好如图:
3.在demo3中引入demo1的依赖,demo3的pom文件中加入:
        <dependency>
            <groupId>com.example</groupId>
            <artifactId>demo1</artifactId>
            <version>0.0.1-SNAPSHOT</version>
        </dependency>
4.demo1中新建service,实现调用。
package com.example.demo1.controller;

import com.example.demo1.configure.TesttConfigure;
import com.example.demo1.service.TestService;
import org.springframework.beans.factory.annotation.Autowired;
import org.springframework.web.bind.annotation.GetMapping;
import org.springframework.web.bind.annotation.RequestMapping;
import org.springframework.web.bind.annotation.RestController;

@RestController
@RequestMapping("/demo1")
public class TestController {

    @Autowired
    private TestService testService;


    @Autowired
    private TesttConfigure testtConfigure;

    @GetMapping("/test1")
    public String test1(){
        System.out.println(testtConfigure.ttt());
        return testtConfigure.ttt()+testService.testService();
    }
}
5.demo1中成功调用后,demo3中直接引入依赖就可以
package com.example.demo3.controller;

import com.example.demo1.configure.TesttConfigure;
import com.example.demo1.service.TestService;
import org.springframework.beans.factory.annotation.Autowired;
import org.springframework.web.bind.annotation.RequestMapping;
import org.springframework.web.bind.annotation.RestController;

@RestController
public class Test3Controller {

    @Autowired
    private TestService testService;

    @Autowired
    private TesttConfigure testtConfigure;

    @RequestMapping("/test3")
    public String test3(){
        String str = testService.testService()+"------test3-------"+testtConfigure.ttt();
        return str;
    }
}
6.demo3实现调用demo1中自定义的bean。
demo1中自定义bean,启动类中配置,实现能正常能访问
自定义配置类:
package com.example.demo1.configure;

import org.springframework.context.annotation.Bean;
import org.springframework.context.annotation.Configuration;

@Configuration
public class TesttConfigure {


    @Bean(name = "Test1")
    public String ttt(){
        return "----tttttt-----";
    }
}
demo1中启动类设置:
package com.example.demo1;

import org.springframework.boot.SpringApplication;
import org.springframework.boot.autoconfigure.SpringBootApplication;
import org.springframework.context.annotation.ComponentScan;

@SpringBootApplication
@ComponentScan(basePackages = "com.example.demo1")
public class Demo1Application {

    public static void main(String[] args) {
        SpringApplication.run(Demo1Application.class, args);
    }

}
controller层注入,实现调用:
package com.example.demo1.controller;

import com.example.demo1.configure.TesttConfigure;
import com.example.demo1.service.TestService;
import org.springframework.beans.factory.annotation.Autowired;
import org.springframework.web.bind.annotation.GetMapping;
import org.springframework.web.bind.annotation.RequestMapping;
import org.springframework.web.bind.annotation.RestController;

@RestController
@RequestMapping("/demo1")
public class TestController {

    @Autowired
    private TestService testService;


    @Autowired
    private TesttConfigure testtConfigure;

    @GetMapping("/test1")
    public String test1(){
        System.out.println(testtConfigure.ttt());
        return testtConfigure.ttt()+testService.testService();
    }
}
这里的 testtConfigure 是自定义配置类。
demo1能访问成功后,demo3直接注入就可以,和上面注入demo1的service一样。

为开发者提供学习成长、分享交流、生态实践、资源工具等服务,帮助开发者快速成长。
更多推荐


 1
1 0
0- 0


 已为社区贡献2条内容

所有评论(0)