spring cloud 实战项目搭建
Spring Cloud简介 Spring Cloud是一个基于Spring Boot实现的云应用开发工具,它为基于JVM的云应用开发中的配置管理、服务发现、断路器、智能路由、微代理、控制总线、全局锁、决策竞选、分布式会话和集群状态管理等操作提供了一种简单的开发方式。Spring Cloud包含了多个子项目(针对分布式系统中涉及的多个不同开源产品),比如:Spring Cloud...
Spring Cloud简介
Spring Cloud是一个基于Spring Boot实现的云应用开发工具,它为基于JVM的云应用开发中的配置管理、服务发现、断路器、智能路由、微代理、控制总线、全局锁、决策竞选、分布式会话和集群状态管理等操作提供了一种简单的开发方式。
Spring Cloud包含了多个子项目(针对分布式系统中涉及的多个不同开源产品),比如:Spring Cloud Config、Spring Cloud Netflix、Spring Cloud CloudFoundry、Spring Cloud AWS、Spring Cloud Security、Spring Cloud Commons、Spring Cloud Zookeeper、Spring Cloud CLI等项目。
1.搭建eureka服务
1.1 创建springboot项目
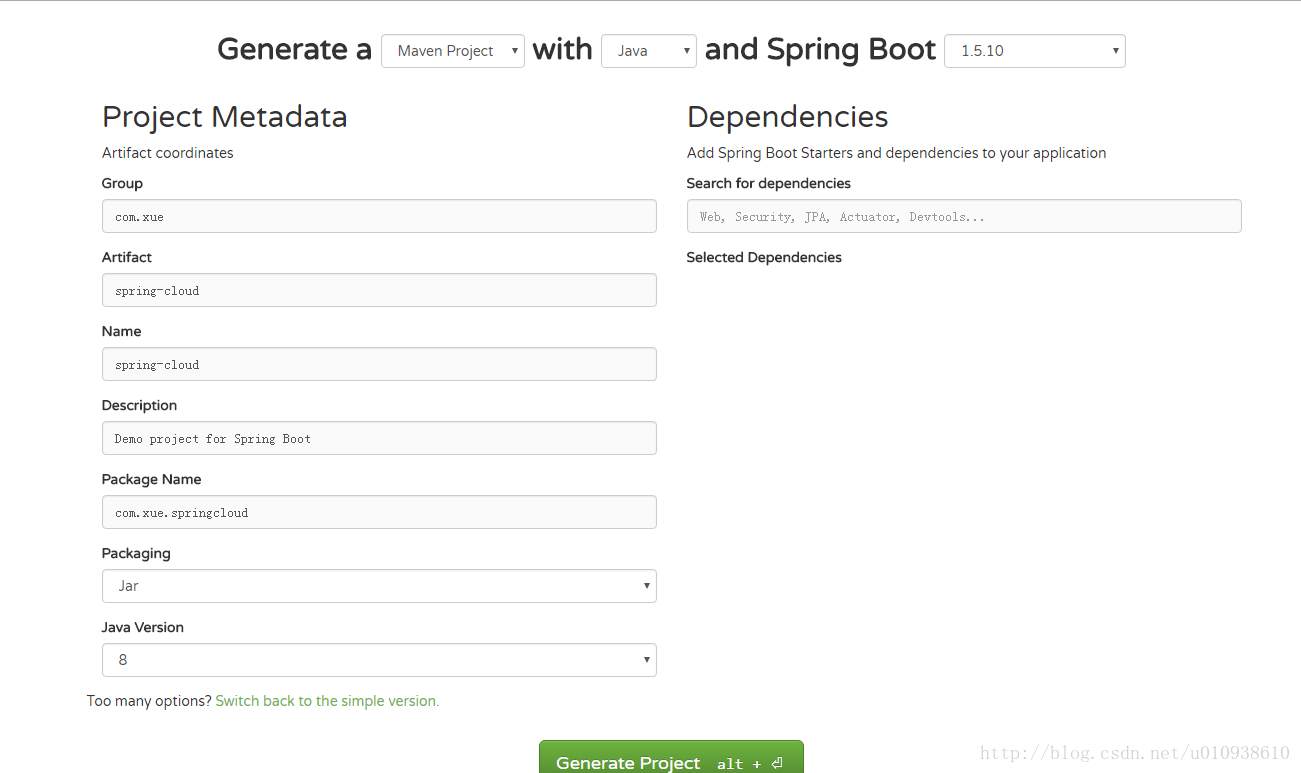
http://start.spring.io/ 自定义spring boot在线maven构建工具很方便
1.2 修改pom文件,添加spring cloud 依赖如下
<dependencies>
		<dependency>
			<groupId>org.springframework.boot</groupId>
			<artifactId>spring-boot-starter-test</artifactId>
			<scope>test</scope>
		</dependency>

		 <dependency>
		    <groupId>org.springframework.cloud</groupId>
			<artifactId>spring-cloud-starter-eureka-server</artifactId>
		 </dependency>
	</dependencies>

	<dependencyManagement>
	    <dependencies>
	        <dependency>
			    <groupId>org.springframework.cloud</groupId>
			    <artifactId>spring-cloud-dependencies</artifactId>
			    <version>Dalston.RELEASE</version>
			    <type>pom</type>
			    <scope>import</scope>
			</dependency>
	    </dependencies>
	</dependencyManagement><version>Dalston.RELEASE</version>
			    <type>pom</type>
			    <scope>import</scope>
			</dependency>
	    </dependencies>
	</dependencyManagement>
代码中加红的部分是对应的版本
如果 spring boot的版本是 1.4之前 对应的版本是Brixton.RELEASE,1.4之后 对应的Dalston.RELEASE版本如果对应不起来会报错
1.3 在启动类上加上注解 如下
@EnableEurekaServer
@SpringBootApplication
public class SpringCloudApplication {

	public static void main(String[] args) {
		SpringApplication.run(SpringCloudApplication.class, args);
	}
}
@SpringBootApplication
public class SpringCloudApplication {

	public static void main(String[] args) {
		SpringApplication.run(SpringCloudApplication.class, args);
	}
}
1.4 配置文件application.properties
#端口号
server.port=1111
# eureka.client.registerWithEureka :表示是否将自己注册到Eureka Server,默认为true。
# 由于当前这个应用就是Eureka Server,故而设为false
eureka.client.register-with-eureka=false
# eureka.client.fetchRegistry :表示是否从Eureka Server获取注册信息,默认为true。因为这是一个单点的Eureka Server,
# 不需要同步其他的Eureka Server节点的数据,故而设为false。
eureka.client.fetch-registry=false
# eureka.client.serviceUrl.defaultZone :设置与Eureka Server交互的地址,查询服务和注册服务都需要依赖这个地址。默认是
eureka.client.serviceUrl.defaultZone=http://localhost:1111/eureka/
配置好了以后启动 访问 http://localhost:1111/ 就出现了spring cloud 管理中心
2.搭建服务端
2.1 创建springboot项目同上
2.2 修改pom文件,添加spring cloud 依赖如下
        <parent>
		<groupId>org.springframework.boot</groupId>
		<artifactId>spring-boot-starter-parent</artifactId>
		<version>1.5.9.RELEASE</version>
		<relativePath/> <!-- lookup parent from repository -->
	</parent>

	<properties>
		<project.build.sourceEncoding>UTF-8</project.build.sourceEncoding>
		<project.reporting.outputEncoding>UTF-8</project.reporting.outputEncoding>
		<java.version>1.8</java.version>
	</properties>

	<dependencies>
		<dependency>
			<groupId>org.springframework.boot</groupId>
			<artifactId>spring-boot-starter</artifactId>
		</dependency>
		<dependency>
		  	<groupId>org.springframework.cloud</groupId>
		  	<artifactId>spring-cloud-starter-config</artifactId>
		</dependency>
		<!-- sping cloud 注册服务 -->
		<dependency>
			<groupId>org.springframework.cloud</groupId>
			<artifactId>spring-cloud-starter-eureka</artifactId>
		</dependency>
		<dependency>
			<groupId>org.springframework.boot</groupId>
			<artifactId>spring-boot-starter-test</artifactId>
			<scope>test</scope>
		</dependency>
		<dependency>
            <groupId>org.springframework.boot</groupId>
            <artifactId>spring-boot-starter-web</artifactId>
        </dependency>
	</dependencies>

	<dependencyManagement>
	    <dependencies>
	        <dependency>
			    <groupId>org.springframework.cloud</groupId>
			    <artifactId>spring-cloud-dependencies</artifactId>
			    <version>Dalston.RELEASE</version>
			    <type>pom</type>
			    <scope>import</scope>
			</dependency>
	    </dependencies>
	</dependencyManagement>

	<build>
		<plugins>
			<plugin>
				<groupId>org.springframework.boot</groupId>
				<artifactId>spring-boot-maven-plugin</artifactId>
			</plugin>
		</plugins>
	</build>
2.3 在启动类上加上注解 如下
@SpringBootApplication
@EnableEurekaClient
@EnableFeignClients
public class SpringServiceApplication {

	public static void main(String[] args) {
		SpringApplication.run(SpringServiceApplication.class, args);
	}
}
2.4 配置文件application.properties
#服务名称
spring.application.name=compute-service1
#端口号
server.port=2222
#注册中心
eureka.client.serviceUrl.defaultZone=http://localhost:1111/eureka/
spring.cloud.config.discovery.enabled=true
#注册中心的服务id
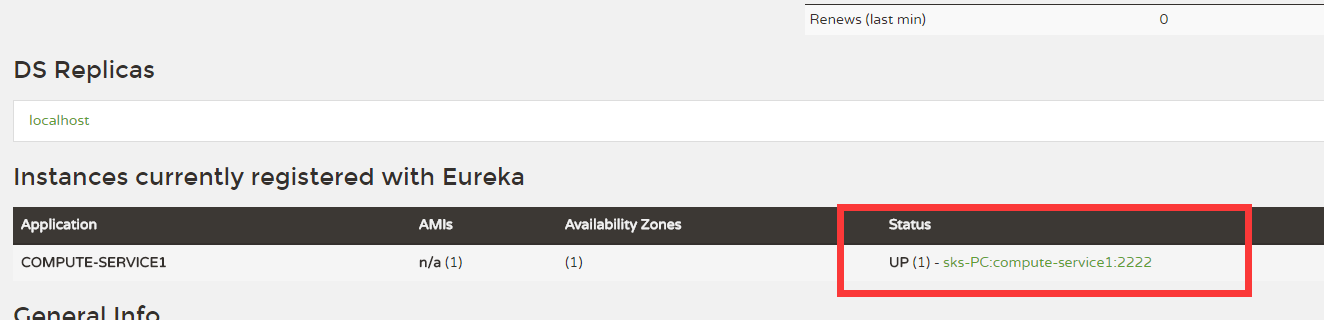
spring.cloud.config.discovery.serviceId=compute-server2.5启动项目后如下图
红框内就是启动的项目,显示的是服务的id和端口号
3 spring cloud 路由网关服务
3.1 创建 spring boot项目 同上
3.2 修改pom文件,添加spring cloud 依赖如下
    <groupId>com.xue</groupId>
	<artifactId>sring-zuul</artifactId>
	<version>0.0.1-SNAPSHOT</version>
	<packaging>jar</packaging>

	<name>sring-zuul</name>
	<description>Demo project for Spring Boot</description>

	<parent>
		<groupId>org.springframework.boot</groupId>
		<artifactId>spring-boot-starter-parent</artifactId>
		<version>1.5.9.RELEASE</version>
		<relativePath/> <!-- lookup parent from repository -->
	</parent>

	<properties>
		<project.build.sourceEncoding>UTF-8</project.build.sourceEncoding>
		<project.reporting.outputEncoding>UTF-8</project.reporting.outputEncoding>
		<java.version>1.8</java.version>
	</properties>

	<dependencies>
		<dependency>
            <groupId>org.springframework.cloud</groupId>
            <artifactId>spring-cloud-starter-eureka</artifactId>
        </dependency>
        <dependency>
            <groupId>org.springframework.cloud</groupId>
            <artifactId>spring-cloud-starter-zuul</artifactId>
        </dependency>
        <dependency>
            <groupId>org.springframework.boot</groupId>
            <artifactId>spring-boot-starter-web</artifactId>
        </dependency>

        <dependency>
            <groupId>org.springframework.boot</groupId>
            <artifactId>spring-boot-starter-test</artifactId>
            <scope>test</scope>
        </dependency>
	</dependencies>
	 <dependencyManagement>
	    <dependencies>
	        <dependency>
			    <groupId>org.springframework.cloud</groupId>
			    <artifactId>spring-cloud-dependencies</artifactId>
			    <version>Dalston.RELEASE</version>
			    <type>pom</type>
			    <scope>import</scope>
			</dependency>
	    </dependencies>
	</dependencyManagement>
	<build>
		<plugins>
			<plugin>
				<groupId>org.springframework.boot</groupId>
				<artifactId>spring-boot-maven-plugin</artifactId>
			</plugin>
		</plugins>
	</build>
3.3 在启动类上加上注解 如下
@EnableZuulProxy
@EnableEurekaClient
@SpringBootApplication
public class SringZuulApplication {

	public static void main(String[] args) {
		SpringApplication.run(SringZuulApplication.class, args);
	}
}
3.4 配置文件application.properties
eureka.client.serviceUrl.defaultZone=http://localhost:1111/eureka/
server.port=3333
spring.application.name=service-zuul
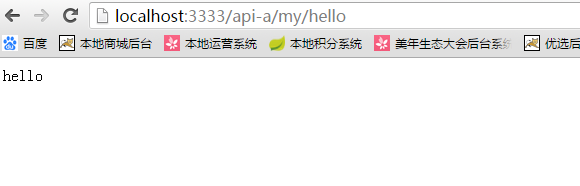
#表示只要访问以/api-a/开头的多层目录都可以路由到 id为compute-service1的服务上
zuul.routes.compute-service1=/api-a/**#表示只要访问以/api-a/开头的多层目录都可以路由到 id为compute-service1的服务上
zuul.routes.compute-service1=/api-a/**
上面的一行等同于下面的两行
zuul.routes.api-a.path=/api-a/**
zuul.routes.api-a.serviceId=compute-service1
| 通配符 | 含义 | 举例 | 解释 |
|---|---|---|---|
| ? | 匹配任意单个字符 | /feign-consumer/? | 匹配/feign-consumer/a,/feign-consumer/b,/feign-consumer/c等 |
| * | 匹配任意数量的字符 | /feign-consumer/* | 匹配/feign-consumer/aaa,feign-consumer/bbb,/feign-consumer/ccc等,无法匹配/feign-consumer/a/b/c |
| ** | 匹配任意数量的字符 | /feign-consumer/* | 匹配/feign-consumer/aaa,feign-consumer/bbb,/feign-consumer/ccc等,也可以匹配/feign-consumer/a/b/c |
3.4 启动项目 测试
3.5服务过滤
zuul不仅只是路由,并且还能过滤,做一些安全验证。继续改造工程;
@Component
public class MyFilter extends ZuulFilter{

    private static Logger log = LoggerFactory.getLogger(MyFilter.class);
    @Override
    public String filterType() {
        return "pre";
    }

    @Override
    public int filterOrder() {
        return 0;
    }

    @Override
    public boolean shouldFilter() {
        return true;
    }

    @Override
    public Object run() {
        RequestContext ctx = RequestContext.getCurrentContext();
        HttpServletRequest request = ctx.getRequest();
        log.info(String.format("%s >>> %s", request.getMethod(), request.getRequestURL().toString()));
        Object accessToken = request.getParameter("token");
        if(accessToken == null) {
            log.warn("token is empty");
            ctx.setSendZuulResponse(false);
            ctx.setResponseStatusCode(401);
            try {
                ctx.getResponse().getWriter().write("token is empty");
            }catch (Exception e){}

            return null;
        }
        log.info("ok");
        return null;
    }
}- filterType:返回一个字符串代表过滤器的类型,在zuul中定义了四种不同生命周期的过滤器类型,具体如下:
- pre:路由之前
- routing:路由之时
- post: 路由之后
- error:发送错误调用
- filterOrder:过滤的顺序
- shouldFilter:这里可以写逻辑判断,是否要过滤,本文true,永远过滤。
- run:过滤器的具体逻辑。可用很复杂,包括查sql,nosql去判断该请求到底有没有权限访问。
总结
项目源码地址: springcloud项目源码

华为开发者空间,是为全球开发者打造的专属开发空间,汇聚了华为优质开发资源及工具,致力于让每一位开发者拥有一台云主机,基于华为根生态开发、创新。
更多推荐


 11
11 0
0- 0


 已为社区贡献1条内容

所有评论(0)