java实现grpc
背景rpc就是Remote Procedure Call的简称,翻译成中文就是远程过程调用。在很多的大型系统中,比如java体系的项目中,如果需要调用数据分析能力或者调用底层的dll代码包,就显得有点捉襟见肘的,此时如果有一个提供rpc服务的中间件就可以很好的解决这个问题,让java体系可以拥有这种能力,只需要简单通信就可以了。在项目中,我通过google的protobuf的序列化手段,基于htt
背景
rpc就是Remote Procedure Call的简称,翻译成中文就是远程过程调用。在很多的大型系统中,比如java体系的项目中,如果需要调用数据分析能力或者调用底层的dll代码包,就显得有点捉襟见肘的,此时如果有一个提供rpc服务的中间件就可以很好的解决这个问题,让java体系可以拥有这种能力,只需要简单通信就可以了。在项目中,我通过google的protobuf的序列化手段,基于http协议实现了grpc,让java体系可以调用python中间件提供的能力。
参考资料
https://www.zhihu.com/question/41609070/answer/1030913797 既然有 HTTP 请求,为什么还要用 RPC 调用? - 易哥的回答 - 知乎
https://zhuanlan.zhihu.com/p/36427583 如何给老婆解释什么是RPC - 柳树的文章 - 知乎
https://www.grpc.io/ grpc官网
https://developers.google.com/protocol-buffers protobuf官网
应用案例
gRPC 是一种现代开源高性能远程过程调用 (RPC) 框架,可以在任何环境中运行。它可以通过对负载平衡、跟踪、健康检查和身份验证的可插拔支持,有效地连接数据中心内和数据中心之间的服务。它还适用于分布式计算的最后一英里,将设备、移动应用程序和浏览器连接到后端服务。特性如下:
1.简单的服务定义
使用 Protocol Buffers 定义您的服务,这是一种强大的二进制序列化工具集和语言。
2.快速启动并扩展
使用一行代码安装运行时和开发环境,并使用框架扩展到每秒数百万次 RPC。
3.跨语言和平台工作
以各种语言和平台为您的服务自动生成惯用的客户端和服务器存根。
4.双向流和集成身份验证
双向流和完全集成的可插拔身份验证与基于 HTTP/2 的传输。
grpc与protobuf是相辅相成的,想要使用grpc,必须先学会使用protobuf,grpc跨语言和平台工作的能力是protobuf赋予的。但是利用传统的protobuf的生成器,反而不能生成grpc的代码,java语言有专门的grpc的代码生成的maven插件。接下来的内容,是假设你会protobuf的,如果不会的话,去参考资料里面学一下protobuf。
1.定义proto文件
在proto文件中定义了有哪些对外接口,以及这个方法的入参和回参。这里贴上我项目中到的例子,使用python调用yolo模型,实现目标检测。定义了三个方法,以及方法中使用到的参数,包括入参和回参。
 syntax = "proto3";


option java_multiple_files = false; //不要拆分成多个文件
option java_package = "com.rpc.yolo";
option java_outer_classname = "YoloProto";


// yolo模型对外提供的接口
service YoloFun {
  // 初始化
  rpc init (InitRequest) returns (InitReply) {}
  // 检测
  rpc detection (DetectionRequest) returns (DetectionReply) {}
  // 模拟方法
  rpc free (FreeRequest) returns (FreeReply) {}
}

// 初始化方法发送对象
message InitRequest {
  string id = 1;
  string cfg = 2;
  string data = 3;
  string weights= 4;
}
// 初始化方法反馈对象
message InitReply {
  string result = 1;
}

// 检测方法发送对象
message DetectionRequest {
  string id = 1; //模型编号
  string path = 2; //原图的文件路径 /usr/img/1.jpg
  string detect_file_path = 3; //识别后的文件路径 /usr/local/1.jpg
}
//怕掉精度,直接存string
message Box{
  string x = 1;
  string y = 2;
  string w = 3;
  string h = 4;
  string obj = 5;
  string prob = 6;
}
// 检测方法反馈对象
message DetectionReply {
  string msg = 1;
  repeated Box boxes = 2;
}

// 释放方法发送对象
message FreeRequest {
  string id = 1;
}
// 释放方法反馈对象
message FreeReply {
  string result = 1;
}
2.利用maven插件生成基础代码
定义好了proto文件之后,需要生成proto文件对应的java代码,方便上层应用调用。生成代码的过程,需要使用maven的插件,如下:
    <properties>
        <maven.compiler.source>8</maven.compiler.source>
        <maven.compiler.target>8</maven.compiler.target>
    </properties>
    <dependencies>
        <dependency>
            <groupId>io.grpc</groupId>
            <artifactId>grpc-netty-shaded</artifactId>
            <version>1.39.0</version>
        </dependency>
        <dependency>
            <groupId>io.grpc</groupId>
            <artifactId>grpc-protobuf</artifactId>
            <version>1.39.0</version>
        </dependency>
        <dependency>
            <groupId>io.grpc</groupId>
            <artifactId>grpc-stub</artifactId>
            <version>1.39.0</version>
        </dependency>
        <dependency> <!-- necessary for Java 9+ -->
            <groupId>org.apache.tomcat</groupId>
            <artifactId>annotations-api</artifactId>
            <version>6.0.53</version>
            <scope>provided</scope>
        </dependency>
    </dependencies>

    <build>
        <extensions>
            <extension>
                <groupId>kr.motd.maven</groupId>
                <artifactId>os-maven-plugin</artifactId>
                <version>1.6.2</version>
            </extension>
        </extensions>
        <plugins>
            <plugin>
                <groupId>org.xolstice.maven.plugins</groupId>
                <artifactId>protobuf-maven-plugin</artifactId>
                <version>0.6.1</version>
                <configuration>
                    <protocArtifact>com.google.protobuf:protoc:3.17.2:exe:${os.detected.classifier}</protocArtifact>
                    <pluginId>grpc-java</pluginId>
                    <pluginArtifact>io.grpc:protoc-gen-grpc-java:1.39.0:exe:${os.detected.classifier}</pluginArtifact>
<!--                    <protoSourceRoot>src/main/resources</protoSourceRoot>-->
                    <protoSourceRoot>你的文件路径</protoSourceRoot>
                </configuration>
                <executions>
                    <execution>
                        <goals>
                            <goal>compile</goal>
                            <goal>compile-custom</goal>
                        </goals>
                    </execution>
                </executions>
            </plugin>
        </plugins>
    </build>
配置好了之后,只需要点击项目的compile生命进程,就会自动在target中出现生成好的代码文件。
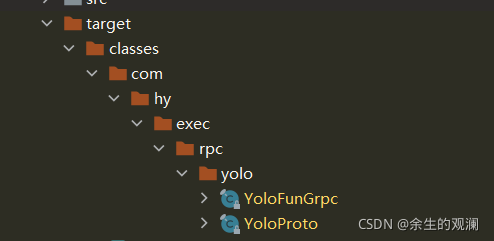
YoloProto:该文件声明了入参与回参的相关信息,不需要改动。
YoloFunGrpc:该文件声明了接口的信息,也不需要改动。
3.java代码调用封装
java代码主要是一套固定的代码套路,将生成的两个文件用起来,代码如下:
@Slf4j
public class YoloFunClient {

	private final YoloFunGrpc.YoloFunBlockingStub blockingStub;
	private final  YoloFunGrpc.YoloFunStub asyncStub;


	public YoloFunClient(String host, int port) {
		this(ManagedChannelBuilder.forAddress(host, port).usePlaintext());
	}


	public YoloFunClient(ManagedChannelBuilder<?> channelBuilder) {
		ManagedChannel channel = channelBuilder.build();
		blockingStub = YoloFunGrpc.newBlockingStub(channel);
		asyncStub = YoloFunGrpc.newStub(channel);
	}

	/**
	 * 初始化模型
	 * @param id
	 * @param cfg
	 * @param data
	 * @param weights
	 * @return
	 */
	public YoloProto.InitReply init(String id, String cfg,String data,String weights){
		//构建对象
		YoloProto.InitRequest.Builder builder = YoloProto.InitRequest.newBuilder();
		builder.setId(id);
		builder.setCfg(cfg);
		builder.setData(data);
		builder.setWeights(weights);
		YoloProto.InitRequest request = builder.build();
		//发送请求
		return blockingStub.init(request);
	}

	/**
	 * 识别图像
	 * @param id
	 * @param path
	 * @return
	 */
	public YoloProto.DetectionReply detection(String id, String path , String detectImgPath){
		//构建对象
		YoloProto.DetectionRequest.Builder builder = YoloProto.DetectionRequest.newBuilder();
		builder.setId(id);
		builder.setPath(path);
		builder.setDetectFilePath(detectImgPath);
		YoloProto.DetectionRequest request = builder.build();
		//发送请求
		return blockingStub.detection(request);
	}

	/**
	 * 释放模型
	 * @param id
	 * @return
	 */
	public YoloProto.FreeReply free(String id){
		//构建对象
		YoloProto.FreeRequest.Builder builder = YoloProto.FreeRequest.newBuilder();
		builder.setId(id);
		YoloProto.FreeRequest request = builder.build();
		//发送请求
		return blockingStub.free(request);
	}
用的过程中记住,入参和回参在yoloproto文件中,触发接口相关的在grpc文件中。
4.正式使用套路
可以在spring的config对象中,return一个这样的bean,然后各处就可以注入使用了。
    @Bean
    public YoloFunClient getYoloFunClient(){
        log.debug("YoloFunClient初始化");
        return new YoloFunClient(rpc_address,rpc_port);
    }
注意事项
1.一个版本的proto文件对应一个版本的java代码,不存在兼容这个概念,必须严格对应。
2.兼容的程度,精细到大小写,大小写对不上都没办法进行连接。

为开发者提供学习成长、分享交流、生态实践、资源工具等服务,帮助开发者快速成长。
更多推荐


 3
3 0
0- 0


 已为社区贡献3条内容

所有评论(0)