Java读取某个目录下所有文件并全部存入Mongo中的GFS;SpringBoot接口实现
以SpringBoot项目为例第一步:引入依赖<!-- https://mvnrepository.com/artifact/org.mongodb/mongo-java-driver --><dependency><groupId>org.mongodb</groupId><artifactId>mongo-java-driver<
·
以SpringBoot项目为例
第一步:引入依赖
<!-- https://mvnrepository.com/artifact/org.mongodb/mongo-java-driver -->
        <dependency>
            <groupId>org.mongodb</groupId>
            <artifactId>mongo-java-driver</artifactId>
            <version>3.6.1</version>
        </dependency>
第二步:添加config
import com.mongodb.MongoClient;
import com.mongodb.MongoCredential;
import com.mongodb.ServerAddress;
import com.mongodb.client.MongoCollection;
import com.mongodb.client.MongoDatabase;
import com.mongodb.client.gridfs.GridFSBucket;
import com.mongodb.client.gridfs.GridFSBuckets;
import org.springframework.beans.factory.annotation.Value;
import org.springframework.context.annotation.Bean;
import org.springframework.context.annotation.Configuration;

import java.util.Arrays;

@Configuration
class MongoConfig {

    @Value("${spring.data.mongodb.ip}")
    private String ip;

    @Value("${spring.data.mongodb.port}")
    private Integer port;

    @Value("${spring.data.mongodb.username}")
    private String username;

    @Value("${spring.data.mongodb.password}")
    private String password;

    @Value("${spring.data.mongodb.database}")
    private String database;

    @Bean
    public MongoClient getMongoClient(){
        MongoCredential credential = MongoCredential.createCredential(username, "admin", password.toCharArray());
//        MongoClient mongoClient = new MongoClient(new ServerAddress(ip, port));  //没有密码用这个
        MongoClient mongoClient = new MongoClient(new ServerAddress(ip, port), Arrays.asList(credential));
        return  mongoClient;
    }

    @Bean
    public MongoDatabase getMongoDatabase(){
        return getMongoClient().getDatabase(database);
    }

    @Bean
    public GridFSBucket getGridFSBucket(){
        return GridFSBuckets.create(getMongoDatabase(), database);
    }

    @Bean
    public MongoCollection<Object> getMongoCollection(){
       return getMongoDatabase().getCollection("Data", Object.class);
    }
}
第三步:添加配置文件
spring:
  data:
    mongodb:
      ip: 127.0.0.1
      port: 27017
      username: root
      password: root
      database: FileData //可自己定义
第四步:注入gridFSBucket,编写接口
@Resource
private GridFSBucket gridFSBucket;
@PostMapping("pullFile")
public void pullFile() throws IOException {
Map<String, String> metaData = new HashMap<>();
metaData.put("tags", "Data"); //Data可自己定义
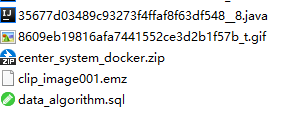
File file = new File("D:\\File\\2021-06");//文件夹路径,可写Linux,此处以Windows为例
File[] tempList = file.listFiles();
InputStream in = null;
for (File temp : tempList) {
String fileName = temp.getName();
GridFSUploadOptions options = new GridFSUploadOptions()
.chunkSizeBytes(1024*1024*1024)
.metadata(new Document("type", "0"));//设置存入后type的值,可以自己定义
InputStream ins = new FileInputStream(temp);
gridFSBucket.uploadFromStream(fileName, ins, options);
in = new FileInputStream(temp);
}
tempList.clone();
in.close();
}
第五步:访问接口测试
报错
Payload document size of is larger than maximum of 16777216.
从字面意思理解,就是我们值设置太大了,
.chunkSizeBytes(1024*1024*1024)改为.chunkSizeBytes(1024*1024)
重新运行,如果有些文件内容过大,就耐心等待一会,打开mongo连接的工具看结果
测试成功!

为开发者提供学习成长、分享交流、生态实践、资源工具等服务,帮助开发者快速成长。
更多推荐


 0
0 0
0- 0


 已为社区贡献14条内容

所有评论(0)