Elasticsearch: 使用 Debian 安装包来安装 Elasticsearch 8.x
详细描述如何在 Debian/Ubuntu 操作系统上安装 Elasticsearch。
在我之前的文章 “Elastic Stack 8.0 安装 - 保护你的 Elastic Stack 现在比以往任何时候都简单” 我详细地描述了如何在 macOS 安装 Elastic Stack。当时的目的也是为了显示这个按照和之前的 Elastic Stack 7.x 有什么不同的地方。当然最重要的是它的默认安全配置和之前的版本是完全不同。我也在 B 站上传了一个视频。之后,又收到一些反馈,说在那个视频里的安装是在前台运行的。如果 Elasticsearch 是在后台,也即是以服务的方式 ,那么我们该如何得到那些密码及 token 呢?
在今天的文章中,我将详述如何使用 Debian 安装包的形式来进行安装 Elastic Stack 8.1。
如何使用 Debian 安装包安装 Elastic Stack 8.x
如何使用 Debian 安装包安装 Elastic Stack 8.x_哔哩哔哩_bilibili
在哪里下载安装包
可以从我们的网站或我们的 APT 存储库下载 Elasticsearch 的 Debian 软件包。 它可用于在任何基于 Debian 的系统上安装 Elasticsearch,例如 Debian 和 Ubuntu。
该软件包包含免费和订阅功能。 开始 30 天试用以试用所有功能。
可以在下载 Elasticsearch 页面上找到 Elasticsearch 的最新稳定版本。 其他版本可以在过去的版本页面上找到。
注意:Elasticsearch 包含来自 JDK 维护者 (GPLv2+CE) 的 OpenJDK 捆绑版本。 要使用你自己的 Java 版本,请参阅 JVM 版本要求
导入 Elasticsearch PGP key
我们使用带有指纹的 Elasticsearch 签名密钥(PGP 密钥 D88E42B4,可从 https://pgp.mit.edu 获得)对我们所有的包进行签名:
4609 5ACC 8548 582C 1A26 99A9 D27D 666C D88E 42B4下载并安装公共签名密钥:
wget -qO - https://artifacts.elastic.co/GPG-KEY-elasticsearch | sudo gpg --dearmor -o /usr/share/keyrings/elasticsearch-keyring.gpg从 APT 存储库安装
在继续之前,你可能需要在 Debian 上安装 apt-transport-https 软件包:
sudo apt-get install apt-transport-https将存储库定义保存到 /etc/apt/sources.list.d/elastic-8.x.list:
echo "deb [signed-by=/usr/share/keyrings/elasticsearch-keyring.gpg] https://artifacts.elastic.co/packages/8.x/apt stable main" | sudo tee /etc/apt/sources.list.d/elastic-8.x.list注意:这些指令不使用 add-apt-repository 有几个原因:
- add-apt-repository 将条目添加到系统 /etc/apt/sources.list 文件,而不是在 /etc/apt/sources.list.d 中干干净净地为每个存储库文件添加
- add-apt-repository 不是许多发行版上默认安装的一部分,并且需要许多非默认依赖项。
旧版本的 add-apt-repository 总是添加一个 deb-src 条目,这会导致错误,因为我们不提供源包。 如果你添加了 deb-src 条目,你将看到类似以下的错误,直到你删除 deb-src 行:
Unable to find expected entry 'main/source/Sources' in Release file
(Wrong sources.list entry or malformed file)
你可以使用以下命令安装 Elasticsearch Debian 软件包:
sudo apt-get update && sudo apt-get install elasticsearch警告:如果同一个 Elasticsearch 存储库存在两个条目,你将在 apt-get update 期间看到如下错误:
Duplicate sources.list entry https://artifacts.elastic.co/packages/8.x/apt/ ...`检查 /etc/apt/sources.list.d/elasticsearch-8.x.list 中的重复条目或在 /etc/apt/sources.list.d/ 和 /etc/apt/ 中的文件中找到重复条目 source.list 文件。
注意:在基于 systemd 的发行版上,安装脚本将尝试设置内核参数(例如 vm.max_map_count); 你可以通过屏蔽 systemd-sysctl.service 单元来跳过此步骤。
parallels@liuxg:~$ sudo apt-get update && sudo apt-get install elasticsearch
[sudo] password for parallels:
Hit:1 https://artifacts.elastic.co/packages/8.x/apt stable InRelease
Hit:2 http://ports.ubuntu.com/ubuntu-ports focal InRelease
Hit:3 http://ports.ubuntu.com/ubuntu-ports focal-updates InRelease
Hit:4 http://ports.ubuntu.com/ubuntu-ports focal-backports InRelease
Hit:5 http://ports.ubuntu.com/ubuntu-ports focal-security InRelease
Reading package lists... Done
Reading package lists... Done
Building dependency tree
Reading state information... Done
The following NEW packages will be installed:
  elasticsearch
0 upgraded, 1 newly installed, 0 to remove and 142 not upgraded.
Need to get 328 MB of archives.
After this operation, 560 MB of additional disk space will be used.
Get:1 https://artifacts.elastic.co/packages/8.x/apt stable/main arm64 elasticsearch arm64 8.1.0 [328 MB]
Fetched 328 MB in 30s (11.0 MB/s)
Selecting previously unselected package elasticsearch.
(Reading database ... 141426 files and directories currently installed.)
Preparing to unpack .../elasticsearch_8.1.0_arm64.deb ...
Creating elasticsearch group... OK
Creating elasticsearch user... OK
Unpacking elasticsearch (8.1.0) ...
Setting up elasticsearch (8.1.0) ...
--------------------------- Security autoconfiguration information ------------------------------

Authentication and authorization are enabled.
TLS for the transport and HTTP layers is enabled and configured.

The generated password for the elastic built-in superuser is : kHbQ9_rzSo31vBpCpWdX

If this node should join an existing cluster, you can reconfigure this with
'/usr/share/elasticsearch/bin/elasticsearch-reconfigure-node --enrollment-token <token-here>'
after creating an enrollment token on your existing cluster.

You can complete the following actions at any time:

Reset the password of the elastic built-in superuser with
'/usr/share/elasticsearch/bin/elasticsearch-reset-password -u elastic'.

Generate an enrollment token for Kibana instances with
 '/usr/share/elasticsearch/bin/elasticsearch-create-enrollment-token -s kibana'.

Generate an enrollment token for Elasticsearch nodes with
'/usr/share/elasticsearch/bin/elasticsearch-create-enrollment-token -s node'.

-------------------------------------------------------------------------------------------------
### NOT starting on installation, please execute the following statements to configure elasticsearch service to start automatically using systemd
 sudo systemctl daemon-reload
 sudo systemctl enable elasticsearch.service
### You can start elasticsearch service by executing
 sudo systemctl start elasticsearch.service
如上所示,它清楚地显示了超级用户 elastic 的密码:kHbQ9_rzSo31vBpCpWdX。
首先,我们查看 elasticsearch 服务是否已经成功地运行起来了:
parallels@liuxg:~$ service elasticsearch status
● elasticsearch.service - Elasticsearch
     Loaded: loaded (/lib/systemd/system/elasticsearch.service; disabled; vendor preset: enabled)
     Active: inactive (dead)
       Docs: https://www.elastic.co
如上所示,elasticsearch 服务还没有被运行起来。我们一种方式是执行如上所示的命令:
### NOT starting on installation, please execute the following statements to configure elasticsearch service to start automatically using systemd
 sudo systemctl daemon-reload
 sudo systemctl enable elasticsearch.service
### You can start elasticsearch service by executing
 sudo systemctl start elasticsearch.service
这样当我们的 Debian/Ubuntu 机器启动后,elasticsearch 服务会被自动启动。我们不再需要手动来启动这个服务了。
另外一种方式是我们手动来启动 elasticsearch 服务:
sudo service elasticsearch start当我们以这种方式启动后,那么每次 Debian/Ubuntu 机器启动后,我们需要再次使用同样的命令来启动 elasticsearch 服务。我们可以使用如下的命令来查看端口地址 9200 是否已经被侦听:
ss -lntp或者使用 watch 来监听:
watch -n l ss -lntp我们使用如下的命令来查看 elasticsearch 服务的状态:
parallels@liuxg:~$ service elasticsearch status
● elasticsearch.service - Elasticsearch
     Loaded: loaded (/lib/systemd/system/elasticsearch.service; disabled; vendor preset: enabled)
     Active: active (running) since Wed 2022-03-16 16:21:48 CST; 1min 20s ago
       Docs: https://www.elastic.co
   Main PID: 6551 (java)
      Tasks: 59 (limit: 4576)
     Memory: 2.3G
     CGroup: /system.slice/elasticsearch.service
             ├─6551 /usr/share/elasticsearch/jdk/bin/java -Xshare:auto -Des.networkaddress.cache.ttl=60 -Des.networkadd>
             └─6830 /usr/share/elasticsearch/modules/x-pack-ml/platform/linux-aarch64/bin/controller

Mar 16 16:21:40 liuxg systemd[1]: Starting Elasticsearch...
Mar 16 16:21:48 liuxg systemd[1]: Started Elasticsearch.
显然我们的 elasticsearch 服务已经成功地运行起来了。
我们可以使用如下的命令来检查 Elasticsearch 是否成功地运行起来了:
curl --insecure --user elastic:kHbQ9_rzSo31vBpCpWdX https://localhost:9200parallels@liuxg:~$ curl --insecure --user elastic:kHbQ9_rzSo31vBpCpWdX https://localhost:9200
{
"name" : "liuxg",
"cluster_name" : "elasticsearch",
"cluster_uuid" : "0GaowezJRY2f2RGpgYBIOQ",
"version" : {
"number" : "8.1.0",
"build_flavor" : "default",
"build_type" : "deb",
"build_hash" : "3700f7679f7d95e36da0b43762189bab189bc53a",
"build_date" : "2022-03-03T14:20:00.690422633Z",
"build_snapshot" : false,
"lucene_version" : "9.0.0",
"minimum_wire_compatibility_version" : "7.17.0",
"minimum_index_compatibility_version" : "7.0.0"
},
"tagline" : "You Know, for Search"
}请注意上面的 --insecure 选项。这是因为我们使用的是自签名的证书,所以我们可以通过这种方式来进行访问。请注意上面的 kHbQ9_rzSo31vBpCpWdX 是超级用户 elastic 的密码。
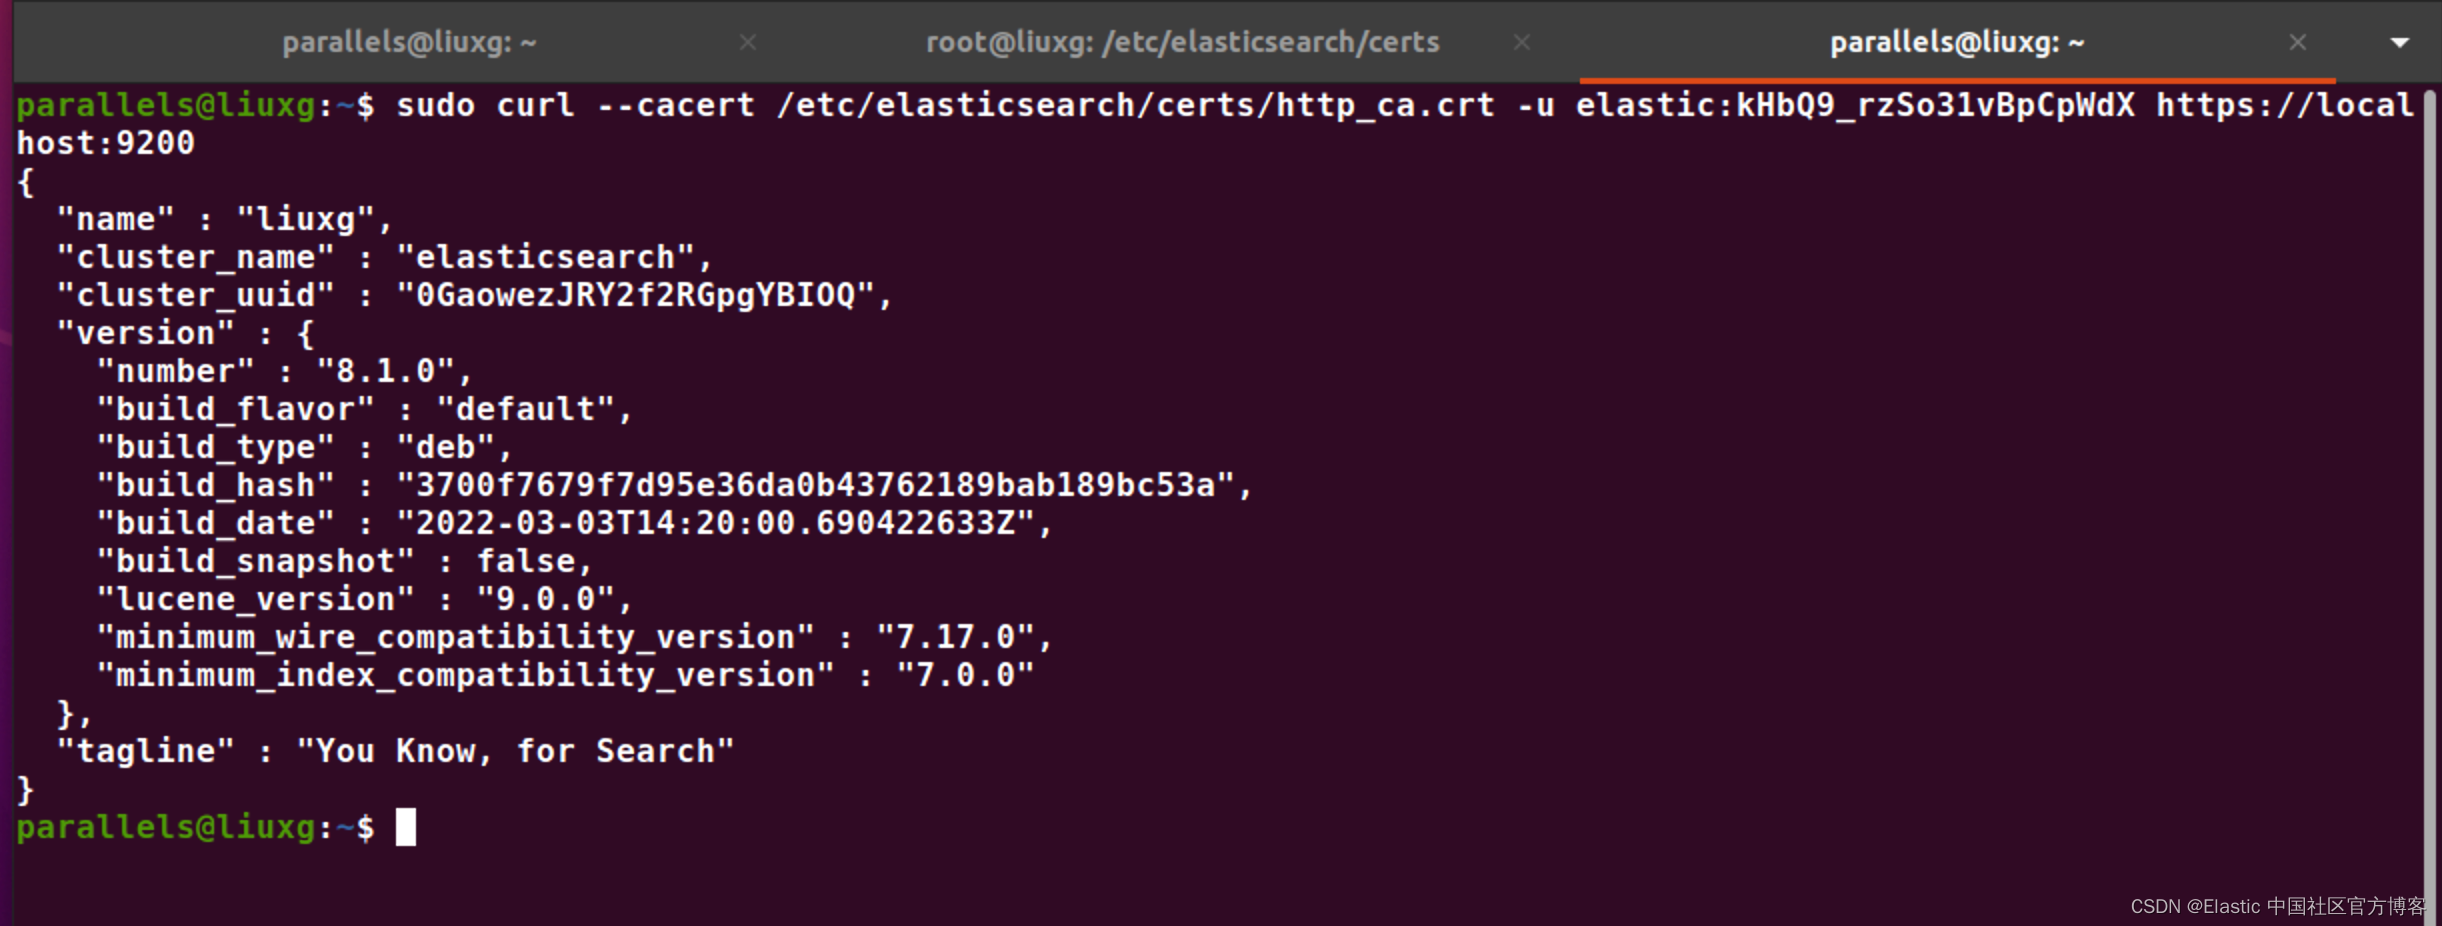
如果我们想要使用证书来进行访问,首先,我们需要切换到 root 用户,然后使用如下的命令:
root@liuxg:/etc/elasticsearch/certs# ls
http_ca.crt  http.p12  transport.p12
root@liuxg:/etc/elasticsearch/certs# curl --cacert http_ca.crt --user elastic:kHbQ9_rzSo31vBpCpWdX https://localhost:9200
{
  "name" : "liuxg",
  "cluster_name" : "elasticsearch",
  "cluster_uuid" : "0GaowezJRY2f2RGpgYBIOQ",
  "version" : {
    "number" : "8.1.0",
    "build_flavor" : "default",
    "build_type" : "deb",
    "build_hash" : "3700f7679f7d95e36da0b43762189bab189bc53a",
    "build_date" : "2022-03-03T14:20:00.690422633Z",
    "build_snapshot" : false,
    "lucene_version" : "9.0.0",
    "minimum_wire_compatibility_version" : "7.17.0",
    "minimum_index_compatibility_version" : "7.0.0"
  },
  "tagline" : "You Know, for Search"
}
在上面,我们可以看到在路径 /etc/elasticsearch/certs 它含有访问所需要的证书。我们或者在普通用户下使用如下的命令来进行访问:
当然我们也可以在浏览器中进行访问:
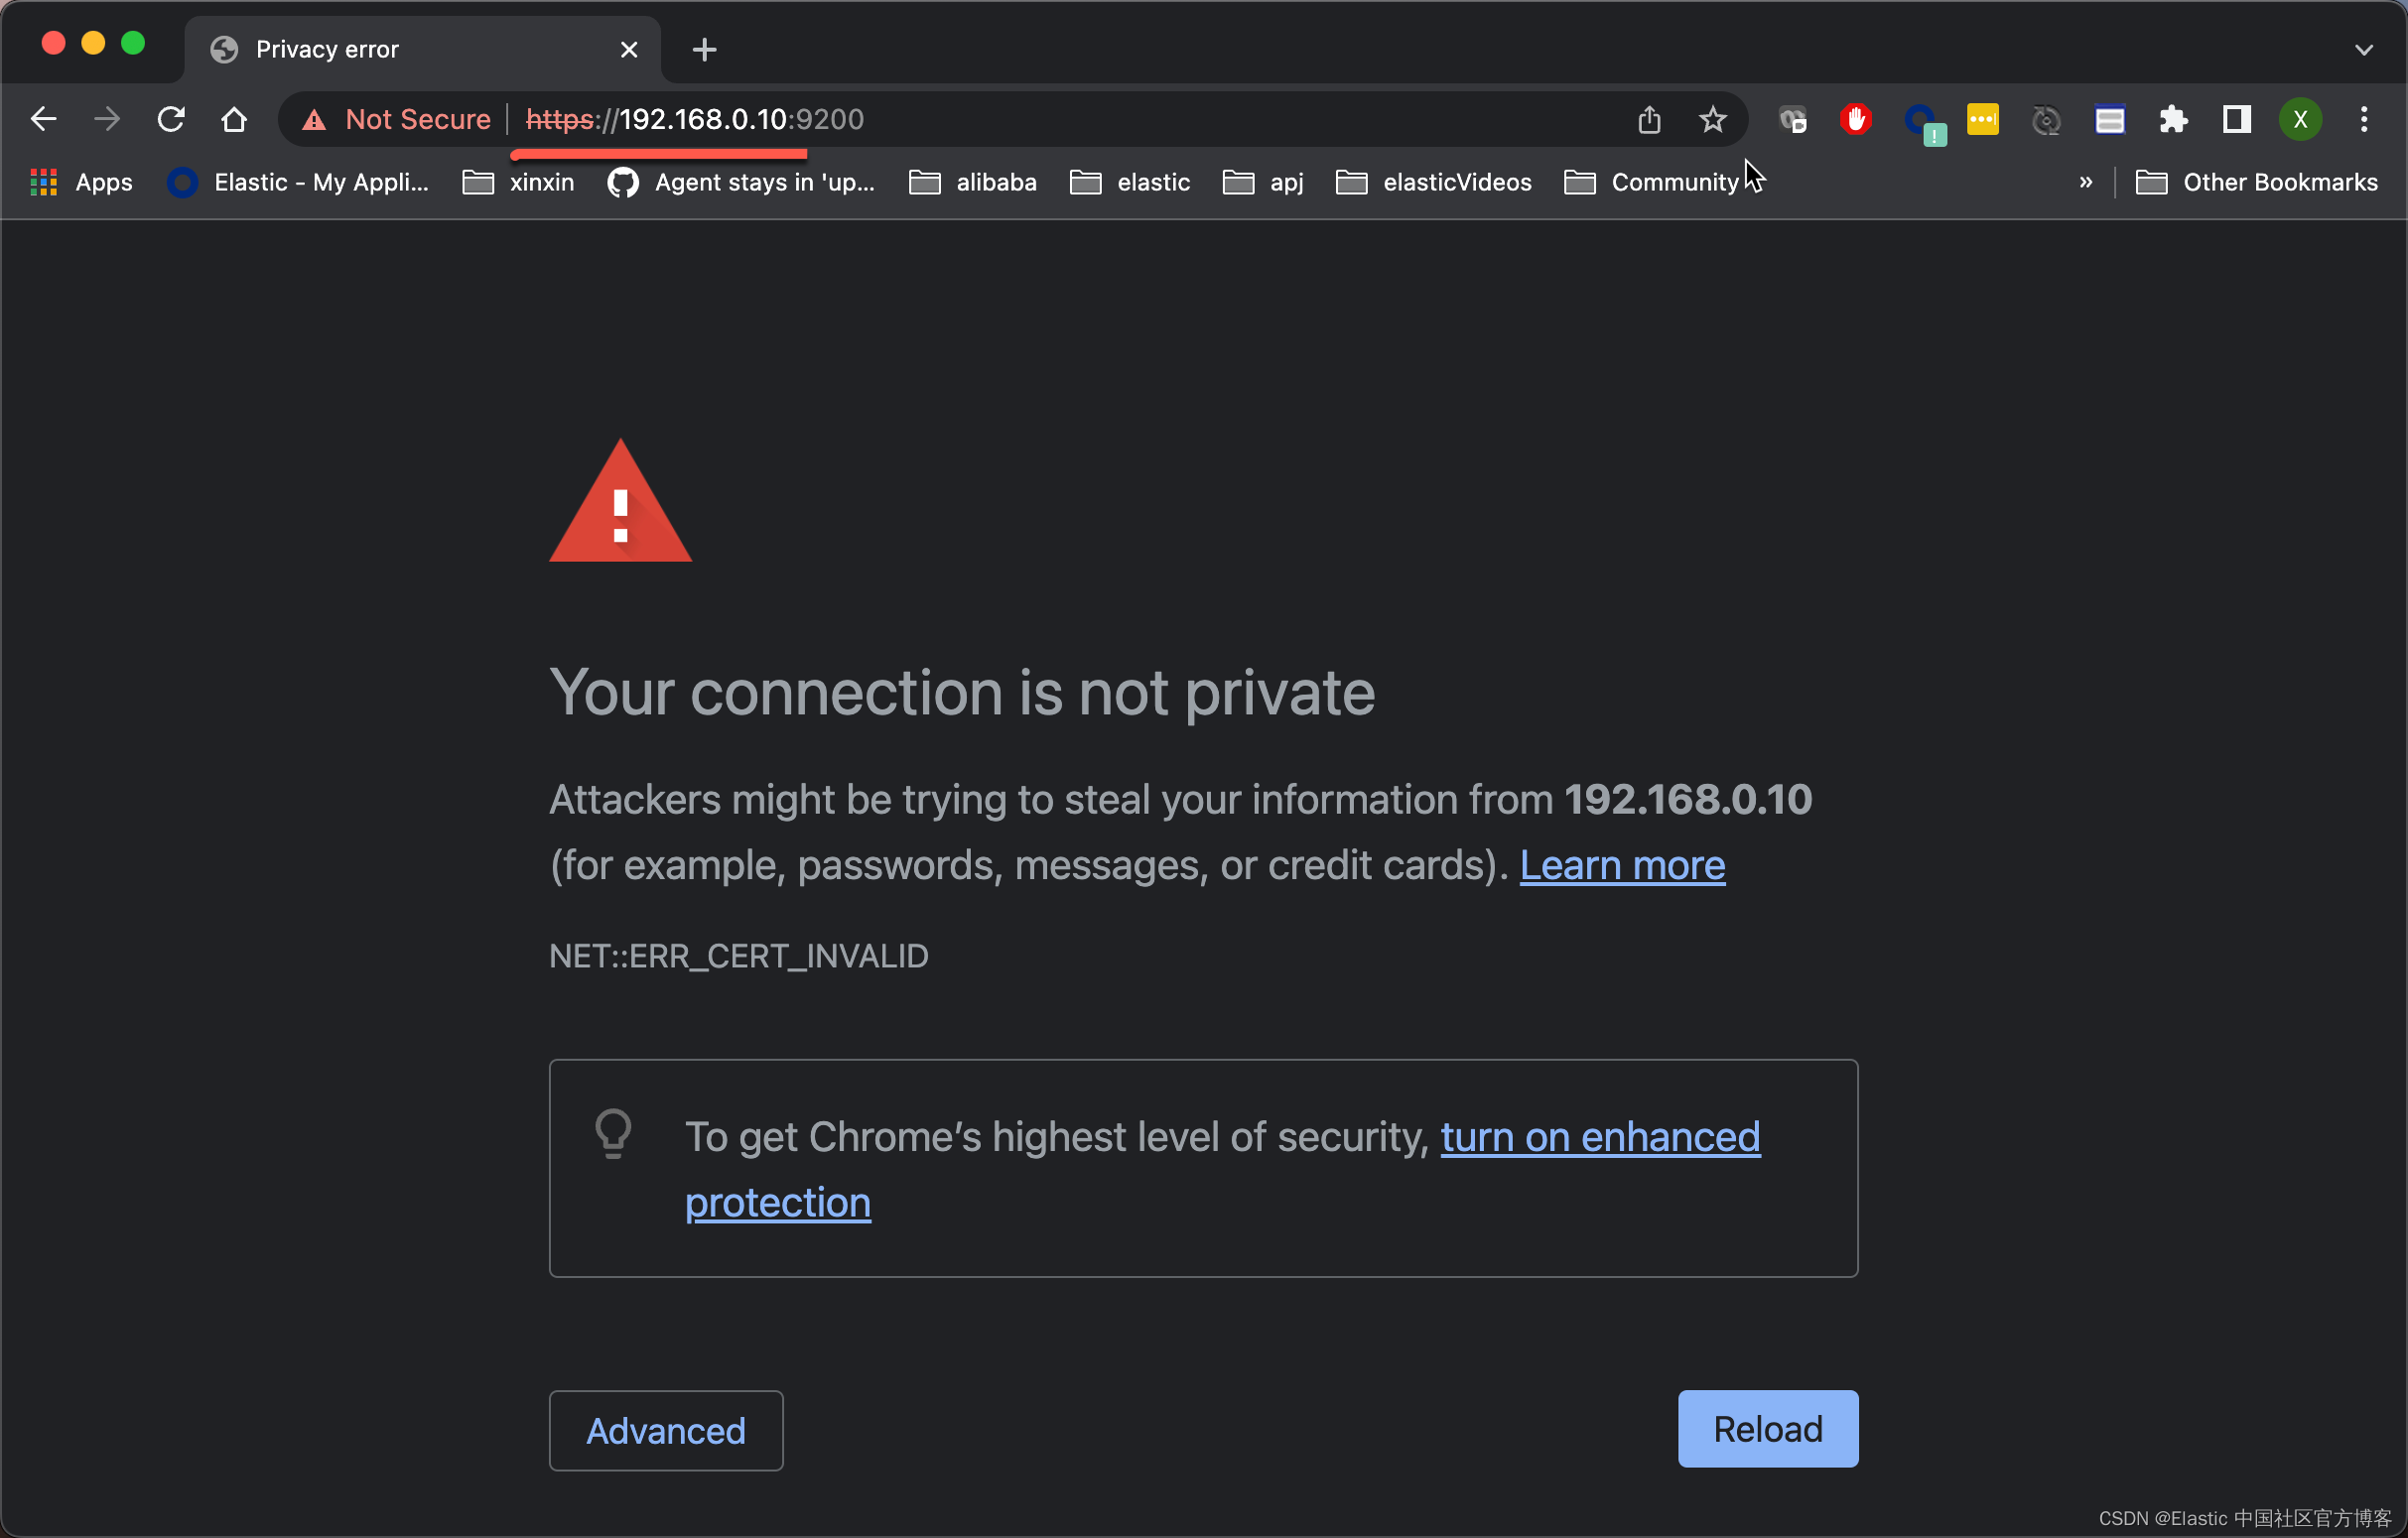
请注意上面的 192.168.0.9 是我们的 ubuntu 机器的私有 IP 地址。我们可以通过如下的方式来获得:
parallels@liuxg:~$ ifconfig | grep 192
        inet 192.168.0.10  netmask 255.255.255.0  broadcast 192.168.0.255
我们必须使用 https 的形式来进行访问。在上面的浏览器中,我们打入 thisisunsafe。我们就可以看到:
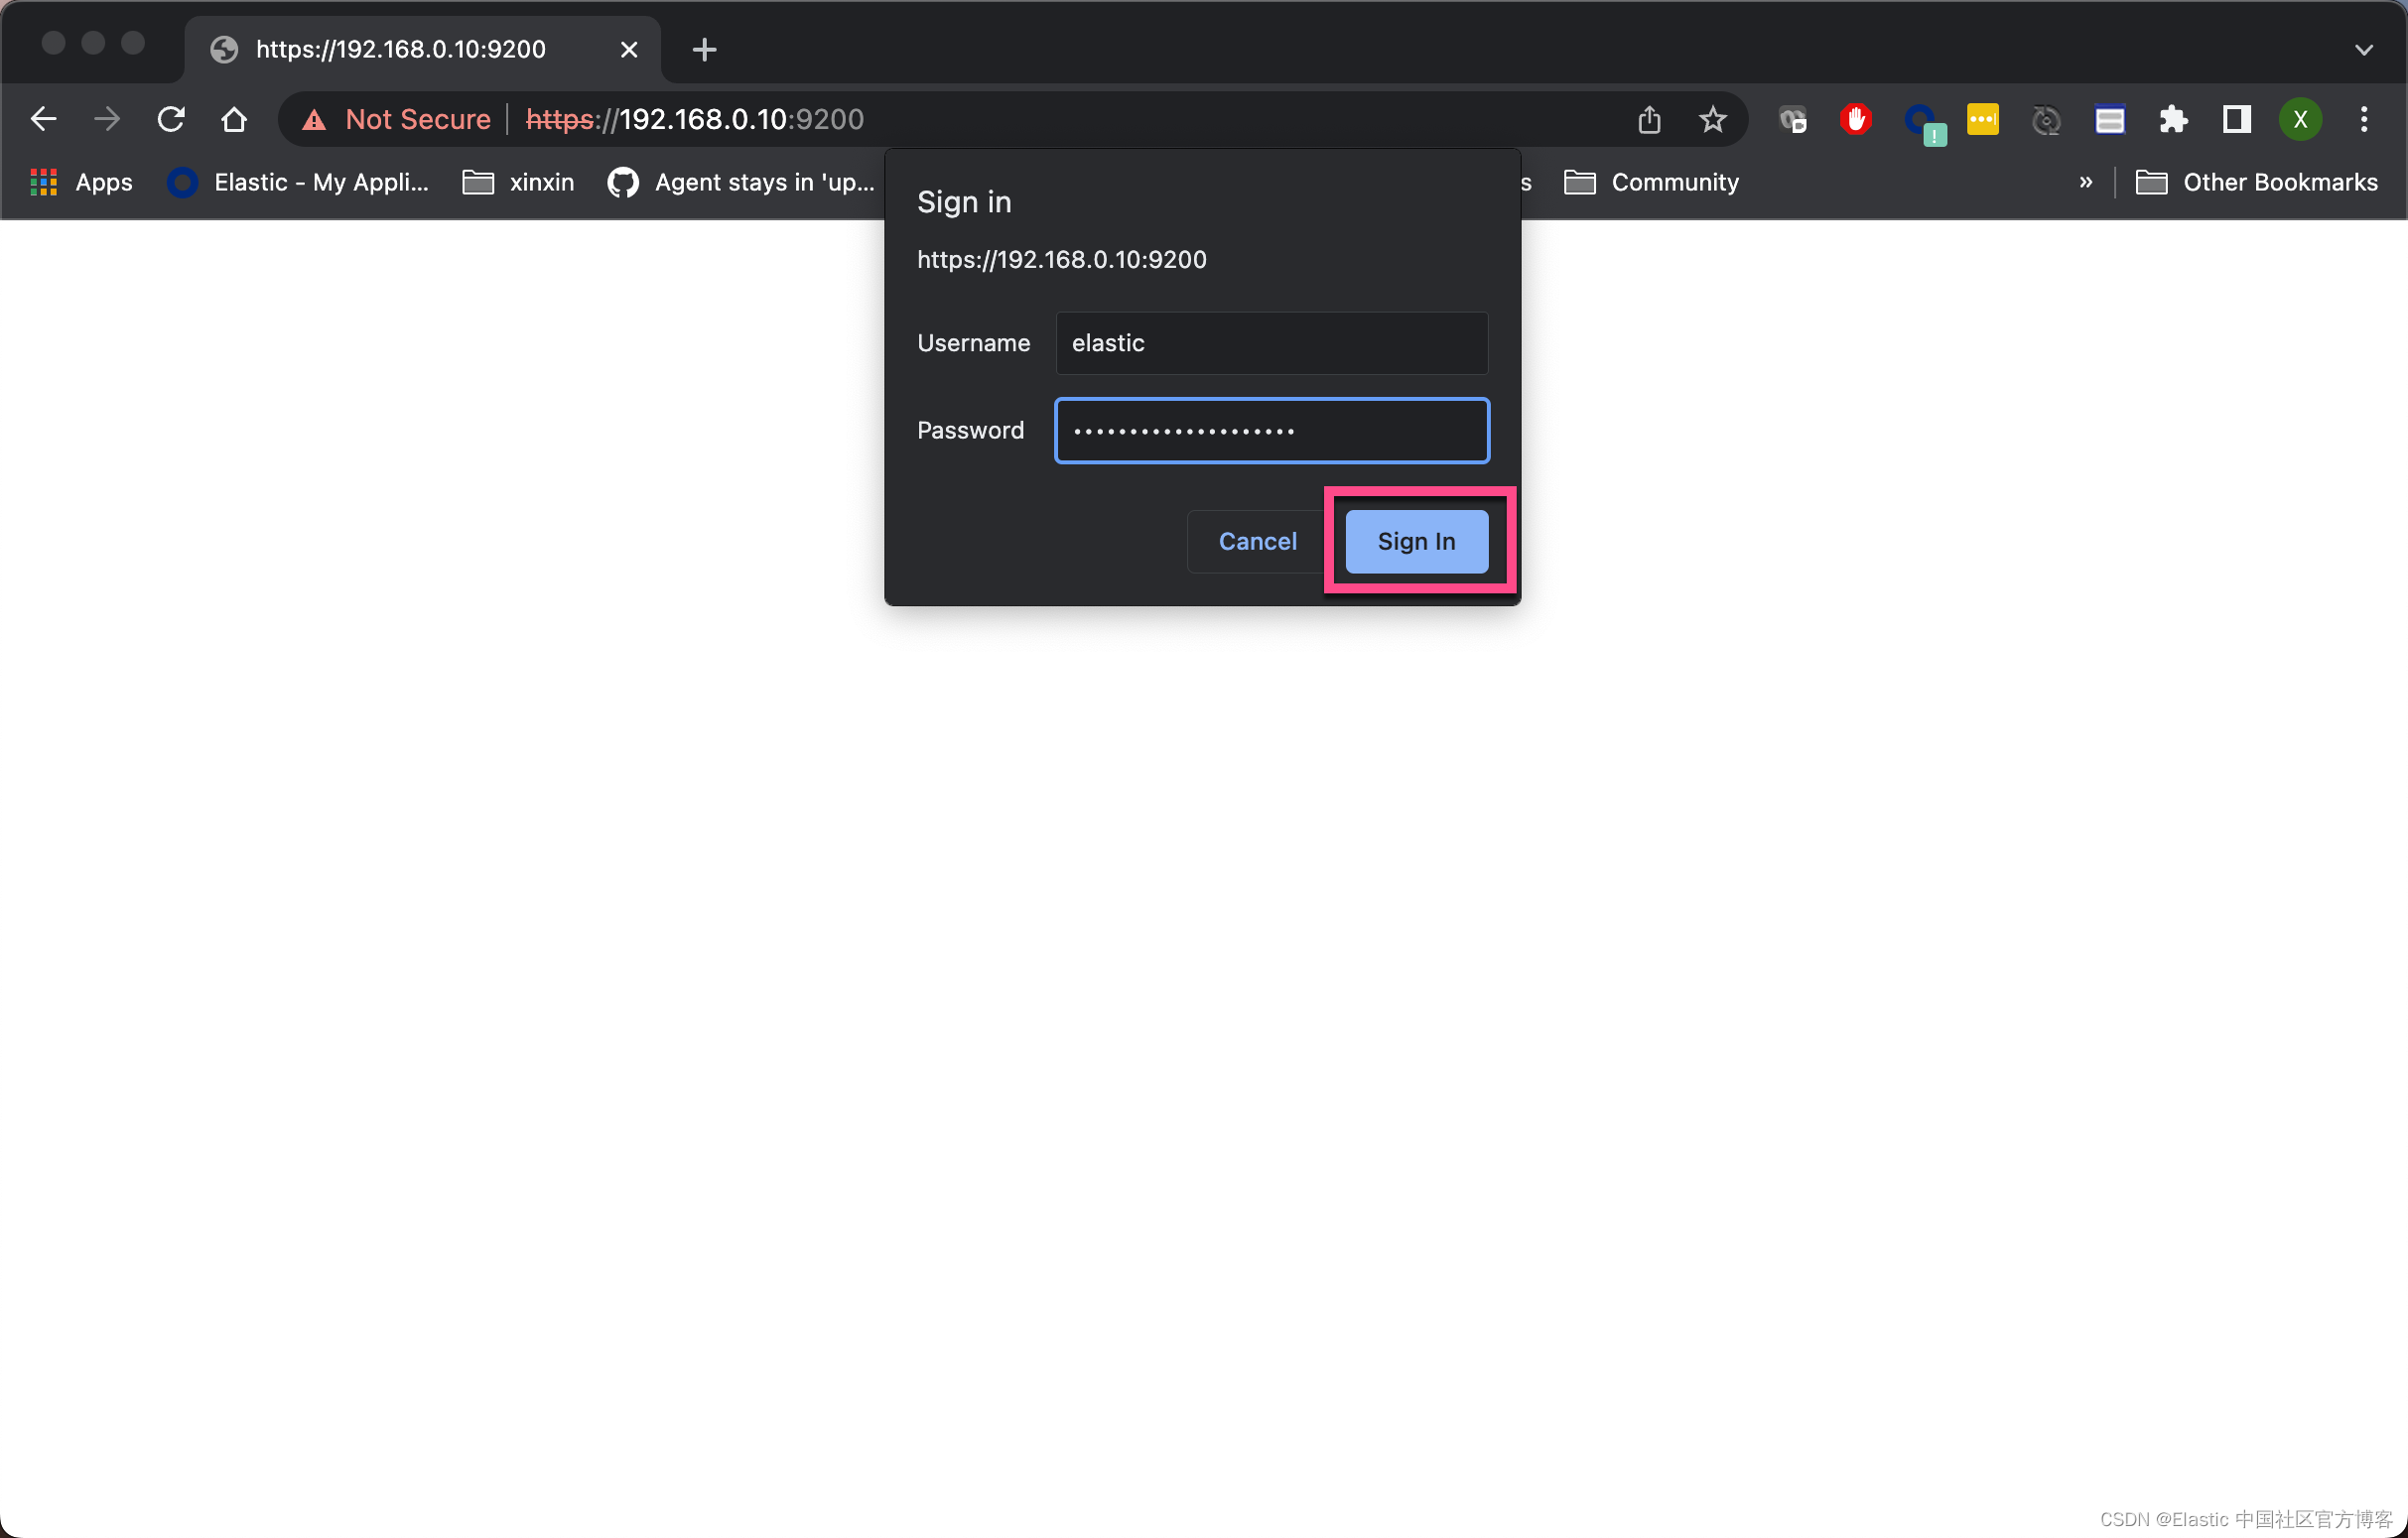
点击 Sign In:
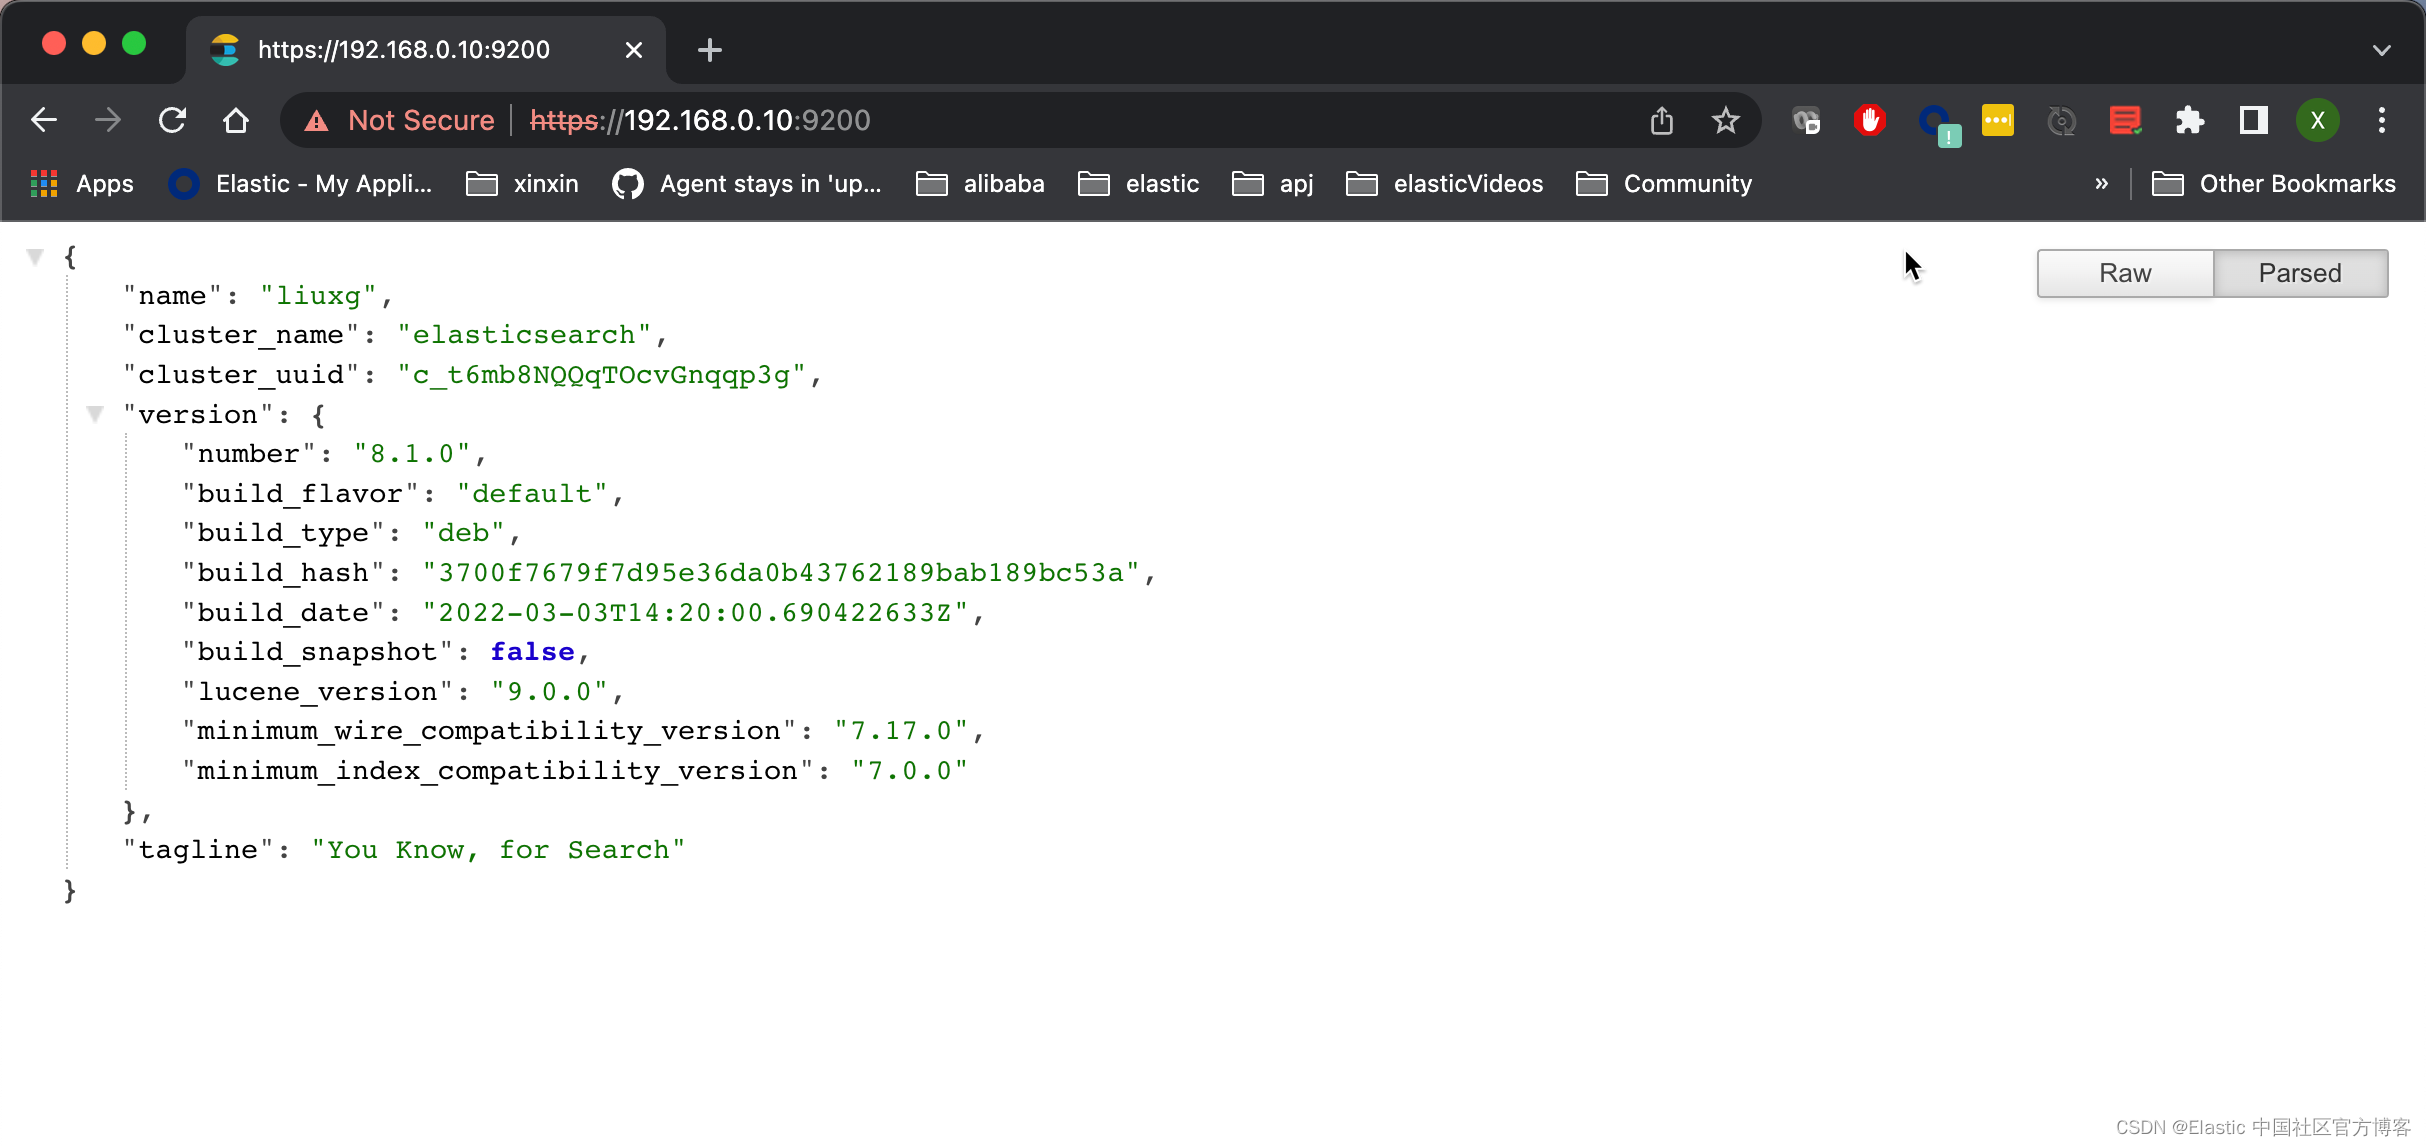
从上面,我们看出来访问是成功的。
下载 debian 安装包并手动安装
上面介绍的步骤是使用 API 仓库来进行安装的。接下来,我们可以直接从 Elastic 的官方网站下载安装包进行安装。Elasticsearch v8.1.0 的 Debian 包可以从网站下载并安装如下:
wget https://artifacts.elastic.co/downloads/elasticsearch/elasticsearch-8.1.0-amd64.deb
wget https://artifacts.elastic.co/downloads/elasticsearch/elasticsearch-8.1.0-amd64.deb.sha512
shasum -a 512 -c elasticsearch-8.1.0-amd64.deb.sha512
sudo dpkg -i elasticsearch-8.1.0-amd64.deb
比较下载的 Debian 包的 SHA 和发布的校验和,应该输出 elasticsearch-{version}-amd64.deb: OK。
使用 systemd 运行 Elasticsearch
要将 Elasticsearch 配置为在系统启动时自动启动,请运行以下命令:
sudo systemctl daemon-reload
sudo systemctl enable elasticsearch.service
我们可以通过如下的命令来检查 elasticsearch.service 是否已经启动:
systemctl is-enabled elasticsearch.service$ systemctl is-enabled elasticsearch.service
disabled如果我们不想在系统启动时启动这个服务,我们可以使用如下的命令:
sudo systemctl disable elasticsearch.serviceElasticsearch 可以按如下方式启动和停止:
sudo systemctl start elasticsearch.service
sudo systemctl stop elasticsearch.service
这些命令不提供关于 Elasticsearch 是否成功启动的反馈。 相反,此信息将写入位于 /var/log/elasticsearch/ 的日志文件中。
如果你对 Elasticsearch 密钥库进行了密码保护,则需要使用本地文件和 systemd 环境变量向 systemd 提供密钥库密码。 这个本地文件应该在它存在时受到保护,一旦 Elasticsearch 启动并运行,就可以安全地删除它。
echo "keystore_password" > /path/to/my_pwd_file.tmp
chmod 600 /path/to/my_pwd_file.tmp
sudo systemctl set-environment ES_KEYSTORE_PASSPHRASE_FILE=/path/to/my_pwd_file.tmp
sudo systemctl start elasticsearch.service
默认情况下,Elasticsearch 服务不会在 systemd 日志中记录信息。 要启用 journalctl 日志记录,必须从 elasticsearch.service 文件的 ExecStart 命令行中删除 --quiet 选项。
启用 systemd 日志记录后,可以使用 journalctl 命令获得日志记录信息:
为了查看最新的日志:
sudo journalctl -f要列出 elasticsearch 服务的日记条目:
sudo journalctl --unit elasticsearch要列出从给定时间开始的 elasticsearch 服务的日志条目:
sudo journalctl --unit elasticsearch --since "2016-10-30 18:17:16"删除 Elasticsearch
我们可以使用如下的方法来删除已经安装的 Elasticsearch:
sudo apt remove elasticsearch
sudo apt purge elasticsearch
如果我们在之前已经启动过 elasticsearch 服务,那么就会在 /var/lib/elasticsearch 文件夹中生成相应的文件。那么经过上述命令删除已经安装过的文件,但是 /var/lib/elasticsearch 目录将继续保存下来。在这种情况下,如果我们再次安装 Elasticsearch 的话,那么就不会出现之前的如下信息:
--------------------------- Security autoconfiguration information ------------------------------

Authentication and authorization are enabled.
TLS for the transport and HTTP layers is enabled and configured.

The generated password for the elastic built-in superuser is : kHbQ9_rzSo31vBpCpWdX

If this node should join an existing cluster, you can reconfigure this with
'/usr/share/elasticsearch/bin/elasticsearch-reconfigure-node --enrollment-token <token-here>'
after creating an enrollment token on your existing cluster.

You can complete the following actions at any time:

Reset the password of the elastic built-in superuser with
'/usr/share/elasticsearch/bin/elasticsearch-reset-password -u elastic'.

Generate an enrollment token for Kibana instances with
 '/usr/share/elasticsearch/bin/elasticsearch-create-enrollment-token -s kibana'.

Generate an enrollment token for Elasticsearch nodes with
'/usr/share/elasticsearch/bin/elasticsearch-create-enrollment-token -s node'.

-------------------------------------------------------------------------------------------------
在安装的时候,它会出现如下的信息:
parallels@liuxg:~$ sudo apt install elasticsearch
Reading package lists... Done
Building dependency tree
Reading state information... Done
The following NEW packages will be installed:
  elasticsearch
0 upgraded, 1 newly installed, 0 to remove and 36 not upgraded.
Need to get 328 MB of archives.
After this operation, 560 MB of additional disk space will be used.
Get:1 https://artifacts.elastic.co/packages/8.x/apt stable/main arm64 elasticsearch arm64 8.1.0 [328 MB]
Fetched 328 MB in 42s (7,797 kB/s)
Selecting previously unselected package elasticsearch.
(Reading database ... 247263 files and directories currently installed.)
Preparing to unpack .../elasticsearch_8.1.0_arm64.deb ...
Creating elasticsearch group... OK
Creating elasticsearch user... OK
Unpacking elasticsearch (8.1.0) ...
Setting up elasticsearch (8.1.0) ...
--------------------------- Security autoconfiguration information ------------------------------

Skipping auto-configuration because security features appear to be already configured.

-------------------------------------------------------------------------------------------------
### NOT starting on installation, please execute the following statements to configure elasticsearch service to start au
tomatically using systemd
 sudo systemctl daemon-reload
 sudo systemctl enable elasticsearch.service
### You can start elasticsearch service by executing
 sudo systemctl start elasticsearch.service
Created elasticsearch keystore in /etc/elasticsearch/elasticsearch.keystore也就是说它不会出现之前的密码及安全设置了。如果我们使用如下的命令来启动 elasticsearch 服务的话:
sudo service elasticsearch start那么我们将只能使用 http://localhost:9200 或者 http://privateIP:9200 来进行访问,而不是之前的那种 https 的访问。特别值得注意的是,我们可以使用之前的 elastic 超级用户来进行访问。访问密码是在上一次安装过程中生成的密码。
如何避免安装的 Elasticsearch 被自动升级
您可以选择通过持有安装包来阻止 APT 自动更新包。 这在生产环境中很重要,因为你不想在没有计划的情况下无意触发 Elasticsearch 升级:
sudo apt-mark hold elasticsearch你可以解除持有包并通过系统的升级而升级:
sudo apt-mark unhold elasticsearch如何彻底删除之前的 Elasticsearch 安装
在有些时候,我们需要彻底地删除已经安装的 Elasticsearch,那么我们可以使用如下的命令:
sudo apt remove elasticsearch
sudo apt purge elasticsearch
sudo rm -rf /var/lib/elasticsearch
经过上面的命令运行后,我们将回到原点。再次安装 Elasticsearch 时,它将自动帮我们生产相应的安全配置。
更多阅读:How To Install and Configure Elasticsearch | DigitalOcean | DigitalOcean

为开发者提供学习成长、分享交流、生态实践、资源工具等服务,帮助开发者快速成长。
更多推荐


 0
0 0
0- 0


 已为社区贡献117条内容

所有评论(0)