牛客网项目——项目开发(六):点赞,关注和取关,优化登录
文章目录1. 点赞1.1 业务层(直接调redis不用数据访问层)1.1.1 生成redis key的工具1.1.2 Service 下实现 LikeService1.2 表现层1.3 前端页面1.3.1 对帖子点赞1.3.2 对回帖列表点赞1.3.3 对回复列表点赞1.3.4 js 实现 like 方法1.3 首页赞的数量的显示1.4 帖子详情页面赞的数量的显示2. 我收到的赞2.1 重构点赞功
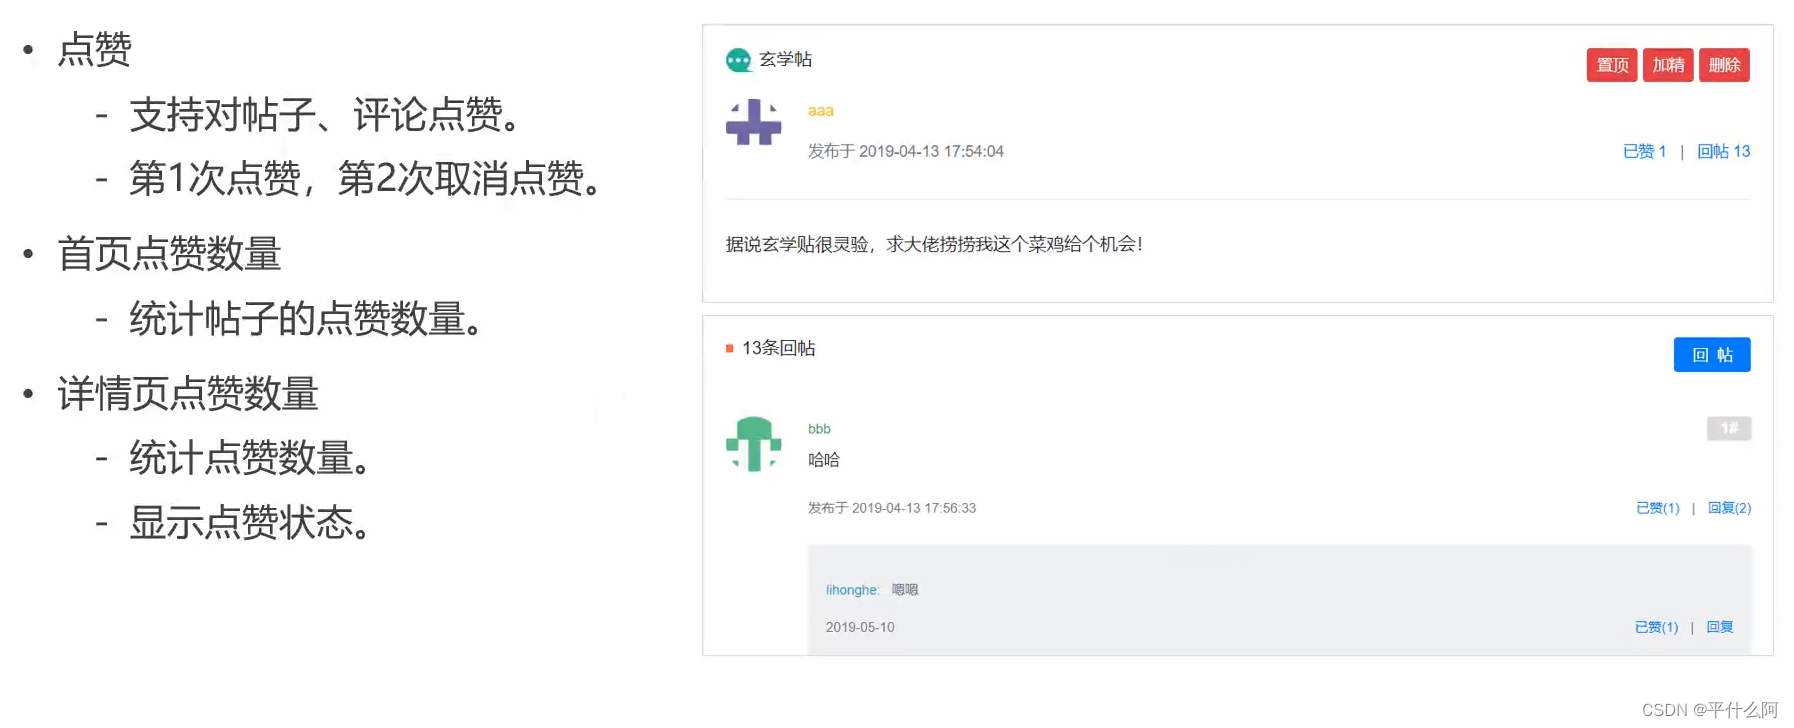
1. 点赞
1.1 业务层(直接调redis不用数据访问层)
1.1.1 生成redis key的工具
在 util 下实现 RedisKeyUtil,集合set存储谁给某个实体点的赞
package com.nowcoder.community.util;

public class RedisKeyUtil {

    private static final String SPLIT = ":";
    private static final String PREFIX_ENTITY_LIKE = "like:entity";
    private static final String PREFIX_USER_LIKE = "like:user";

    // 某个实体的赞
    // like:entity:entityType:entityId -> set(userId)
    public static String getEntityLikeKey(int entityType, int entityId) {
        return PREFIX_ENTITY_LIKE + SPLIT + entityType + SPLIT + entityId;
    }
}
1.1.2 Service 下实现 LikeService
package com.nowcoder.community.service;

import com.nowcoder.community.util.RedisKeyUtil;
import org.springframework.beans.factory.annotation.Autowired;
import org.springframework.dao.DataAccessException;
import org.springframework.data.redis.core.RedisOperations;
import org.springframework.data.redis.core.RedisTemplate;
import org.springframework.data.redis.core.SessionCallback;
import org.springframework.stereotype.Service;

@Service
public class LikeService {

    @Autowired
    private RedisTemplate redisTemplate;

    // 点赞
    public void like(int userId, int entityType, int entityId) {
		String entityLikeKey = RedisKeyUtil.getEntityLikeKey(entityType, entityId);
		boolean isMember = operations.opsForSet().isMember(entityLikeKey, userId);

		if (isMember) {
		    operations.opsForSet().remove(entityLikeKey, userId);
		} else {
		    operations.opsForSet().add(entityLikeKey, userId);
		}
    }

    // 查询某实体点赞的数量
    public long findEntityLikeCount(int entityType, int entityId) {
        String entityLikeKey = RedisKeyUtil.getEntityLikeKey(entityType, entityId);
        return redisTemplate.opsForSet().size(entityLikeKey);
    }

    // 查询某人对某实体的点赞状态
    public int findEntityLikeStatus(int userId, int entityType, int entityId) {
        String entityLikeKey = RedisKeyUtil.getEntityLikeKey(entityType, entityId);
        return redisTemplate.opsForSet().isMember(entityLikeKey, userId) ? 1 : 0;
    }
}
1.2 表现层
Controller 下实现 LikeController
- 获取当前用户
- 调用service点赞方法
- 获取数量和状态
- 放入map
- 返回json格式数据
package com.nowcoder.community.controller;

import com.nowcoder.community.entity.User;
import com.nowcoder.community.service.LikeService;
import com.nowcoder.community.util.CommunityUtil;
import com.nowcoder.community.util.HostHolder;
import org.springframework.beans.factory.annotation.Autowired;
import org.springframework.stereotype.Controller;
import org.springframework.web.bind.annotation.RequestMapping;
import org.springframework.web.bind.annotation.RequestMethod;
import org.springframework.web.bind.annotation.ResponseBody;

import java.util.HashMap;
import java.util.Map;

@Controller
public class LikeController {

    @Autowired
    private LikeService likeService;

    @Autowired
    private HostHolder hostHolder;

    @RequestMapping(path = "/like", method = RequestMethod.POST)
    @ResponseBody
    public String like(int entityType, int entityId) {
        User user = hostHolder.getUser();

        // 点赞
        likeService.like(user.getId(), entityType, entityId, entityUserId);

        // 数量
        long likeCount = likeService.findEntityLikeCount(entityType, entityId);
        // 状态
        int likeStatus = likeService.findEntityLikeStatus(user.getId(), entityType, entityId);
        // 返回的结果
        Map<String, Object> map = new HashMap<>();
        map.put("likeCount", likeCount);
        map.put("likeStatus", likeStatus);

        return CommunityUtil.getJSONString(0, null, map);
    }

}
1.3 前端页面
1.3.1 对帖子点赞
descuss-detail.html
- 处理超链接,点击超链接的时候访问服务器
href="javascript:; - 定义单击事件,调用js方法发送请求
like(this,1,${post.id};this:当前结点1:entityType${post.id}:entityId
- 赞 和 赞的数量 分别加标签和,方便以后修改
<li class="d-inline ml-2">
	<a href="javascript:;" th:onclick="|like(this,1,${post.id});|" class="text-primary">
		<b>赞</b> <i>11</i>
	</a>
</li>
1.3.2 对回帖列表点赞
处理逻辑同上
<li class="d-inline ml-2">
	<a href="javascript:;" th:onclick="|like(this,2,${cvo.comment.id});|" class="text-primary">
		<b>赞</b>(<i>1</i>)
	</a>
</li>
1.3.3 对回复列表点赞
处理逻辑同上
<li class="d-inline ml-2">
	<a href="javascript:;" th:onclick="|like(this,2,${rvo.reply.id});|" class="text-primary">
		<b>赞</b>(<i>1</i>)
	</a>
</li>
1.3.4 js 实现 like 方法
在 discus-detail.html 下创建新的js
<script th:src="@{/js/discuss.js}"></script>
在 static.js 下实现 discuss.js
- 三个参数
btn, entityType, entityId - post 请求
- 访问路径:
CONTEXT_PATH + "/like" - 携带参数:
{"entityType":entityType,"entityId":entityId,"entityUserId":entityUserId} - 返回的字符串转成 json 串
data = $.parseJSON(data); - 如果成功,改变赞的数量和显示的文字
- 获取 btn 的子节点 i,并改变为data返回的数据
$(btn).children("i").text(data.likeCount); - 获取 btn 的子节点 b,并改变为data返回的数据
$(btn).children("b").text(data.likeStatus==1?'已赞':"赞");
- 获取 btn 的子节点 i,并改变为data返回的数据
- 如果失败,响应一个msg
alert(data.msg);
function like(btn, entityType, entityId) {
    $.post(
        CONTEXT_PATH + "/like",
        {"entityType":entityType,"entityId":entityId,"entityUserId":entityUserId},
        function(data) {
            data = $.parseJSON(data);
            if(data.code == 0) {
                $(btn).children("i").text(data.likeCount);
                $(btn).children("b").text(data.likeStatus==1?'已赞':"赞");
            } else {
                alert(data.msg);
            }
        }
    );
}
1.3 首页赞的数量的显示
HomeController 下的 getIndexPage 添加逻辑
    @Autowired
    private LikeService likeService;

	long likeCount = likeService.findEntityLikeCount(ENTITY_TYPE_POST, post.getId());
    map.put("likeCount", likeCount);
修改 index.html 显示赞的逻辑
<li class="d-inline ml-2">赞 <span th:text="${map.likeCount}">11</span></li>
1.4 帖子详情页面赞的数量的显示
修改 DiscussPostController 下的 getDiscussPost
@Autowired
private LikeService likeService;
- 对于帖子,如果没有登录,点赞状态就是0
// 点赞数量
long likeCount = likeService.findEntityLikeCount(ENTITY_TYPE_POST, discussPostId);
model.addAttribute("likeCount", likeCount);
// 点赞状态
int likeStatus = hostHolder.getUser() == null ? 0 :
        likeService.findEntityLikeStatus(hostHolder.getUser().getId(), ENTITY_TYPE_POST, discussPostId);
model.addAttribute("likeStatus", likeStatus);
- 对于评论
// 点赞数量
likeCount = likeService.findEntityLikeCount(ENTITY_TYPE_COMMENT, comment.getId());
commentVo.put("likeCount", likeCount);
// 点赞状态
likeStatus = hostHolder.getUser() == null ? 0 :
        likeService.findEntityLikeStatus(hostHolder.getUser().getId(), ENTITY_TYPE_COMMENT, comment.getId());
commentVo.put("likeStatus", likeStatus);
- 对于回复
// 点赞数量
likeCount = likeService.findEntityLikeCount(ENTITY_TYPE_COMMENT, reply.getId());
replyVo.put("likeCount", likeCount);
// 点赞状态
likeStatus = hostHolder.getUser() == null ? 0 :
        likeService.findEntityLikeStatus(hostHolder.getUser().getId(), ENTITY_TYPE_COMMENT, reply.getId());
replyVo.put("likeStatus", likeStatus);
- 修改前端显示数据
<b th:text="${likeStatus==1?'已赞':'赞'}">赞</b> <i th:text="${likeCount}">11</i>
<b th:text="${cvo.likeStatus==1?'已赞':'赞'}">赞</b>(<i th:text="${cvo.likeCount}">1</i>)
<b th:text="${rvo.likeStatus==1?'已赞':'赞'}">赞</b>(<i th:text="${rvo.likeCount}">1</i>)
2. 我收到的赞
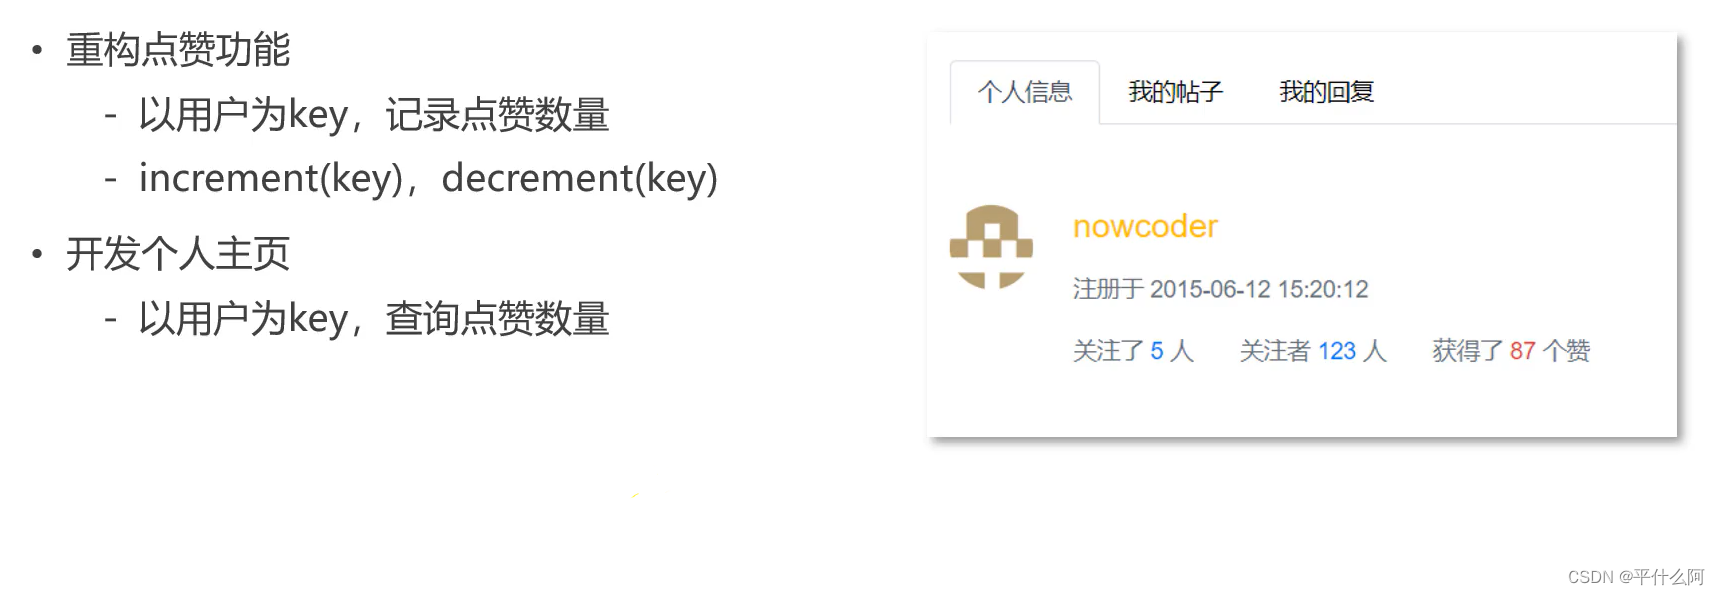
2.1 重构点赞功能
2.1.1 RedisKeyUtil 增加功能
- 以user为key
private static final String PREFIX_USER_LIKE = "like:user";

// 某个用户的赞
// like:user:userId -> int
public static String getUserLikeKey(int userId) {
    return PREFIX_USER_LIKE + SPLIT + userId;
}
2.1.2 LikeService
需要增加一步操作,保证事务性,通过编程解决,重构like
- 先得到两个 key,一个以实体,一个以user
- 多传一个参数,被赞人的userid
- 查询放在事务之外
operations.multi();- 执行事务,点赞或取消赞
return operations.exec();
// 点赞
public void like(int userId, int entityType, int entityId, int entityUserId) {
    redisTemplate.execute(new SessionCallback() {
        @Override
        public Object execute(RedisOperations operations) throws DataAccessException {
            String entityLikeKey = RedisKeyUtil.getEntityLikeKey(entityType, entityId);
            String userLikeKey = RedisKeyUtil.getUserLikeKey(entityUserId);

            boolean isMember = operations.opsForSet().isMember(entityLikeKey, userId);

            operations.multi();

            if (isMember) {
                operations.opsForSet().remove(entityLikeKey, userId);
                operations.opsForValue().decrement(userLikeKey);
            } else {
                operations.opsForSet().add(entityLikeKey, userId);
                operations.opsForValue().increment(userLikeKey);
            }

            return operations.exec();
        }
    });`在这里插入代码片`
}
添加新方法
默认得到 object,转成 Integer
// 查询某个用户获得的赞
public int findUserLikeCount(int userId) {
    String userLikeKey = RedisKeyUtil.getUserLikeKey(userId);
    Integer count = (Integer) redisTemplate.opsForValue().get(userLikeKey);
    return count == null ? 0 : count.intValue();
}
2.1.3 LikeController
方法中增加参数
// 点赞
likeService.like(user.getId(), entityType, entityId, entityUserId);
2.1.4 页面处理
discuss-detail.html。后面两个对于评论的和回复的处理方法一样${rvo.reply.id}
<a href="javascript:;" th:onclick="|like(this,2,${rvo.reply.id},${rvo.reply.userId});|" class="text-primary">
	<b th:text="${rvo.likeStatus==1?'已赞':'赞'}">赞</b>(<i th:text="${rvo.likeCount}">1</i>)
</a>
修改js增加参数
{"entityType":entityType,"entityId":entityId,"entityUserId":entityUserId},
2.2 用户主页开发
2.2.1 Controller 层
UserController 下 增加 getProfilePage
- 查出访问的用户
userService.findUserById(userId) - 防止恶意攻击判断用户是否存在
- 用户
- 点赞数
@Autowired
private LikeService likeService;

// 个人主页
@RequestMapping(path = "/profile/{userId}", method = RequestMethod.GET)
public String getProfilePage(@PathVariable("userId") int userId, Model model) {
    User user = userService.findUserById(userId);
    if (user == null) {
        throw new RuntimeException("该用户不存在!");
    }

    // 用户
    model.addAttribute("user", user);
    // 点赞数量
    int likeCount = likeService.findUserLikeCount(userId);
    model.addAttribute("likeCount", likeCount);

    return "/site/profile";
}
2.2.2 修改前端页面index.html
- 修改头部
<a class="dropdown-item text-center" th:href="@{|/user/profile/${loginUser.id}|}">个人主页</a>
- 帖子列表里,每个用户头像都能点进他的首页
<a th:href="@{|/user/profile/${map.user.id}|}">
	<img th:src="${map.user.headerUrl}" class="mr-4 rounded-circle" alt="用户头像" style="width:50px;height:50px;">
</a>
2.2.2 修改主页页面profile.html
- 声明模板
- 路径处理
- header复用
- js路径处理
- 用户头像修改
<img th:src="${user.headerUrl}" class="align-self-start mr-4 rounded-circle" alt="用户头像" style="width:50px;">
- 用户名
<span th:utext="${user.username}">nowcoder</span>
- 注册时间
<span>注册于 <i class="text-muted" th:text="${#dates.format(user.createTime,'yyyy-MM-dd HH:mm:ss')}">2015-06-12 15:20:12</i></span>
- 获得多少赞
<span class="ml-4">获得了 <i class="text-danger" th:text="${likeCount}">87</i> 个赞</span>
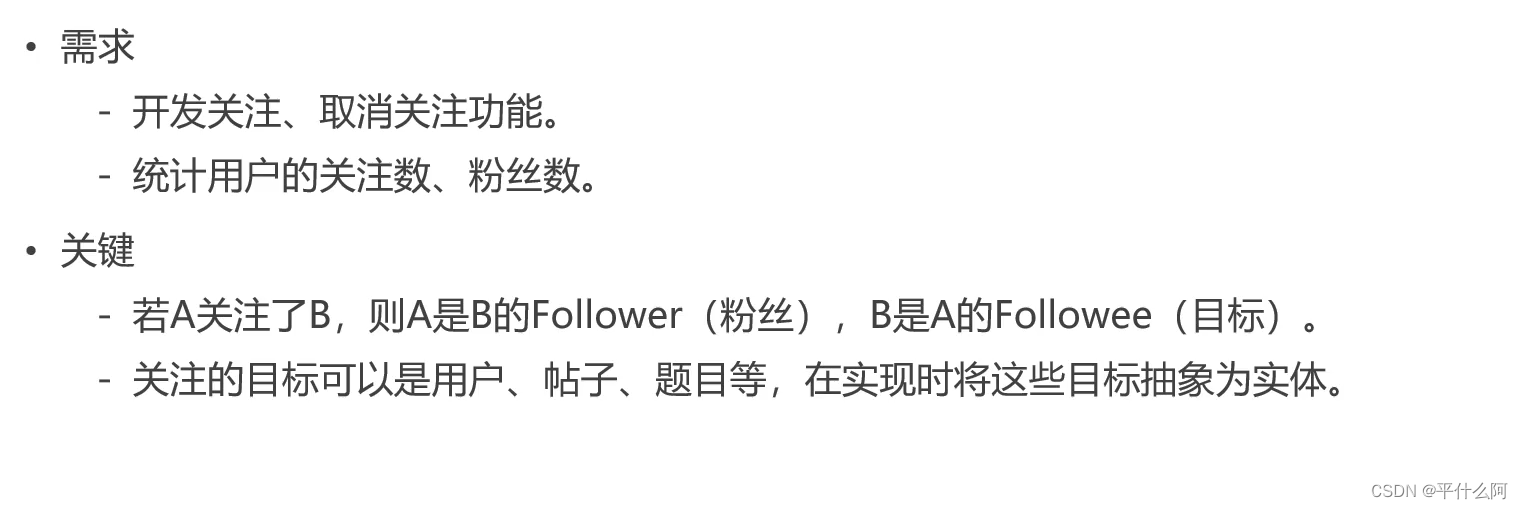
3. 关注和取关
3.1 新加 RedisKeyUtil
- 两份数据,一份是业务需要,一份是统计方便
private static final String PREFIX_FOLLOWEE = "followee";
private static final String PREFIX_FOLLOWER = "follower";

// 某个用户关注的实体
// followee:userId:entityType -> zset(entityId,now)
public static String getFolloweeKey(int userId, int entityType) {
    return PREFIX_FOLLOWEE + SPLIT + userId + SPLIT + entityType;
}

// 某个实体拥有的粉丝
// follower:entityType:entityId -> zset(userId,now)
public static String getFollowerKey(int entityType, int entityId) {
    return PREFIX_FOLLOWER + SPLIT + entityType + SPLIT + entityId;
}
3.2 实现 FollowService
package com.nowcoder.community.service;

import com.nowcoder.community.entity.User;
import com.nowcoder.community.util.CommunityConstant;
import com.nowcoder.community.util.RedisKeyUtil;
import org.springframework.beans.factory.annotation.Autowired;
import org.springframework.dao.DataAccessException;
import org.springframework.data.redis.core.RedisOperations;
import org.springframework.data.redis.core.RedisTemplate;
import org.springframework.data.redis.core.SessionCallback;
import org.springframework.stereotype.Service;

import java.util.*;

@Service
public class FollowService implements CommunityConstant {

    @Autowired
    private RedisTemplate redisTemplate;

    @Autowired
    private UserService userService;

    public void follow(int userId, int entityType, int entityId) {
        redisTemplate.execute(new SessionCallback() {
            @Override
            public Object execute(RedisOperations operations) throws DataAccessException {
                String followeeKey = RedisKeyUtil.getFolloweeKey(userId, entityType);
                String followerKey = RedisKeyUtil.getFollowerKey(entityType, entityId);

                operations.multi();

                operations.opsForZSet().add(followeeKey, entityId, System.currentTimeMillis());
                operations.opsForZSet().add(followerKey, userId, System.currentTimeMillis());

                return operations.exec();
            }
        });
    }

    public void unfollow(int userId, int entityType, int entityId) {
        redisTemplate.execute(new SessionCallback() {
            @Override
            public Object execute(RedisOperations operations) throws DataAccessException {
                String followeeKey = RedisKeyUtil.getFolloweeKey(userId, entityType);
                String followerKey = RedisKeyUtil.getFollowerKey(entityType, entityId);

                operations.multi();

                operations.opsForZSet().remove(followeeKey, entityId);
                operations.opsForZSet().remove(followerKey, userId);

                return operations.exec();
            }
        });
    }
}
3.2 实现 FollowController
- 实现关注功能,异步,
@ResponseBody - 成功后返回消息
@RequestMapping(path = "/follow", method = RequestMethod.POST)
@ResponseBody
public String follow(int entityType, int entityId) {
    User user = hostHolder.getUser();

    followService.follow(user.getId(), entityType, entityId);

    return CommunityUtil.getJSONString(0, "已关注!");
}
- 取关功能,异步,
@ResponseBody
@RequestMapping(path = "/unfollow", method = RequestMethod.POST)
@ResponseBody
public String unfollow(int entityType, int entityId) {
    User user = hostHolder.getUser();

    followService.unfollow(user.getId(), entityType, entityId);

    return CommunityUtil.getJSONString(0, "已取消关注!");
}
3.3 profile.js 关注按钮事件
- 路径
CONTEXT_PATH + "/follow", - 参数
{"entityType":3,"entityId":$(btn).prev().val()},。profile.html文件button前加个隐藏框传入id,<input type="hidden" id="entityId" th:value="${user.id}">获得entityId - 返回值转成 js 对象
data = $.parseJSON(data); - 成功后刷新页面(省事)
- 失败后弹框
$(function(){
	$(".follow-btn").click(follow);
});

function follow() {
	var btn = this;
	if($(btn).hasClass("btn-info")) {
		// 关注TA
		$.post(
		    CONTEXT_PATH + "/follow",
		    {"entityType":3,"entityId":$(btn).prev().val()},
		    function(data) {
		        data = $.parseJSON(data);
		        if(data.code == 0) {
                    window.location.reload();
		        } else {
                    alert(data.msg);
		        }
		    }
		);
		// $(btn).text("已关注").removeClass("btn-info").addClass("btn-secondary");
	} else {
		// 取消关注
		$.post(`在这里插入代码片`
		    CONTEXT_PATH + "/unfollow",
		    {"entityType":3,"entityId":$(btn).prev().val()},
		    function(data) {
		        data = $.parseJSON(data);
		        if(data.code == 0) {
                    window.location.reload();
		        } else {
                    alert(data.msg);
		        }
		    }
		);
		//$(btn).text("关注TA").removeClass("btn-secondary").addClass("btn-info");
	}
}
3.4 profile.html 显示相关数据
3.4.1 FollowService 补充方法
// 查询关注的实体的数量
public long findFolloweeCount(int userId, int entityType) {
    String followeeKey = RedisKeyUtil.getFolloweeKey(userId, entityType);
    return redisTemplate.opsForZSet().zCard(followeeKey);
}

// 查询实体的粉丝的数量
public long findFollowerCount(int entityType, int entityId) {
    String followerKey = RedisKeyUtil.getFollowerKey(entityType, entityId);
    return redisTemplate.opsForZSet().zCard(followerKey);
}

// 查询当前用户是否已关注该实体
public boolean hasFollowed(int userId, int entityType, int entityId) {
    String followeeKey = RedisKeyUtil.getFolloweeKey(userId, entityType);
    return redisTemplate.opsForZSet().score(followeeKey, entityId) != null;
}
3.4.2 UserController. getProfilePage补充方法
// 关注数量
long followeeCount = followService.findFolloweeCount(userId, ENTITY_TYPE_USER);
model.addAttribute("followeeCount", followeeCount);
// 粉丝数量
long followerCount = followService.findFollowerCount(ENTITY_TYPE_USER, userId);
model.addAttribute("followerCount", followerCount);
// 是否已关注
boolean hasFollowed = false;
if (hostHolder.getUser() != null) {
    hasFollowed = followService.hasFollowed(hostHolder.getUser().getId(), ENTITY_TYPE_USER, userId);
}
model.addAttribute("hasFollowed", hasFollowed);
3.4.3 处理profile.html
- 关注状态
<span>关注了 <a class="text-primary" th:href="@{|/followees/${user.id}|}" th:text="${followeeCount}">5</a> 人</span>
<span class="ml-4">关注者 <a class="text-primary" th:href="@{|/followers/${user.id}|}" th:text="${followerCount}">123</a> 人</span>
- 按钮状态
① 登录用户访问自己空间不能点击关注th:if="${loginUser!=null&&loginUser.id!=user.id}"
② 关注后样式改变th:class="|btn ${hasFollowed?'btn-secondary':'btn-info'} btn-sm float-right mr-5 follow-btn|"
<button type="button" th:class="|btn ${hasFollowed?'btn-secondary':'btn-info'} btn-sm float-right mr-5 follow-btn|"
th:text="${hasFollowed?'已关注':'关注TA'}" th:if="${loginUser!=null&&loginUser.id!=user.id}">关注TA</button>
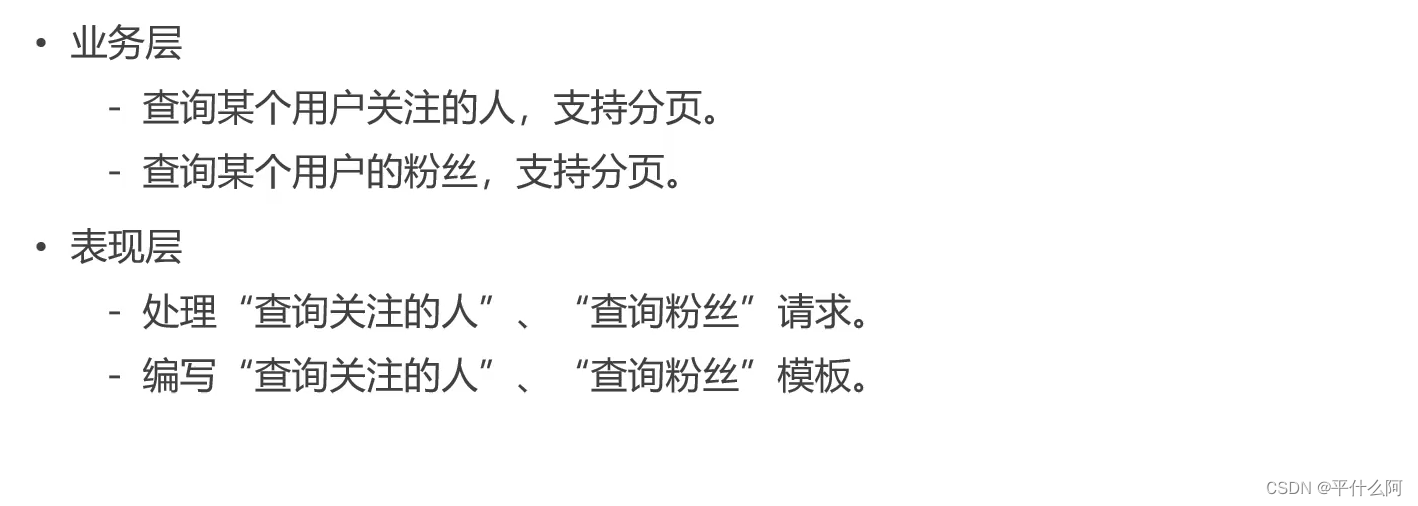
4. 关注列表和粉丝列表
4.1 FollowerService 补充
- map 包装返回的数据
- 由大到小倒序查询
reverseRange
// 查询某用户关注的人
public List<Map<String, Object>> findFollowees(int userId, int offset, int limit) {
    String followeeKey = RedisKeyUtil.getFolloweeKey(userId, ENTITY_TYPE_USER);
    Set<Integer> targetIds = redisTemplate.opsForZSet().reverseRange(followeeKey, offset, offset + limit - 1);

    if (targetIds == null) {
        return null;
    }

    List<Map<String, Object>> list = new ArrayList<>();
    for (Integer targetId : targetIds) {
        Map<String, Object> map = new HashMap<>();
        User user = userService.findUserById(targetId);
        map.put("user", user);
        Double score = redisTemplate.opsForZSet().score(followeeKey, targetId);
        map.put("followTime", new Date(score.longValue()));
        list.add(map);
    }

    return list;
}

// 查询某用户的粉丝
public List<Map<String, Object>> findFollowers(int userId, int offset, int limit) {
    String followerKey = RedisKeyUtil.getFollowerKey(ENTITY_TYPE_USER, userId);
    Set<Integer> targetIds = redisTemplate.opsForZSet().reverseRange(followerKey, offset, offset + limit - 1);

    if (targetIds == null) {
        return null;
    }

    List<Map<String, Object>> list = new ArrayList<>();
    for (Integer targetId : targetIds) {
        Map<String, Object> map = new HashMap<>();
        User user = userService.findUserById(targetId);
        map.put("user", user);
        Double score = redisTemplate.opsForZSet().score(followerKey, targetId);
        map.put("followTime", new Date(score.longValue()));
        list.add(map);
    }

    return list;
}
4.2 FollowController 补充
@Autowired
private UserService userService;


@RequestMapping(path = "/followees/{userId}", method = RequestMethod.GET)
public String getFollowees(@PathVariable("userId") int userId, Page page, Model model) {
    User user = userService.findUserById(userId);
    if (user == null) {
        throw new RuntimeException("该用户不存在!");
    }
    model.addAttribute("user", user);

    page.setLimit(5);
    page.setPath("/followees/" + userId);
    page.setRows((int) followService.findFolloweeCount(userId, ENTITY_TYPE_USER));

    List<Map<String, Object>> userList = followService.findFollowees(userId, page.getOffset(), page.getLimit());
    if (userList != null) {
        for (Map<String, Object> map : userList) {
            User u = (User) map.get("user");
            map.put("hasFollowed", hasFollowed(u.getId()));
        }
    }
    model.addAttribute("users", userList);

    return "/site/followee";
}

@RequestMapping(path = "/followers/{userId}", method = RequestMethod.GET)
public String getFollowers(@PathVariable("userId") int userId, Page page, Model model) {
    User user = userService.findUserById(userId);
    if (user == null) {
        throw new RuntimeException("该用户不存在!");
    }
    model.addAttribute("user", user);

    page.setLimit(5);
    page.setPath("/followers/" + userId);
    page.setRows((int) followService.findFollowerCount(ENTITY_TYPE_USER, userId));

    List<Map<String, Object>> userList = followService.findFollowers(userId, page.getOffset(), page.getLimit());
    if (userList != null) {
        for (Map<String, Object> map : userList) {
            User u = (User) map.get("user");
            map.put("hasFollowed", hasFollowed(u.getId()));
        }
    }
    model.addAttribute("users", userList);

    return "/site/follower";
}

private boolean hasFollowed(int userId) {
	if (hostHolder.getUser() == null) {
	    return false;
	}

	return followService.hasFollowed(hostHolder.getUser().getId(), ENTITY_TYPE_USER, userId);
}
4.3 处理 profile.html
<span>关注了 <a class="text-primary" th:href="@{|/followees/${user.id}|}" th:text="${followeeCount}">5</a> 人</span>
<span class="ml-4">关注者 <a class="text-primary" th:href="@{|/followers/${user.id}|}" th:text="${followerCount}">123</a> 人</span>
4.4 处理 followee.html
- 页签连接,显示当前用户名
<li class="nav-item">
	<a class="nav-link position-relative active" th:href="@{|/followees/${user.id}|}">
		<i class="text-info" th:utext="${user.username}">Nowcoder</i> 关注的人
	</a>
	</li>
	<li class="nav-item">
	<a class="nav-link position-relative" th:href="@{|/followers/${user.id}|}">
		关注 <i class="text-info" th:utext="${user.username}">Nowcoder</i> 的人
	</a>
</li>
- 遍历关注列表
<li class="media pb-3 pt-3 mb-3 border-bottom position-relative" th:each="map:${users}">
- 关注者的头像
<a th:href="@{|/user/profile/${map.user.id}|}">
	<img th:src="${map.user.headerUrl}" class="mr-4 rounded-circle user-header" alt="用户头像" >
</a>
- 关注名和关注时间
<h6 class="mt-0 mb-3">
	<span class="text-success" th:utext="${map.user.username}">落基山脉下的闲人</span>
	<span class="float-right text-muted font-size-12">
		关注于 <i th:text="${#dates.format(map.followTime,'yyyy-MM-dd HH:mm:ss')}">2019-04-28 14:13:25</i>
	</span>
</h6>
- 关注他的处理
<div>
	<input type="hidden" id="entityId" th:value="${map.user.id}">
	<button type="button" th:class="|btn ${map.hasFollowed?'btn-secondary':'btn-info'} btn-sm float-right follow-btn|"
		th:if="${loginUser!=null && loginUser.id!=map.user.id}" th:text="${map.hasFollowed?'已关注':'关注TA'}">关注TA</button>
</div>
- 复用首页分页逻辑
- follower.html 相同处理逻辑
5. 优化登陆模块
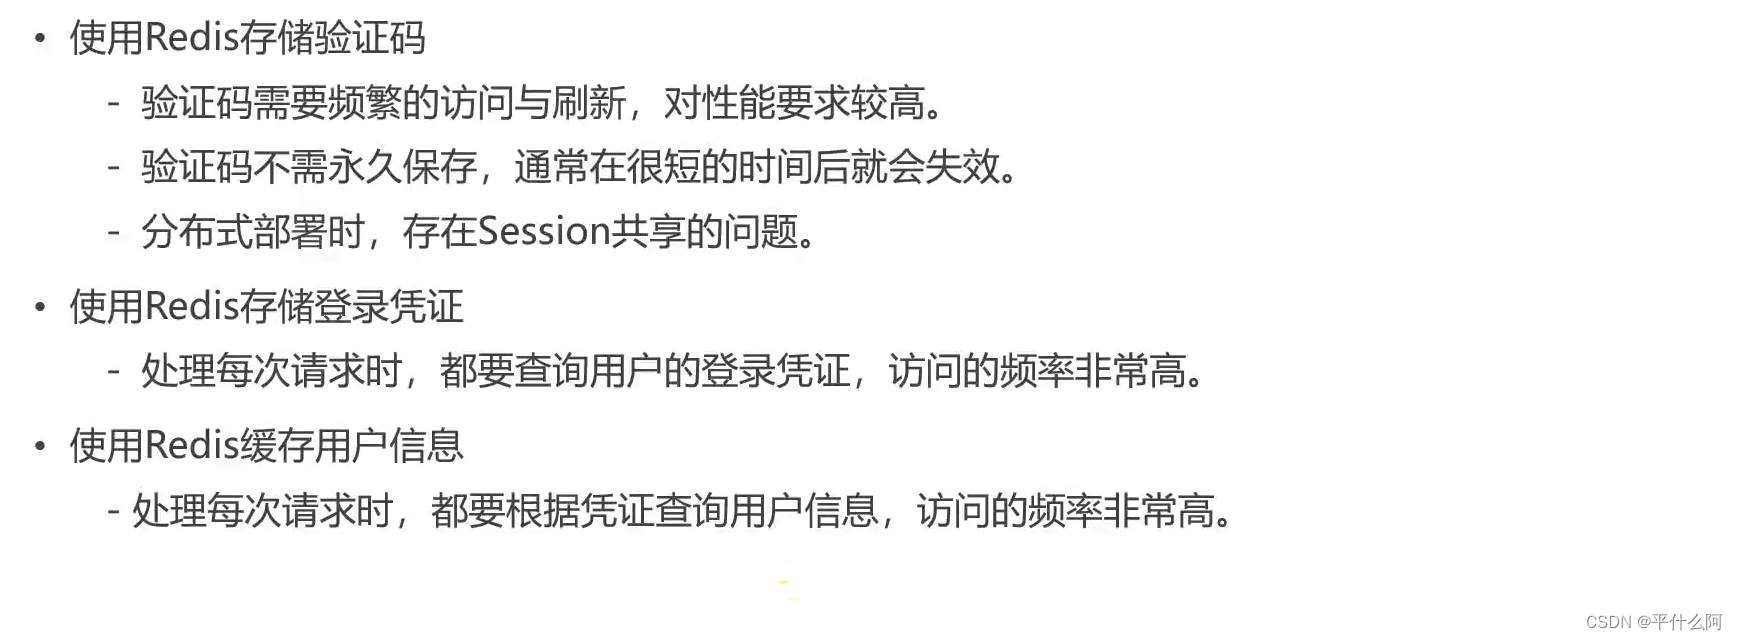
5.1 使用Redis存储验证码
5.1.1 RedisKeyUtil
owner,用户的临时凭证
// 登录验证码
public static String getKaptchaKey(String owner) {
    return PREFIX_KAPTCHA + SPLIT + owner;
}
5.1.2 LoginController.getKaptcha
老方法:
// 将验证码存入session
// session.setAttribute("kaptcha", text);
新方法:
@Autowired
private RedisTemplate redisTemplate;

// 验证码的归属
String kaptchaOwner = CommunityUtil.generateUUID();
Cookie cookie = new Cookie("kaptchaOwner", kaptchaOwner);
cookie.setMaxAge(60);
cookie.setPath(contextPath);
response.addCookie(cookie);
// 将验证码存入Redis`在这里插入代码片`
String redisKey = RedisKeyUtil.getKaptchaKey(kaptchaOwner);
redisTemplate.opsForValue().set(redisKey, text, 60, TimeUnit.SECONDS);
5.1.3 LoginController.login
老方法:
// 检查验证码
// String kaptcha = (String) session.getAttribute("kaptcha");
新方法,首先加参数@CookieValue("kaptchaOwner") String kaptchaOwner:
String kaptcha = null;
if (StringUtils.isNotBlank(kaptchaOwner)) {
    String redisKey = RedisKeyUtil.getKaptchaKey(kaptchaOwner);
    kaptcha = (String) redisTemplate.opsForValue().get(redisKey);
}

if (StringUtils.isBlank(kaptcha) || StringUtils.isBlank(code) || !kaptcha.equalsIgnoreCase(code)) {
    model.addAttribute("codeMsg", "验证码不正确!");
    return "/site/login";
}
5.2 使用Redis存储登录凭证
5.2.1 RedisKeyUtil
// 登录的凭证
public static String getTicketKey(String ticket) {
    return PREFIX_TICKET + SPLIT + ticket;
}
5.2.2 LoginTicketMapper
不推荐使用@Deprecated
@Mapper
@Deprecated
public interface LoginTicketMapper {
}
5.2.3 UserService
- login 生成登录凭证
// 生成登录凭证
LoginTicket loginTicket = new LoginTicket();
loginTicket.setUserId(user.getId());
loginTicket.setTicket(CommunityUtil.generateUUID());
loginTicket.setStatus(0);
loginTicket.setExpired(new Date(System.currentTimeMillis() + expiredSeconds * 1000));
//        loginTicketMapper.insertLoginTicket(loginTicket);

String redisKey = RedisKeyUtil.getTicketKey(loginTicket.getTicket());
redisTemplate.opsForValue().set(redisKey, loginTicket);

map.put("ticket", loginTicket.getTicket());
- logout 退出登录,ticket取出来再存进去
public void logout(String ticket) {
//        loginTicketMapper.updateStatus(ticket, 1);
    String redisKey = RedisKeyUtil.getTicketKey(ticket);
    LoginTicket loginTicket = (LoginTicket) redisTemplate.opsForValue().get(redisKey);
    loginTicket.setStatus(1);
    redisTemplate.opsForValue().set(redisKey, loginTicket);
}
- LoginTicket 查询凭证
public LoginTicket findLoginTicket(String ticket) {
//        return loginTicketMapper.selectByTicket(ticket);
    String redisKey = RedisKeyUtil.getTicketKey(ticket);
    return (LoginTicket) redisTemplate.opsForValue().get(redisKey);
}
5.3 使用Redis缓存用户数据
5.3.1 UserService
// 1.优先从缓存中取值
private User getCache(int userId) {
    String redisKey = RedisKeyUtil.getUserKey(userId);
    return (User) redisTemplate.opsForValue().get(redisKey);
}

// 2.取不到时初始化缓存数据
private User initCache(int userId) {
    User user = userMapper.selectById(userId);
    String redisKey = RedisKeyUtil.getUserKey(userId);
    redisTemplate.opsForValue().set(redisKey, user, 3600, TimeUnit.SECONDS);
    return user;
}

// 3.数据变更时清除缓存数据
private void clearCache(int userId) {
    String redisKey = RedisKeyUtil.getUserKey(userId);
    redisTemplate.delete(redisKey);
}
public User findUserById(int id) {
//        return userMapper.selectById(id);
    User user = getCache(id);
    if (user == null) {
        user = initCache(id);
    }
    return user;
}
public int activation(int userId, String code) {
    User user = userMapper.selectById(userId);
    if (user.getStatus() == 1) {
        return ACTIVATION_REPEAT;
    } else if (user.getActivationCode().equals(code)) {
        userMapper.updateStatus(userId, 1);
        clearCache(userId);
        return ACTIVATION_SUCCESS;
    } else {
        return ACTIVATION_FAILURE;
    }
}
public int updateHeader(int userId, String headerUrl) {
//        return userMapper.updateHeader(userId, headerUrl);
    int rows = userMapper.updateHeader(userId, headerUrl);
    clearCache(userId);
    return rows;
}

为开发者提供学习成长、分享交流、生态实践、资源工具等服务,帮助开发者快速成长。
更多推荐


 1
1 0
0- 0


 已为社区贡献1条内容

所有评论(0)