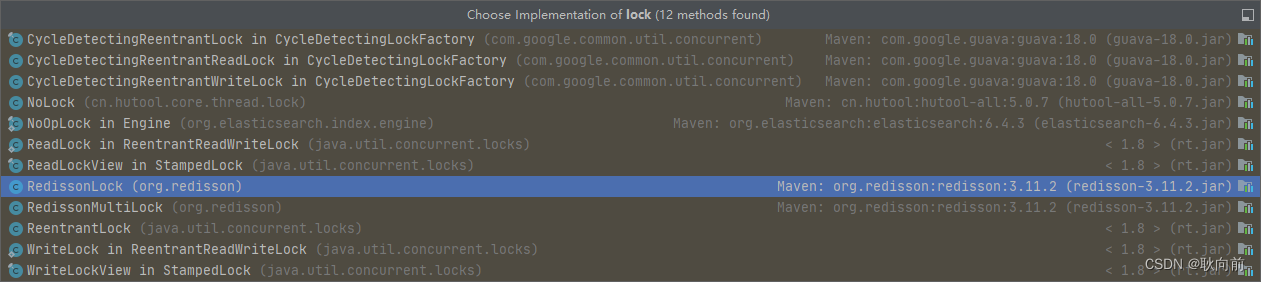
分布式锁的使用:Redisson(redissonClient);以及核心代码分析
所有竞争这把锁的线程都要判断在这个key下有没有自己线程的字段,如果没有则不能获得锁,如果有,则相当于重入,字段值加1(次数)重点在下图,主要实现,然后执行里面的lua脚本语言,返回 数据,就算就算加上锁了(广播0表示资源可用)这里用的数据结构是hash,hash的结构是: key字段1值1 字段2值2。用在锁这个场景下,key就表示锁的名称,也可以理解为临界资源,字段就表示当前获得锁的线程。初始
·
1.引入依赖
<!--导入Lombok依赖-->
<dependency>
    <groupId>org.projectlombok</groupId>
    <artifactId>lombok</artifactId>
</dependency>
<!--Spring Data Redis 的启动器 -->
<dependency>
    <groupId>org.springframework.boot</groupId>
    <artifactId>spring-boot-starter-data-redis</artifactId>
</dependency>
<dependency>
    <groupId>org.redisson</groupId>
    <artifactId>redisson</artifactId>
    <version>3.7.5</version>
</dependency>
2.配置 application.properties
# Redis服务器地址
spring.redis.host=xxxxx
# Redis服务器连接密码(默认为空)
spring.redis.password=11111
# Redis服务器连接端口
spring.redis.port=6379
3.Redisson的配置类(初始化配置)
import org.redisson.Redisson;
import org.redisson.api.RedissonClient;
import org.redisson.config.Config;
import org.springframework.beans.factory.annotation.Value;
import org.springframework.context.annotation.Bean;
import org.springframework.context.annotation.Configuration;

import java.io.IOException;

@Configuration
public class RedissonConfig {

    @Value("${spring.redis.host}")
    private String host;

    @Value("${spring.redis.port}")
    private String port;

    //@Value("${spring.redis.password}")
    //private String password;

    /**
     * RedissonClient,单机模式
     * @return
     * @throws IOException
     */
    @Bean(destroyMethod = "shutdown")
    public RedissonClient redisson() throws IOException {
        Config config = new Config();
        //config.useSingleServer().setAddress("redis://" + host + ":" + port).setPassword(password);
        config.useSingleServer().setAddress("redis://" + host + ":" + port);
        return Redisson.create(config);
    }
}
4.实现业务
import lombok.extern.slf4j.Slf4j;
import org.redisson.api.RLock;
import org.redisson.api.RedissonClient;
import org.springframework.stereotype.Service;

import javax.annotation.Resource;
import java.util.concurrent.TimeUnit;

@Slf4j
@Service
public class SkillService {
    @Resource
    RedissonClient redissonClient;

    private final static String LOCK_KEY = "RESOURCE_KEY";
    int n = 500;

    public void seckill() {
        //定义锁
        RLock lock = redissonClient.getLock(LOCK_KEY);
        //lock.lock();
        try {
            //尝试加锁,最大等待时间300毫秒,上锁30毫秒自动解锁
            if (lock.tryLock(300, 30, TimeUnit.MILLISECONDS)) {
                log.info("线程:" + Thread.currentThread().getName() + "获得了锁");
                log.info("剩余数量:{}", --n);
            }
        } catch (Exception e) {
            log.error("程序执行异常:{}", e);
        } finally {
            log.info("线程:" + Thread.currentThread().getName() + "准备释放锁");
            //释放锁
            lock.unlock();
        }
    }
}
5.测试
import org.springframework.beans.factory.annotation.Autowired;
import org.springframework.web.bind.annotation.RequestMapping;
import org.springframework.web.bind.annotation.RestController;

@RestController
public class SkillServiceTest {

    @Autowired
    SkillService service;

    @RequestMapping("/testSkillService")
    public void TestSkillService(){
        for (int i = 10; i < 60; i++) { //开50个线程
            SkillThread skillThread = new SkillThread(service, "skillThread->" + i);
            skillThread.start();
        }
    }
}

class SkillThread extends Thread {

    private SkillService skillService;

    public SkillThread(SkillService skillService, String skillThreadName) {
        super(skillThreadName);
        this.skillService = skillService;
    }

    @Override
    public void run() {
        skillService.seckill();
    }
}
1.解析getLock
初始化RedissonLock对象 ,并且根据入参名字相当于创建了一个全局的key的锁

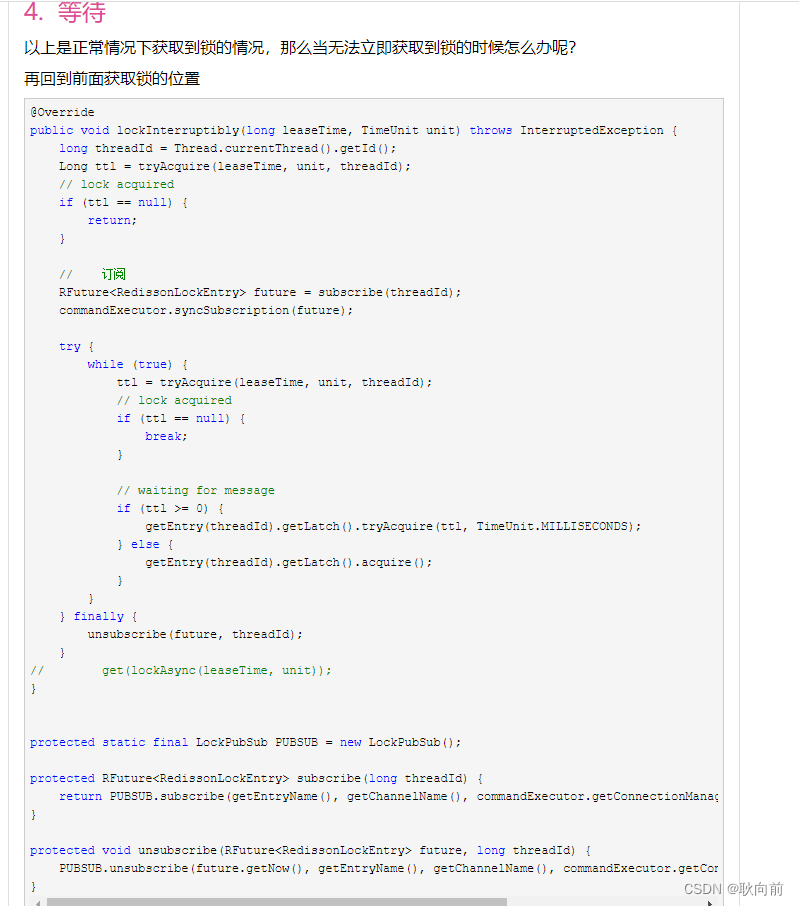
2.lock.lock()
找到实现方法核心
然后找到重新方法,核心下图
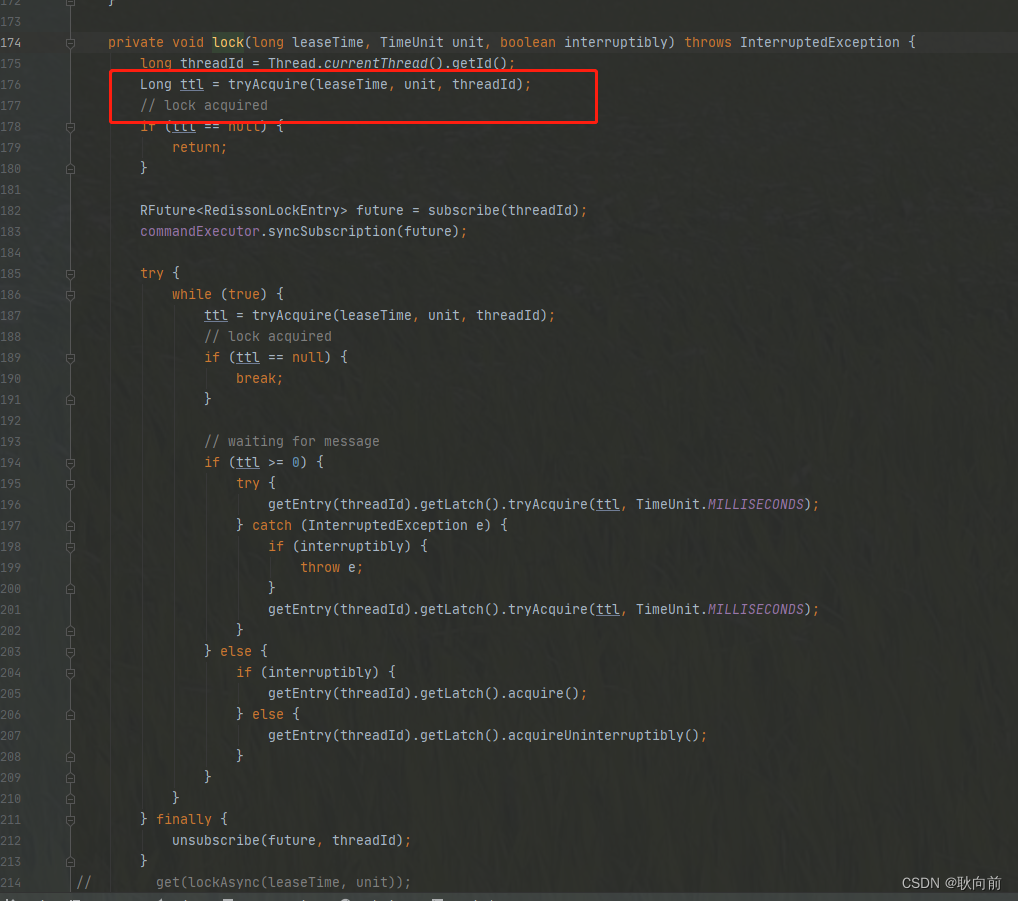
重点在下图,主要实现,然后执行里面的lua脚本语言,返回 数据,就算就算加上锁了(广播0表示资源可用)
这里用的数据结构是hash,hash的结构是: key 字段1 值1 字段2 值2 。。。
用在锁这个场景下,key就表示锁的名称,也可以理解为临界资源,字段就表示当前获得锁的线程
所有竞争这把锁的线程都要判断在这个key下有没有自己线程的字段,如果没有则不能获得锁,如果有,则相当于重入,字段值加1(次数)
1. (正常情况下可以获取到锁)
private Long tryAcquire(long leaseTime, TimeUnit unit, long threadId) {
return get(tryAcquireAsync(leaseTime, unit, threadId));
}
2.
private <T> RFuture<Long> tryAcquireAsync(long leaseTime, TimeUnit unit, long threadId) {
if (leaseTime != -1) {
return tryLockInnerAsync(leaseTime, unit, threadId, RedisCommands.EVAL_LONG);
}
RFuture<Long> ttlRemainingFuture = tryLockInnerAsync(commandExecutor.getConnectionManager().getCfg().getLockWatchdogTimeout(), TimeUnit.MILLISECONDS, threadId, RedisCommands.EVAL_LONG);
ttlRemainingFuture.onComplete((ttlRemaining, e) -> {
if (e != null) {
return;
}
// lock acquired
if (ttlRemaining == null) {
scheduleExpirationRenewal(threadId);
}
});
return ttlRemainingFuture;
}
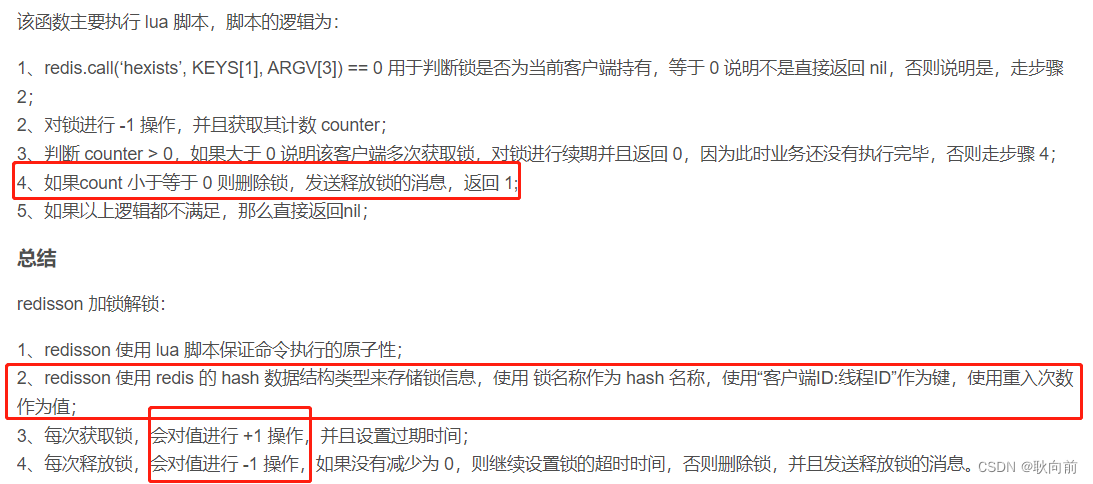
3.执行脚本语言(核心参数为 getName() getLockName(threadId)线程id)
<T> RFuture<T> tryLockInnerAsync(long leaseTime, TimeUnit unit, long threadId, RedisStrictCommand<T> command) {
internalLockLeaseTime = unit.toMillis(leaseTime);
return commandExecutor.evalWriteAsync(getName(), LongCodec.INSTANCE, command,
"if (redis.call('exists', KEYS[1]) == 0) then " +
"redis.call('hset', KEYS[1], ARGV[2], 1); " +
"redis.call('pexpire', KEYS[1], ARGV[1]); " +
"return nil; " +
"end; " +
"if (redis.call('hexists', KEYS[1], ARGV[2]) == 1) then " +
"redis.call('hincrby', KEYS[1], ARGV[2], 1); " +
"redis.call('pexpire', KEYS[1], ARGV[1]); " +
"return nil; " +
"end; " +
"return redis.call('pttl', KEYS[1]);",
Collections.<Object>singletonList(getName()), internalLockLeaseTime, getLockName(threadId));
}
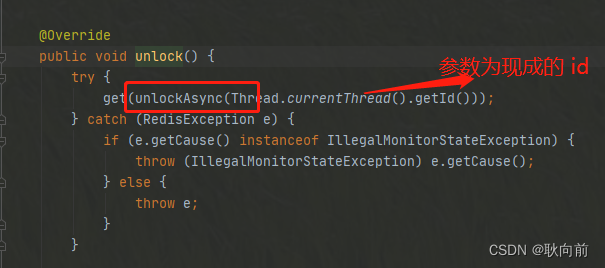
解析锁:lock.unlock();
找到实现方法,unlockAsync())
然后找里面的核心方法,主要是执行lua脚本


为开发者提供学习成长、分享交流、生态实践、资源工具等服务,帮助开发者快速成长。
更多推荐


 1
1 0
0- 0


 已为社区贡献1条内容

所有评论(0)