概述springboot使用redis注解做缓存的基本操作
首先是添加方法,我们需要在方法上添加@CachePut注解,此注解用在添加以及更新的方法上,其中的key属性,是为了给redis中的key赋值,内容自定义,但一般为了key的唯一性,都取参数对象的id作为值,此处#user.id表示取方法阐述中的user的id属性作为值。我们准备五个方法用于测试,增删改查,以及全部查询,方法的返回值不能随便写,由于我们要添加缓存,添加到缓存中的数据是根据方法的返回
在springboot中,我们可以很方便地使用注解来让redis为我们的数据库作缓存,以下为基本步骤
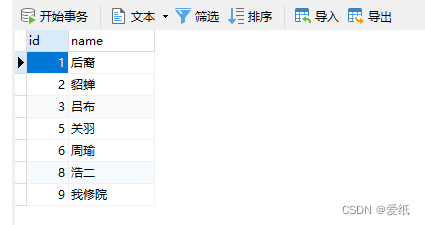
数据库中的用户表(主键id自增)
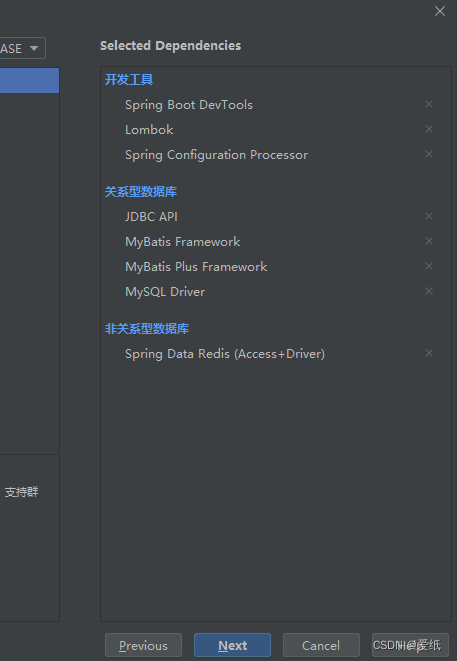
在,创建springboot项目时,我们选中非关系型数据库中的redis
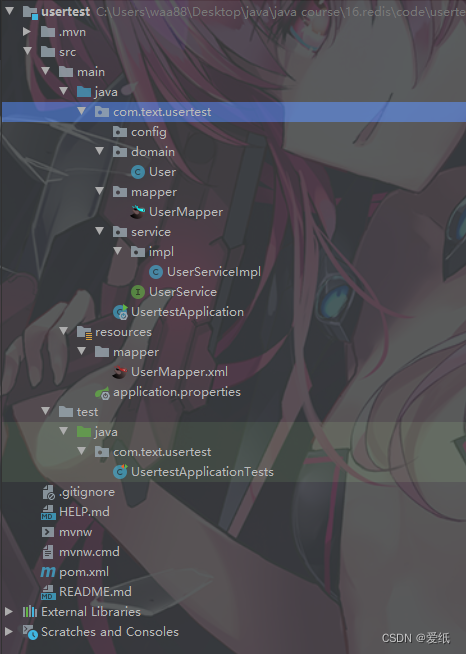
项目结构:
首先添加连接池的依赖
<dependency>
    <groupId>org.apache.commons</groupId>
    <artifactId>commons-pool2</artifactId>
    <version>2.9.0</version>
</dependency>
在配置文件中添加有关redis的配置:
# redis配置
spring.redis.host=192.168.134.128
spring.redis.port=6379
spring.redis.password=123456
spring.redis.lettuce.pool.min-idle=3
spring.redis.lettuce.pool.max-idle=8
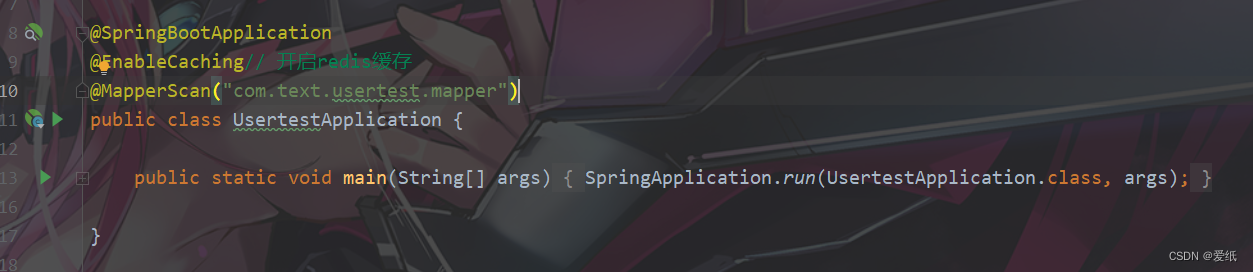
之后我们在启动类上添加@EnableCaching注解,表示开启redis缓存托管
现在我们着手来改造service层
我们准备五个方法用于测试,增删改查,以及全部查询,方法的返回值不能随便写,由于我们要添加缓存,添加到缓存中的数据是根据方法的返回值来操作的,所以除了删除的操作,方法的返回值都要给定成相应的对象
public interface UserService extends IService<User> {
    User saveUser(User user);
    int removeUser(Integer id);
    User updateUser(User user);
    User findById(Integer id);
    List<User> findAll();
}
之后我们在service实现类上添加@CacheConfig注解,并给定cacheNames属性,用于区分各个service中间的缓存内容,一般建议使用该类的全限定名

之后我们来到具体的方法上
首先是添加方法,我们需要在方法上添加@CachePut注解,此注解用在添加以及更新的方法上,其中的key属性,是为了给redis中的key赋值,内容自定义,但一般为了key的唯一性,都取参数对象的id作为值,此处#user.id表示取方法阐述中的user的id属性作为值
    @CachePut(key = "#user.id")
    @Override
    public User saveUser(User user) {
        userMapper.insert(user);
        return user;
    }
接下来是删除方法,我们需要在方法上添加@CacheEvict注解,此注解一般用在删除方法上作缓存,key属性作用与以上相同
    @CacheEvict(key = "#id")
    @Override
    public int removeUser(Integer id) {
        return userMapper.deleteById(id);
    }
修改(更新)方法,使用@CachePut注解
    @CachePut(key = "#user.id")
    @Override
    public User updateUser(User user) {
        userMapper.updateById(user);
        return user;
    }
查询方法,使用@Cacheable注解
    @Cacheable(key = "#id")
    @Override
    public User findById(Integer id) {
        return userMapper.selectById(id);
    }
接下来是查询全部的注解,此处要注意@Cacheable注解中的key值,我们自定义该值为userAll,但是如果直接写进去,会被当做是变量进行识别。而我们则希望这个值是一个字符串类型,所以我们还需要添加一层单引号,也可以用双引号加上转义字符来实现
    @Cacheable(key = "'userAll'")
    @Override
    public List<User> findAll() {
        return userMapper.selectList(new QueryWrapper<User>());
    }
但是到此,我们发现逻辑上出现了问题,一旦我们执行了增删改操作,redis中的userAll就会和数据库中的不匹配,此时我们就需要移除redis中的userAll,所以我们在执行增删改方法时,就需要用到多次redis的缓存操作,此时我们就需要用到@Caching注解,这里先以增加方法为例
//  @CachePut(key = "#user.id")
    @Caching(
            put = @CachePut(key = "#user.id"),
            evict = @CacheEvict(key = "'userAll'")
    )
    @Override
    public User saveUser(User user) {
        userMapper.insert(user);
        return user;
    }
此处@Caching中的内容表示,在先执行了往redis中添加操作后,就立即删除掉redis中userAll这个key,这里的put和evict属性的值都是数组,所以我们可以添加多个增加(更新)和删除方法(查询方法也可以,使用cacheable属性)
类似得,我们将其他方法也做改造(查询方法不需要),最终service实现类的方法如下
// @CachePut(key = "#user.id")// 为添加的值指定id
    @Caching(// 添加多个缓存操作
            put = @CachePut(key = "#user.id"),
            evict = @CacheEvict(key = "'userAll'")
    )
    @Override
    public User saveUser(User user) {
        userMapper.insert(user);
        return user;
    }

    //    @CacheEvict(key = "#id")
    @Caching(
            evict = {@CacheEvict(key = "#id"), @CacheEvict(key = "'userAll'")}
    )
    @Override
    public int removeUser(Integer id) {
        return userMapper.deleteById(id);
    }

    //    @CachePut(key = "#user.id")
    @Caching(
            put = @CachePut(key = "#user.id"),
            evict = @CacheEvict(key = "'userAll'")
    )
    @Override
    public User updateUser(User user) {
        userMapper.updateById(user);
        return user;
    }

    @Cacheable(key = "#id")
    @Override
    public User findById(Integer id) {
        return userMapper.selectById(id);
    }

    @Cacheable(key = "'userAll'")
    @Override
    public List<User> findAll() {
        return userMapper.selectList(new QueryWrapper<User>());
    }
我们来到测试方法,首先测试查询全部
    @Test
    public void selectAll(){
        List<User> userList = userService.findAll();
        for (User user : userList) {
            System.out.println("user = " + user);
        }
    }
第一次查询:
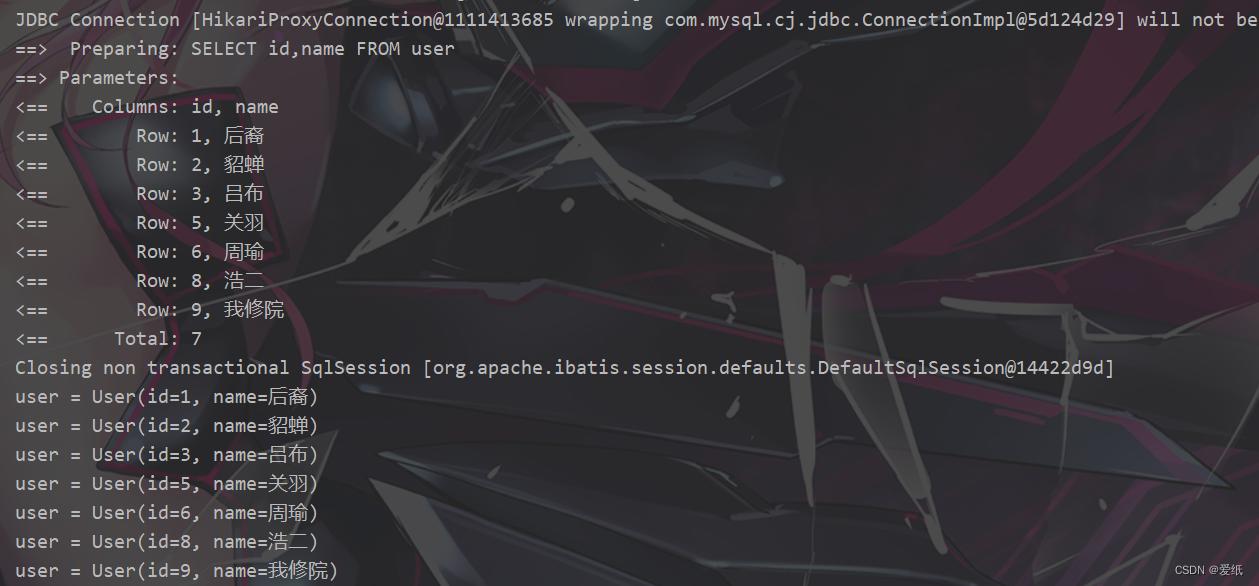
我们看到控制台出现了sql查询,表示这一次是在数据库中查询得到的
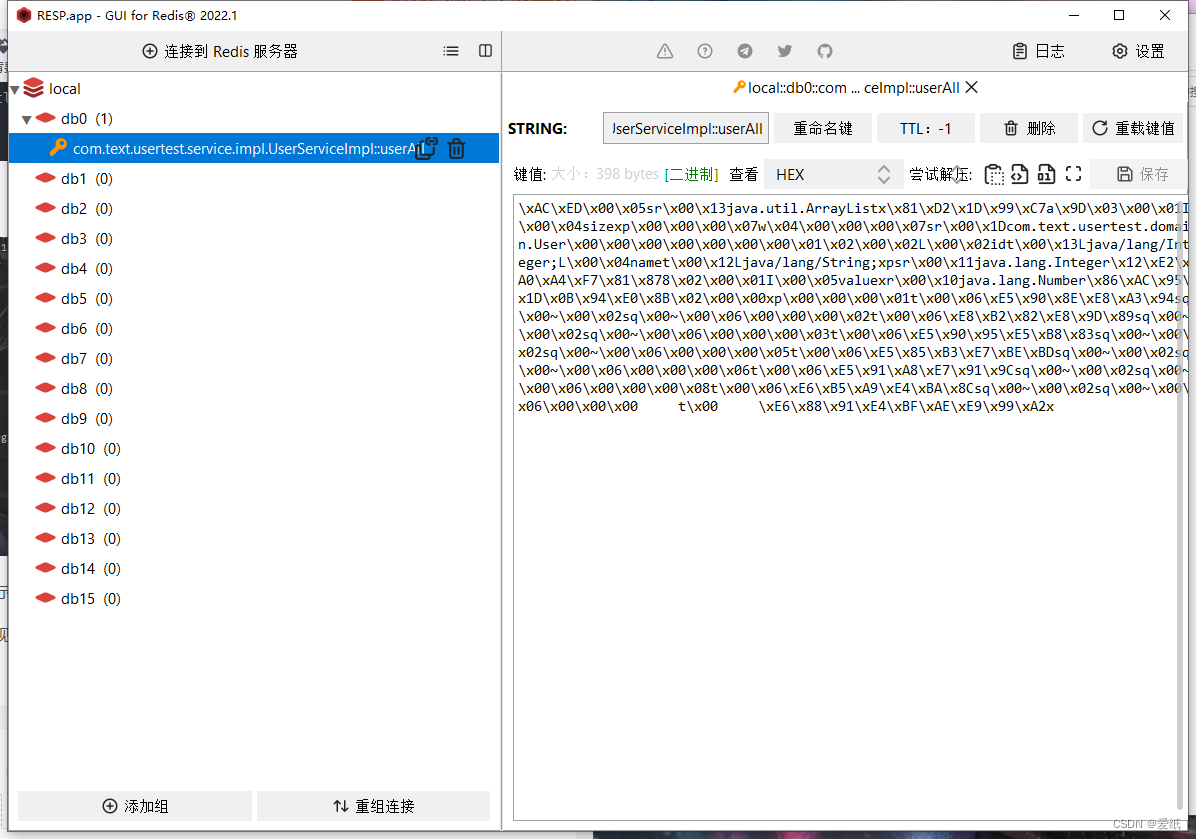
我们查看redis中的内容,发现也出现了userAll这条信息
 接下来进行第二次查询
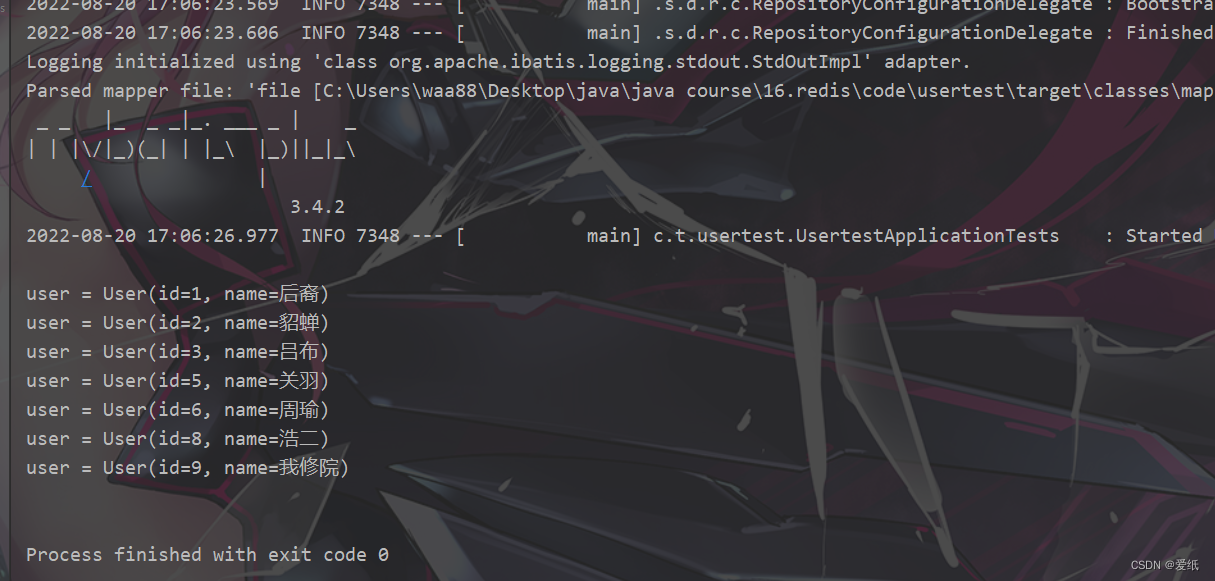
我们看到这次查询在控制台上并没有sql的输出,表示我们配置redis缓存成功
接下来测试添加功能
    /**
     * 测试添加user
     */
    @Test
    public void add(){
        User user = new User();
        user.setName("德川");
        userService.saveUser(user);
    }
执行之后我们查看数据库

执行成功,接下来我们查看redis
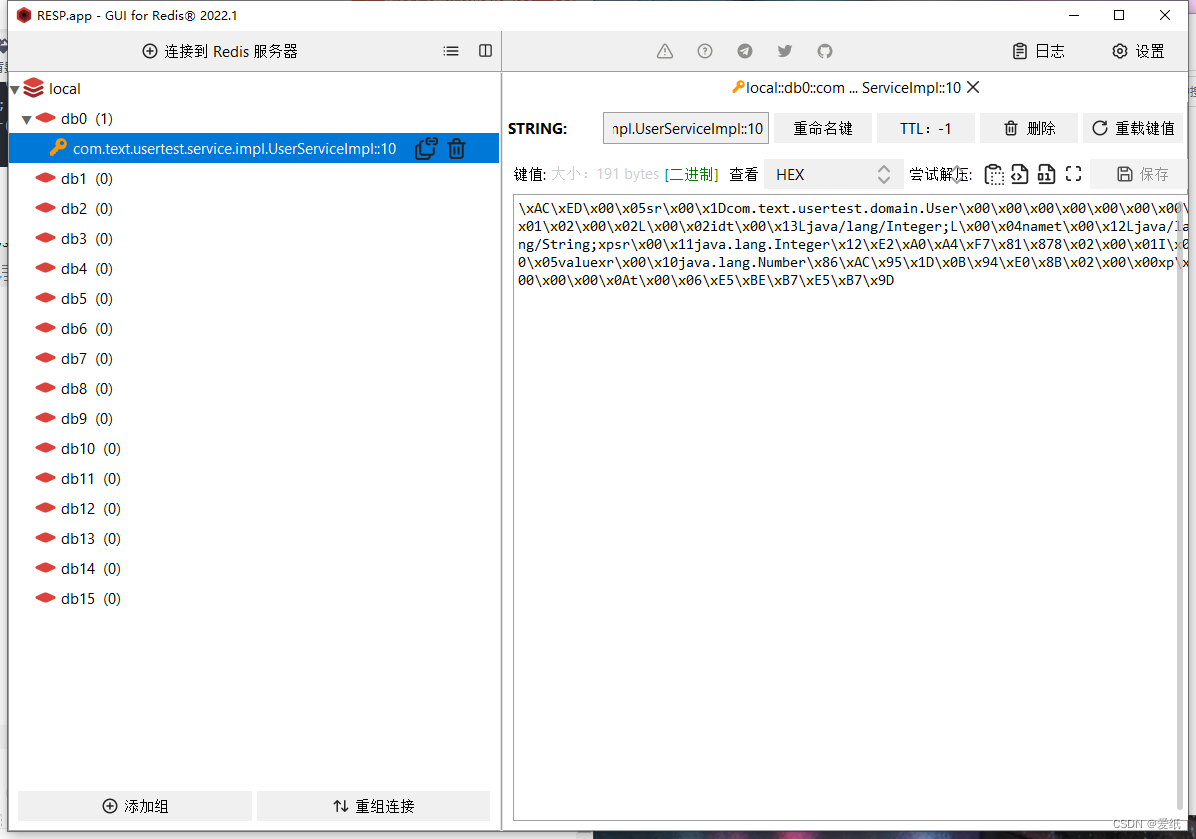
我们发现只有一条数据,就是这次添加的id为10的数据,之前的userAll信息确实也被删除掉了,表示@Caching注解直接也得到了执行
但是我们在查看redis时发现一个问题,redis中存储的数据我们根本看不懂,这是因为springboot在将数据存入redis时,由于redis并不能存储java对象,所以springboot只能将对象序列化成字符串,再存入redis中,但是默认使用的是jdk的序列化方式,可读性不高,我们一般都希望其转换成json格式,此时就需要我们进行手动配置序列化方式
首先我们导入jackson的启动器依赖
        <dependency>
            <groupId>org.springframework.boot</groupId>
            <artifactId>spring-boot-starter-json</artifactId>
        </dependency>
在config包中添加如下配置类
@Configuration
public class RedisConfig {

    /**
     * 设置序列化等缓存配置
     *
     * @return
     */
    @Bean
    public RedisCacheConfiguration redisCacheConfiguration() {
        RedisCacheConfiguration redisCacheConfiguration = RedisCacheConfiguration.defaultCacheConfig();
        // 设置序列化的方式
        redisCacheConfiguration = redisCacheConfiguration.serializeValuesWith(RedisSerializationContext
                .SerializationPair
                .fromSerializer(RedisSerializer.json()));
        return redisCacheConfiguration;
    }
}
接下来我们测试更新方法
    /**
     *  测试更新user
     */
    @Test
    public void update(){
        User user = new User();
        user.setId(10);
        user.setName("原野");
        userService.updateUser(user);
    }
我们来到redis中查看结果
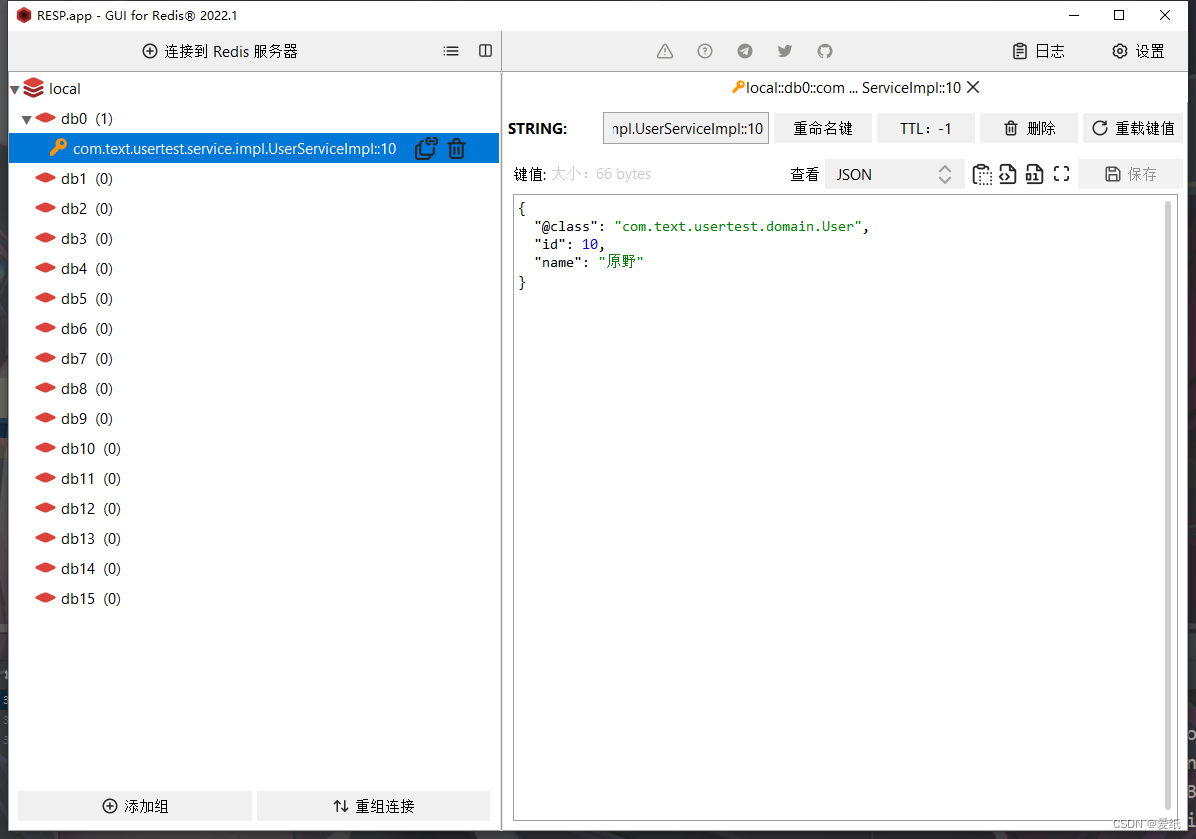
发现存储的信息变成了json格式,大功告成

华为开发者空间,是为全球开发者打造的专属开发空间,汇聚了华为优质开发资源及工具,致力于让每一位开发者拥有一台云主机,基于华为根生态开发、创新。
更多推荐


 4
4 0
0- 0


 已为社区贡献3条内容

所有评论(0)