SpringCache Redis Key设置过期时间
SpringCache Redis Key设置过期时间1. Spring CacheSpring Cache 是Spring 提供的一整套的缓存解决方案,它不是具体的缓存实现,它只提供一整套的接口和代码规范、配置、注解等,用于整合各种缓存方案。先理解抽象层的几个概念:1.1 Cache 缓存的抽象Cache 缓存的抽象,Spring定义为一个接口。一个缓存对象中可以存储多个Entry<key
SpringCache Redis Key设置过期时间
1. Spring Cache
Spring Cache 是Spring 提供的一整套的缓存解决方案,它不是具体的缓存实现,它只提供一整套的接口和代码规范、配置、注解等,用于整合各种缓存方案。
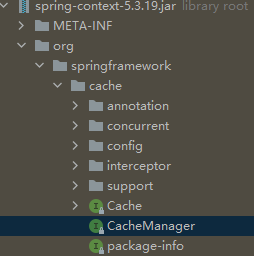
先理解抽象层的几个概念:
1.1 Cache 缓存的抽象
Cache 缓存的抽象,Spring定义为一个接口。
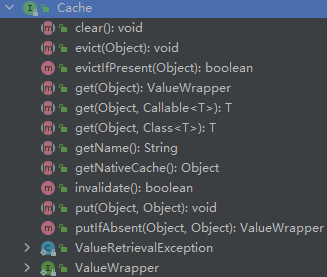
一个缓存对象中可以存储多个Entry<key,value>, 几个重要方法:
- getName() 每个缓存都有名称,通过这个方法可以获取到
- get(key) 方法, 获取这个缓存中某个 key映射的值
- put(key,value) 方法,保存或者更新这个缓存中某个key 映射的值
- evict(key) 方法,从这个缓存中删除某个key ,即删除缓存中的某个条目
- clear() 方法,清空缓存中的所有条目
1.2 CacheManager 缓存管理器的抽象
CacheManager 缓存管理器的抽象,Spring定义为一个接口:
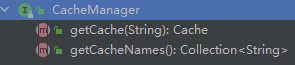
一个CacheManager可以管理多个Cache,所以一个CacheManager提供了两个方法:
- getCache(String):Cache 根据缓存的名称得到缓存对象
- getCacheNames():Collection 获取管理器管理范围内的所有cache名称。
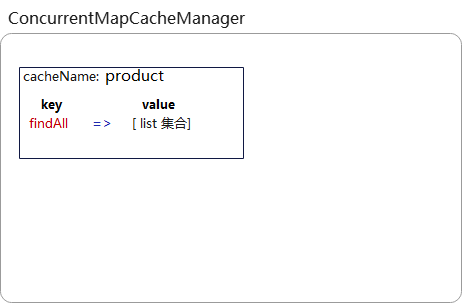
在 org.springframework.cache.concurrent 包中,提供了 ConcurrentMapCache和 ConcurrentMapCacheManager 的实现,他们将cache中的Entry 保存在了本地内存中,其数据结构为ConcurrentHashMap
1.3 缓存操作的Annotation
实际开发的时候,我们往往会在方法上添加一些annotation来指明对缓存的操作,即指明 对哪个或哪些缓存(cacheName)中的哪个 key 在什么条件下,做什么操作(添加,更新,删除):
| Annotation | 作用 |
|---|---|
| @Cacheable | 将方法的结果缓存起来,下一次方法执行参数相同时,将不执行方法,返回缓存中的结果。@Cacheable 会进行缓存检查 |
| @CacheEvict | 移除指定缓存 |
| @CachePut | 标记该注解的方法总会执行,根据注解的配置将结果缓存。一般用于更新数据的时候,方法更新了数据,就将更新后的数据返回,如果有这个Annotation,那么这个数据就立即被缓存了。 |
| @Caching | 可以组合使用@Cacheable,@CacheEvict,@CachePut |
| @CacheConfig | 类级别注解,可以设置一些共通的配置,@CacheConfig(cacheNames=“user”), 代表该类下的方法均使用这个cacheNames |
在支持 Spring Cache 的环境下,对于使用 @Cacheable 标注的方法,Spring 在每次执行前都会检查 Cache 中是否存在相同 key 的缓存元素,如果存在就不再执行该方法,而是直接从缓存中获取结果进行返回,否则才会执行并将返回结果存入指定的缓存中。@CachePut 也可以声明一个方法支持缓存功能。与 @Cacheable 不同的是使用 @CachePut 标注的方法在执行前不会去检查缓存中是否存在之前执行过的结果,而是每次都会执行该方法,并将执行结果以键值对的形式存入指定的缓存中。
这些缓存操作Annotation 中常用属性的解释:
-
cacheNames/Value: 缓存名字,可以指定多个
-
key: 缓存数据时使用的key,默认空字符串。key可以使用spEL表达式
-
keyGenerator: key的生成器。自己编写一个key生成器,并注册到Spring容器中,keyGenerator指定bean的名称即可,这样就会自动调用生成器来生成 key
-
cacheManager: 指定缓存管理器。 即缓存管理器在Spring容器中的bean的名称
-
cacheResolver:Cache 解析器
缓存操作的Annotation会标注在业务方法上,当这些业务方法被调用的时候,如果指明了 Cache解析器,此时Cache解析器就会根据 方法调用的 上下文(哪个业务方法被调用,方法的参数是什么,要做什么样的缓存操作,这个上下文叫做CacheOperationInvocationContext 情况,将需要用到的Cache解析出来

-
condition: 符合条件的才会被缓存,支持 spEL表达式
-
unless: 否定缓存。当unless指定的条件为true时,方法的返回值不会被缓存。支持spEL
-
sync: 是否使用异步模式
实际使用时:
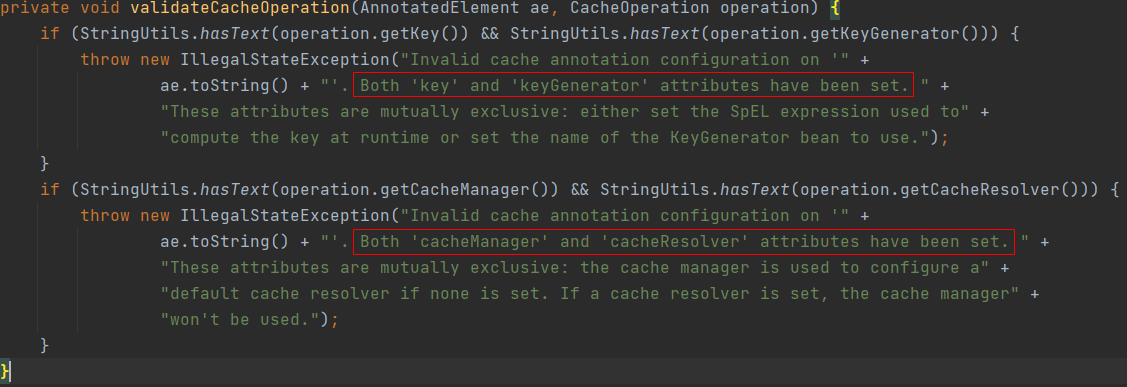
key和keyGenerator 不能同时出现,因为它们决定了 cache中某个 entry的 key。 key支持springEL 表达式,解析后就是key,而 keyGenerator 是通过调用一个方法返回值作为key。
cacheManager和cacheResolve 不能同时出现。如果没有指定cacheResolve,cacheManager会作为默认的cacheResolve
SpringCacheAnnotationParser 类中的 validateCacheOperation 方法有说明:
1.3 拦截器包
拦截器 org.springframework.cache.interceptor 包
SpringCache 操作的Annotation (@Cacheable,@CacheEvict,@CachePut) 之所以能够起作用,其本质还是用到了Spring AOP。
即: 容器启动后,会为业务 bean生成 代理对象 Proxy, 那要为哪些bean生成 Proxy?这就是 PointCut,PointCut 负责筛选出要切入的点,这里简单理解为应用中业务类中的某个或某些方法,增强的操作是什么?这是 advice, 在Spring Cache中就是对缓存的操作。
Spring AOP中,一般 advisor 理解为 advisor = PointCut + Advice .
使用Spring Cache的第一步是需要在配置类上用 开启的,它实际上就是在注册 advisor.
这里要重点关注几个bean:实际开发的时候并不需要我们的干预。
-
代理对象生成器。 跟踪源码,找到了
org.springframework.aop.framework.autoproxy.InfrastructureAdvisorAutoProxyCreator它就是用来生成代理对象的。 -
advisor: SpringCache 注册的 advisor 为
BeanFactoryCacheOperationSourceAdvisor -
pointcut :
BeanFactoryCacheOperationSourceAdvisor内部的切入点实现类是 CacheOperationSourcePointcut在切入点中就用到了 AnnotationCacheOperationSource 对象来获取CacheOperatios的集合CacheOperation的概念 : 缓存操作的抽象。
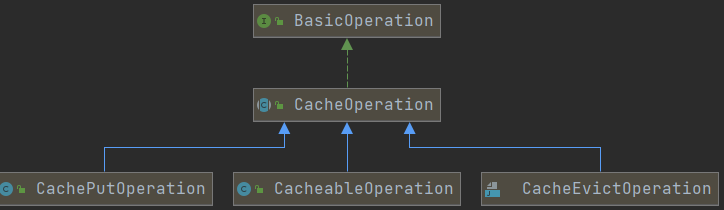
BasicOperation: 所有缓存操作(Operation, 即 @Cacheable 对应的先缓存检查,后进行数据缓存操作, @CacheEvict 对应的缓存失效操作, @CachePut 对应的不检查进行数据缓存操作 )
CacheAnnotationParser的概念:将 put、caching、evict、cacheable四大注解 解析为 Cacheoperation 后存起来。

- advice: 名称为:
cacheInterceptor类型为CacheInterceptor的bean对象。 方法拦截器,用于操作Cache的 AOP Advice
2. SpringBoot中使用默认Cache
在没有做特殊配置的情况下, SpringBoot的自动配置会为我们配置ConcurrentMapCacheManager 它使用的cache就是 ConcurrentMapCache
2.1 依赖引入
新建SpringBoot项目,引入依赖:
pom.xml
<dependency>
<groupId>org.springframework.boot</groupId>
<artifactId>spring-boot-starter-cache</artifactId>
</dependency>
2.2 打开Cache配置
在入口处加入 打开缓存配置:
@SpringBootApplication
@EnableCaching
public class Application {
public static void main(String[] args) {
SpringApplication.run(Application.class, args);
}
}
2.3 业务方法上标注缓存操作
// 这里使用了 lombok
// 产品实体类
@Data
@AllArgsConstructor
@NoArgsConstructor
public class Product implements Serializable {
private String productId;
private String category;
private String name;
private String descn;
}
// 业务接口
public interface ProductService {
public List<Product> findAll();
public Product findProductById(String id);
public int updateProduct(Product product);
}
// 业务接口实现
@Service
@Slf4j
public class ProductServiceImpl implements ProductService {
private List<Product> data;//模拟数据库中的数据
public ProductServiceImpl(){
data=new ArrayList<>();
data.add(new Product("1001","水果","苹果","红富士苹果"));
data.add(new Product("1002","水果","香蕉","香蕉香蕉"));
data.add(new Product("1003","洗护","洗发水","海飞丝"));
data.add(new Product("1004","休闲食品","辣条","辣条辣条"));
}
// ...
}
2.4 使用@Cacheable
这里所有的方法都是 ProductServiceImpl 类中的方法
@Cacheable(cacheNames = {"product"},key="#root.methodName")
public List<Product> findAll() {
log.info("数据库访问:findAll方法");
return data;
}
@Cacheable(cacheNames = {"product"},key = "#root.methodName+'['+#id+']'")
public Product findProductById(String id) {
log.info("findProductById,数据库访问查询id:{}",id);
for(Product p:data){
if(p.getProductId().equals(id)){
return p;
}
}
return null;
}
-
cacheNames : 可以指定多个cache名称,是一个数组。
-
key : cache中的key,可以使用SpringEL表达式获取当前方法上下文信息,比如方法名称,参数的值等。
Caching SpringEL Evaluation Context说明:
属性名称 描述 示例 methodName 当前方法名 #root.methodName method 当前方法 #root.method.name target 当前被调用的对象 #root.target targetClass 当前被调用的对象的class #root.targetClass args 当前方法参数组成的数组 #root.args[0] caches 当前被调用的方法使用的Cache #root.caches[0].name 要使用 root 对象的属性作为 key 时,也可以将“#root”省略,因为 Spring 默认使用的就是 root 对象的属性。
如果要直接使用方法参数传递的值,可以用
来取出方法调用的时候传递的实参值,比如上面的id
当findAll() 被调用一次后,产品集合就会被放入缓存中。
当findProductById 被调用后,指定id的产品会放入到缓存中:

cacheManager不指定,则使用默认注册的cacheManager.
2.5 使用 keyGenerator
如果key的生成规则比较复杂,无法用 SpringEL来生成,可以自定义一个 KeyGenerator, 分为三个步骤来实现:
-
定义一个类,实现 org.springframework.cache.interceptor.KeyGenerator 接口。
@FunctionalInterface public interface KeyGenerator { Object generate(Object target, Method method, Object... params); }可以看到这个接口是一个函数式接口,只需要实现一个方法:
target : 被拦截的目标对象
method: 被拦截的方法
params: 被拦截的方法参数
为了方便,可以在第2步中用 lambda 表达式。
-
将自定义的KeyGenerator注册到容器中
@Configuration public class ApplicationCacheConfig { /** * 生成缓存主键策略 (方法名+参数) 这里直接用 lambda表达式实现了 * @return KeyGenerator */ @Bean("cacheKeyGenerator") // 注意这里的cacheKeyGenerator 是要在 @Cacheable的 keyGenerator 中指定的 public KeyGenerator keyGenerator() { return (target, method, params) -> (method.getName() + " [ " + Arrays.asList(params) + " ]"); } } -
在@Cacheable 中使用
keyGenerator属性
@Cacheable(cacheNames = {"product"},keyGenerator = "cacheKeyGenerator")
public Product findProductById(String id){
...
}
一旦使用了
keyGenerator,就不要再使用 key属性了。
2.6 使用@CacheEvict
2.6.1 使用方式1:
指定要失效的缓存的名称和 key
@CacheEvict(cacheNames = "product",key="'findProductById['+#product.productId+']'")
public int updateProduct1(Product product) {
log.info("updateProduct1,更新product,让缓存失效");
return 0;
}
2.6.2 使用方式2:
如果同时要让其它的key也失效,就需要使用 @Cacheing 来组合多个@CacheEvict
@Caching(
evict={
@CacheEvict(cacheNames = "product",key="'findProductById['+#product.productId+']'"),
@CacheEvict(cacheNames = "product",key="'findAll'")
}
)
public int updateProduct2(Product product) {
log.info("updateProduct2,更新product,让多个缓存失效");
return 0;
}
2.6.3 使用方式3:
如果向让cache 中所有的 key-value 都失效,即清空cache中所有的数据,可以使用 allEntries=true
@CacheEvict(cacheNames = "product",allEntries = true)
public int updateProduct3(Product product){
log.info("updateProduct3,让整个 emp 下所有的 k-v 全部失效");
return 0;
}
2.7 使用 @CachePut
也是将数据加入到缓存中,与 相似,但对于使用 @Cacheable 标注的方法,Spring 在每次执行前都会检查 Cache 中是否存在相同 key 的缓存元素,如果存在就不再执行该方法,而是直接从缓存中获取结果进行返回,否则才会执行并将返回结果存入指定的缓存中。@CachePut 也可以声明一个方法支持缓存功能。与 @Cacheable 不同的是使用 @CachePut 标注的方法在执行前不会去检查缓存中是否存在之前执行过的结果,而是每次都会执行该方法,并将执行结果以键值对的形式存入指定的缓存中。
一般在做数据更新的时候,可以考虑使用, 它可以做到同时更新数据库中的数据和缓存中的数据。
2.8 使用 @CacheConfig
类级别注解,可以设置一些共通的配置,@CacheConfig(cacheNames=“user”), 代表该类下的方法均使用这个cacheNames。
如果业务方法很多属性都相同,可以在业务类上使用 来做一些通用配置。
2.9 SpringBoot Cache 自动注册
首先SpringFactoriesLoader加载器加载META-INF/spring.factories文件中指定了要加载的配置:
org.springframework.boot.autoconfigure.EnableAutoConfiguration=\
...
org.springframework.boot.autoconfigure.cache.CacheAutoConfiguration,\
...
org.springframework.boot.autoconfigure.cache.CacheAutoConfiguration :
@Configuration(proxyBeanMethods = false)
@ConditionalOnClass(CacheManager.class)
@ConditionalOnBean(CacheAspectSupport.class)
@ConditionalOnMissingBean(value = CacheManager.class, name = "cacheResolver")
@EnableConfigurationProperties(CacheProperties.class)
@AutoConfigureAfter({ CouchbaseDataAutoConfiguration.class, HazelcastAutoConfiguration.class,
HibernateJpaAutoConfiguration.class, RedisAutoConfiguration.class })
@Import({ CacheConfigurationImportSelector.class, CacheManagerEntityManagerFactoryDependsOnPostProcessor.class })
public class CacheAutoConfiguration {
...
}
它导入了CacheConfigurationImportSelector, 缓存配置导入选择器, SpringCache 有很多类型:
public enum CacheType {
GENERIC,JCACHE,EHCACHE,HAZELCAST,INFINISPAN,COUCHBASE,
REDIS,
CAFFEINE,
SIMPLE,
NONE
}
它会按照类型的顺序来加载各种类型对应的配置,一旦加载了,那么 cacheManager 这个bean就存在了,其它类型配置加载的时候,因为添加了,发现 cacheManager 这个bean已经存在,就不在加载配置了。
在没有引入其它缓存实现的情况下,默认使用了 SIMPLE这个类型,它对应的配置类是 SimpleCacheConfiguration:
final class CacheConfigurations {
...
static {
Map<CacheType, String> mappings = new EnumMap<>(CacheType.class);
mappings.put(CacheType.GENERIC, GenericCacheConfiguration.class.getName());
mappings.put(CacheType.EHCACHE, EhCacheCacheConfiguration.class.getName());
mappings.put(CacheType.HAZELCAST, HazelcastCacheConfiguration.class.getName());
mappings.put(CacheType.INFINISPAN, InfinispanCacheConfiguration.class.getName());
mappings.put(CacheType.JCACHE, JCacheCacheConfiguration.class.getName());
mappings.put(CacheType.COUCHBASE, CouchbaseCacheConfiguration.class.getName());
mappings.put(CacheType.REDIS, RedisCacheConfiguration.class.getName());
mappings.put(CacheType.CAFFEINE, CaffeineCacheConfiguration.class.getName());
mappings.put(CacheType.SIMPLE, SimpleCacheConfiguration.class.getName());
mappings.put(CacheType.NONE, NoOpCacheConfiguration.class.getName());
MAPPINGS = Collections.unmodifiableMap(mappings);
}
...
}
可以看到 SimpleCacheConfiguration 配置的cacheManager bean的名称为 cacheManager, 类型为ConcurrentMapCacheManager
@Configuration(proxyBeanMethods = false)
@ConditionalOnMissingBean(CacheManager.class)
@Conditional(CacheCondition.class)
class SimpleCacheConfiguration {
@Bean
ConcurrentMapCacheManager cacheManager(CacheProperties cacheProperties,
CacheManagerCustomizers cacheManagerCustomizers) {
ConcurrentMapCacheManager cacheManager = new ConcurrentMapCacheManager();
...
}
}
3. 使用Redis Cache
3.1 引入依赖
<dependency>
<groupId>org.springframework.boot</groupId>
<artifactId>spring-boot-starter-cache</artifactId>
</dependency>
<dependency>
<groupId>org.springframework.boot</groupId>
<artifactId>spring-boot-starter-data-redis</artifactId>
</dependency>
<dependency>
<groupId>org.springframework.boot</groupId>
<artifactId>spring-boot-starter-aop</artifactId>
</dependency>
<!-- 将数据序列化成 JSON字符串后存储到redis中,非必须,根据情况引入 -->
<dependency>
<groupId>com.alibaba</groupId>
<artifactId>fastjson</artifactId>
<version> 1.2.70</version>
</dependency>
3.2 配置redis服务器
application.yml
spring:
# redis配置
redis:
host: localhost
port: 6379
database: 0
jedis:
pool:
max-active: -1
max-wait: 3000ms
timeout: 3000ms
3.3 自动配置
CacheType.REDIS 对应的 配置类为:RedisCacheConfiguration,在 RedisCacheConfiguration 之前,需要先加载 RedisAutoConfiguration 配置类,RedisAutoConfiguration 配置了注册了以下几个bean:
-
redisConnectionFactory => JedisConnectionFactory 默认使用的是Jedis连接
-
redisTemplate =>RedisTemplate
这个bean实现了
InitializingBean接口,所以spring容器在初始化它的时候,调用了afterPropertiesSet方法,在这个方法中,为 redisTemplate 创建了默认的序列化器:JdkSerializationRedisSerializer,默认的 key, value 序列化器都是这个默认的序列化器。 -
stringRedisTemplate=> StringRedisTemplate
RedisCacheCongiguration 注册的bean名称为cacheManager,类型为: RedisCacheManager
它提供了一个 createRedisCache 方法,内部在管理 cache的时候,用来创建cache,每次创建cache的时候,都可以为 cache 指定一个 新的 RedisCacheConfiguration 对象,如果没有指定,则使用默认的RedisCacheConfiguration:
public static RedisCacheConfiguration defaultCacheConfig(@Nullable ClassLoader classLoader) {
...
return new RedisCacheConfiguration(
Duration.ZERO, // 失效时间
true, // 允许空值
true, // 使用前缀
CacheKeyPrefix.simple(),// 可以分隔符,默认使用 "::"
SerializationPair.fromSerializer(RedisSerializer.string()),//key 序列化器
SerializationPair.fromSerializer(RedisSerializer.java(classLoader)), //value 序列化器
conversionService);
}
3.4 使用
一般情况下,引入了spring-boot-starter-data-redis 依赖后,就可以直接使用了, 业务类上无需做任何改动。
4. 为 Redis Cache中的key设置有效期
在 RedisCacheConfiguration 类中定义了一个 ttl属性:
public class RedisCacheConfiguration {
...
private final Duration ttl;
...
}
RedisCache 类在调用 put方法向redis服务器写入数据的源码中,调用了 cacheWriter来写入数据,可以看到,key的存活时间(TTL) 是从 RedisCacheConfiguration 对象中获取的。
也就是说,每个RedisCache都会有一个对应的 RedisCacheConfiguration对象,这个对象中就保存了存活时间,在Redis中创建key的时候,也确实指定了这个存活时间。
默认情况下,为每个 RedisCache设置的RedisCacheConfiguration 对象中 这个TTL被设置成了 Duration.ZERO
public class RedisCache extends AbstractValueAdaptingCache {
public void put(Object key, @Nullable Object value) {
...
cacheWriter.put(
name,
createAndConvertCacheKey(key),
serializeCacheValue(cacheValue),
cacheConfig.getTtl() // 从配置中获取key存活时间ttl(Time To Live)
);
}
}
所以要想实现为 RedisCache 设置key的有效期,只需要为 每个RedisCache配置一个新的 RedisCacheConfiguration 对象即可。
4.1 全局默认配置
先看看 RedisCacheConfiguration 类注册 cacheManager的源码:
class RedisCacheConfiguration {
@Bean
RedisCacheManager cacheManager(
CacheProperties cacheProperties, // 参数1
CacheManagerCustomizers cacheManagerCustomizers,// 参数2
ObjectProvider<org.springframework.data.redis.cache.RedisCacheConfiguration> redisCacheConfiguration, // 参数3
ObjectProvider<RedisCacheManagerBuilderCustomizer> redisCacheManagerBuilderCustomizers, // 参数4
RedisConnectionFactory redisConnectionFactory, // 参数5
ResourceLoader resourceLoader // 参数6
) {
...
}
...
}
可以看到参数3 注入了一个 ObjectProvider<org.springframework.data.redis.cache.RedisCacheConfiguration> , ObjectProvider 是在 Spring 4.3 中引入的,ObjectProvider接口是ObjectFactory接口的扩展,专门为注入点设计的,可以让注入变得更加宽松和更具有可选项。
如果待注入参数的Bean为空或有多个时,便是ObjectProvider发挥作用的时候了。如果注入实例为空时,使用ObjectProvider则避免了依赖对象不存在而导致异常,如果有多个实例,ObjectProvider的方法会根据Bean实现的Ordered接口或@Order注解指定的先后顺序获取一个Bean。从而了提供了一个更加宽松的依赖注入方式。
所以只需要在自定义的配置中,注册一个 RedisCacheConfiguration bean即可:
// 自定义的用于全局 RedisCache 的配置对象
@Configuration
public class RedisCacheConfig {
private static final String REDIS_CACHE_PREFIX="Qw3RedisCache::";
// 默认key TTL为 1小时,根据实际情况做调整,这里仅用于演示
private static final Duration defaultTTL=Duration.ofHours(1);
@Bean
public RedisCacheConfiguration redisCacheConfiguration(){
// 使用 fastJson来序列化数据
FastJsonRedisSerializer<Object> fastJsonRedisSerializer = new FastJsonRedisSerializer<>(Object.class);
//相当于new了一个RedisCacheConfiguration
RedisCacheConfiguration configuration = RedisCacheConfiguration.defaultCacheConfig();
configuration = configuration.serializeValuesWith
// 指定value序列化器
(RedisSerializationContext.SerializationPair.fromSerializer(fastJsonRedisSerializer))
// 指定 key的TTL
.entryTtl(defaultTTL)
// 指定前缀
.prefixCacheNameWith(REDIS_CACHE_PREFIX);
return configuration;
}
}
4.2 为每个cache key设置TTL
全局配置后,每个cache key的TTL都是一样的,实际开发的时候,如果需要为cache key 指定 TTL怎么办?网上有一种办法是将需要设置TTL的key在 配置文件中定义好。
然后自己来注册 RedisCacheManager,在注册RedisCacheManager的时候为每一个需要指定TTL的cache设置一个新的RedisCacheConfiguration 对象,并指定TTL时间。
这样一来,同一个cacheName中的所有key都会使用相同的TTL,依然不够灵活。最好的方式是能够为每一个key指定TTL。
可以自定义一个 Annotation,和@Cacheable一起添加到业务方法上 如:
@Target(ElementType.METHOD)
@Retention(RetentionPolicy.RUNTIME)
public @interface CacheExpire {
/**
* 失效时间,默认是60
*/
public long ttl() default 60L;
/**
* 单位,默认是秒
*/
public TimeUnit unit() default TimeUnit.SECONDS;
}
// 和@Cacheable 一起标注在业务方法上,指定TTL
@Cacheable(cacheNames = {"product"},key="#root.methodName")
@CacheExpire(ttl = 20,unit=TimeUnit.SECONDS)
@Override
public List<Product> findAll() {
...
}
在向redis写入数据的时候,得到当前被拦截的方法,通过反射读取@CacheExpire的值,然后为redis key设置 ttl
那么什么时候能够获取到 当前被拦截的方法?很自然想到了 Spring Cache 的 方法拦截器,即 bean name为 cacheInterceptor 类型为 CacheInterceptor 的bean对象。
即需要重写 CacheInterceptor 类,然后注册称为bean, 但是:
自己注册的 cacheInterceptor 无法替换掉默认的 cacheInterceptor Bean , Spring 不允许应用自己替换。
至于为什么不允许,目前无法得知,还请知道的同学在评论区留言。
这条路行不通,还有宁外一条路,那就是 自定义 CacheResolver
4.3 自定义 CacheResolver
先看看CacheResolver接口定义:
@FunctionalInterface
public interface CacheResolver {
Collection<? extends Cache> resolveCaches(CacheOperationInvocationContext<?> context);
}
public interface CacheOperationInvocationContext<O extends BasicOperation> {
O getOperation();
Object getTarget();
Method getMethod();
Object[] getArgs();
}
可以看到,扩展了CacheResolver后,就相当于拦截了 Cache的解析,即能获取到 Cache对象,又能获取到被拦截的Method,这样就可以通过method 的反射 获取到 对象了。这样就能替换掉 RedisCache中的RedisCacheConfiguration 对象了。
然而我发现:
public class RedisCache extends AbstractValueAdaptingCache {
//...
private final RedisCacheConfiguration cacheConfig;
//...
}
cacheConfig 居然是一个 private final 的
那通过反射能将其替换掉吗?尝试了一下,居然可以,这样就解决了每个key定义一个 TTL,下面是具体的做法:
4.3.1 自定义CacheResolver
@Slf4j
public class RedisExpireCacheResolver extends SimpleCacheResolver {
public RedisExpireCacheResolver(CacheManager cacheManager){
super(cacheManager);
}
@Override
public Collection<? extends Cache> resolveCaches(CacheOperationInvocationContext<?> context) {
Collection<String> cacheNames = getCacheNames(context);
if (cacheNames == null) {
return Collections.emptyList();
}
Collection<Cache> result = new ArrayList<>(cacheNames.size());
for (String cacheName : cacheNames) {
Cache cache = getCacheManager().getCache(cacheName);
if (cache == null) {
throw new IllegalArgumentException("Cannot find cache named '" +
cacheName + "' for " + context.getOperation());
}
// 获取到Cache对象后,开始解析 @CacheExpire
parseCacheExpire(cache,context);
result.add(cache);
}
return result;
}
private void parseCacheExpire(Cache cache,CacheOperationInvocationContext<?> context){
Method method= context.getMethod();
// 方法上是否标注了CacheExpire
if(AnnotatedElementUtils.isAnnotated(method,CacheExpire.class)){
// 获取对象
CacheExpire cacheExpire=AnnotationUtils.getAnnotation(method,CacheExpire.class);
log.info("CacheExpire ttl:{}, CacheExpire unit:{}",cacheExpire.ttl(), cacheExpire.unit());
// 将 cache强制转换成 RedisCache,准备替换掉 配置
RedisCache redisCache=(RedisCache) cache;
Duration duration=Duration.ofMillis(cacheExpire.unit().toMillis(cacheExpire.ttl()));
// 替换RedisCacheConfiguration 对象
setRedisCacheConfiguration(redisCache,duration);
}
}
// 替换RedisCacheConfiguration 对象
private void setRedisCacheConfiguration(RedisCache redisCache, Duration duration){
RedisCacheConfiguration defaultConfiguration=redisCache.getCacheConfiguration();
RedisCacheConfiguration configuration = RedisCacheConfiguration.defaultCacheConfig();
configuration = configuration.serializeValuesWith
(defaultConfiguration.getValueSerializationPair())
.entryTtl(duration)
.prefixCacheNameWith("Qw3RedisCache::Expire::");
// 实践发现可以替换掉 private final 的field值
//反射设置新的值
Field configField = ReflectionUtils.findField(RedisCache.class,"cacheConfig", RedisCacheConfiguration.class);
configField.setAccessible(true);
ReflectionUtils.setField(configField,redisCache,configuration);
}
}
当private final修改直接初始化的基本类型或String时,使⽤反射⽆法修改变量值,其它情况下可以修
改.
4.3.2 注册CacheResolver Bean
@Configuration
public class RedisCacheConfig {
...
// 注册Bean,Bean的名称为方法名: redisExpireCacheResolver
@Bean
public CacheResolver redisExpireCacheResolver(CacheManager cacheManager) {
return new RedisExpireCacheResolver(cacheManager);
}
}
4.3.3 使用 cacheResolver
@Cacheable(cacheNames = {"product"},key="#root.methodName" ,cacheResolver = "redisExpireCacheResolver")
@CacheExpire(ttl = 20,unit=TimeUnit.SECONDS)
public List<Product> findAll() {
log.info("数据库访问:这是第{}次调用findAll方法",++count);
return data;
}
方法执行之后,到Redis中查看,TTL已经生效了

华为开发者空间,是为全球开发者打造的专属开发空间,汇聚了华为优质开发资源及工具,致力于让每一位开发者拥有一台云主机,基于华为根生态开发、创新。
更多推荐


 40
40 0
0- 0


 已为社区贡献1条内容
 免费领云主机


 华为云 x DeepSeek:AI驱动云上应用创新

 DTT年度收官盛典:华为开发者空间大咖汇,共探云端开发创新
 华为云数字人,助力行业数字化业务创新
 企业数据治理一站式解决方案及应用实践
 轻松构建AIoT智能场景应用


所有评论(0)