最新elasticsearch 8.0 安装配置
2022 年 2 月 11 日,Elastic 8.0 正式发布。这里进行试用。首先下载elasticsearch-8.0.1-linux-x86_64.tar.gz,并解压修改配置文件elasticsearch.yml:cluster.name: elasticsearchnode.name: node-1node.attr.rack: r1path.data: /home/$USER/app/
·
2022 年 2 月 11 日,Elastic 8.0 正式发布。
这里进行试用。
首先下载elasticsearch-8.0.1-linux-x86_64.tar.gz,并解压
修改配置文件elasticsearch.yml:
cluster.name: elasticsearch
node.name: node-1
node.attr.rack: r1
path.data: /home/$USER/app/elasticsearch-8.0.1/data/
path.logs: /home/$USER/app/elasticsearch-8.0.1/logs/
network.host: 192.168.171.51
http.port: 9201
transport.profiles.default.port: 9301
discovery.seed_hosts: ["192.168.171.51:9301"]
cluster.initial_master_nodes: ["node-1"]
http.cors.enabled: true
http.cors.allow-origin: "*"
http.cors.allow-headers: Authorization,X-Requested-With,Content-Length,Content-Type
其中设置:
http.cors.enabled: true
http.cors.allow-origin: "*"
http.cors.allow-headers: Authorization,X-Requested-With,Content-Length,Content-Type
主要是为了在elasticsearch head中可以进行访问。
启动elasticsearch:./bin/elasticsearch,在启动过程中会出现默认设置的密码:
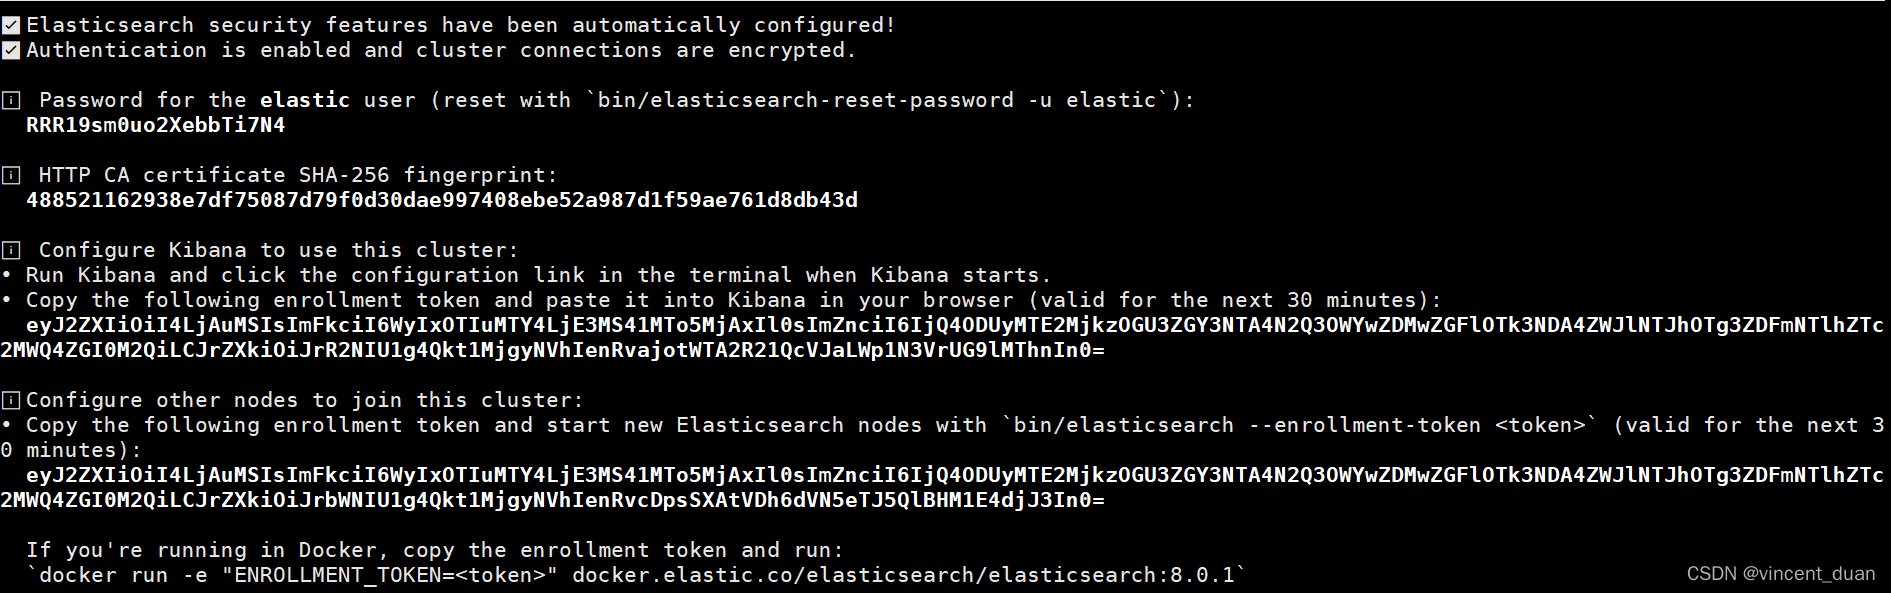
这个密码可以通过命令./bin/elasticsearch-reset-password -u elastic进行重置:

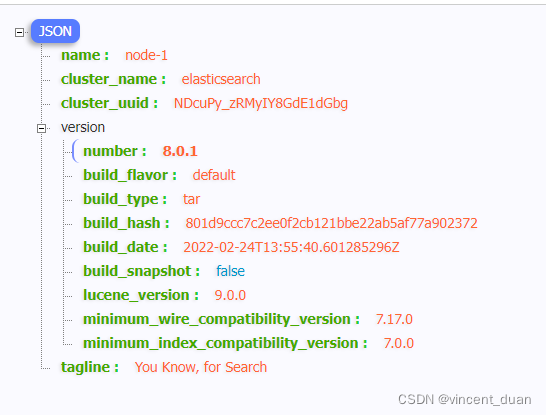
在浏览器中输入https://192.168.171.51:9201/然后输入用户名和密码就可以显示状态了:
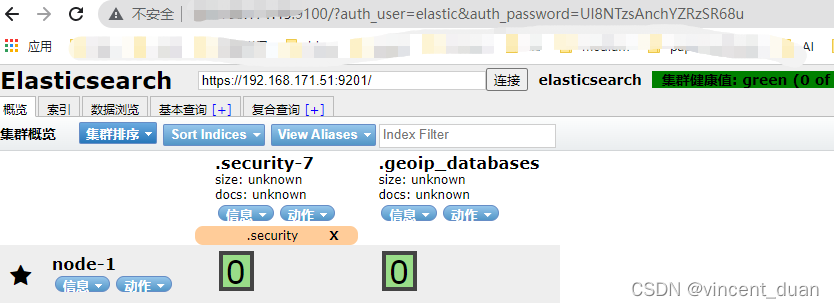
可以通过elasticsearch-head工具进行查看,需要在head地址中添加http://localhost:9100/?auth_user=elastic&auth_password=对应密码:
关闭xpack
如果不需要安全访问设置,可以将配置文件elasticsearch.yml添加设置如下:
xpack.security.transport.ssl.enabled: false
xpack.security.http.ssl.enabled: false

xpack.ml.enabled: false
xpack.monitoring.collection.enabled: false
xpack.security.enabled: false
xpack.watcher.enabled: false
修改kibana设置:
server.publicBaseUrl: "http://192.168.171.51:5601"
elasticsearch.hosts: ["http://192.168.171.51:9201"]
server.host: "0.0.0.0"

为开发者提供学习成长、分享交流、生态实践、资源工具等服务,帮助开发者快速成长。
更多推荐


 2
2 0
0- 0


 已为社区贡献14条内容

所有评论(0)