安装完华为的opengauss 后,能ping通服务地址,telnet不通端口
能ping通服务的地址,telnet不通端口
一、事件起因:
安装完华为的openGauss 后,能ping通服务的地址,telnet不通端口
linux服务本机可以用gsql客户端访问,但是外部用 Data Studio 或者 Navicat 进行连接时,连接服务失败
利用 cmd 进行 telnet ip 端口 时,发现ip地址可以ping通,端口连不通
二、解决办法:
1. 第一步考虑,防火墙未关闭,端口不通。
关闭防火墙,测试端口,还是不通,继续思考。
2. 第二步考虑,pg数据库的远程连接,需要新建用户,对用户授予足够的权限,进行远程访问的设置。
查询资料,研究相关方法可以总结为
1).修改为MD5的加密方式
2).在配置文件里面,添加远程连接的ip地址,可以使得外部IP能够 访问数据库服务
3).使数据库用户有足够大的权限,可以远程连接
具体步骤:
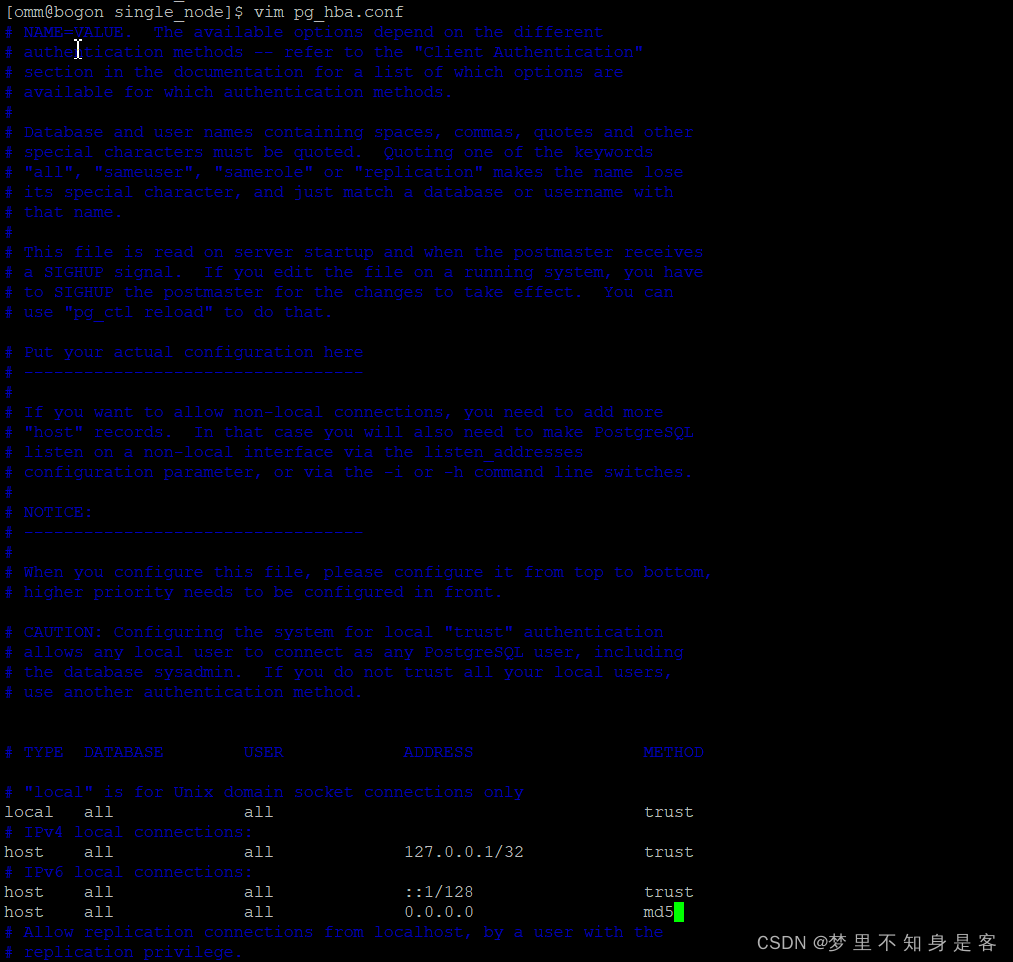
- a.切换至用户omm,添加放行IP对pg_hba.conf进行修改,路径以下面为准,可以放上自己的IP,如果
不考虑安全性,也可以用0.0.0.0对所有IP地址进行开放,并将后面的trust替换成md5加密方式。
[omm@bogon single_node]$ pwd
/opt/software/openGauss/data/single_node
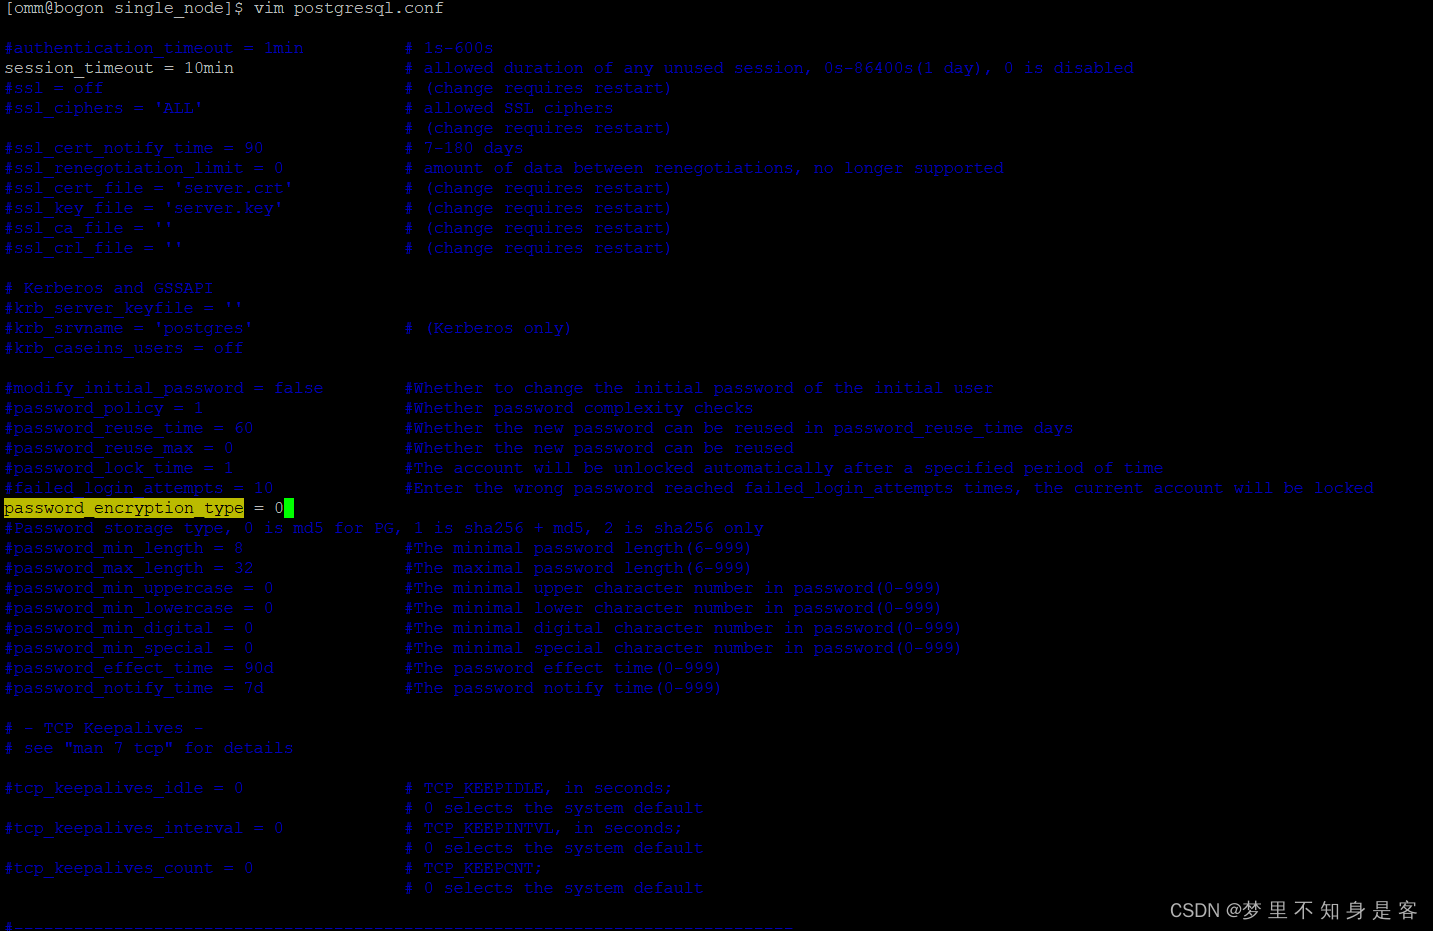
- b.修改加密方式,修改postgresql.conf配置文件。删除此行的注释,并将原本的
password_encryption_type= 2
更换为
password_encryption_type = 0 (使用md5加密)。
- c. 重启openGauss的服务,我这里用的是openGauss的极简版,
关闭方法:
gs_ctl stop -D /opt/software/openGauss/data/single_node -Z /opt/software/openGauss/data/single_node
启动方法:
gs_ctl start -D /opt/software/openGauss/data/single_node -Z /opt/software/openGauss/data/single_node
如果关闭失败,用kill -9 杀掉进程,进行重启。
- d. 创建远程连接角色 jim,授予足够的权限 首先使用gsql -d postgres -p 5432 -r
进入数据库,创建用户 jim,使密码使用md5进行加密。
将权限授予新建的用户: GRANT ALL PRIVILEGES TO jim
[omm@bogon single_node]$ gsql -d postgres -p 5432 -r
gsql ((openGauss 2.1.0 build 590b0f8e) compiled at 2021-09-30 14:29:04 commit 0 last mr  )
Non-SSL connection (SSL connection is recommended when requiring high-security)
Type "help" for help.

openGauss=# CREATE USER jim PASSWORD 'Bigdata123@';
NOTICE:  The encrypted password contains MD5 ciphertext, which is not secure.
CREATE ROLE
openGauss=# GRANT ALL PRIVILEGES TO jim;
ALTER ROLE
openGauss=#
完成第二步后,继续在本地计算机上telnet该端口,连接不通,继续想办法
3. 第三步,从服务本身思考,同一台服务器,telnet 22 端口,可以通。telnet 5432 端口,却不通,观察监听形式
利用netstat -antp查看,发现 Local Address 这一栏sshd服务默认监听所有ip 的0.0.0.0
而gaussdb服务监听的5432端口,只是本机的ip 127.0.0.1
[root@bogon ~]# netstat -antp
Active Internet connections (servers and established)
Proto Recv-Q Send-Q Local Address           Foreign Address         State       PID/Program name
tcp        0      0 0.0.0.0:111             0.0.0.0:*               LISTEN      719/rpcbind
tcp        0      0 0.0.0.0:22              0.0.0.0:*               LISTEN      1074/sshd
tcp        0      0 127.0.0.1:631           0.0.0.0:*               LISTEN      1069/cupsd
tcp        0      0 127.0.0.1:5432          0.0.0.0:*               LISTEN      2381/gaussdb
tcp        0      0 127.0.0.1:5433          0.0.0.0:*               LISTEN      2381/gaussdb
tcp        0      0 127.0.0.1:25            0.0.0.0:*               LISTEN      1389/master
tcp        0     64 192.168.197.130:22      192.168.197.1:6568      ESTABLISHED 2707/sshd: root@pts
tcp        0      0 192.168.197.130:22      192.168.197.1:5313      ESTABLISHED 2217/sshd: root@pts
tcp        0      0 192.168.197.130:22      192.168.197.1:7481      ESTABLISHED 3465/sshd: omm [pri
tcp        0      0 192.168.197.130:22      192.168.197.1:5315      ESTABLISHED 2219/sshd: root
tcp6       0      0 :::111                  :::*                    LISTEN      719/rpcbind
tcp6       0      0 :::22                   :::*                    LISTEN      1074/sshd
tcp6       0      0 ::1:631                 :::*                    LISTEN      1069/cupsd
tcp6       0      0 ::1:5432                :::*                    LISTEN      2381/gaussdb
tcp6       0      0 ::1:5433                :::*                    LISTEN      2381/gaussdb
tcp6       0      0 ::1:25                  :::*                    LISTEN      1389/master
tcp6       0      0 ::1:39186               ::1:5432                TIME_WAIT   -
tcp6       0      0 ::1:39182               ::1:5432                TIME_WAIT   -
tcp6       0      0 ::1:39184               ::1:5432                TIME_WAIT   -
tcp6       0      0 ::1:39192               ::1:5432                TIME_WAIT   -
tcp6       0      0 ::1:39188               ::1:5432                TIME_WAIT   -
tcp6       0      0 ::1:39190               ::1:5432                TIME_WAIT   -
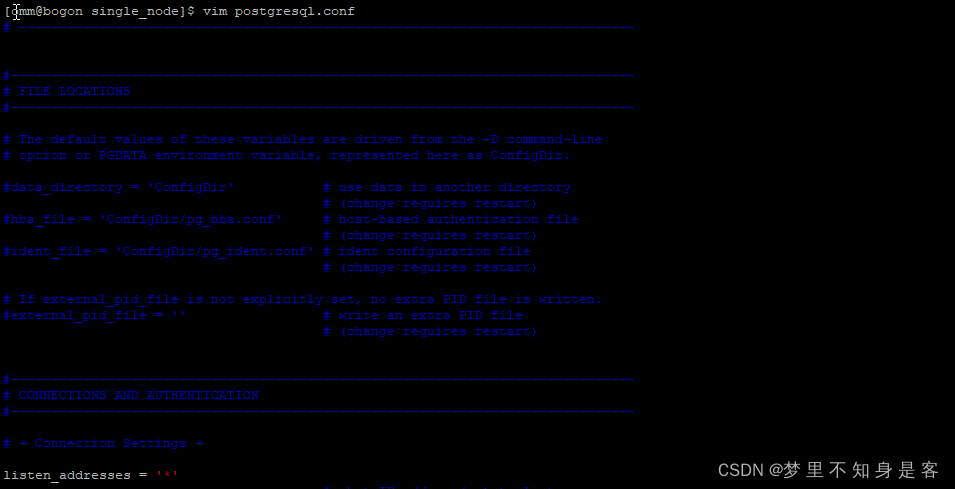
在配置文件postgresql.conf中,进行修改,将之前 listen_addresses = 'localhost’改为 listen_addresses = ‘*’
再利用netstat -antp查看,发现5432端口,已被正常监听
tcp 0 0 0.0.0.0:5432 0.0.0.0:* LISTEN 3765/gaussdb
[omm@bogon ~]$ netstat -antp
(Not all processes could be identified, non-owned process info
 will not be shown, you would have to be root to see it all.)
Active Internet connections (servers and established)
Proto Recv-Q Send-Q Local Address           Foreign Address         State       PID/Program name
tcp        0      0 0.0.0.0:111             0.0.0.0:*               LISTEN      -
tcp        0      0 0.0.0.0:22              0.0.0.0:*               LISTEN      -
tcp        0      0 127.0.0.1:631           0.0.0.0:*               LISTEN      -
tcp        0      0 0.0.0.0:5432            0.0.0.0:*               LISTEN      3765/gaussdb
tcp        0      0 0.0.0.0:5433            0.0.0.0:*               LISTEN      3765/gaussdb
tcp        0      0 127.0.0.1:25            0.0.0.0:*               LISTEN      -
tcp        0      0 192.168.197.130:22      192.168.197.1:6568      ESTABLISHED -
tcp        0      0 192.168.197.130:22      192.168.197.1:5313      ESTABLISHED -
tcp        0      0 192.168.197.130:22      192.168.197.1:7481      ESTABLISHED -
tcp        0      0 192.168.197.130:22      192.168.197.1:5315      ESTABLISHED -
tcp6       0      0 :::111                  :::*                    LISTEN      -
tcp6       0      0 :::22                   :::*                    LISTEN      -
tcp6       0      0 ::1:631                 :::*                    LISTEN      -
tcp6       0      0 :::5432                 :::*                    LISTEN      3765/gaussdb
tcp6       0      0 :::5433                 :::*                    LISTEN      3765/gaussdb
tcp6       0      0 ::1:25                  :::*                    LISTEN      -
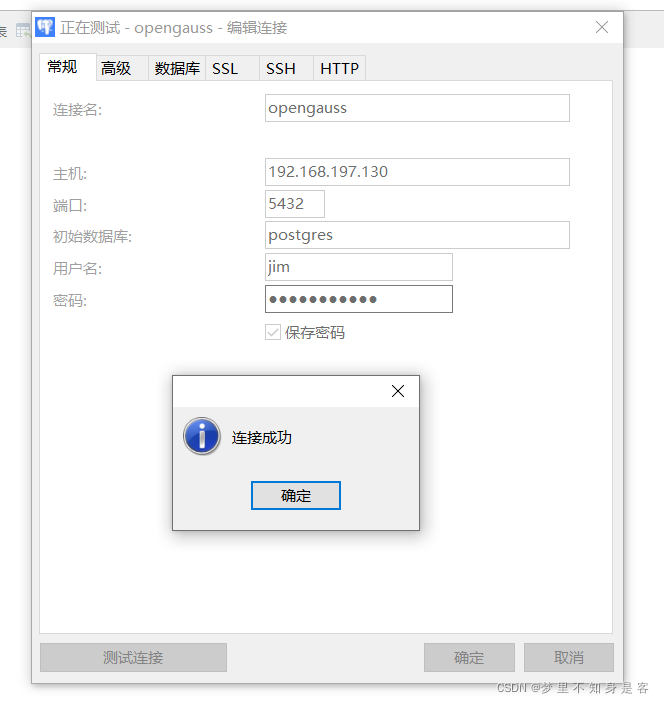
三、验证
利用cmd ,进行telnet ip 端口 ,发现已经可以访问该端口。
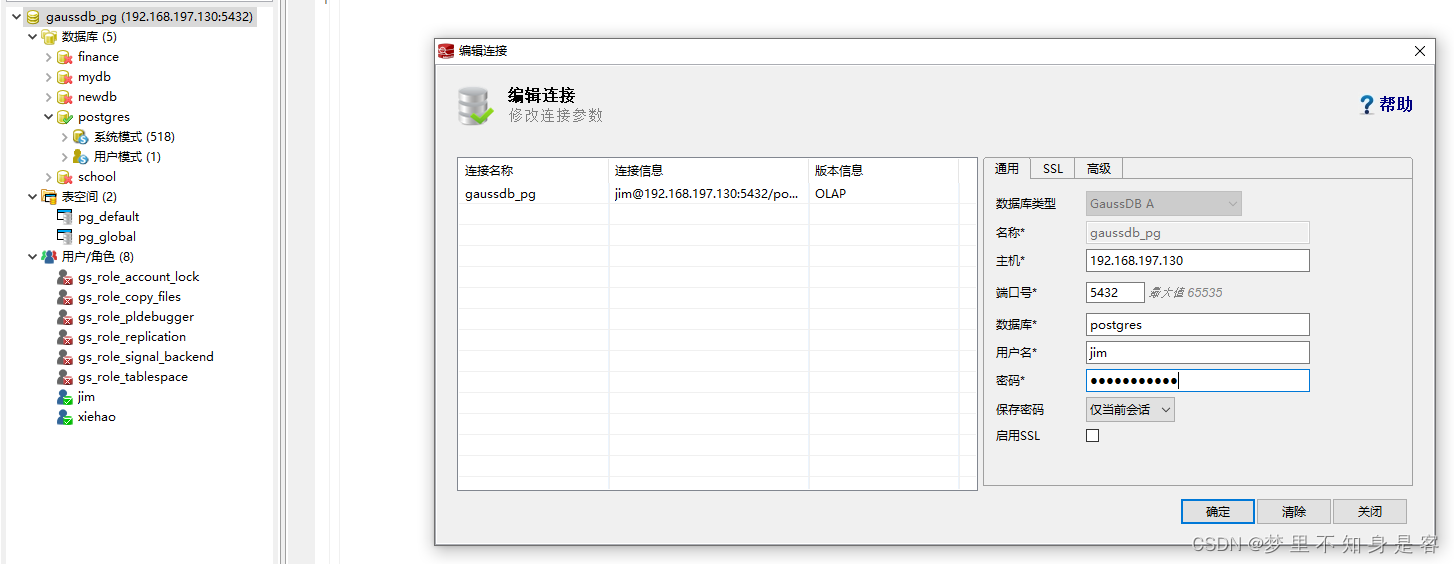
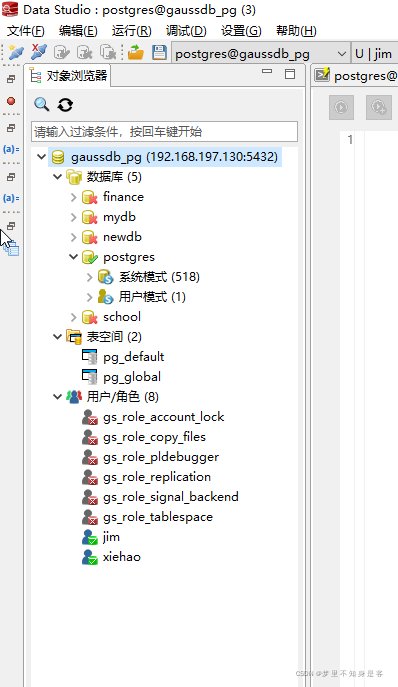
再利用 Navicat 或者 Data Studio进行连接测试。
Navicat:
Data Studio:

为开发者提供学习成长、分享交流、生态实践、资源工具等服务,帮助开发者快速成长。
更多推荐


 1
1 0
0- 0


 已为社区贡献2条内容

所有评论(0)