学习open62541 --- [33] 加密(使用OpenSSL)
使用openssl进行加密
从open62541 v1.1版本开始,支持使用OpenSSL进行加密,之前的版本只支持使用mbedTLS加密。mbedTLS比较适合运行在嵌入式设备上,也可以运行在桌面端;而OpenSSL在桌面端用的更广泛一点。
Linux系统下基本都默认安装了OpenSSL,使用起来会比较方便,Windows下安装OpenSSL也非常简单,参考这篇。
本文主要讲述如何使用OpenSSL进行加密通信。
一 下载和编译open62541
去https://github.com/open62541/open62541/releases下载v1.1.1的release源码(本文写作时最新release版本是1.1.1)

选择zip或tar.gz格式的都行。这里下载zip格式,然后放到Linux虚拟机下进行解压。本人使用的是debian10,ubuntu也是一样的。
在open62541源码目录下找到并打开CMakeLists.txt,找到以下4个option,
- UA_ENABLE_AMALGAMATION
- UA_ENABLE_ENCRYPTION
- UA_ENABLE_ENCRYPTION_OPENSSL
- UA_ENABLE_ENCRYPTION_MBEDTLS
把前3个option的值由OFF改为ON,最后一个保持默认的OFF值,这样就开启了OpenSSL功能。然后在open62541源码目录下新建build目录,cd进入,执行以下命令进行编译,
cmake ..
make
这里要特别注意cmake ..运行时关于OpenSSL的查找打印,本人打印如下,

不同的系统或者openssl版本,打印会有所变化。
编译好之后,我们把open62541.h和open62541.c拿出来(也可以拿open62541.h和libopen62541.a,libopen62541.a在build/bin目录下)
二 生成证书和私匙
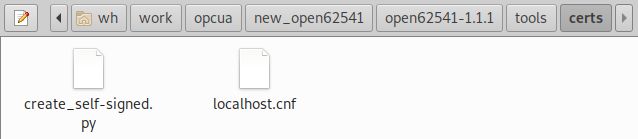
加密要使用证书和私匙,关于证书和私匙如何实现加密,可以阅读这篇文章,通俗易懂。这里使用open62541自带的工具来生成,该工具位于tools/certs/下,
这个工具需要安装一个python库netifaces,使用下面命令去安装,
pip3 install netifaces
接着运行python3 create_self-signed.py -h来查看帮助信息,如下,

这里需要生成2对证书和私匙,一个给server用,一个给client用,使用下面命令去生成,
# 生成Server的证书和私匙,使用默认参数
python3 create_self-signed.py .

# 生成Client的证书和私匙,自定义URI参数和名称
python3 create_self-signed.py -u urn:open62541.client.application -c client .
这样我们在tool/certs目录下就能看到2对证书和私匙,

可以使用如下命令来查看证书的URI参数,这个参数比较关键,
# 查看Server证书
openssl x509 -in server_cert.der -inform der -noout -text
URI打印如下,

接着看下Client的证书,
# 查看Client证书
openssl x509 -in client_cert.der -inform der -noout -text
URI打印如下,

这样,证书和私匙就生成好了,留着后面再用。
三 验证加密通信
1. 代码验证
需要一个server.c和一个client.c,使用open62541自带example,进行一定的修改
client.c如下,比较重要的是第48~52行,加密策略使用256Sha256,在第41行指定,
/* This work is licensed under a Creative Commons CCZero 1.0 Universal License.
 * See http://creativecommons.org/publicdomain/zero/1.0/ for more information. */

#include <stdlib.h>

#include "common.h"


#define MIN_ARGS 4

int main(int argc, char* argv[]) {
    if(argc < MIN_ARGS) {
        UA_LOG_FATAL(UA_Log_Stdout, UA_LOGCATEGORY_USERLAND,
                     "Arguments are missing. The required arguments are "
                     "<opc.tcp://host:port> "
                     "<client-certificate.der> <client-private-key.der> "
                     "[<trustlist1.der>, ...]");
        return EXIT_FAILURE;
    }

    const char *endpointUrl = argv[1];

    /* 加载client的证书和私匙 */
    UA_ByteString certificate = loadFile(argv[2]);
    UA_ByteString privateKey  = loadFile(argv[3]);

    /* 加载trustList. revocationList目前还不支持 */
    size_t trustListSize = 0;
    if(argc > MIN_ARGS)
        trustListSize = (size_t)argc-MIN_ARGS;
    UA_STACKARRAY(UA_ByteString, trustList, trustListSize);
    for(size_t trustListCount = 0; trustListCount < trustListSize; trustListCount++)
        trustList[trustListCount] = loadFile(argv[trustListCount+4]);

    UA_ByteString *revocationList = NULL;
    size_t revocationListSize = 0;

    UA_Client *client = UA_Client_new();
    UA_ClientConfig *cc = UA_Client_getConfig(client);

    cc->securityPolicyUri = UA_STRING_ALLOC("http://opcfoundation.org/UA/SecurityPolicy#Basic256Sha256");
    cc->securityMode = UA_MESSAGESECURITYMODE_SIGNANDENCRYPT;
    UA_ClientConfig_setDefaultEncryption(cc, certificate, privateKey,
                                         trustList, trustListSize,
                                         revocationList, revocationListSize);

    // 给安全策略None添加证书信息,去除运行时不匹配的警告
    UA_SecurityPolicy_None(cc->securityPolicies, certificate, &cc->logger);

    // 填坑的地方,非常重要,URI需要保证和证书里的URI一致
    UA_String_deleteMembers(&cc->clientDescription.applicationUri);
    cc->clientDescription.applicationUri = UA_STRING_ALLOC("urn:open62541.client.application");

    UA_ByteString_clear(&certificate);
    UA_ByteString_clear(&privateKey);
    for(size_t deleteCount = 0; deleteCount < trustListSize; deleteCount++) {
        UA_ByteString_clear(&trustList[deleteCount]);
    }

    /* Secure client connect */
    UA_StatusCode retval = UA_Client_connect(client, endpointUrl);
    if(retval != UA_STATUSCODE_GOOD) {
        UA_Client_delete(client);
        return EXIT_FAILURE;
    }

    UA_Variant value;
    UA_Variant_init(&value);

    /* NodeId of the variable holding the current time */
    const UA_NodeId nodeId = UA_NODEID_NUMERIC(0, UA_NS0ID_SERVER_SERVERSTATUS_CURRENTTIME);
    retval = UA_Client_readValueAttribute(client, nodeId, &value);

    if(retval == UA_STATUSCODE_GOOD &&
       UA_Variant_hasScalarType(&value, &UA_TYPES[UA_TYPES_DATETIME])) {
        UA_DateTime raw_date  = *(UA_DateTime *) value.data;
        UA_DateTimeStruct dts = UA_DateTime_toStruct(raw_date);
        UA_LOG_INFO(UA_Log_Stdout, UA_LOGCATEGORY_USERLAND, "date is: %u-%u-%u %u:%u:%u.%03u\n",
                    dts.day, dts.month, dts.year, dts.hour, dts.min, dts.sec, dts.milliSec);
    }

    /* Clean up */
    UA_Variant_clear(&value);
    UA_Client_delete(client);
    return retval == UA_STATUSCODE_GOOD ? EXIT_SUCCESS : EXIT_FAILURE;
}
server.c内容如下,配置URI的地方在第64~70行,要和server证书里的URI值一样
/* This work is licensed under a Creative Commons CCZero 1.0 Universal License.
 * See http://creativecommons.org/publicdomain/zero/1.0/ for more information.
 *
 *    Copyright 2019 (c) Kalycito Infotech Private Limited
 *
 */


#include <signal.h>
#include <stdlib.h>

#include "common.h"


UA_Boolean running = true;
static void stopHandler(int sig) {
    UA_LOG_INFO(UA_Log_Stdout, UA_LOGCATEGORY_USERLAND, "received ctrl-c");
    running = false;
}

int main(int argc, char* argv[]) {
    signal(SIGINT, stopHandler);
    signal(SIGTERM, stopHandler);

    if(argc < 3) {
        UA_LOG_FATAL(UA_Log_Stdout, UA_LOGCATEGORY_USERLAND,
                     "Missing arguments. Arguments are "
                     "<server-certificate.der> <private-key.der> "
                     "[<trustlist1.der>, ...]");
        return EXIT_FAILURE;
    }

    /* 加载server的证书和私匙 */
    UA_ByteString certificate = loadFile(argv[1]);
    UA_ByteString privateKey  = loadFile(argv[2]);

    /* 加载trustlist */
    size_t trustListSize = 0;
    if(argc > 3)
        trustListSize = (size_t)argc-3;
    UA_STACKARRAY(UA_ByteString, trustList, trustListSize);
    for(size_t i = 0; i < trustListSize; i++)
        trustList[i] = loadFile(argv[i+3]);

    /* Loading of a issuer list, not used in this application */
    size_t issuerListSize = 0;
    UA_ByteString *issuerList = NULL;

    /* Loading of a revocation list currently unsupported */
    UA_ByteString *revocationList = NULL;
    size_t revocationListSize = 0;

    UA_Server *server = UA_Server_new();
    UA_ServerConfig *config = UA_Server_getConfig(server);

    UA_StatusCode retval =
        UA_ServerConfig_setDefaultWithSecurityPolicies(config, 4840,
                                                       &certificate, &privateKey,
                                                       trustList, trustListSize,
                                                       issuerList, issuerListSize,
                                                       revocationList, revocationListSize);

    // 填坑的地方,非常重要,URI需要保证和证书里的URI一致
    UA_String_deleteMembers(&config->applicationDescription.applicationUri);
    config->applicationDescription.applicationUri = UA_STRING_ALLOC("urn:open62541.server.application");
    for (size_t i = 0; i < config->endpointsSize; ++i)
    {
        UA_String_deleteMembers(&config->endpoints[i].server.applicationUri);
        config->endpoints[i].server.applicationUri = UA_String_fromChars("urn:open62541.server.application");
    }

    UA_ByteString_clear(&certificate);
    UA_ByteString_clear(&privateKey);
    for(size_t i = 0; i < trustListSize; i++)
        UA_ByteString_clear(&trustList[i]);
    if(retval != UA_STATUSCODE_GOOD)
        goto cleanup;

    retval = UA_Server_run(server, &running);

 cleanup:
    UA_Server_delete(server);
    return retval == UA_STATUSCODE_GOOD ? EXIT_SUCCESS : EXIT_FAILURE;
}
common.h内容如下,功能就是提供函数loadFile()来读取证书和私匙,
/* This work is licensed under a Creative Commons CCZero 1.0 Universal License.
 * See http://creativecommons.org/publicdomain/zero/1.0/ for more information. */

#include "open62541.h"


/* loadFile parses the certificate file.
 *
 * @param  path               specifies the file name given in argv[]
 * @return Returns the file content after parsing */
static UA_INLINE UA_ByteString loadFile(const char *const path)
{
    UA_ByteString fileContents = UA_STRING_NULL;

    /* Open the file */
    FILE *fp = fopen(path, "rb");
    if(!fp) {
        errno = 0; /* We read errno also from the tcp layer... */
        return fileContents;
    }

    /* Get the file length, allocate the data and read */
    fseek(fp, 0, SEEK_END);
    fileContents.length = (size_t)ftell(fp);
    fileContents.data = (UA_Byte *)UA_malloc(fileContents.length * sizeof(UA_Byte));
    if(fileContents.data) {
        fseek(fp, 0, SEEK_SET);
        size_t read = fread(fileContents.data, sizeof(UA_Byte), fileContents.length, fp);
        if(read != fileContents.length)
            UA_ByteString_clear(&fileContents);
    } else {
        fileContents.length = 0;
    }
    fclose(fp);

    return fileContents;
}
使用cmake进行编译,整体工程结构如下,

certs目录下的证书和私匙是第二节生成的,然后拷贝过来,open62541.h和open62541.c是第一节生成并拷贝过来的。src目录下的文件就是本节的。
CMakeLists.txt内容如下,
cmake_minimum_required(VERSION 3.5)

project(encryption_openssl)

set (EXECUTABLE_OUTPUT_PATH  ${PROJECT_SOURCE_DIR}/bin)

add_definitions(-std=c99)

include_directories(${PROJECT_SOURCE_DIR}/open62541)
include_directories(${PROJECT_SOURCE_DIR}/src)

find_package(OpenSSL REQUIRED)

add_executable(server ${PROJECT_SOURCE_DIR}/src/server.c ${PROJECT_SOURCE_DIR}/open62541/open62541.c)
target_link_libraries(server ${OPENSSL_LIBRARIES})


add_executable(client ${PROJECT_SOURCE_DIR}/src/client.c ${PROJECT_SOURCE_DIR}/open62541/open62541.c)
target_link_libraries(client ${OPENSSL_LIBRARIES})
target_link_libraries()里的第二个参数就是OpenSSL库,通过find_package()查找到的。
最后,cd到build目录下执行cmake .. && make,就可以成功生成server和client这2个elf文件。
然后切到bin目录下,先运行server,运行以下命令,最后一个参数是server信任的证书,即client的证书,
./server ../certs/server_cert.der ../certs/server_key.der ../certs/client_cert.der
接着运行client,最后一个参数是client信任的证书,即server的证书,
./client opc.tcp://127.0.0.1:4840 ../certs/client_cert.der ../certs/client_key.der ../certs/server_cert.der
client的功能是获取server的系统时间,打印如下,注意这是UTC时间,

在打印信息里也可以看到已经使用了256Sha256加密策略。
2. UaExpert验证 (windows下操作)
UaExpert是一个OPC UA Client,使用加密通信,也需要使用证书和私匙。在安装好UaExpert后第一次启动时,会要求填一些信息,可以看下这篇文章,这些信息就会用来生成UaExpert的证书和私匙。
server信任某个client,就需要知道这个client的证书,client信任某个server,就需要知道这个server的证书,那UaExpert的证书在哪里呢?
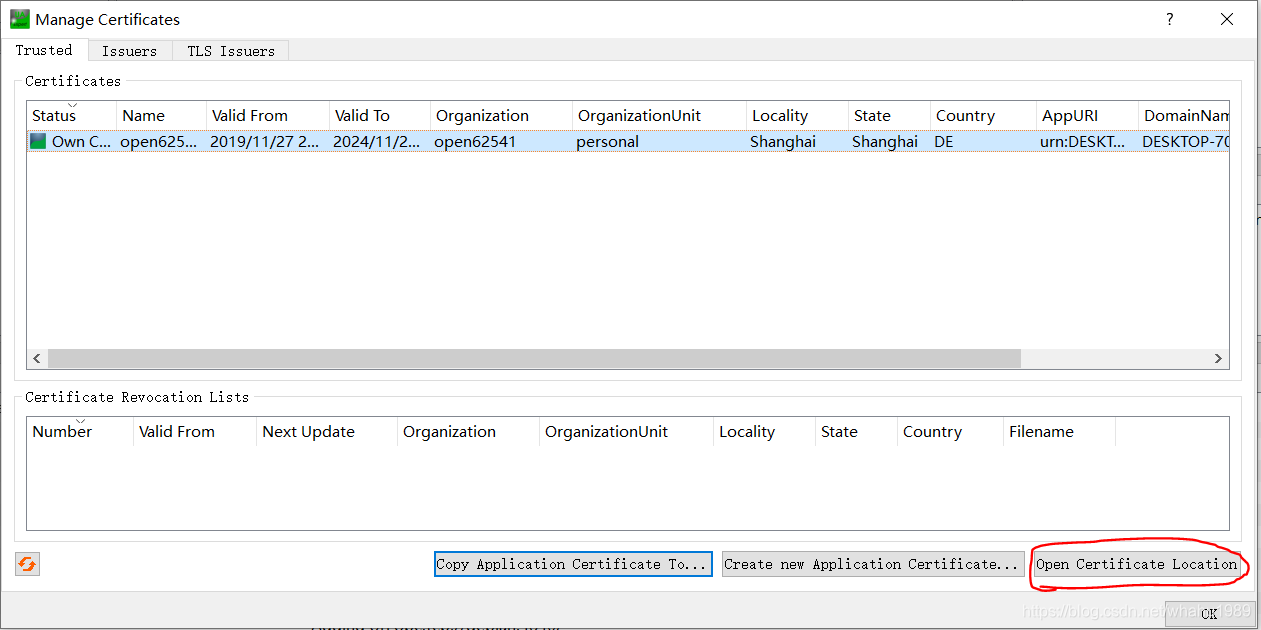
打开UaExpert,在Settings下点击Manage Certificates…,

弹出如下界面,就可以看到UaExpert的证书,选中,然后点击右下角的Open Certificate Location,
不过打开的是trusted/certs目录,而且是空的,

我们回到上2级目录到PKI下,

然后打开own/certs目录,就可以看到UaExpert的证书了,

把uaexpert.der放到上小节代码验证里的工程目录下的certs目录里(可以使用WinSCP传到Linux虚拟机下),然后重新运行server,
./server ../certs/server_cert.der ../certs/server_key.der ../certs/uaexpert.der
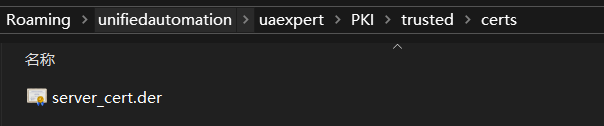
同时,把server_cert.der传到UaExpert存放证书的目录下(同样可以使用WinSCP),即PKI/trusted/certs,
最后使用UaExpert进行连接,在Custom Discovery下的opc.tcp://192.168.58.134:4840里可以看到7个endpoint,

这里选择Basic256Sha256 - Sign & Encrypt进行连接,最后连接成功,中间不会有任何警告或错误,如下,

四 总结
本文讲述如何使用OpenSSL进行加密通信,现在open62541同时支持mbedTLS和OpenSSL加密,这样用户可以根据需要进行选择,桌面端可以使用OpenSSL,嵌入式设备可以使用mbedTLS,都非常方便。
如果有写的不对的地方,希望能留言指正,谢谢阅读。

为开发者提供学习成长、分享交流、生态实践、资源工具等服务,帮助开发者快速成长。
更多推荐


 21
21 0
0- 0


 已为社区贡献3条内容

所有评论(0)