FFmpeg — 视频剪辑、动静水印、转场特效[gl-transitions]
官方多平台下载地址:http://ffmpeg.org/download.html官方命令解释地址: https://www.ffmpeg.org/ffmpeg-all.htmlCSDN博主案例分享网址https://blog.csdn.net/dangxw_/article/details/49001413ffmpeg 滤镜及其效果展示https://juejin.cn/post/6844904
CSDN博主案例分享网址和官网地址
https://blog.csdn.net/dangxw_/article/details/49001413 ffmpeg 滤镜及其效果展示
FFmpeg命令收集 - 掘金 ffmpeg 命令收集
Download FFmpeg 官方多平台下载地址
ffmpeg Documentation 官方命令地址
参考 https://github.com/transitive-bullshit/ffmpeg-gl-transition
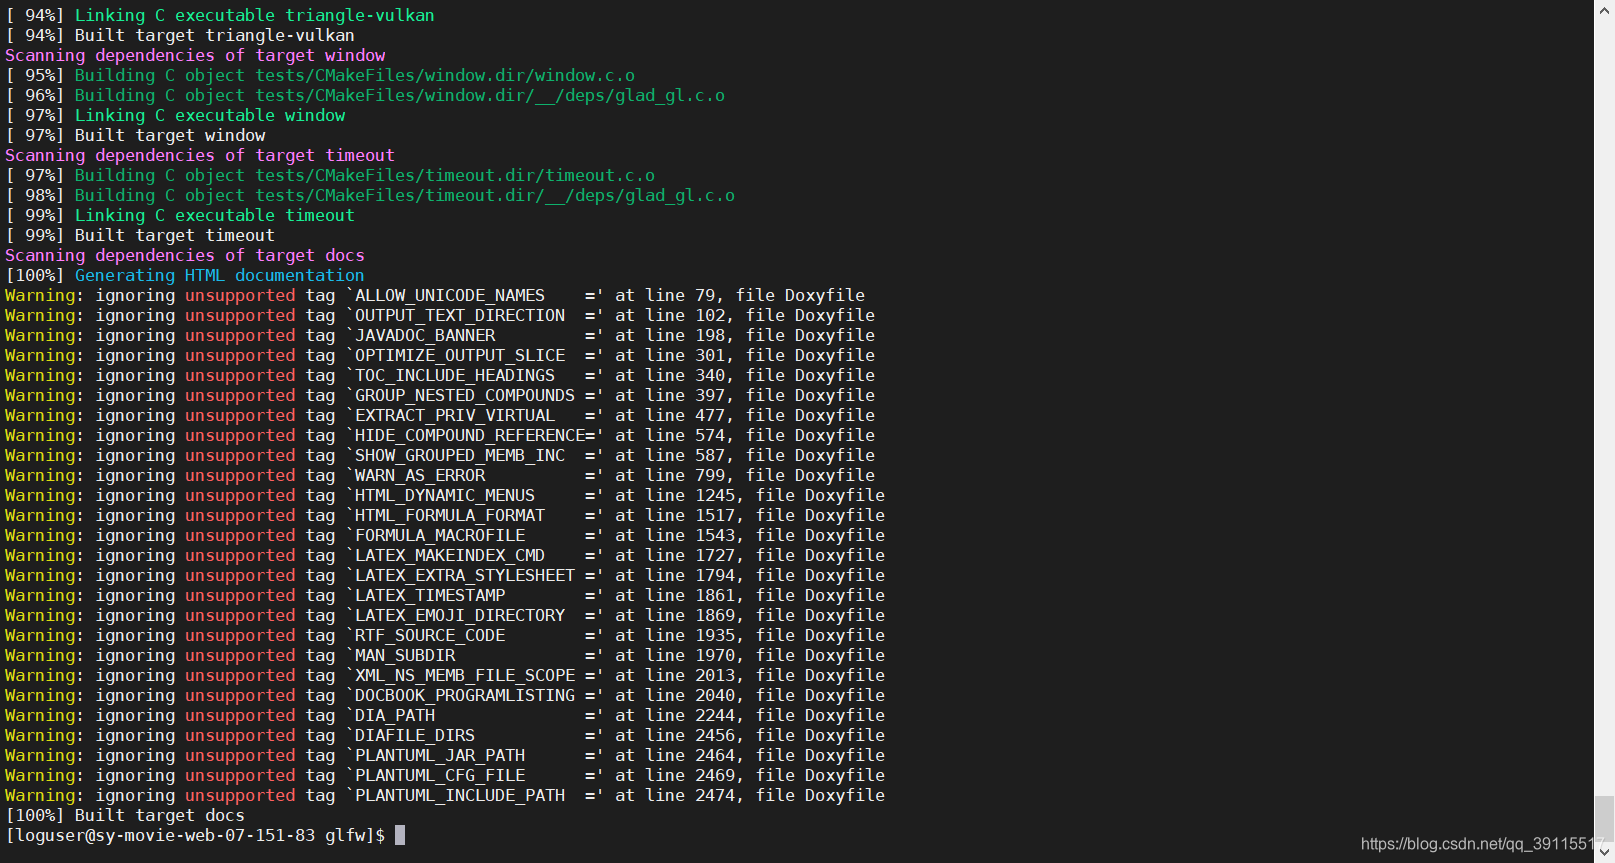
linux下正常的安装FFMpeg
流程:
解压、配置(configure)、编译(make)、安装(make install)
1、下载解压(下载指定版本的安装包)
wget http://www.ffmpeg.org/releases/ffmpeg-3.1.tar.gz
tar -zxvf ffmpeg-3.1.tar.gz
2、 进入解压后目录,输入如下命令/usr/local/ffmpeg为自己指定的安装目录
cd ffmpeg-3.1
./configure --prefix=/usr/local/ffmpeg
configure文件是一个可执行的脚本文件
其中--prefix选项是配置安装目录,如果不配置该选项,安装后可执行文件默认放在/usr /local/bin,库文件默认放在/usr/local/lib,配置文件默认放在/usr/local/etc,其它的资源文件放在/usr /local/share,比较凌乱
如果配置了--prefix,如:./configure --prefix=/usr/local/ffmpeg --enable-shared --enable-yasm --enable-libx264
安装后的所有资源文件都会被放在/usr/local/ffmpeg目录中,不会分散到其他目录。
配置相关包的时候 可能会报错:
nasm/yasm not found or too old. Use --disable-x86asm for a crippled build.

If you think configure made a mistake, make sure you are using the latest
version from Git.  If the latest version fails, report the problem to the
ffmpeg-user@ffmpeg.org mailing list or IRC #ffmpeg on irc.freenode.net.
Include the log file "ffbuild/config.log" produced by configure as this will help
solve the problem.
原因为:
yasm/nasm 包不存在或者很旧,可以使用--disable-yasm禁用这个选项编译,yasm是一款汇编器,并且是完全重写了nasm的汇编环境,接收nasm和gas语法,支持x86和amd64指令集,所以这里需要安装yasm依赖包
wget http://www.tortall.net/projects/yasm/releases/yasm-1.3.0.tar.gz
tar -zxvf yasm-1.3.0.tar.gz
cd yasm-1.3.0
./configure
make && make install
3、make && make install
4、配置变量
vi /etc/profile                           编辑文件
export PATH=$PATH:/usr/local/ffmpeg/bin   在最后PATH添加环境变量
wq!                                       保存退出
source /ect/profile                       设置生效
5、查看版本
ffmpeg -version 查看版本ffmpeg命令-拆分-解析
示例:
ffmpeg -i C:\Users\heshiping\Desktop\videoDown\2.mp4 -i C:\Users\heshiping\Desktop\videoDown\4.jpg -filter_complex "[1:v]scale=200:200[sf];[0:v][sf]overlay=x='if(between(t,5,15),100,NAN)':100[out]" -map "[out]" -threads 5 -preset ultrafast C:\Users\heshiping\Desktop\videoDown\111.mp4 -y
解析:
ffmpeg 安装包bin目录的命令(配置文件配置命令地址)
-i 视频或者图片等文件路径
-filter_complex 滤镜
[1:v] 这个里头两个参数,1表示的是操作对象的编号,本例中0就是原始视频文件2.mp4,1就是4.jpg ,而另一个参数v表示操作对象里的视频信息。
scale 尺寸比例
[sf] 操作过滤器的名字,名字随便起
[1:v]scale=500:500[sf] 意思就是对图片4.jpg进行调节尺寸的操作,并将这个操作的结果命名为sf
overlay 覆盖
[0:v][sf]overlay=x='if(between(t,10,30),300,NAN)':150[cc];[cc]colorkey=0x000000:0.6:1.0[tmd]意思就是将[sf]叠加到0对象(2.mp4)的视频上; 注意的就是顺序:后一个对象叠加到前一个上
'if(between(t,10,30),300,NAN)' 特定时间显示水印, 语句结构:if(条件,条件为true时的值,条件为false时的值) ,当时间在10秒和30秒之时,水印x位置为300,反之不显示水印;如果不用条件语句between也可以用表达式gte(x,y) 大于等于 和 lte来判断 小于或等于,水印的移动x坐标上加上了+t*10,于是水印就会慢慢向右边移动。
colorkey=0x000000:0.6:1.0 半透明度 水印透明度color(用于抠图的背景色。这个色值将会被替换成透明色):similarity(相似度,范围[0.01-1],1的话匹配所有色值):blend(透明度[0-1],默认0,完全透明,例如0.5则是50%的透明度)
-map 流输出文件-threads 5 -preset ultrafast 开启五个线程效率最佳
-y 生成视频的地址 文件是否允许覆盖
转场特效——ffmpeg gl-transitions
gl-transitions (做动画转场特效 演示地址:GL Transitions )
实现转场效果完整命令:
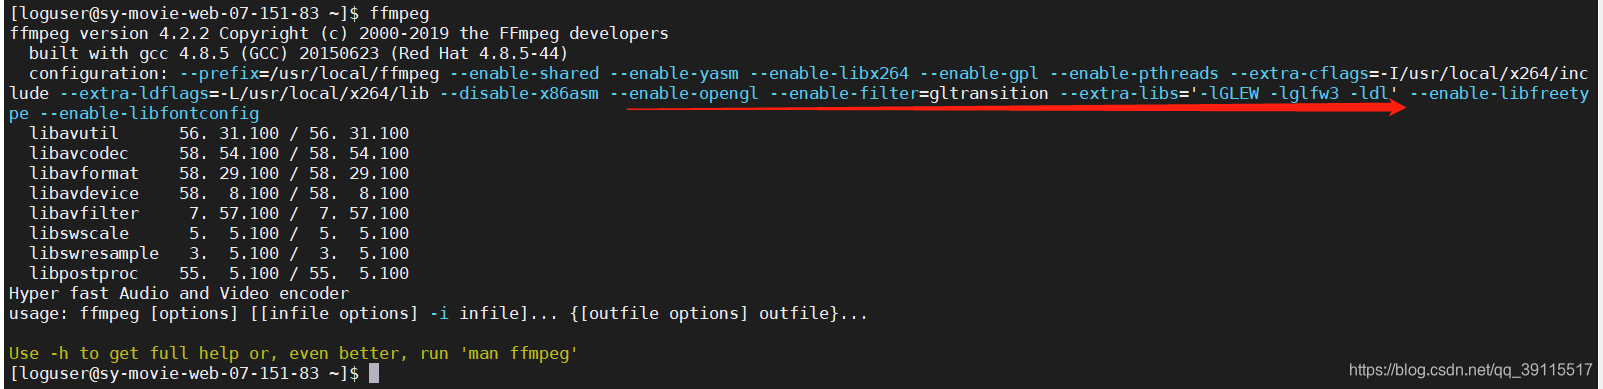
./configure --prefix=/usr/local/ffmpeg --enable-shared --enable-yasm --enable-libx264 --enable-gpl --enable-pthreads --extra-cflags=-I/usr/local/x264/include --extra-ldflags=-L/usr/local/x264/lib --disable-x86asm --enable-opengl --enable-filter=gltransition --extra-libs='-lGLEW -lglfw3 -ldl' --enable-libfreetype --enable-libfontconfig --enable-libfribidi要想 ffmpeg 过滤器中使用 gl-transitions 做特效,需要下载:以下两个库
https://github.com/transitive-bullshit/ffmpeg-gl-transition.git
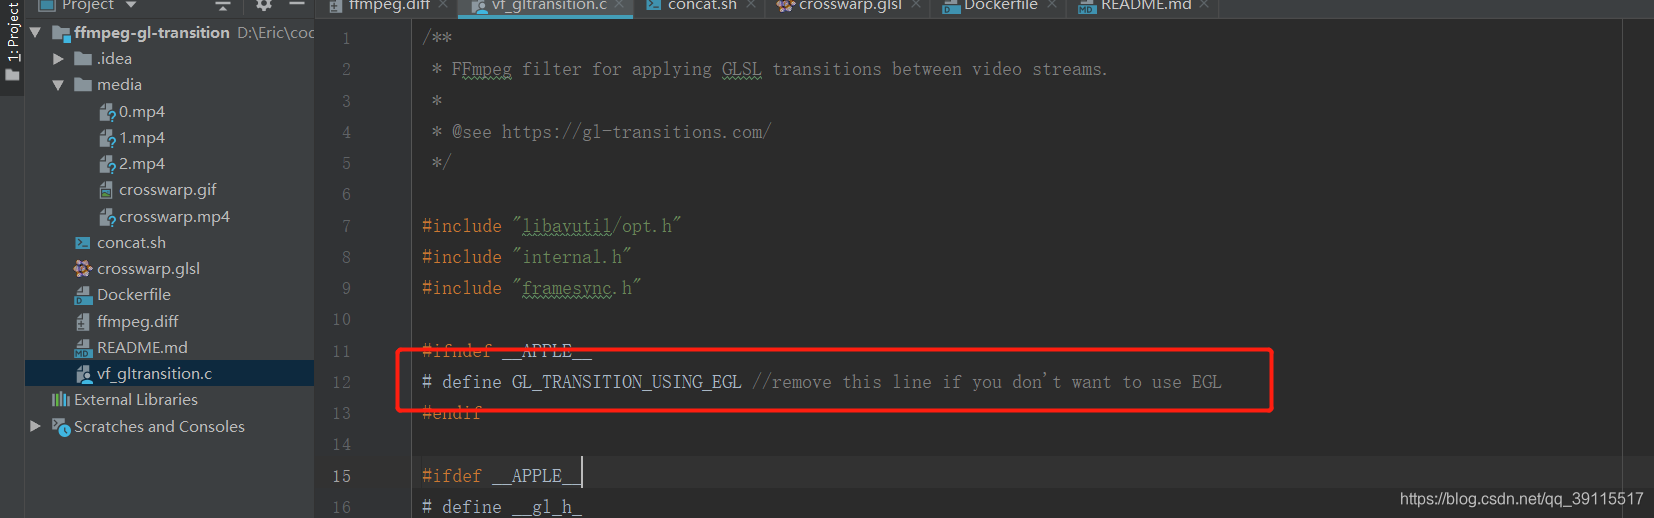
这个库是一个 ffmpeg 扩展,可以很容易地在 ffmpeg 过滤器图中使用 gl-transitions,如果您不想使用 EGL,请删除此行 ffmpeg-gl-transition库下 vf_gltransition.c 文件
# define GL_TRANSITION_USING_EGL //remove this line if you don't want to use EGL
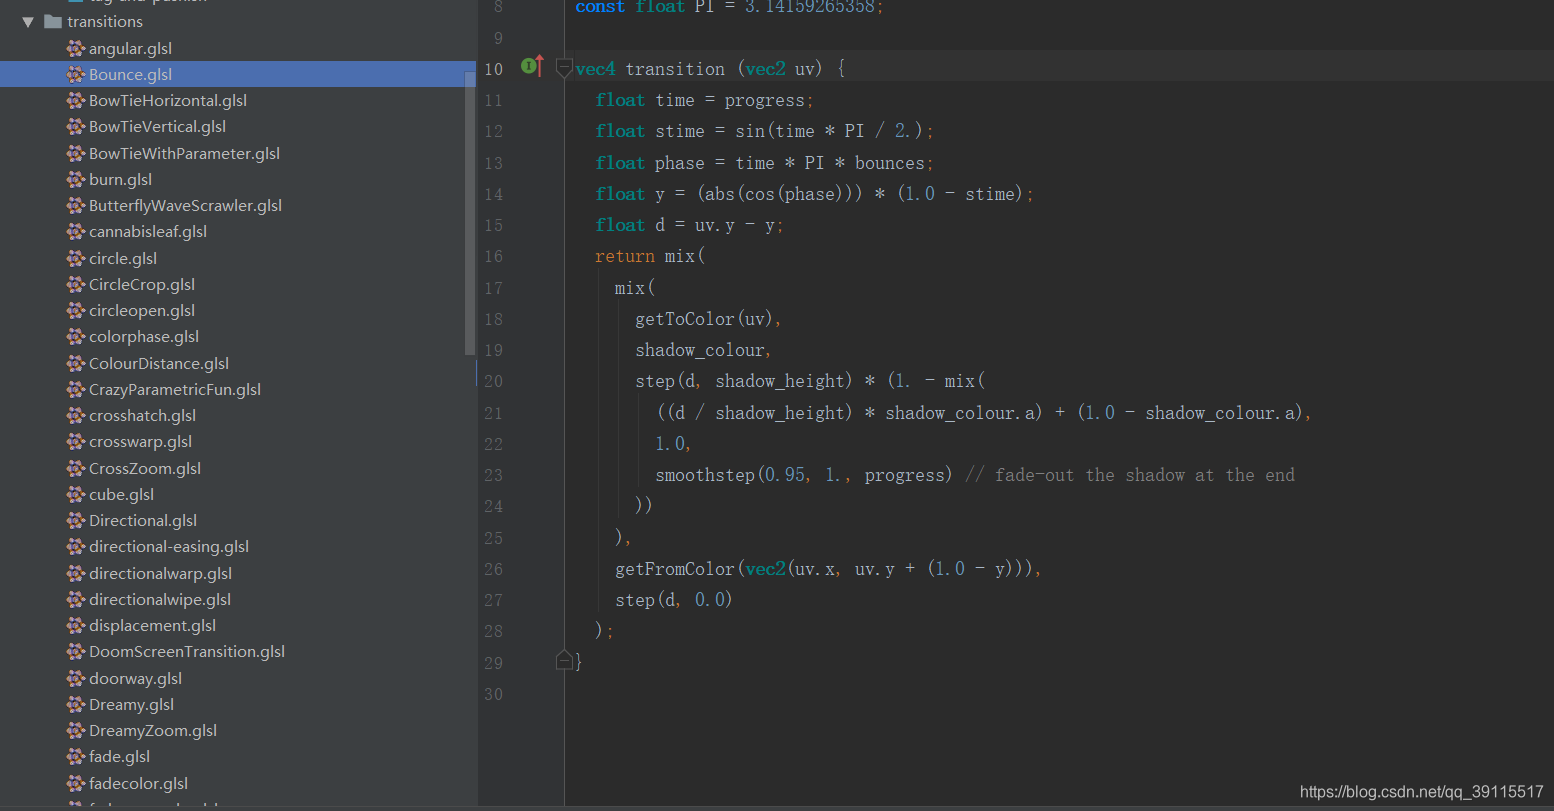
https://github.com/gl-transitions/gl-transitions.git
这个库提供更多的转场特效
下载两个库并放到指定文件夹后(我这边将gl库,放到ffmpeg-gl下面如图)
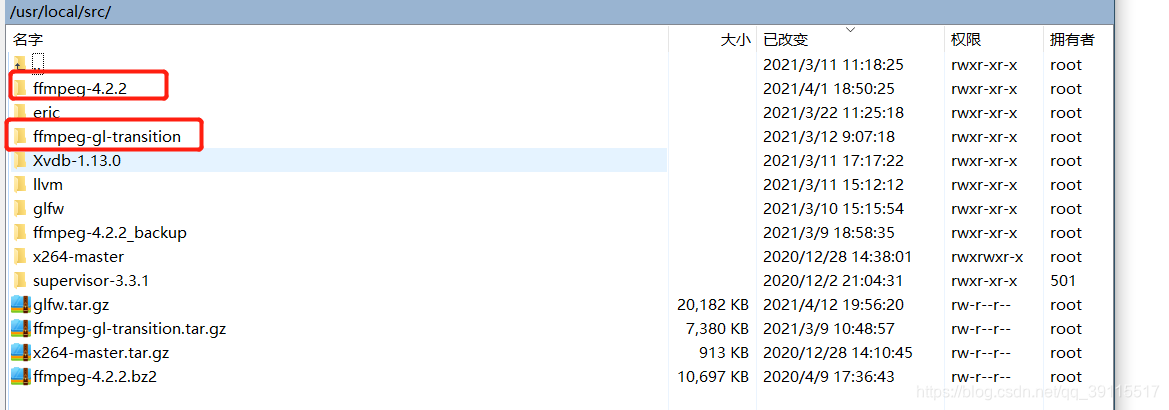
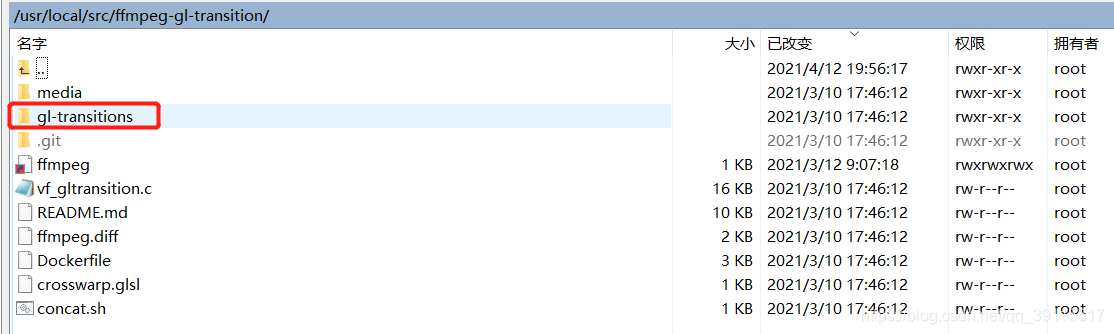
放置指定目录后:需要打补丁
cd ffmpeg-4.2.2/
git apply ../ffmpeg-gl-transition/ffmpeg.dif
在没有 EGL 的无头环境中,您还需要安装xvfb和mesa
1.安装Xvfb和mesa
sudo yum install mesa*
sudo yum install xorg-x11-server-Xvfb.x86_64
sudo yum install glew glew-develXvfb :1 -screen 0 1280x1024x16
配置:
export DISPLAY=:99输入:
Xvfb -ac :99 -screen 0 1280x1024x16 & export DISPLAY=:99
2.要先装 glfw 克隆源码放到随意指定目录
没有权限可以上传到 /tmp 目录下 cp -r /tmp/glfw /usr/local/src/
git clone https://github.com/glfw/glfw
3.进入到 glfw 目录 运行:
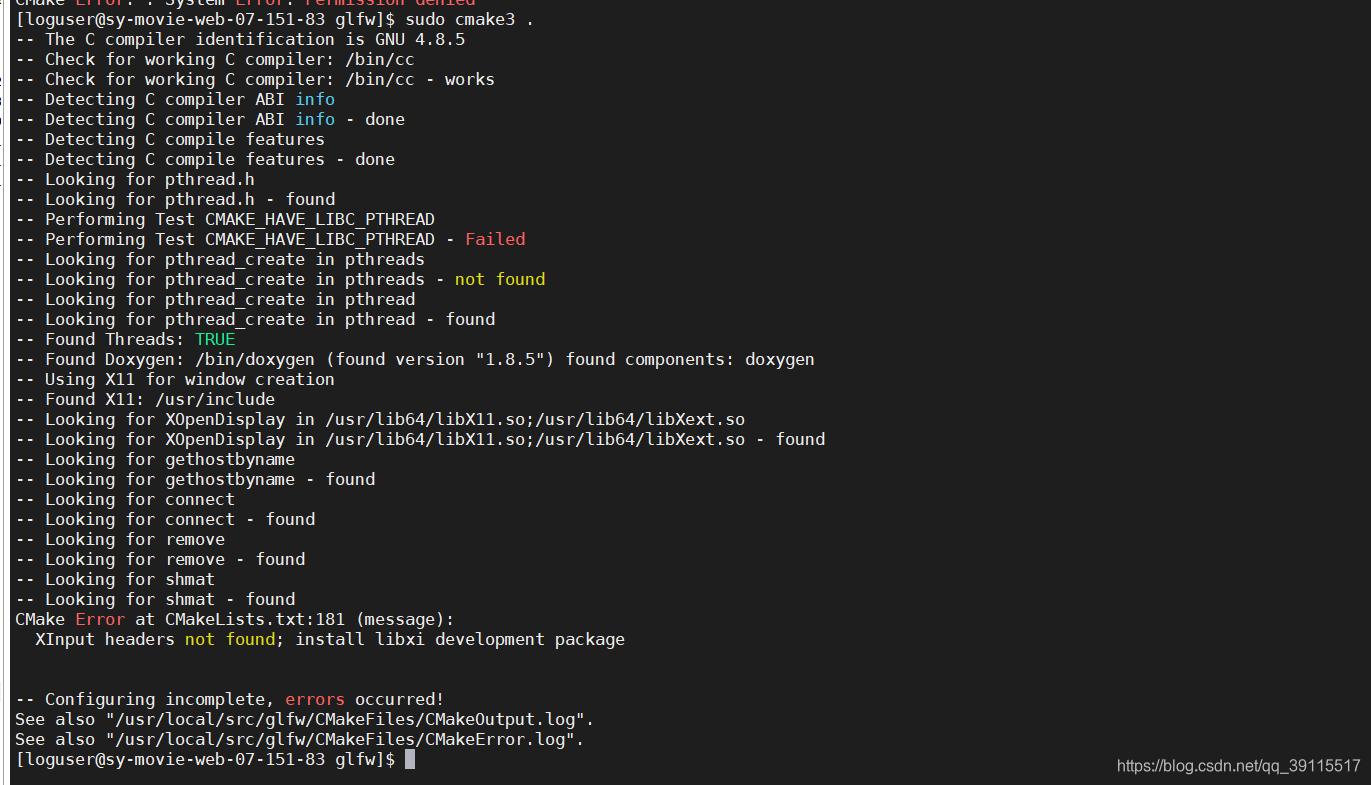
cmake3 .
如没有找到指定命令(cmake3.: command not found),需要以下操作
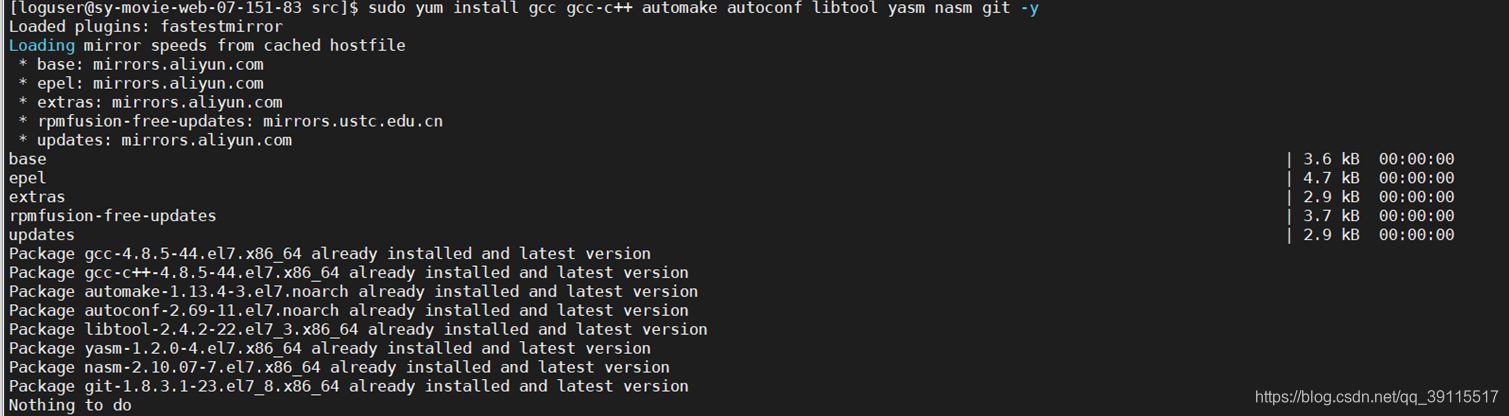
yum install gcc gcc-c++ automake autoconf libtool yasm nasm git -y
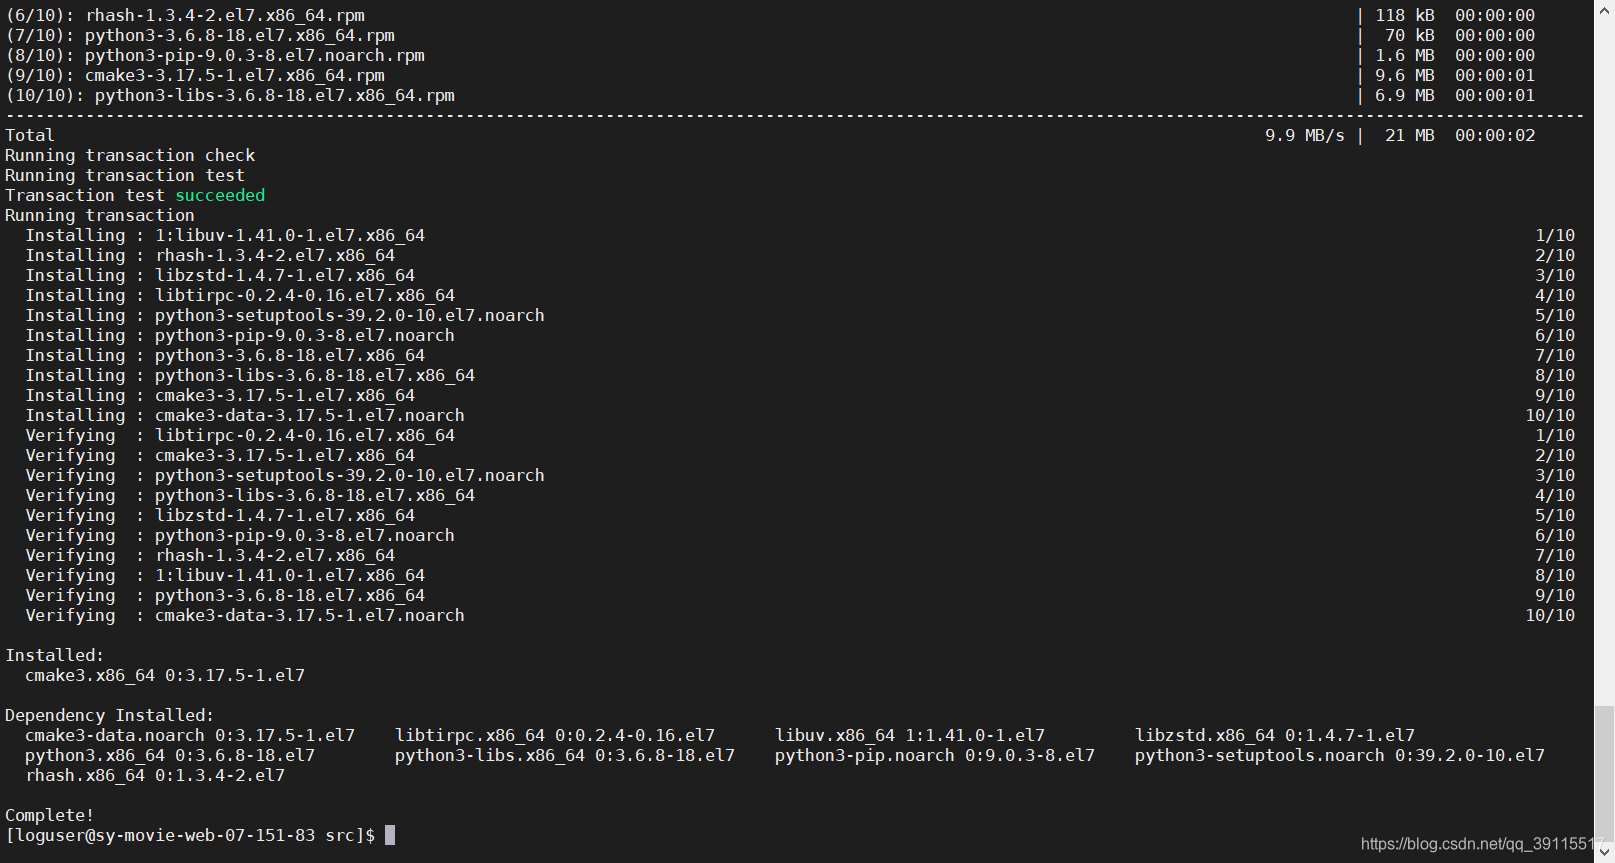
yum install cmake3
进入到 glfw 目录 运行:
cmake3 .
如果出现缺各种包,根据错误各行安装对应依赖包即可,以下示例一种情况
如报错:(Error:XInput headers not found ,install libxi development package)
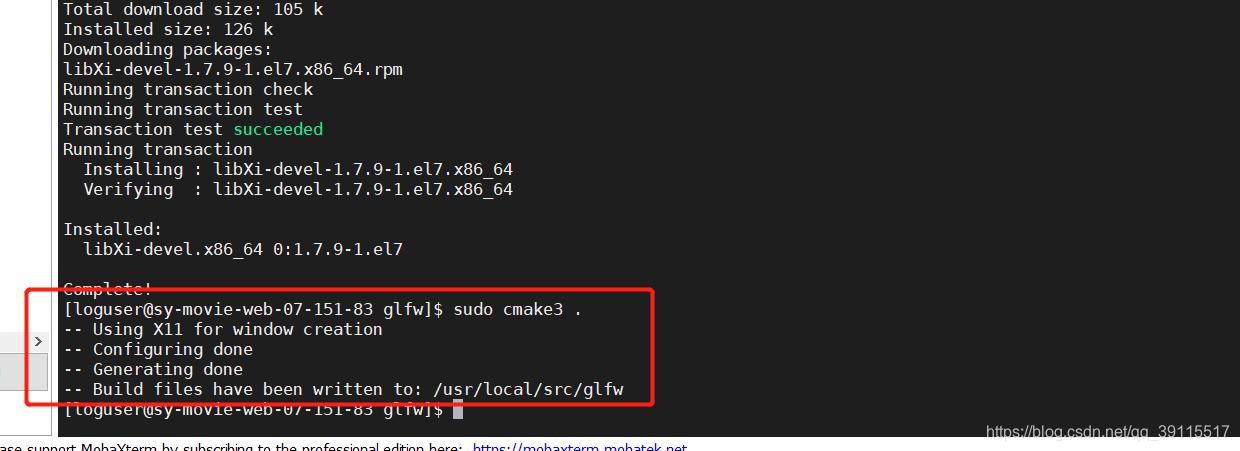
yum install libXi* -y
成功则编译安装:
成功
make
make install
4.cd /usr/local/lib64/pkgconfig 查看是否含有glfw3.pc文件

5.配置文件配置
vim /etc/profile
追加最后一行
export PKG_CONFIG_PATH="/usr/local/lib64/pkgconfig"
Esc :wq (保存并退出),pkgconfig目录下:
source /etc/profile
6.ffmpeg源码目录下 检测编译环境 再编译 ffmpeg
./configure --prefix=/usr/local/ffmpeg --enable-shared --enable-yasm --enable-libx264 --enable-gpl --enable-pthreads --extra-cflags=-I/usr/local/x264/include --extra-ldflags=-L/usr/local/x264/lib --disable-x86asm --enable-opengl --enable-filter=gltransition --extra-libs='-lGLEW -lglfw3 -ldl' --enable-libfreetype --enable-libfontconfig --enable-libfribidi
make
make install
sudo ./ffmpeg -v 0 -filters | grep gltransition

7.输入./ffmpeg 查看configuration 是否启用成功
命令案例:
水印位置:(x,y)=(10,10)<=(left,top)距离左侧、顶部各10像素;

贴图水印时间显示
ffmpeg -i C:\Users\heshiping\Desktop\videoDown\2.mp4 -i C:\Users\heshiping\Desktop\videoDown\4.jpg -filter_complex  overlay=x='if(between(t,15,30),150,NAN)':0 -threads 5  -preset ultrafast  C:\Users\heshiping\Desktop\videoDown\15-30s.mp4


透明度
ffmpeg -i C:\Users\heshiping\Desktop\videoDown\2.mp4 -i C:\Users\heshiping\Desktop\videoDown\4.jpg -filter_complex  "[1:v]colorkey=0x000000:0.6:1.0[ckout];[0:v][ckout]overlay=10:10[out]" -map "[out]"   -threads 5  -preset ultrafast C:\Users\heshiping\Desktop\videoDown\xuanzhuans.mp4

ffmpeg -i C:\Users\heshiping\Desktop\videoDown\2.mp4 -i C:\Users\heshiping\Desktop\videoDown\4.jpg -filter_complex  "[1:v]scale=100:100[wm];[0:v][wm]overlay=x='if(between(t,15,30),150,NAN)':50[HSP];[HSP]colorkey=0x000000:0.6:1.0[ckouts];[0:v][ckouts]overlay=150:50[out]" -map "[out]"  -threads 5  -preset ultrafast C:\Users\heshiping\Desktop\videoDown\缩放透明度时间显示位置.mp4

合成
ffmpeg -i C:\Users\heshiping\Desktop\videoDown\2.mp4 -i C:\Users\heshiping\Desktop\videoDown\4.jpg -filter_complex  "[1:v]scale=500:500[sf];[0:v][sf]overlay=x='if(between(t,10,30),300,NAN)':150[cc];[cc]colorkey=0x000000:0.6:1.0[tmd];[0:v][tmd]overlay=300:150[out]" -map "[out]" -threads 5  -preset ultrafast  -max_muxing_queue_size 1024 C:\Users\heshiping\Desktop\videoDown\111.mp4

ffmpeg
-i C:\Users\heshiping\Desktop\videoDown\2.mp4
-i C:\Users\heshiping\Desktop\videoDown\4.jpg
-filter_complex  "[1:v]scale=500:500[sf];[0:v][sf]overlay=x='if(between(t,10,30),300,NAN)':150[cc];[cc]colorkey=0x000000:0.6:1.0[tmd];[0:v][tmd]overlay=300:150[out]"
-map "[out]"
-threads 5  -preset ultrafast
C:\Users\heshiping\Desktop\videoDown\final.mp4

ffmpeg -i C:\Users\heshiping\Desktop\videoDown\2.mp4 -i C:\Users\heshiping\Desktop\videoDown\4.jpg -filter_complex  "[1:v]scale=500:500[sf];[0:v][sf]overlay=x='if(between(t,10,30),300,NAN)':150[cc];[cc]colorkey=0x000000:0.6:1.0[tmd];[0:v][tmd]overlay=300:150[out]" -map "[out]" -threads 5  -preset ultrafast  -max_muxing_queue_size 1024 C:\Users\heshiping\Desktop\videoDown\111.mp4


//垂直翻转
ffmpeg -i C:\\Users\\heshiping\\Desktop\\videoDown\\1.jpg -vf vflip -y C:\\Users\\heshiping\\Desktop\\videoDown\\1s.jpg
//水平翻转
ffmpeg -i C:\\Users\\heshiping\\Desktop\\videoDown\\66.webm -vf hflip -y C:\\Users\\heshiping\\Desktop\\videoDown\\66.webm
ffmpeg -i C:\Users\heshiping\Desktop\videoDown\4.jpg -vf vflip -y C:\Users\heshiping\Desktop\videoDown\vflip.jpg

delogo 去除视频某处的logo。其实实现原理就是将给出区域进行高斯模糊处理。
delogo=x=0:y=0:w=100:h=77:band=10
x,y,w,h 构成一个Rect,band是模糊强度。
removelogo ,消除logo水印,和delogo 类似。


视频水印 透明度
ffmpeg -i C:\Users\heshiping\Desktop\videoDown\21.mp4 -itsoffset 5 -i C:\Users\heshiping\Desktop\videoDown\c.webm -filter_complex [1:v]scale=900:500[sf];[sf]format=yuva444p,colorchannelmixer=aa=0.5[sf];[0:v][sf]overlay=x='if(between(t,5,13),0,NAN)':0 -y C:\Users\heshiping\Desktop\videoDown\eric1.mp4

视频水印旋转透明
ffmpeg -i  C:\Users\heshiping\Desktop\videoDown\21.mp4 -itsoffset 10 -i C:\Users\heshiping\Desktop\videoDown\c.webm  -filter_complex [1:v]scale=300:200[sf];[sf]format=yuva444p,colorchannelmixer=aa=0.6[sf];[sf]rotate='45*PI/180:ow=hypot(iw,ih):oh=ow:c=none'[sf];[0:v][sf]overlay=x='if(between(t,10,18),100,NAN)':100 C:\Users\heshiping\Desktop\videoDown\ccccc.mp4 -y


转场滤镜
ffmpeg -i /data/video/tencent/动漫/a8dukd400400_泽塔奥特曼_普通话版_18_mp4/a8dukd400400_泽塔奥特曼_普通话版_18_001121_001142.mp4 -i /data/video/tencent/动漫/a8dukd400400_泽塔奥特曼_普通话版_18_mp4/a8dukd400400_泽塔奥特曼_普通话版_18_001100_001121.mp4 -filter_complex "[0:v]split[v0a][v0b];[v0a]trim=0:20[v0020];[v0b]trim=20:21,setpts=PTS-STARTPTS[v02021];[1:v]split[v1a][v1b];[v1a]trim=0:20[v1020];[v1b]trim=20:21,setpts=PTS-STARTPTS[v12021];[v02021][v1020]gltransition=duration=2:source=/usr/local/src/ffmpeg-gl-transition/gl-transitions/transitions/InvertedPageCurl.glsl[g01];[v0020][g01][v12021]concat=n=3[outv];[outv]scale=1920:1080[outv]" -map "[outv]" -c:v libx264 -profile:v baseline -preset slow -movflags faststart -pix_fmt yuv420p -threads 5 -preset ultrafast /data/video/ovwq2f20210322171622763.mp4 -y


任意位置文字水印

ffmpeg -i C:\Users\heshiping\Desktop\videoDown\2021.mp4 -vf "drawtext=fontfile=MengNaJianCaiYun-2.ttf: text='heshiping':x=100:y=100:fontsize=29:fontcolor=yellow:shadowy=2" -b:v 3000k C:\Users\heshiping\Desktop\videoDown\222222.mp4 -y


滚动文字水印
ffmpeg -i C:\Users\heshiping\Desktop\videoDown\2021.mp4 -vf "drawtext=fontfile=Arial.ttf: text='hu': y=h-line_h-10:x=(mod(2*n\,w+tw)-tw):fontsize=34:fontcolor=yellow:shadowy=2" -b:v 3000k C:\Users\heshiping\Desktop\videoDown\222222.mp4 -y

底部文字水印
ffmpeg -i C:\Users\heshiping\Desktop\videoDown\2021.mp4 -vf "drawtext=fontfile=Arial.ttf:text='pruduction by http\://baidu.com':y=h-line_h-20:x=(w-text_w)/2:fontsize=34:fontcolor=yellow:shadowy=2" -b:v 3000k C:\Users\heshiping\Desktop\videoDown\222222.mp4 -y

水平运动
ffmpeg -y -i demo.mp4 -vf drawtext=arialbd.ttf:text=HelloWorld:x=w-t*5:fontcolor=red:fontsize=30 demo_drawtext_h_dyn.mp4

垂直运动
ffmpeg -y -i demo.mp4 -vf drawtext=arialbd.ttf:text=HelloWorld:x=w/2:y=h-t*5:fontcolor=red:fontsize=30 demo_drawtext_v_dyn.mp4
剪辑转场成果展示:


华为开发者空间,是为全球开发者打造的专属开发空间,汇聚了华为优质开发资源及工具,致力于让每一位开发者拥有一台云主机,基于华为根生态开发、创新。
更多推荐


 7
7 0
0- 0


 已为社区贡献1条内容

所有评论(0)