记录-bigdata-使用Scala语言,使用Spark抽取MySQL指定数据表中的数据到HIVE的ODS层的表中
我这里是完成编码之后,打包发送到集群上运行的!!!1.使用IDEA创建MAVEN项目pom配置如下<project xmlns="http://maven.apache.org/POM/4.0.0" xmlns:xsi="http://www.w3.org/2001/XMLSchema-instance" xsi:schemaLocation="http://maven.apache.org
·
有问题可以私聊我交流
我这里是完成编码之后,打包发送到集群上运行的!!!
1.使用IDEA创建MAVEN项目
pom配置如下
<project xmlns="http://maven.apache.org/POM/4.0.0" xmlns:xsi="http://www.w3.org/2001/XMLSchema-instance" xsi:schemaLocation="http://maven.apache.org/POM/4.0.0 http://maven.apache.org/maven-v4_0_0.xsd">
  <modelVersion>4.0.0</modelVersion>
  <groupId>com.tledu</groupId>
  <artifactId>llll</artifactId>
  <version>1.0-SNAPSHOT</version>
  <name>${project.artifactId}</name>
  <description>My wonderfull scala app</description>
  <inceptionYear>2018</inceptionYear>
  <licenses>
    <license>
      <name>My License</name>
      <url>http://....</url>
      <distribution>repo</distribution>
    </license>
  </licenses>

  <properties>
    <maven.compiler.source>1.8</maven.compiler.source>
    <maven.compiler.target>1.8</maven.compiler.target>
    <encoding>UTF-8</encoding>
    <scala.version>2.11.11</scala.version>
    <scala.compat.version>2.11</scala.compat.version>
    <spec2.version>4.2.0</spec2.version>
  </properties>

  <dependencies>
    <dependency>
      <groupId>org.scala-lang</groupId>
      <artifactId>scala-library</artifactId>
      <version>${scala.version}</version>
    </dependency>


    <dependency>
      <groupId>org.apache.spark</groupId>
      <artifactId>spark-core_${scala.compat.version}</artifactId>
      <version>2.3.2</version>
      <scope>provided</scope>
    </dependency>

    <dependency>
      <groupId>org.apache.spark</groupId>
      <artifactId>spark-sql_${scala.compat.version}</artifactId>
      <version>2.3.2</version>
      <scope>provided</scope>
    </dependency>

    <dependency>
      <groupId>org.apache.spark</groupId>
      <artifactId>spark-hive_2.11</artifactId>
      <version>2.0.2</version>
      <scope>provided</scope>
    </dependency>

    <dependency>
      <groupId>mysql</groupId>
      <artifactId>mysql-connector-java</artifactId>
      <version>8.0.23</version>
    </dependency>


    <!-- Test -->
    <dependency>
      <groupId>junit</groupId>
      <artifactId>junit</artifactId>
      <version>4.12</version>
      <scope>test</scope>
    </dependency>
    <dependency>
      <groupId>org.scalatest</groupId>
      <artifactId>scalatest_${scala.compat.version}</artifactId>
      <version>3.0.5</version>
      <scope>test</scope>
    </dependency>
    <dependency>
      <groupId>org.specs2</groupId>
      <artifactId>specs2-core_${scala.compat.version}</artifactId>
      <version>${spec2.version}</version>
      <scope>test</scope>
    </dependency>
    <dependency>
      <groupId>org.specs2</groupId>
      <artifactId>specs2-junit_${scala.compat.version}</artifactId>
      <version>${spec2.version}</version>
      <scope>test</scope>
    </dependency>
  </dependencies>

  <build>
    <sourceDirectory>src/main/scala</sourceDirectory>
    <testSourceDirectory>src/test/scala</testSourceDirectory>
    <plugins>
      <plugin>
        <!-- see http://davidb.github.com/scala-maven-plugin -->
        <groupId>net.alchim31.maven</groupId>
        <artifactId>scala-maven-plugin</artifactId>
        <version>3.3.2</version>
        <executions>
          <execution>
            <goals>
              <goal>compile</goal>
              <goal>testCompile</goal>
            </goals>
            <configuration>
              <args>
                <arg>-dependencyfile</arg>
                <arg>${project.build.directory}/.scala_dependencies</arg>
              </args>
            </configuration>
          </execution>
        </executions>
      </plugin>
      <plugin>
        <groupId>org.apache.maven.plugins</groupId>
        <artifactId>maven-surefire-plugin</artifactId>
        <version>2.21.0</version>
        <configuration>
          <!-- Tests will be run with scalatest-maven-plugin instead -->
          <skipTests>true</skipTests>
        </configuration>
      </plugin>
      <plugin>
        <groupId>org.scalatest</groupId>
        <artifactId>scalatest-maven-plugin</artifactId>
        <version>2.0.0</version>
        <configuration>
          <reportsDirectory>${project.build.directory}/surefire-reports</reportsDirectory>
          <junitxml>.</junitxml>
          <filereports>TestSuiteReport.txt</filereports>
          <!-- Comma separated list of JUnit test class names to execute -->
          <jUnitClasses>samples.AppTest</jUnitClasses>
        </configuration>
        <executions>
          <execution>
            <id>test</id>
            <goals>
              <goal>test</goal>
            </goals>
          </execution>
        </executions>
      </plugin>

      <plugin>
        <artifactId>maven-assembly-plugin</artifactId>
        <configuration>
          <descriptorRefs>
            <descriptorRef>jar-with-dependencies</descriptorRef>
          </descriptorRefs>
        </configuration>
        <executions>
          <execution>
            <id>make-assembly</id>
            <phase>package</phase>
            <goals>
              <goal>assembly</goal>
            </goals>
          </execution>
        </executions>
      </plugin>
    </plugins>
  </build>
</project>
编码过程如下
// 1. 构建sparkSession
    val sparkSession = SparkSession
      .builder()
      .appName("抽取mysql数据到hive")
      .enableHiveSupport() // 开启hive支持
      //.master("local[2]") // 指定运行模式,使用本地模式进行调试, 启动的时候指定即可,这个参数只在本地调试的时候使用
      .getOrCreate()

//定义函数,获取mysql链接
 def extractFromMysql(sparkSession: SparkSession, tableName: String): DataFrame = {
    val DB_URL = "jdbc:mysql://  ip地址   /库名"
    val jdbcMap = Map(
      "driver" -> "com.mysql.jdbc.Driver",
      "url" -> DB_URL,
      "dbtable" -> tableName,
      "user" -> "用户名",
      "password" -> "密码"
    )
    sparkSession.read.format("jdbc").options(jdbcMap).load()
  }

//调用函数获取dataframe
    val df = extractFromMysql(sparkSession, "tablename")

 // 加载hive表数据
    // 切换数据库
    sparkSession.sql("use hive库名")
// 读取数据
    // spark 可以直接操作非事务表,但是无法操作事务表
    val customerDF = sparkSession.sql(
      """
        | select * from customer
        |""".stripMargin)
    // hive表中的数据
    customerDF.show()

    // 把数据存进去,全量的数据存储
    df.write.mode(SaveMode.Append).format("hive").saveAsTable("customer")

    sparkSession.close()
加一段抽取到分区表的代码
// 1. 获取sparksession
    val sparkSession = SparkSession
      .builder()
      .appName("抽取分区表")
      .enableHiveSupport() // 开启hive支持
      // 增加了对hive的配置,设置的动态分区的大小
      .config("hive.exec.max.dynamic.partitions",5000)
      // 配置动态分区的支持
      .config("hive.exec.dynamic.partition.mode","nonstric")
      .getOrCreate()


 def extractFromMysql(sparkSession: SparkSession, tableName: String): DataFrame = {
      val DB_URL = "jdbc:mysql:// 数据库IP地址 / 库名"
      val jdbcMap = Map(
        "driver" -> "com.mysql.jdbc.Driver",
        "url" -> DB_URL,
        "dbtable" -> tableName,
        "user" -> "root",
        "password" -> "123456"
      )
      sparkSession.read.format("jdbc").options(jdbcMap).load()
    }


// 加载mysql中的数据
    val df = extractFromMysql(sparkSession, "ORDERS")
    df.createOrReplaceTempView("mysql_orders")
    //使用hive中的数据
    sparkSession.sql("use ods")


    sparkSession.sql(
      """
        |insert overwrite table orders partition(etldate='2022-03-27')
        |select * from mysql_orders limit 5000
        |""".stripMargin)


   //获取增量数据,这里是只把新增的数据抽取到ods层
        //val addDF = df.except(customerDF)

        //addDF.write.mode(SaveMode.Append).format("hive").saveAsTable("customer")
    sparkSession.close()
编码之后可能爆红,因为没有引入spark的jar包和mysql-connect的jar包
点击idea右上角的这里
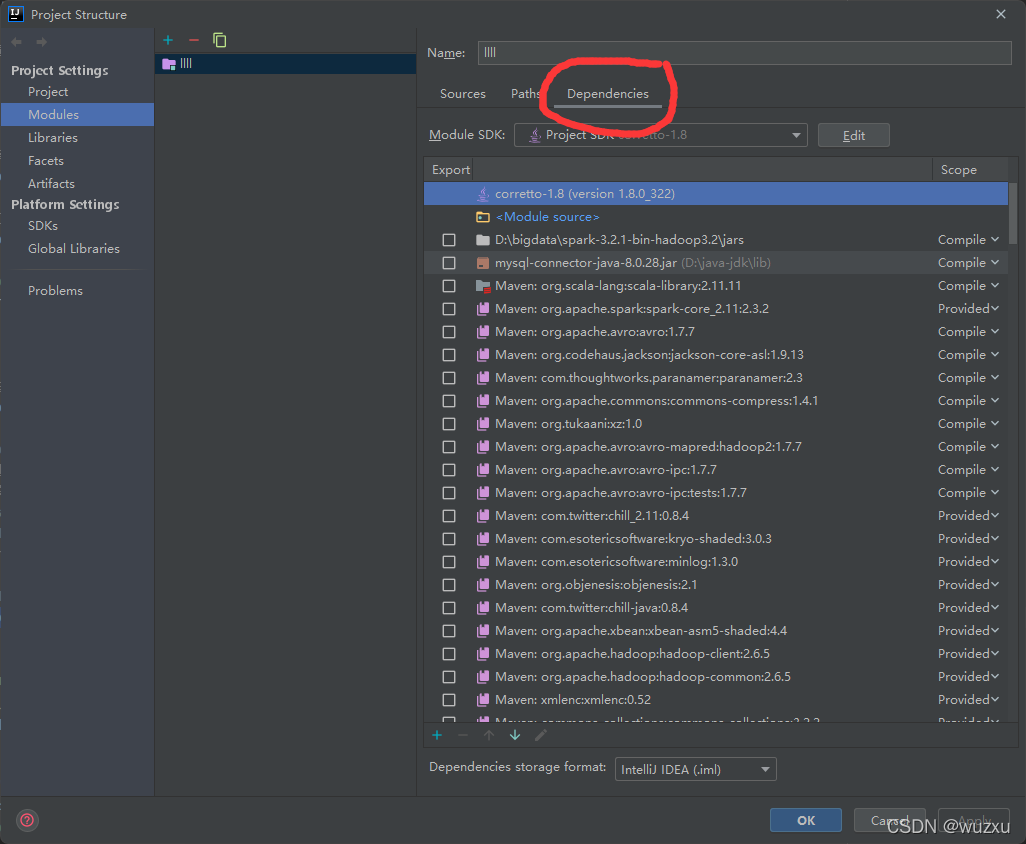
引入你的jar包
(我在这里引入完之后 习惯 先mvn clean install 再rebuild 再restart 如果你不习惯,就看下一句)
之后就好了 不行就 rebuild 和 restart
最后mvn clean mvn package 执行打包操作
2.在集群上建个空的hive表
可以用脚本建表(我用的脚本)
#! /bin/bash

hive -e "
	use hive库名;
	CREATE  TABLE CUSTOMER (
		CUSTKEY INT comment '',
		NAME string comment '',
		ADDRESS string comment '',
		NATIONKEY string comment '',
                PHONE string comment '',
                ACCTBAL string comment '',
                MKTSEGMENT string comment '',
		COMMENT string comment ''
	)
	comment 'customer表'
	ROW FORMAT DELIMITED
	FIELDS TERMINATED BY '\001'
	LINES TERMINATED BY '\n'
	STORED AS textfile
	TBLPROPERTIES(
		'transactional'='false'
	);
"
3. 上传你打好的包
在集群上 rz -bye 即可上传
可以写个脚本运行你的包(我写的脚本)
#! /bin/bash
export HADOOP_CONF_DIR=/usr/hdp/3.1.0.0-78/hadoop/conf
/usr/hdp/3.1.0.0-78/spark2/bin/spark-submit \
--class 这里是你要运行的类 \
--master local[2] \
--driver-memory 512m \
--executor-memory 512m \
--num-executors 2 \
/这里是你jar包的地址    最前面有这个/哦
sh start.sh 运行脚本 MYSQL数据就导入进HIVE数据库了

为开发者提供学习成长、分享交流、生态实践、资源工具等服务,帮助开发者快速成长。
更多推荐


 23
23 1
1- 0


 已为社区贡献2条内容

所有评论(0)