Centos 7 安装 ORACLE 11g
Centos 7 安装 ORACLE 11g第一章:系统基本信息第二章:安装 ORACLE 11g2.1 安装前的准备工作2.2 开始安装 ORACLE2.4 Netca 配置监听2.5 dbca 静默建库2.6 启动 ORACLE第三章:异常处理1. yum 报错:Loaded plugins: fastestmirror, langpacks2. Oracle 安装报错 ins_ctx.mk3
Centos 7 安装 ORACLE 11g
时间:2022-4-27
作者:高玉涵
博客:blog.csdn.net/cg_i
第一章:系统基本信息
- uname -a
Linux vmdata 3.10.0-1160.62.1.el7.x86_64 #1 SMP Tue Apr 5 16:57:59 UTC 2022 x86_64 x86_64 x86_64 GNU/Linux
- yum grouplist
[gao@localhost ~]$ yum grouplist
There is no installed groups file.
Maybe run: yum groups mark convert (see man yum)
Available Environment Groups:
   Minimal Install
   Compute Node
   Infrastructure Server
   File and Print Server
   Basic Web Server
   Virtualization Host
   Server with GUI
   GNOME Desktop
   KDE Plasma Workspaces
   Development and Creative Workstation
Available Groups:
   Compatibility Libraries
   Console Internet Tools
   Development Tools
   Graphical Administration Tools
   Legacy UNIX Compatibility
   Scientific Support
   Security Tools
   Smart Card Support
   System Administration Tools
   System Management
Done
- java -version
openjdk version "1.8.0_262"
OpenJDK Runtime Environment (build 1.8.0_262-b10)
OpenJDK 64-Bit Server VM (build 25.262-b10, mixed mode)
- rpm -qa|grep ‘java*’
javapackages-tools-3.4.1-11.el7.noarch
java-1.8.0-openjdk-headless-1.8.0.262.b10-1.el7.x86_64
dejavu-sans-fonts-2.33-6.el7.noarch
dejavu-fonts-common-2.33-6.el7.noarch
tzdata-java-2020a-1.el7.noarch
java-1.7.0-openjdk-headless-1.7.0.261-2.6.22.2.el7_8.x86_64
dejavu-sans-mono-fonts-2.33-6.el7.noarch
dejavu-serif-fonts-2.33-6.el7.noarch
java-1.8.0-openjdk-1.8.0.262.b10-1.el7.x86_64
python-javapackages-3.4.1-11.el7.noarch
java-1.7.0-openjdk-1.7.0.261-2.6.22.2.el7_8.x86_64
- gcc -v
Using built-in specs.
COLLECT_GCC=gcc
COLLECT_LTO_WRAPPER=/usr/libexec/gcc/x86_64-redhat-linux/4.8.5/lto-wrapper
Target: x86_64-redhat-linux
Configured with: ../configure --prefix=/usr --mandir=/usr/share/man --infodir=/usr/share/info --with-bugurl=http://bugzilla.redhat.com/bugzilla --enable-bootstrap --enable-shared --enable-threads=posix --enable-checking=release --with-system-zlib --enable-__cxa_atexit --disable-libunwind-exceptions --enable-gnu-unique-object --enable-linker-build-id --with-linker-hash-style=gnu --enable-languages=c,c++,objc,obj-c++,java,fortran,ada,go,lto --enable-plugin --enable-initfini-array --disable-libgcj --with-isl=/builddir/build/BUILD/gcc-4.8.5-20150702/obj-x86_64-redhat-linux/isl-install --with-cloog=/builddir/build/BUILD/gcc-4.8.5-20150702/obj-x86_64-redhat-linux/cloog-install --enable-gnu-indirect-function --with-tune=generic --with-arch_32=x86-64 --build=x86_64-redhat-linux
Thread model: posix
gcc version 4.8.5 20150623 (Red Hat 4.8.5-44) (GCC)
- echo $BASH_VERSION
4.2.46(2)-release
第二章:安装 ORACLE 11g
为了方便以下操作均在 root 用户下进行。
2.1 安装前的准备工作
- 关闭系统的防火墙
systemctl stop firewalld
systemctl status firewalld
systemctl disable firewalld.service
- 关闭 SELINUX
vi /etc/selinux/config
SELINUX=disabled
- 修改主机名称
hostnamectl set-hostname vmdata # 会影响命令提示符中的主机名
vi /etc/hosts
127.0.0.1 vmdata
- 修改 OS 系统标识
oracle 默认不支持 CentOS 系统安装,需要修改系统标识。
vi /etc/redhat-release
redhat-7
- YUM 更新系统
yum update
- 系统内核配置更改
配合 ORACLE 和 TUXEDO 应用部署而进行的内核参数调整。修改 /etc/sysctl.conf 后,执行 sysctl -p使设置立即生效。
kernel.shmmax = 2147483648 #最大共享内存的段大小
kernel.shmall = 2097152    #共享内存的总量, 8G:2097152*4k/1024/1024
kernel.shmmni = 4096       #整个系统共享内存端的最大数
kernel.sem = 250 32000 100 128
net.ipv4.ip_local_port_range = 9000 65500 #可使用的IPV4端口范围
net.core.rmem_default = 262144
net.core.rmem_max = 4194304
net.core.wmem_default = 262144
net.core.wmem_max = 1048576
fs.aio-max-nr = 1048576
fs.file-max = 6815744 # 最大打开文件数
- 创建组
| 用户组 | ID | 说明 | 备主 |
|---|---|---|---|
| oinstall | 500 | oracle使用 | |
| dba | 501 | oracle使用 |
groupadd -g 500 oinstall
groupadd -g 501 dba
- 创建用户
| 用户 | ID | 属组 | 附属组 | SHELL | 目录 | 说明 | 备注 |
|---|---|---|---|---|---|---|---|
| oracle | 500 | oinstall | dba | bash | /home/oracle | oracle使用 |
useradd -u 500 -d /home/oracle -s /usr/bin/bash -g oinstall -G dba oracle
- 修改 oracle 用户密码
passwd oracle
- 安装依赖包
yum install binutils-2.* compat-libstdc++-33* elfutils-libelf-0.* elfutils-libelf-devel-* gcc-4.* gcc-c++-4.* glibc-2.* glibc-common-2.* glibc-devel-2.* glibc-headers-2.* ksh-2* libaio-0.* libaio-devel-0.* libgcc-4.* libstdc++-4.* libstdc++-devel-4.* make-3.* sysstat-7.* unixODBC-2.* unixODBC-devel-2.* pdksh*
- 上传 oracle 安装包并展开
将 linux.x64_11gR2_database_1of2.zip、linux.x64_11gR2_database_2of2.zip 上传到 oracle 用户目录下。
cd /home/oracle
chown oracle:oinstall linux.x64_11gR2_database_1of2*
unzip linux.x64_11gR2_database_1of2.zip
unzip  linux.x64_11gR2_database_2of2.zip
- 配置 ORACLE 用户环境
# .bash_profile

# Get the aliases and functions
if [ -f ~/.bashrc ]; then
        . ~/.bashrc
fi

# User specific environment and startup programs

PATH=$PATH:$HOME/.local/bin:$HOME/bin
ORACLE_BASE=$HOME/app/oracle
ORACLE_HOME=$HOME/app/oracle/product/11.2.0.4/db_1/
ORACLE_SID=orac
PATH=$PATH:$ORACLE_HOME/bin:$HOME/bin

export ORACLE_BASE ORACLE_HOME ORACLE_SID PAT
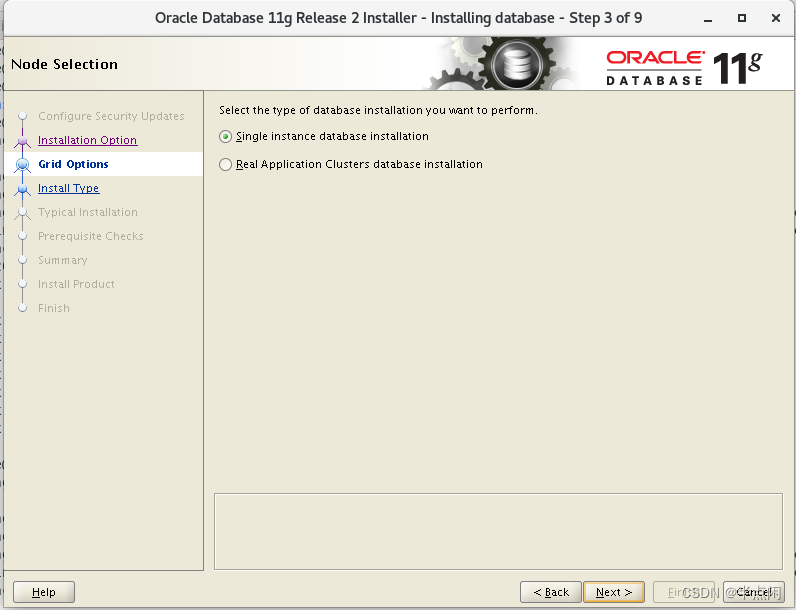
2.2 开始安装 ORACLE
切换到 oracle 用户下,执行 database/runInstaller。


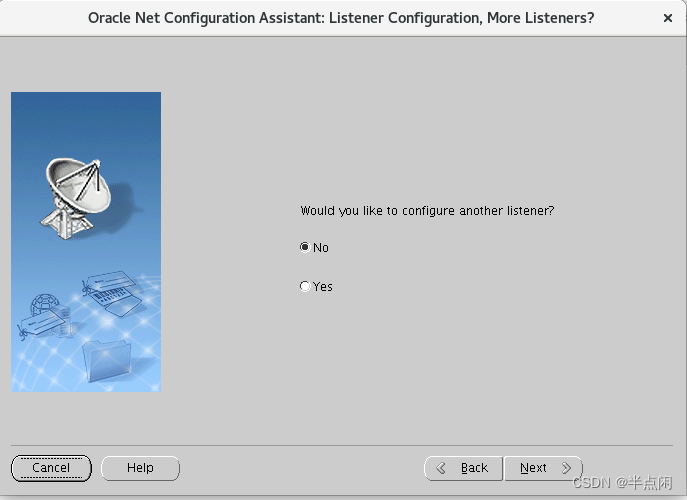
2.3 Netca 配置监听
Oracle 用户下输入 netca根据提示逐步操作即可。

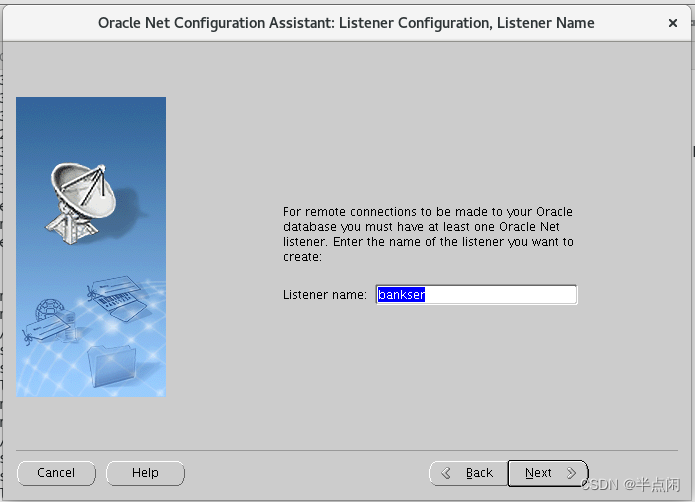


Listener configuration complete.
Oracle Net Listener Startup:
    Running Listener Control:
      /home/oracle/app/oracle/product/11.2.0.4/db_1/bin/lsnrctl start BANKSER
    Listener Control complete.
    Listener started successfully.
Oracle Net Services configuration successful. The exit code is 0
lsnrctl start(启动监听)
$ lsnrctl start

LSNRCTL for Linux: Version 11.2.0.1.0 - Production on 28-APR-2022 19:06:44

Copyright (c) 1991, 2009, Oracle.  All rights reserved.

Starting /home/oracle/app/oracle/product/11.2.0.4/db_1//bin/tnslsnr: please wait...

TNSLSNR for Linux: Version 11.2.0.1.0 - Production
System parameter file is /home/oracle/app/oracle/product/11.2.0.4/db_1/network/admin/listener.ora
Log messages written to /home/oracle/app/oracle/diag/tnslsnr/vmdata/listener/alert/log.xml
Listening on: (DESCRIPTION=(ADDRESS=(PROTOCOL=tcp)(HOST=vmdata)(PORT=1521)))

Connecting to (ADDRESS=(PROTOCOL=tcp)(HOST=)(PORT=1521))
STATUS of the LISTENER
------------------------
Alias                     LISTENER
Version                   TNSLSNR for Linux: Version 11.2.0.1.0 - Production
Start Date                28-APR-2022 19:06:44
Uptime                    0 days 0 hr. 0 min. 0 sec
Trace Level               off
Security                  ON: Local OS Authentication
SNMP                      OFF
Listener Parameter File   /home/oracle/app/oracle/product/11.2.0.4/db_1/network/admin/listener.ora
Listener Log File         /home/oracle/app/oracle/diag/tnslsnr/vmdata/listener/alert/log.xml
Listening Endpoints Summary...
  (DESCRIPTION=(ADDRESS=(PROTOCOL=tcp)(HOST=vmdata)(PORT=1521)))
The listener supports no services
The command completed successfully
2.4 dbca 静默建库
$ vi dbca.rsp
GDBNAME="orac.oracle"
SID="orac"
SYSPASSWORD = "xxxxxx"
SYSTEMPASSWORD = "xxxxxx"
CHARACTERSET="AL32UTF8"
NATIONALCHARACTERSET="UTF8"
# 执行:
$dbca -silent -responseFile /home/oracle/dbca.rsp
Copying database files
1% complete
3% complete
11% complete
18% complete
37% complete
Creating and starting Oracle instance
40% complete
45% complete
50% complete
55% complete
56% complete
60% complete
62% complete
Completing Database Creation
66% complete
70% complete
73% complete
85% complete
96% complete
100% complete
Look at the log file "/home/oracle/app/oracle/cfgtoollogs/dbca/bankser/bankser.log" for further details.
2.5 启动 ORACLE
SQL> startup
ORACLE instance started.

Total System Global Area 1586708480 bytes
Fixed Size		    2213736 bytes
Variable Size		  922749080 bytes
Database Buffers	  654311424 bytes
Redo Buffers		    7434240 bytes
Database mounted.
Database opened.
第三章:异常处理
1. yum 报错:Loaded plugins: fastestmirror, langpacks
网上的解释是 fastestmirror 是 yum 的一个加速插件,这里是插件提示信息是插件不能用了,禁用掉,如下:
- 修改插件的配置文件
vi /etc/yum/pluginconf.d/fastestmirror.conf
enabled = 1 # 由 1 改为 0,禁用该插件
- 修改 yum 的配置文件
vi /etc/yum.conf
plugins = 1 # 改为 0,不使用插件
- 清除缓存并重新构建 yum 源
yum clean all
yum clean dbcache
yum makecache
成功。
2. Oracle 安装报错 ins_ctx.mk

先查看 /usr/lib64/libc.a是否存在:
ls /usr/lib64 | grep libc.a
如果找不到先安装:glibc-static如果有则略过此步:
yum -y install glibc-static
修改 oracle 安装目录下 $ORACLE_HOME/ctx/lib/ins_ctx.mk将
    ctxhx: $(CTXHXOBJ)
        $(LINK_CTXHX) $(CTXHXOBJ) $(INSO_LINK)
修改为:
    ctxhx: $(CTXHXOBJ)
        -static $(LINK_CTXHX) $(CTXHXOBJ) $(INSO_LINK) /usr/lib64/libc.a
然后点击retry通过。
3. Oracle 安装报错 agent nmhs
修改 $ORACLE_HOME/sysman/lib/ins_emagent.mk将 $(MK_EMAGENT_NMECTL)修改为 $(MK_EMAGENT_NMECTL) -lnnz11然后点击 retry 通过。

为开发者提供学习成长、分享交流、生态实践、资源工具等服务,帮助开发者快速成长。
更多推荐


 2
2 0
0- 0


 已为社区贡献2条内容

所有评论(0)