
Centos安装Mysql的三种方式
以下都是在Centos7环境下安装Mysql5.7,环境不同可能会不出一些不一样的问题,所以大家尽量使用和本文一样的环境,Centos7环境可以参考VM安装Centos7的文档。一、yum安装https://repo.mysql.com/中找到自己要下载的版本,这里以5.7为例[root@mysql01 tools]# wget https://repo.mysql.com/mysql57-com
以下都是在Centos7环境下安装Mysql5.7,环境不同可能会不出一些不一样的问题,所以大家尽量使用和本文一样的环境,Centos7环境可以参考VM安装Centos7的文档。
一、yum安装
https://repo.mysql.com/中找到自己要下载的版本,这里以5.7为例
[root@mysql01 tools]# wget https://repo.mysql.com/mysql57-community-release-el7.rpm
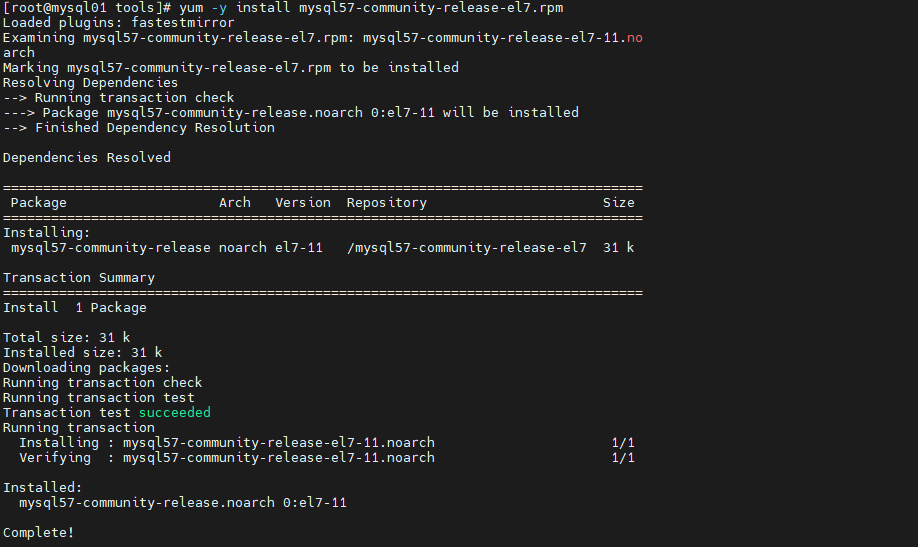
1)安装mysql源
[root@mysql01 tools]# yum -y install mysql57-community-release-el7.rpm
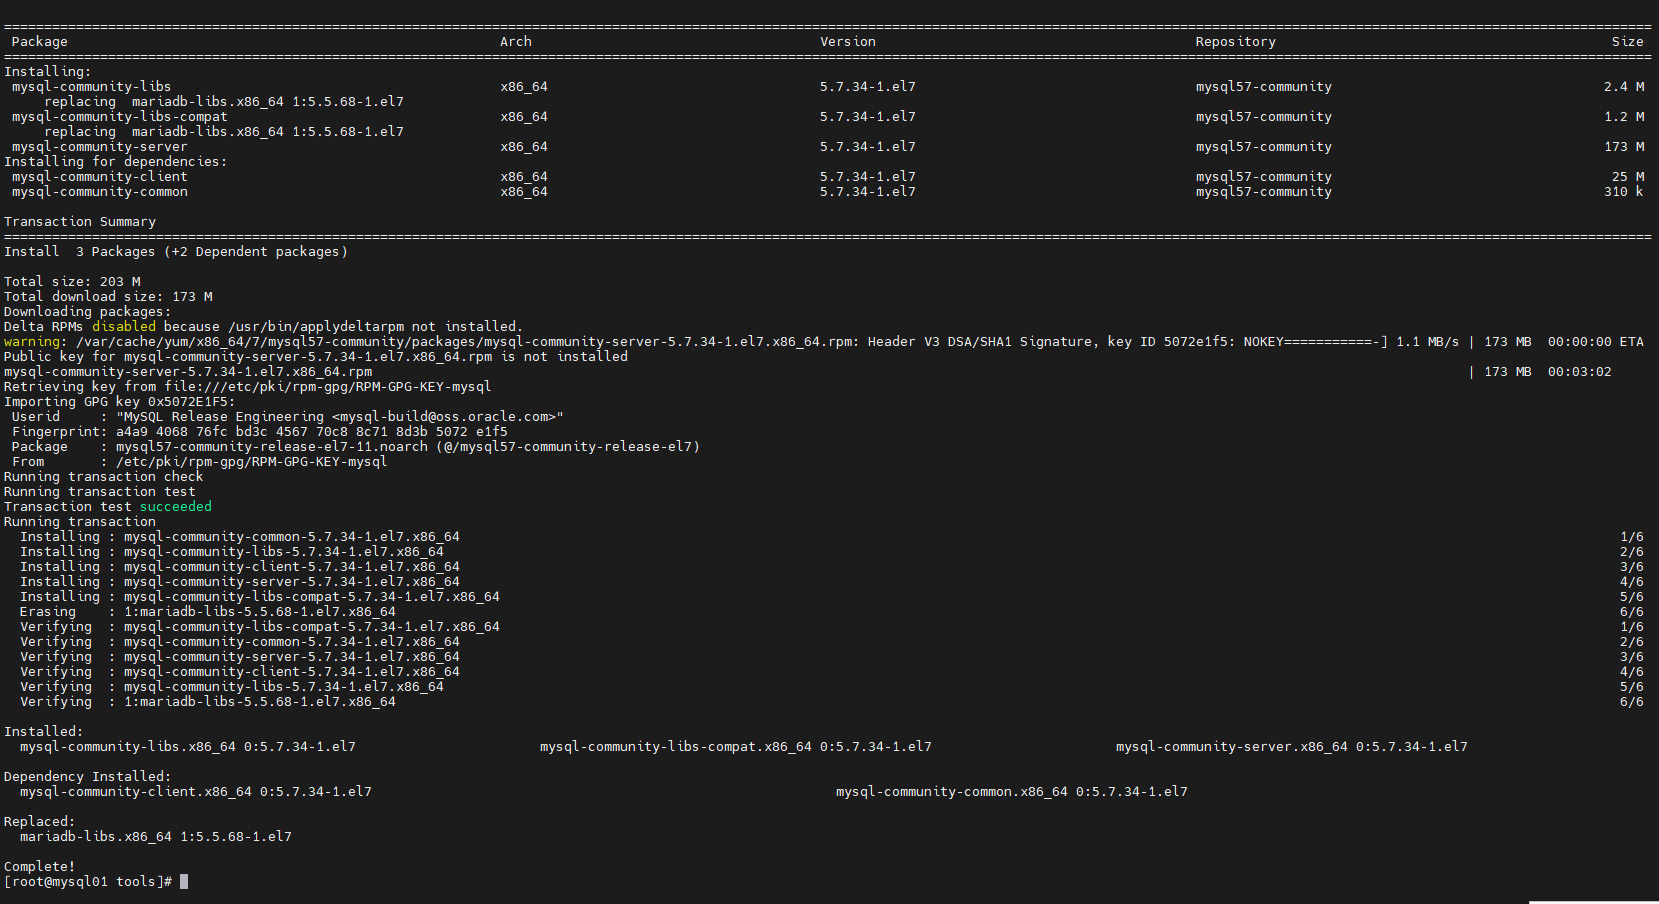
[root@mysql01 tools]# yum -y install mysql-community-server
2)启动mysql
[root@mysql01 tools]# systemctl start  mysqld.service
[root@mysql01 tools]# systemctl status mysqld.service
● mysqld.service - MySQL Server
   Loaded: loaded (/usr/lib/systemd/system/mysqld.service; enabled; vendor prese                                                                                                                              t: disabled)
   Active: active (running) since Sat 2021-06-26 23:12:39 CST; 10s ago
     Docs: man:mysqld(8)
           http://dev.mysql.com/doc/refman/en/using-systemd.html
  Process: 1693 ExecStart=/usr/sbin/mysqld --daemonize --pid-file=/var/run/mysql                                                                                                                              d/mysqld.pid $MYSQLD_OPTS (code=exited, status=0/SUCCESS)
  Process: 1644 ExecStartPre=/usr/bin/mysqld_pre_systemd (code=exited, status=0/                                                                                                                              SUCCESS)
 Main PID: 1696 (mysqld)
   CGroup: /system.slice/mysqld.service
           └─1696 /usr/sbin/mysqld --daemonize --pid-file=/var/run/mysqld/mys...

Jun 26 23:12:35 mysql01 systemd[1]: Starting MySQL Server...
Jun 26 23:12:39 mysql01 systemd[1]: Started MySQL Server.
3)找出mysql的root密码
[root@mysql01 tools]# grep "password" /var/log/mysqld.log
2021-06-26T15:12:36.965053Z 1 [Note] A temporary password is generated for root@localhost: 4,j.UO#v8h&6
4)登录到mysql
[root@mysql01 tools]# mysql -uroot -p
Enter password:
Welcome to the MySQL monitor.  Commands end with ; or \g.
Your MySQL connection id is 2
Server version: 5.7.34

Copyright (c) 2000, 2021, Oracle and/or its affiliates.

Oracle is a registered trademark of Oracle Corporation and/or its
affiliates. Other names may be trademarks of their respective
owners.

Type 'help;' or '\h' for help. Type '\c' to clear the current input statement.

mysql>
5)修改root密码
默认root密码不能过于简单,否则会出现ERROR,需要设置两个参数使其可以设置简单密码
mysql> alter user 'root'@'localhost' identified by 'root';
ERROR 1819 (HY000): Your password does not satisfy the current policy requiremen
mysql> set global validate_password_policy=0;
mysql> set global validate_password_length=1;
mysql> alter user 'root'@'localhost' identified by 'root';
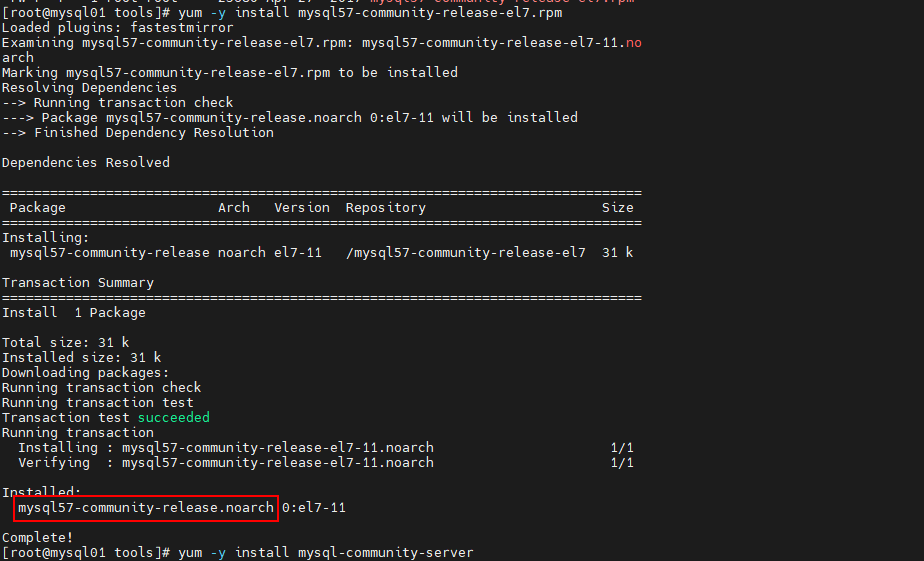
6)删除yum源
[root@mysql01 tools]# yum -y remove mysql57-community-release.noarch
7)创建用户及数据库
mysql> set global validate_password_policy=0;
mysql> set global validate_password_length=1;
mysql> create user 'kfbb'@'%' identified by 'kfbb';
mysql> create database kfbb;
#给kfbb用户授权kfbb库的所有权限
mysql> grant all privileges on kfbb.* to kfbb@localhost identified by 'kfbb';
8)远程访问
远程访问授权,这样就可以使用客户端工具进行数据库连接了。
mysql> grant all privileges on kfbb.* to 'kfbb'@'%' identified by 'kfbb' with grant option;
mysql> flush privileges;
mysql> use mysql
mysql> select host,user from user;
+-----------+---------------+
| host      | user          |
+-----------+---------------+
| %         | kfbb          |
| localhost | kfbb          |
| localhost | mysql.session |
| localhost | mysql.sys     |
| localhost | root          |
+-----------+---------------+
5 rows in set (0.00 sec)
9)设置开机启动
[root@mysql01 tools]# systemctl enable mysqld
[root@mysql01 tools]# systemctl daemon-reload
二、tar方式安装
1)下载安装包
https://downloads.mysql.com/archives/community/网站上选择对应的安装版本下载,这里以5.7.33的tar包为例
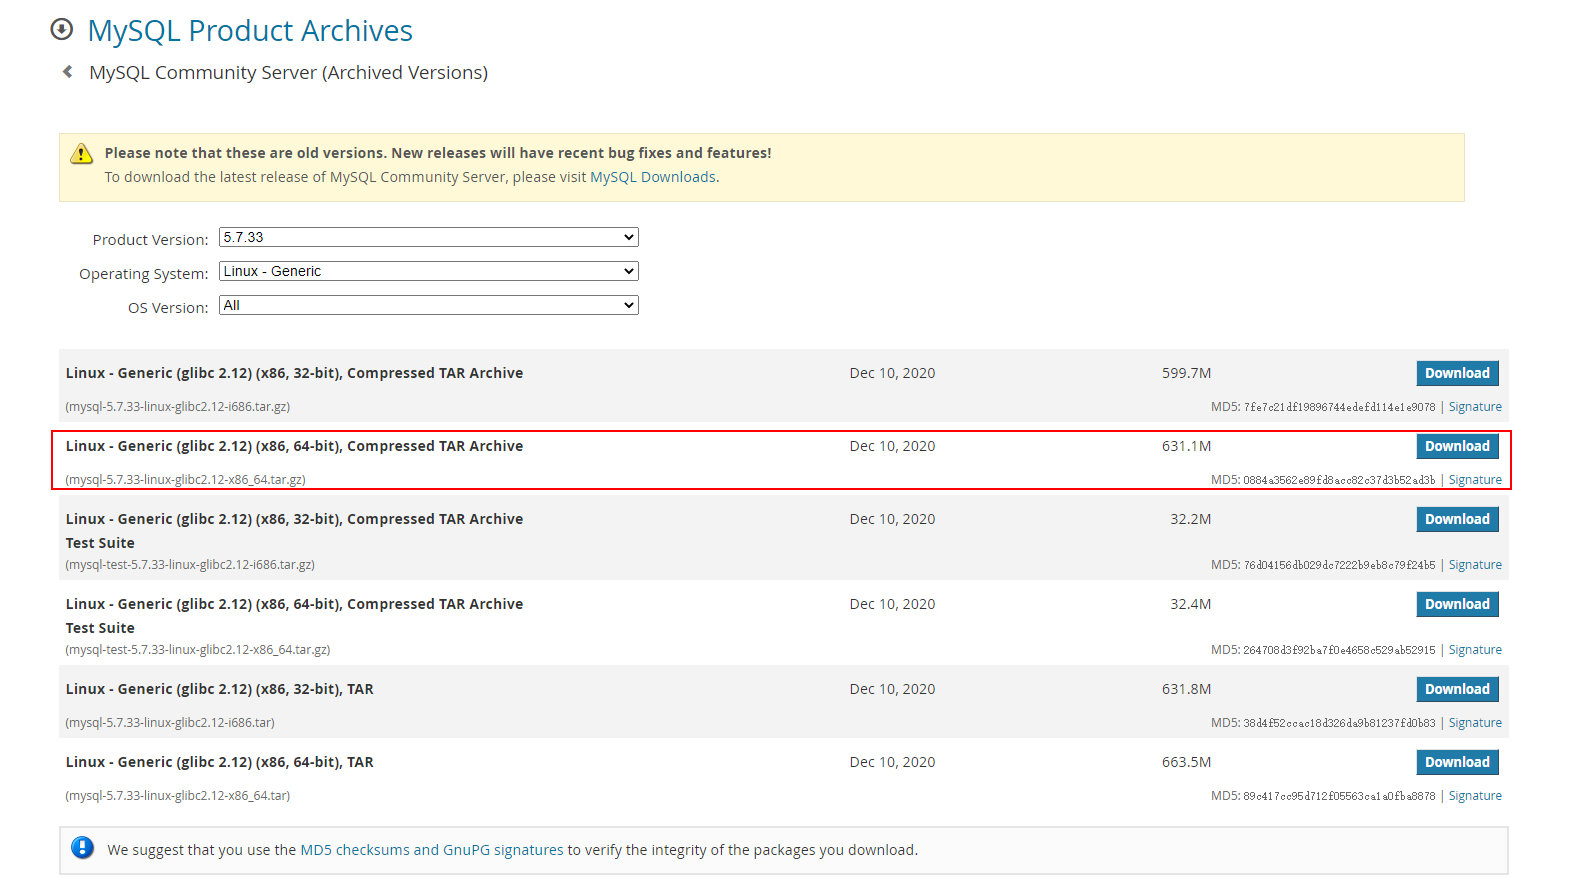
[root@mother-board tools]# wget https://downloads.mysql.com/archives/get/p/23/file/mysql-5.7.33-linux-glibc2.12-x86_64.tar.gz
[root@mother-board tools]# tar -zxvf mysql-5.7.33-linux-glibc2.12-x86_64.tar.gz
[root@mother-board tools]# mv mysql-5.7.33-linux-glibc2.12-x86_64 mysql
[root@mother-board tools]# mv mysql /usr/local/
2)创建mysql用户
首先删除系统已有的mysql
#删除mariadb
[root@mother-board ~]# rpm -qa|grep mariadb
mariadb-libs-5.5.68-1.el7.x86_64
[root@mother-board ~]# rpm -e --nodeps mariadb-libs-5.5.68-1.el7.x86_64
#和删除mariadb一样,列出了多少个,就一个个通过:rmp -e --nodeps来删除
[root@mother-board ~]# rpm -qa|grep mysql
创建一个不需要登录的mysql账号,给对应的目录授予权限。
# 创建不需要登录的一个mysql账号,启动MySQL服务时会使用该账号
[root@mother-board tools]# groupadd mysql
[root@mother-board tools]# useradd -r -g mysql -s /bin/false mysql
#与上面作用一样[root@mother-board tools]# useradd -r -g mysql -s /sbin/nologin mysql
#授予权限
[root@mother-board tools]# chown -R mysql:mysql /usr/local/mysql
[root@mother-board tools]# mkdir -p /data/mysql
[root@mother-board tools]# chown -R mysql:mysql /data/mysql
3)安装依赖
[root@mother-board tools]# yum -y install libaio
4)初始化
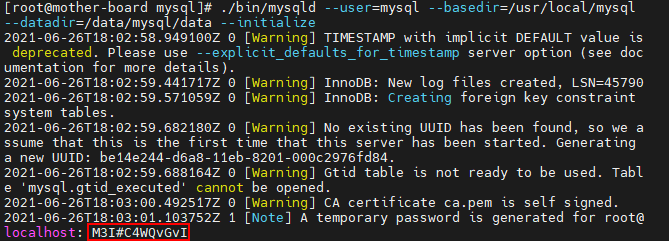
初始化的时候会显示初始的root账户密码,如下红框所示。M3I#C4WQvGvI即为默认root账户密码。
[root@mother-board tools]# cd /usr/local/mysql/
[root@mother-board mysql]# ./bin/mysqld --user=mysql --basedir=/usr/local/mysql --datadir=/data/mysql/data --initialize
5)添加环境变量
#设置环境变量
[root@mother-board mysql]# vi /etc/profile
export MYSQL_HOME=/opt/apps/mysql
export PATH=$PATH:${MYSQL_HOME}/bin
[root@mother-board mysql]# source /etc/profile
6)添加到系统服务
[root@mother-board mysql]# cd support-files
#修改mysql.server中的basedir、datadir、mysqld_pid_file_path对应的值
[root@mother-board support-files]# vi mysql.server
basedir=/usr/local/mysql
datadir=/data/mysql/data
mysqld_pid_file_path=/data/mysql/mysql.pid
7)设置开机启动
#启动mysql,设置开机启动
[root@mother-board support-files]# cp mysql.server /etc/init.d/mysql
[root@mother-board support-files]# chmod 755 /etc/init.d/mysql
[root@mother-board support-files]# service mysql start
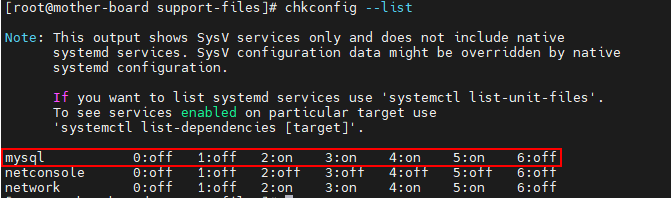
[root@mother-board support-files]# chkconfig --add mysql
[root@mother-board support-files]# chkconfig --list
8)修改root密码
使用找出的root密码登录到mysql
[root@mother-board ~]# mysql -uroot -p
Enter password:
Welcome to the MySQL monitor.  Commands end with ; or \g.
Your MySQL connection id is 2
Server version: 5.7.33

Copyright (c) 2000, 2021, Oracle and/or its affiliates.

Oracle is a registered trademark of Oracle Corporation and/or its
affiliates. Other names may be trademarks of their respective
owners.

Type 'help;' or '\h' for help. Type '\c' to clear the current input statement.

mysql>
修改root密码,默认root密码不能过于简单,否则会出现ERROR,需要设置两个参数使其可以设置简单密码
mysql> alter user 'root'@'localhost' identified by 'root';
ERROR 1819 (HY000): Your password does not satisfy the current policy requiremen
mysql> set global validate_password_policy=0;
mysql> set global validate_password_length=1;
mysql> alter user 'root'@'localhost' identified by 'root';
9)创建用户以及数据库
mysql> set global validate_password_policy=0;
mysql> set global validate_password_length=1;
mysql> create user 'kfbb'@'%' identified by 'kfbb';
mysql> create database kfbb;
#给kfbb用户授权kfbb库的所有权限
mysql> grant all privileges on kfbb.* to kfbb@localhost identified by 'kfbb';
10)远程访问
mysql> grant all privileges on kfbb.* to 'kfbb'@'%' identified by 'kfbb' with grant option;
mysql> flush privileges;
mysql> use mysql
mysql> select host,user from user;
+-----------+---------------+
| host      | user          |
+-----------+---------------+
| %         | kfbb          |
| localhost | kfbb          |
| localhost | mysql.session |
| localhost | mysql.sys     |
| localhost | root          |
+-----------+---------------+
5 rows in set (0.00 sec)
三、源码编译安装
1)删除mysql
首先删除Mysql,否则会出现一些奇怪的问题。本人开始没有删除mariadb,启动时报了下面的错误。
Starting MySQL.2021-06-28T01:25:22.833546Z mysqld_safe error: log-error set to '/var/log/mariadb/mariadb.log', however file don't exists. Create writable for user 'mysql'.
 ERROR! The server quit without updating PID file (/opt/apps/mysql/mysql.pid).
#删除mariadb
[root@mother-board ~]# rpm -qa|grep mariadb
mariadb-libs-5.5.68-1.el7.x86_64
[root@mother-board ~]# rpm -e --nodeps mariadb-libs-5.5.68-1.el7.x86_64
#和删除mariadb一样,列出了多少个,就一个个通过:rmp -e --nodeps来删除
[root@mother-board ~]# rpm -qa|grep mysql
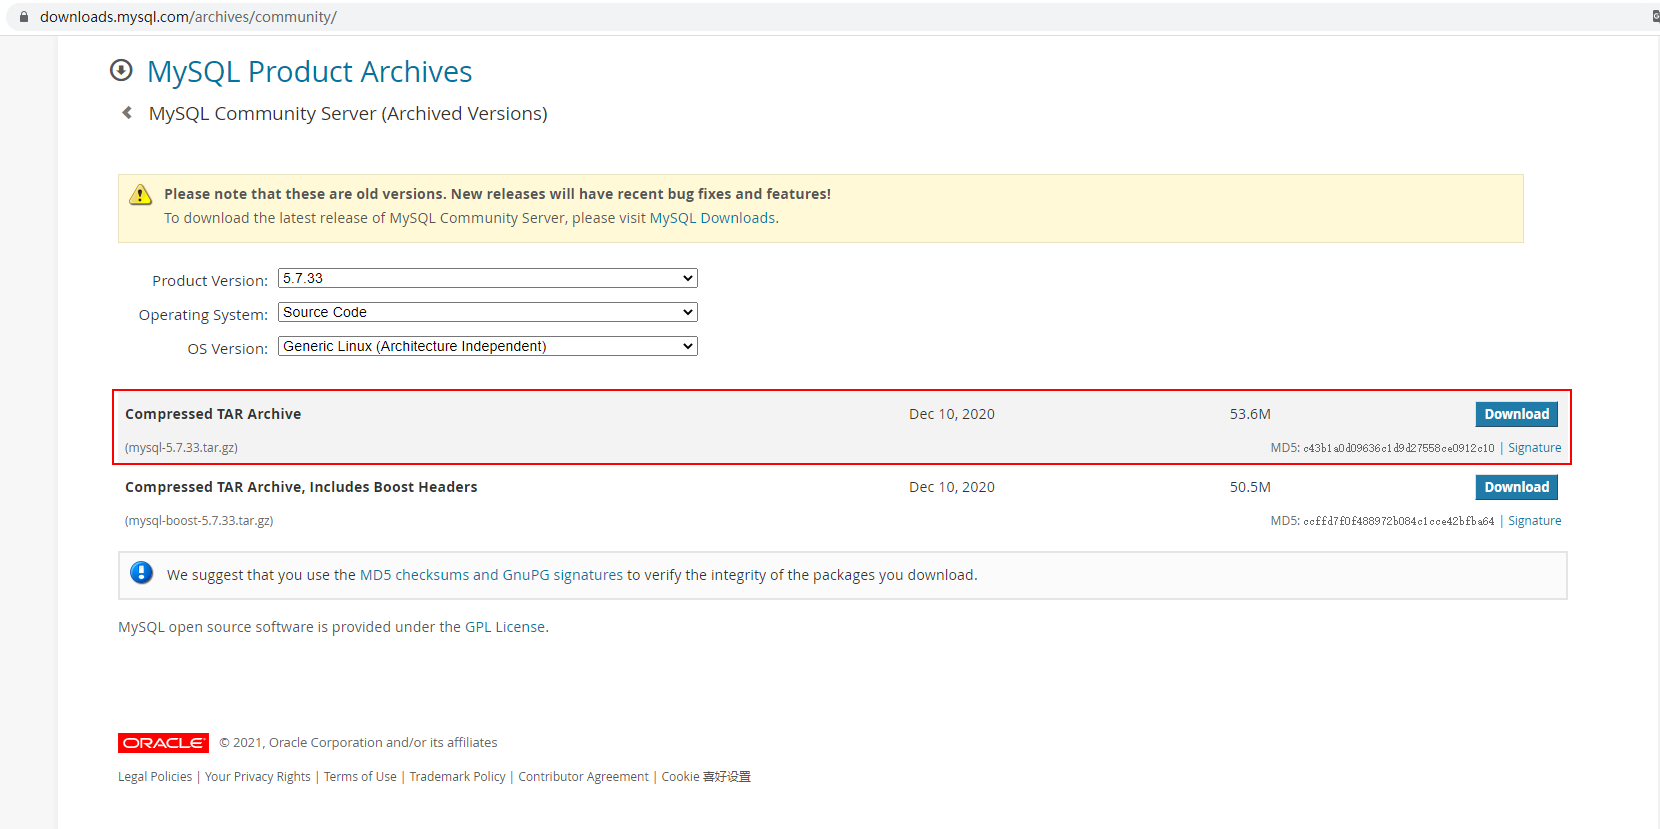
2)下载源码
https://downloads.mysql.com/archives/community/网站上选择对应的安装版本下载,这里以5.7.33的源码为例。
源码有两个版本,自带boost的版本和不带boost的版本,推荐下载带boost的版本,否则还要另外下载boost。
下载带boost版本的:https://downloads.mysql.com/archives/get/p/23/file/mysql-boost-5.7.33.tar.gz
[root@mother-board tools]# wget https://downloads.mysql.com/archives/get/p/23/file/mysql-boost-5.7.33.tar.gz
[root@mother-board tools]# tar -zxvf mysql-boost-5.7.33.tar.gz
3)安装依赖
[root@mother-board tools]# yum -y install make gcc-c++ cmake bison-devel ncurses-devel openssl-devel libaio-devel
4)创建mysql用户
[root@mother-board tools]# groupadd mysql
[root@mother-board tools]# useradd -r -g mysql -s /bin/false mysql
#与上面作用一样[root@mother-board tools]# useradd -r -g mysql -s /sbin/nologin mysql
[root@mother-board tools]# mkdir -p /opt/apps/mysql
[root@mother-board tools]# chown -R mysql:mysql /opt/apps/mysql
[root@mother-board tools]# mkdir -p /data/mysql
[root@mother-board tools]# chown -R mysql:mysql /data/mysql
5)编译源码
| 参数 | 解释 |
|---|---|
| DCMAKE_INSTALL_PREFIX | #安装目录 |
| DMYSQL_DATADIR | #数据库存放目录 |
| DMYSQL_TCP_PORT | #MySQL 监听端口 |
| DMYSQL_UNIX_ADDR | #Unix socket 文件路径 |
| DDEFAULT_CHARSET | #使用 utf8 字符 |
| DDEFAULT_COLLATION | #校验字符 |
| DWITH_INNOBASE_STORAGE_ENGINE | #安装 innodb 存储引擎 |
| DWITH_ARCHIVE_STORAGE_ENGINE | #安装 archive 存储引擎 |
| DWITH_PARTITION_STORAGE_ENGINE | #安装数据库分区 |
| DWITH_FEDERATED_STORAGE_ENGINE | #FEDERATED存储引擎,类似于Oracle的dblink |
| DWITH_BLACKHOLE_STORAGE_ENGINE | #安装 blackhole 存储引擎 |
| DWITH_MYISAM_STORAGE_ENGINE | #安装 myisam 存储引擎 |
| DENABLED_LOCAL_INFILE | #允许从本地导入数据 |
| DWITH_READLINE | #快捷键功能 |
| DEXTRA_CHARSETS | #安装所有扩展字符集 |
[root@mother-board tools]# cd mysql-5.7.33
[root@mother-board mysql-5.7.33]# cmake \
-DCMAKE_INSTALL_PREFIX=/opt/apps/mysql \
-DMYSQL_DATADIR=/data/mysql \
-DMYSQL_TCP_PORT=3306 \
-DMYSQL_UNIX_ADDR=/opt/apps/mysql/mysql.sock \
-DDEFAULT_CHARSET=utf8 \
-DDEFAULT_COLLATION=utf8_general_ci \
-DWITH_INNOBASE_STORAGE_ENGINE=1 \
-DWITH_ARCHIVE_STORAGE_ENGINE=1 \
-DWITH_PARTITION_STORAGE_ENGINE=1 \
-DWITH_BLACKHOLE_STORAGE_ENGINE=1 \
-DWITH_MYISAM_STORAGE_ENGINE=1 \
-DENABLED_LOCAL_INFILE=1 \
-DWITH_READLINE=1 \
-DEXTRA_CHARSETS=all \
-DWITH_SSL=system \
-DWITH_ZLIB=system  \
-DMYSQL_USER=mysql \
-DWITH_BOOST=boost/
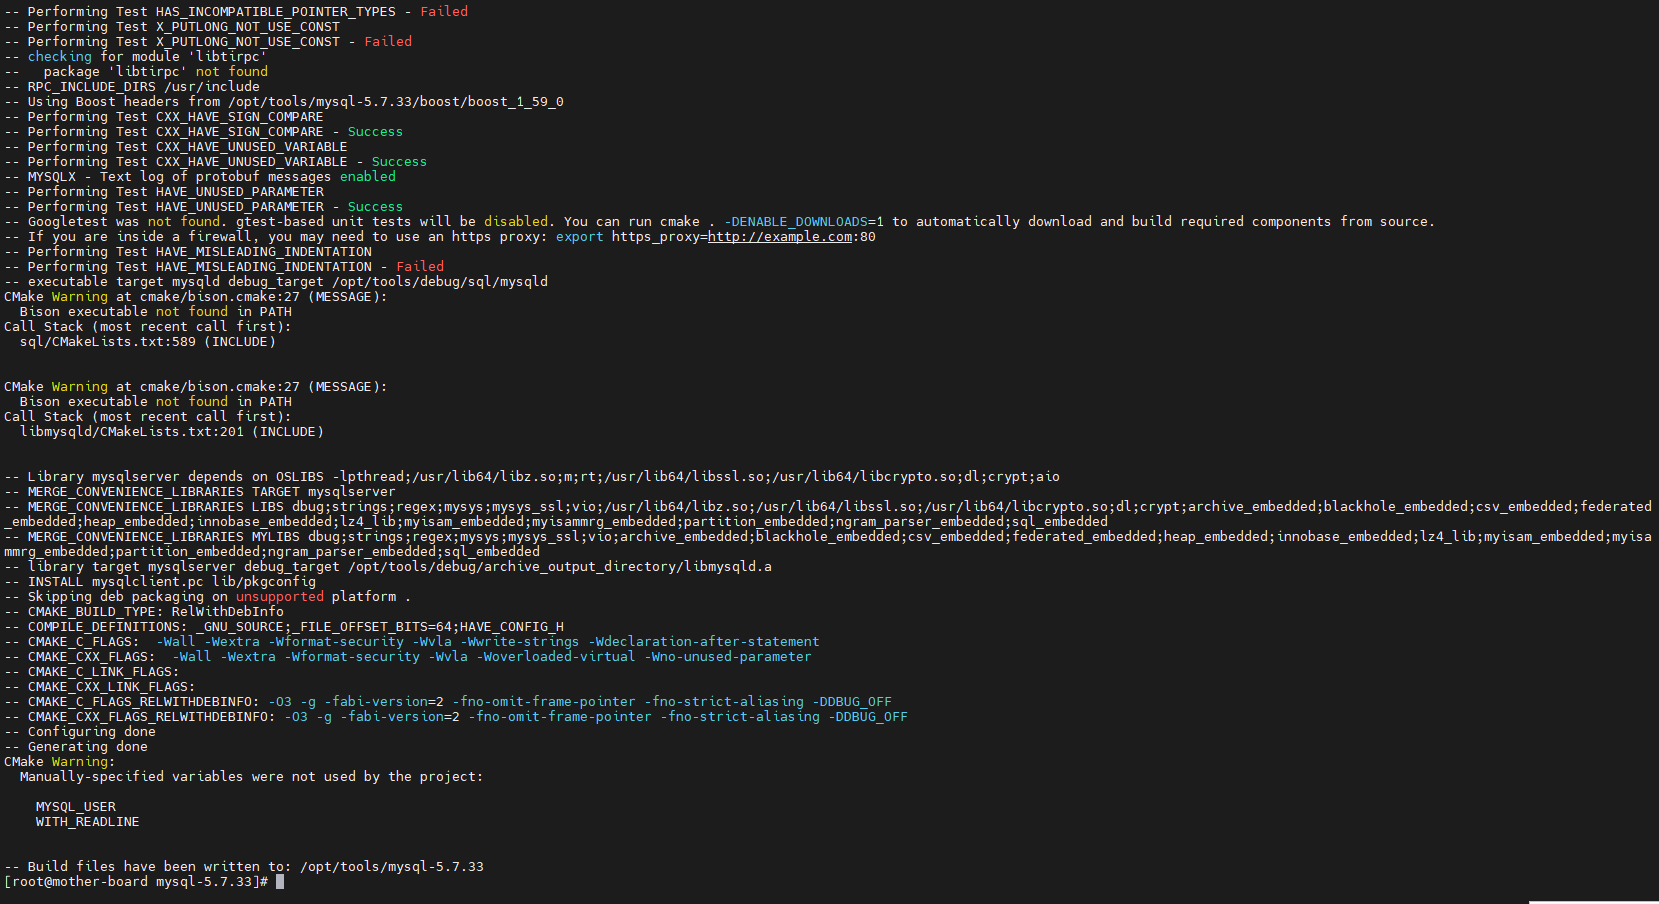
cmake的时候会出现很多failed、warning,不用管它,只要不是中途结束,能够编译完就可以。
6)安装
#-j表示使用的线程数,虚拟机内存最好配置2G或以上,否则可能很慢...
[root@mother-board mysql-5.7.33]# make -j2 && make install
7)初始化数据库
初始化会输出root账户的初始密码,下面的x!kV#BS>R4ik即为初始密码。
[root@mother-board mysql-5.7.33]# cd /opt/apps/mysql/
[root@mother-board mysql]# ./bin/mysqld --user=mysql --basedir=/opt/apps/mysql --datadir=/data/mysql --initialize
2021-06-28T06:29:00.796910Z 0 [Warning] TIMESTAMP with implicit DEFAULT value is deprecated. Please use --explicit_defaults_for_timestamp server option (see documentation for more details).
2021-06-28T06:29:01.028327Z 0 [Warning] InnoDB: New log files created, LSN=45790
2021-06-28T06:29:01.072159Z 0 [Warning] InnoDB: Creating foreign key constraint system tables.
2021-06-28T06:29:01.140822Z 0 [Warning] No existing UUID has been found, so we assume that this is the first time that this server has been started. Generating a new UUID: 206730aa-d7da-11eb-b5b7-000c295e50c6.
2021-06-28T06:29:01.142759Z 0 [Warning] Gtid table is not ready to be used. Table 'mysql.gtid_executed' cannot be opened.
2021-06-28T06:29:01.494925Z 0 [Warning] CA certificate ca.pem is self signed.
2021-06-28T06:29:01.573612Z 1 [Note] A temporary password is generated for root@localhost: x!kV#BS>R4ik
8)添加环境变量
#设置环境变量
[root@mother-board mysql]# vi /etc/profile
export MYSQL_HOME=/opt/apps/mysql
export PATH=$PATH:${MYSQL_HOME}/bin
[root@mother-board mysql]# source /etc/profile
9)添加到系统服务
[root@mother-board mysql]# cd support-files
#修改mysql.server中的basedir、datadir、mysqld_pid_file_path对应的值
[root@mother-board support-files]# vi mysql.server
basedir=/opt/apps/mysql
datadir=/data/mysql
mysqld_pid_file_path=/opt/apps/mysql/mysql.pid
10)设置开机启动
#启动mysql,设置开机启动
[root@mother-board support-files]# cp mysql.server /etc/init.d/mysql
[root@mother-board support-files]# chmod 755 /etc/init.d/mysql
[root@mother-board support-files]# service mysql start
[root@mother-board support-files]# chkconfig --add mysql
[root@mother-board support-files]# chkconfig --list
11)修改root密码
使用找出的root密码登录到mysql
[root@mother-board ~]# mysql -uroot -p
Enter password:
Welcome to the MySQL monitor.  Commands end with ; or \g.
Your MySQL connection id is 2
Server version: 5.7.33

Copyright (c) 2000, 2021, Oracle and/or its affiliates.

Oracle is a registered trademark of Oracle Corporation and/or its
affiliates. Other names may be trademarks of their respective
owners.

Type 'help;' or '\h' for help. Type '\c' to clear the current input statement.

mysql>
#修改root密码
mysql> alter user 'root'@'localhost' identified by 'root';
- 如果密码过于简单,出现ERROR,需要设置两个参数使其可以设置简单密码
mysql> alter user 'root'@'localhost' identified by 'root';
ERROR 1819 (HY000): Your password does not satisfy the current policy requiremen
mysql> set global validate_password_policy=0;
mysql> set global validate_password_length=1;
mysql> alter user 'root'@'localhost' identified by 'root';
12)创建用户及数据库
#如果创建用户出现密码简单错误,就设置下面两个属性
#mysql> set global validate_password_policy=0;
#mysql> set global validate_password_length=1;
mysql> create user 'kfbb'@'%' identified by 'kfbb';
mysql> create database kfbb;
#给kfbb用户授权kfbb库的所有权限
mysql> grant all privileges on kfbb.* to kfbb@localhost identified by 'kfbb';
13)远程访问
mysql> grant all privileges on kfbb.* to 'kfbb'@'%' identified by 'kfbb' with grant option;
mysql> flush privileges;
mysql> use mysql
mysql> select host,user from user;
+-----------+---------------+
| host      | user          |
+-----------+---------------+
| %         | kfbb          |
| localhost | kfbb          |
| localhost | mysql.session |
| localhost | mysql.sys     |
| localhost | root          |
+-----------+---------------+
5 rows in set (0.00 sec)

为开发者提供学习成长、分享交流、生态实践、资源工具等服务,帮助开发者快速成长。
更多推荐


 13
13 0
0- 0


 已为社区贡献1条内容

所有评论(0)