
JAVA 导入数据到Elasticsearch中
导入数据到Elasticsearch中前言我们在使用es时候,需要手动将数据导入到es中,导入数据无非就是给es中写入数据,可以从mysql中写入,也可以从其他db或者excle中导入中间需要做一层转换,然后使用es的相关api批量写入es中。写入的几种方案写入方案有很多种:业务代码中异步写入如我们创单成功时,异步将订单数据写入es中数据同步到mq中然后mq在写入es中如项目日志操作,kafka
导入数据到Elasticsearch中
es入门使用
es索引使用
es分词使用
es聚合使用
java操作es
前言
我们在使用es时候,需要手动将数据导入到es中,导入数据无非就是给es中写入数据,可以从mysql中写入,也可以从其他db或者excle中导入中间需要做一层转换,然后使用es的相关api批量写入es中。
写入的几种方案
写入方案有很多种:
- 业务代码中异步写入
如我们创单成功时,异步将订单数据写入es中 - 数据同步到mq中然后mq在写入es中
如项目日志操作,kafka + es 收集日志操作 - 将mysql指定表中数据写入到es
这里我们演示将某个表中数据写入es中 - 订阅mysql binlog 异步导入es
cancel伪装bin log 将解析后的数据导入到es中
具体操作
一般随着业务的发展,db查询到一定程度就显得力不从心(当然这里指的是加索引,分库分表以及各种优化之后也无济于事,数据量还是很大),此时我们就需要使用es来提高查询效率,此时就需要从db将数据导入到es中。
- 读取db数据
- 批量写入es
- 依次循环,直到数据都被写完
实现
写入es方法有很多种,我们可以使用es的api,一条一条写,也可以批量操作。
这里我们使用es官方推荐的一个工具类Using Bulk Processor操作
官方文档地址
版本:
jdk: 11
es:7.1
sb : 2.1
mysql: 5.7
首先导入依赖
 <dependencies>
        <dependency>
            <groupId>org.springframework.boot</groupId>
            <artifactId>spring-boot-starter-web</artifactId>
        </dependency>

        <dependency>
            <groupId>org.springframework.boot</groupId>
            <artifactId>spring-boot-starter-test</artifactId>
            <scope>test</scope>
        </dependency>


        <dependency>
            <groupId>org.springframework.boot</groupId>
            <artifactId>spring-boot-starter-test</artifactId>
        </dependency>
        <dependency>
            <groupId>org.elasticsearch.client</groupId>
            <artifactId>elasticsearch-rest-high-level-client</artifactId>
            <version>7.3.0</version>
            <exclusions>
                <exclusion>
                    <groupId>org.elasticsearch</groupId>
                    <artifactId>elasticsearch</artifactId>
                </exclusion>
            </exclusions>
        </dependency>

        <dependency>
            <groupId>org.elasticsearch</groupId>
            <artifactId>elasticsearch</artifactId>
            <version>7.3.0</version>
        </dependency>


        <dependency>
            <groupId>org.springframework.boot</groupId>
            <artifactId>spring-boot-starter-thymeleaf</artifactId>
        </dependency>

        <dependency>
            <groupId>org.springframework.boot</groupId>
            <artifactId>spring-boot-starter-web</artifactId>
        </dependency>

        <dependency>
            <groupId>org.springframework.boot</groupId>
            <artifactId>spring-boot-devtools</artifactId>
            <scope>runtime</scope>
            <optional>true</optional>
        </dependency>

        <dependency>
            <groupId>org.springframework.boot</groupId>
            <artifactId>spring-boot-configuration-processor</artifactId>
            <optional>true</optional>
        </dependency>


        <dependency>
            <groupId>org.springframework.boot</groupId>
            <artifactId>spring-boot-starter-test</artifactId>
            <scope>test</scope>
            <exclusions>
                <exclusion>
                    <groupId>org.junit.vintage</groupId>
                    <artifactId>junit-vintage-engine</artifactId>
                </exclusion>
            </exclusions>
        </dependency>

        <!-- HttpClient -->
        <dependency>
            <groupId>org.apache.httpcomponents</groupId>
            <artifactId>httpclient</artifactId>
            <version>4.5.3</version>
        </dependency>

        <dependency>
            <groupId>com.alibaba</groupId>
            <artifactId>fastjson</artifactId>
            <version>1.2.58</version>
        </dependency>

        <dependency>
            <groupId>org.projectlombok</groupId>
            <artifactId>lombok</artifactId>
            <optional>true</optional>
        </dependency>

        <dependency>
            <groupId>mysql</groupId>
            <artifactId>mysql-connector-java</artifactId>
            <version>5.1.38</version>
            <classifier></classifier>
            <scope>compile</scope>
        </dependency>

        <!-- https://mvnrepository.com/artifact/org.apache.commons/commons-lang3 -->
        <dependency>
            <groupId>org.apache.commons</groupId>
            <artifactId>commons-lang3</artifactId>
            <version>3.9</version>
        </dependency>
        <dependency>
            <groupId>junit</groupId>
            <artifactId>junit</artifactId>
            <version>4.12</version>
            <scope>test</scope>
        </dependency>


    </dependencies>
yml配置
spring:
  devtools:
    restart:
      enabled: true  #\u8BBE\u7F6E\u5F00\u542F\u70ED\u90E8\u7F72
      additional-paths: src/main/java #\u91CD\u542F\u76EE\u5F55
      exclude: WEB-INF/**
    freemarker:
      cache: false    #\u9875\u9762\u4E0D\u52A0\u8F7D\u7F13\u5B58\uFF0C\u4FEE\u6539\u5373\u65F6\u751F\u6548

  elasticsearch:
    rest:
      uris: 127.0.0.1:9200
server:
  port: 8080

logging:
  level:
    root: info
    com.xdclass.search: debug
我们需要初始化db,以及es(这里可以集群,也可以单机),然后写相关api
首先是db操作,这里直接单个db实例,简单一点,当然也可以使用其他的mybatis,jpa,jdbc等
package com.example.esdemo.config;

import java.sql.Connection;
import java.sql.DriverManager;

public class DBHelper {
    public static final String url = "jdbc:mysql://127.0.0.1:3306/test?useUnicode=true&characterEncoding=utf-8&serverTimezone=Asia/Shanghai";
//    public static final String name = "com.mysql.cj.jdbc.Driver";
    public static final String name = "com.mysql.jdbc.Driver";
    public static final String user = "root";
    public static final String password = "root";
    private  static Connection  connection = null;

    public  static   Connection  getConn(){
        try {
            Class.forName(name);
            connection = DriverManager.getConnection(url,user,password);
        }catch (Exception e){
            e.printStackTrace();
        }
        return  connection;
    }
}
es配置
package com.example.esdemo.config;

import org.apache.http.HttpHost;
import org.elasticsearch.client.RestClient;
import org.elasticsearch.client.RestHighLevelClient;
import org.springframework.beans.factory.annotation.Value;
import org.springframework.context.annotation.Bean;
import org.springframework.context.annotation.Configuration;

@Configuration
public class ElasticsearchConfig {


    @Value("${spring.elasticsearch.rest.uris}")
    private String hostlist;

    @Bean
    public RestHighLevelClient restHighLevelClient() {
        //解析hostlist配置信息
        String[] split = hostlist.split(",");
        //创建HttpHost数组,其中存放es主机和端口的配置信息
        HttpHost[] httpHostArray = new HttpHost[split.length];
        for (int i = 0; i < split.length; i++) {
            String item = split[i];
            httpHostArray[i] = new HttpHost(item.split(":")[0], Integer.parseInt(item.split(":")[1]), "http");
        }
        //创建RestHighLevelClient客户端
        return new RestHighLevelClient(RestClient.builder(httpHostArray));
    }//项目主要使用RestHighLevelClient,对于低级的客户端暂时不用

    @Bean
    public RestClient restClient() {
        // 解析hostlist配置信息
        String[] split = hostlist.split(",");
        //创建HttpHost数组,其中存放es主机和端口的配置信息
        HttpHost[] httpHostArray = new HttpHost[split.length];
        for (int i = 0; i < split.length; i++) {
            String item = split[i];
            httpHostArray[i] = new HttpHost(item.split(":")[0], Integer.parseInt(item.split(":")[1]), "http");
        }
        return RestClient.builder(httpHostArray).build();
    }
}
db 和es相关的表明和index名
 */
public class ImportDb2Es {

    private String dbTableName;

    private String esIndexName;
    //get  set 省略
}
然后是相关service,导入service
public interface ImportService {

    void importDb2Es(String dbName,String esIndexName);
}
实现
package com.example.esdemo.service.impl;

import com.example.esdemo.config.DBHelper;
import com.example.esdemo.imports.ImportDb2Es;
import com.example.esdemo.service.ImportService;
import org.apache.logging.log4j.LogManager;
import org.apache.logging.log4j.Logger;
import org.elasticsearch.action.ActionListener;
import org.elasticsearch.action.bulk.BackoffPolicy;
import org.elasticsearch.action.bulk.BulkProcessor;
import org.elasticsearch.action.bulk.BulkRequest;
import org.elasticsearch.action.bulk.BulkResponse;
import org.elasticsearch.action.index.IndexRequest;
import org.elasticsearch.client.RequestOptions;
import org.elasticsearch.client.RestHighLevelClient;
import org.elasticsearch.common.unit.ByteSizeUnit;
import org.elasticsearch.common.unit.ByteSizeValue;
import org.elasticsearch.common.unit.TimeValue;
import org.springframework.beans.factory.annotation.Autowired;
import org.springframework.stereotype.Component;

import java.sql.*;
import java.util.ArrayList;
import java.util.HashMap;
import java.util.concurrent.TimeUnit;
import java.util.function.BiConsumer;


/**
 * 导入db2es 实现类
 */
@Component
public class ImportServiceImpl implements ImportService {

    private static final Logger logger = LogManager.getLogger(ImportServiceImpl.class);

    @Autowired
    private RestHighLevelClient client;


    @Override
    public void importDb2Es(ImportDb2Es importDb2Es) {
        writeMySQLDataToES(importDb2Es.getDbTableName(),importDb2Es.getDbTableName());
    }


    private void writeMySQLDataToES(String tableName,String esIndeName) {
        BulkProcessor bulkProcessor = getBulkProcessor(client);
        Connection connection = null;
        PreparedStatement ps = null;
        ResultSet rs = null;
        try {
            connection = DBHelper.getConn();
            logger.info("start handle data :" + tableName);
            String sql = "select * from " + tableName;
            ps = connection.prepareStatement(sql, ResultSet.TYPE_FORWARD_ONLY, ResultSet.CONCUR_READ_ONLY);
            // 根据自己需要设置 fetchSize
            ps.setFetchSize(20);
            rs = ps.executeQuery();
            ResultSetMetaData colData = rs.getMetaData();
            ArrayList<HashMap<String, String>> dataList = new ArrayList<>();
            HashMap<String, String> map = null;
            int count = 0;
            // c 就是列的名字   v 就是列对应的值
            String c = null;
            String v = null;
            while (rs.next()) {
                count++;
                map = new HashMap<String, String>(128);
                for (int i = 1; i < colData.getColumnCount(); i++) {
                    c = colData.getColumnName(i);
                    v = rs.getString(c);
                    map.put(c, v);
                }
                dataList.add(map);
                // 每1万条 写一次   不足的批次的数据 最后一次提交处理
                if (count % 10000 == 0) {
                    logger.info("mysql handle data  number:" + count);
                    // 将数据添加到 bulkProcessor
                    for (HashMap<String, String> hashMap2 : dataList) {
                        bulkProcessor.add(new IndexRequest(esIndeName).source(hashMap2));
                    }
                    // 每提交一次 清空 map 和  dataList
                    map.clear();
                    dataList.clear();
                }
            }
            // 处理 未提交的数据
            for (HashMap<String, String> hashMap2 : dataList) {
                bulkProcessor.add(new IndexRequest(esIndeName).source(hashMap2));
            }
            bulkProcessor.flush();

        } catch (SQLException e) {
            e.printStackTrace();
        } finally {
            try {
                rs.close();
                ps.close();
                connection.close();
                boolean terinaFlag = bulkProcessor.awaitClose(150L, TimeUnit.SECONDS);
                logger.info(terinaFlag);
            } catch (Exception e) {
                e.printStackTrace();
            }
        }

    }

    private BulkProcessor getBulkProcessor(RestHighLevelClient client) {

        BulkProcessor bulkProcessor = null;
        try {

            BulkProcessor.Listener listener = new BulkProcessor.Listener() {
                @Override
                public void beforeBulk(long executionId, BulkRequest request) {
                    logger.info("Try to insert data number : "
                            + request.numberOfActions());
                }

                @Override
                public void afterBulk(long executionId, BulkRequest request,
                                      BulkResponse response) {
                    logger.info("************** Success insert data number : "
                            + request.numberOfActions() + " , id: " + executionId);
                }

                @Override
                public void afterBulk(long executionId, BulkRequest request, Throwable failure) {
                    logger.error("Bulk is unsuccess : " + failure + ", executionId: " + executionId);
                }
            };

            BiConsumer<BulkRequest, ActionListener<BulkResponse>> bulkConsumer = (request, bulkListener) -> client
                    .bulkAsync(request, RequestOptions.DEFAULT, bulkListener);

            BulkProcessor.Builder builder = BulkProcessor.builder(bulkConsumer, listener);
            builder.setBulkActions(5000);
            builder.setBulkSize(new ByteSizeValue(100L, ByteSizeUnit.MB));
            builder.setConcurrentRequests(10);
            builder.setFlushInterval(TimeValue.timeValueSeconds(100L));
            builder.setBackoffPolicy(BackoffPolicy.constantBackoff(TimeValue.timeValueSeconds(1L), 3));
            // 注意点:让参数设置生效
            bulkProcessor = builder.build();

        } catch (Exception e) {
            e.printStackTrace();
            try {
                bulkProcessor.awaitClose(100L, TimeUnit.SECONDS);
            } catch (Exception e1) {
                logger.error(e1.getMessage());
            }
        }
        return bulkProcessor;
    }
}
这里我们提供一个http 测试
 @Autowired
    private ImportService importService;

    @RequestMapping("api/import")
    public Map<String, Object> imports(ImportDb2Es importDb2Es) {
        Map<String, Object> map = new HashMap<>();


        importService.importDb2Es(importDb2Es);
        map.put("code", 200);
        map.put("msg", "成功");

        return map;
    }
这里我们准备了一个表一些数据
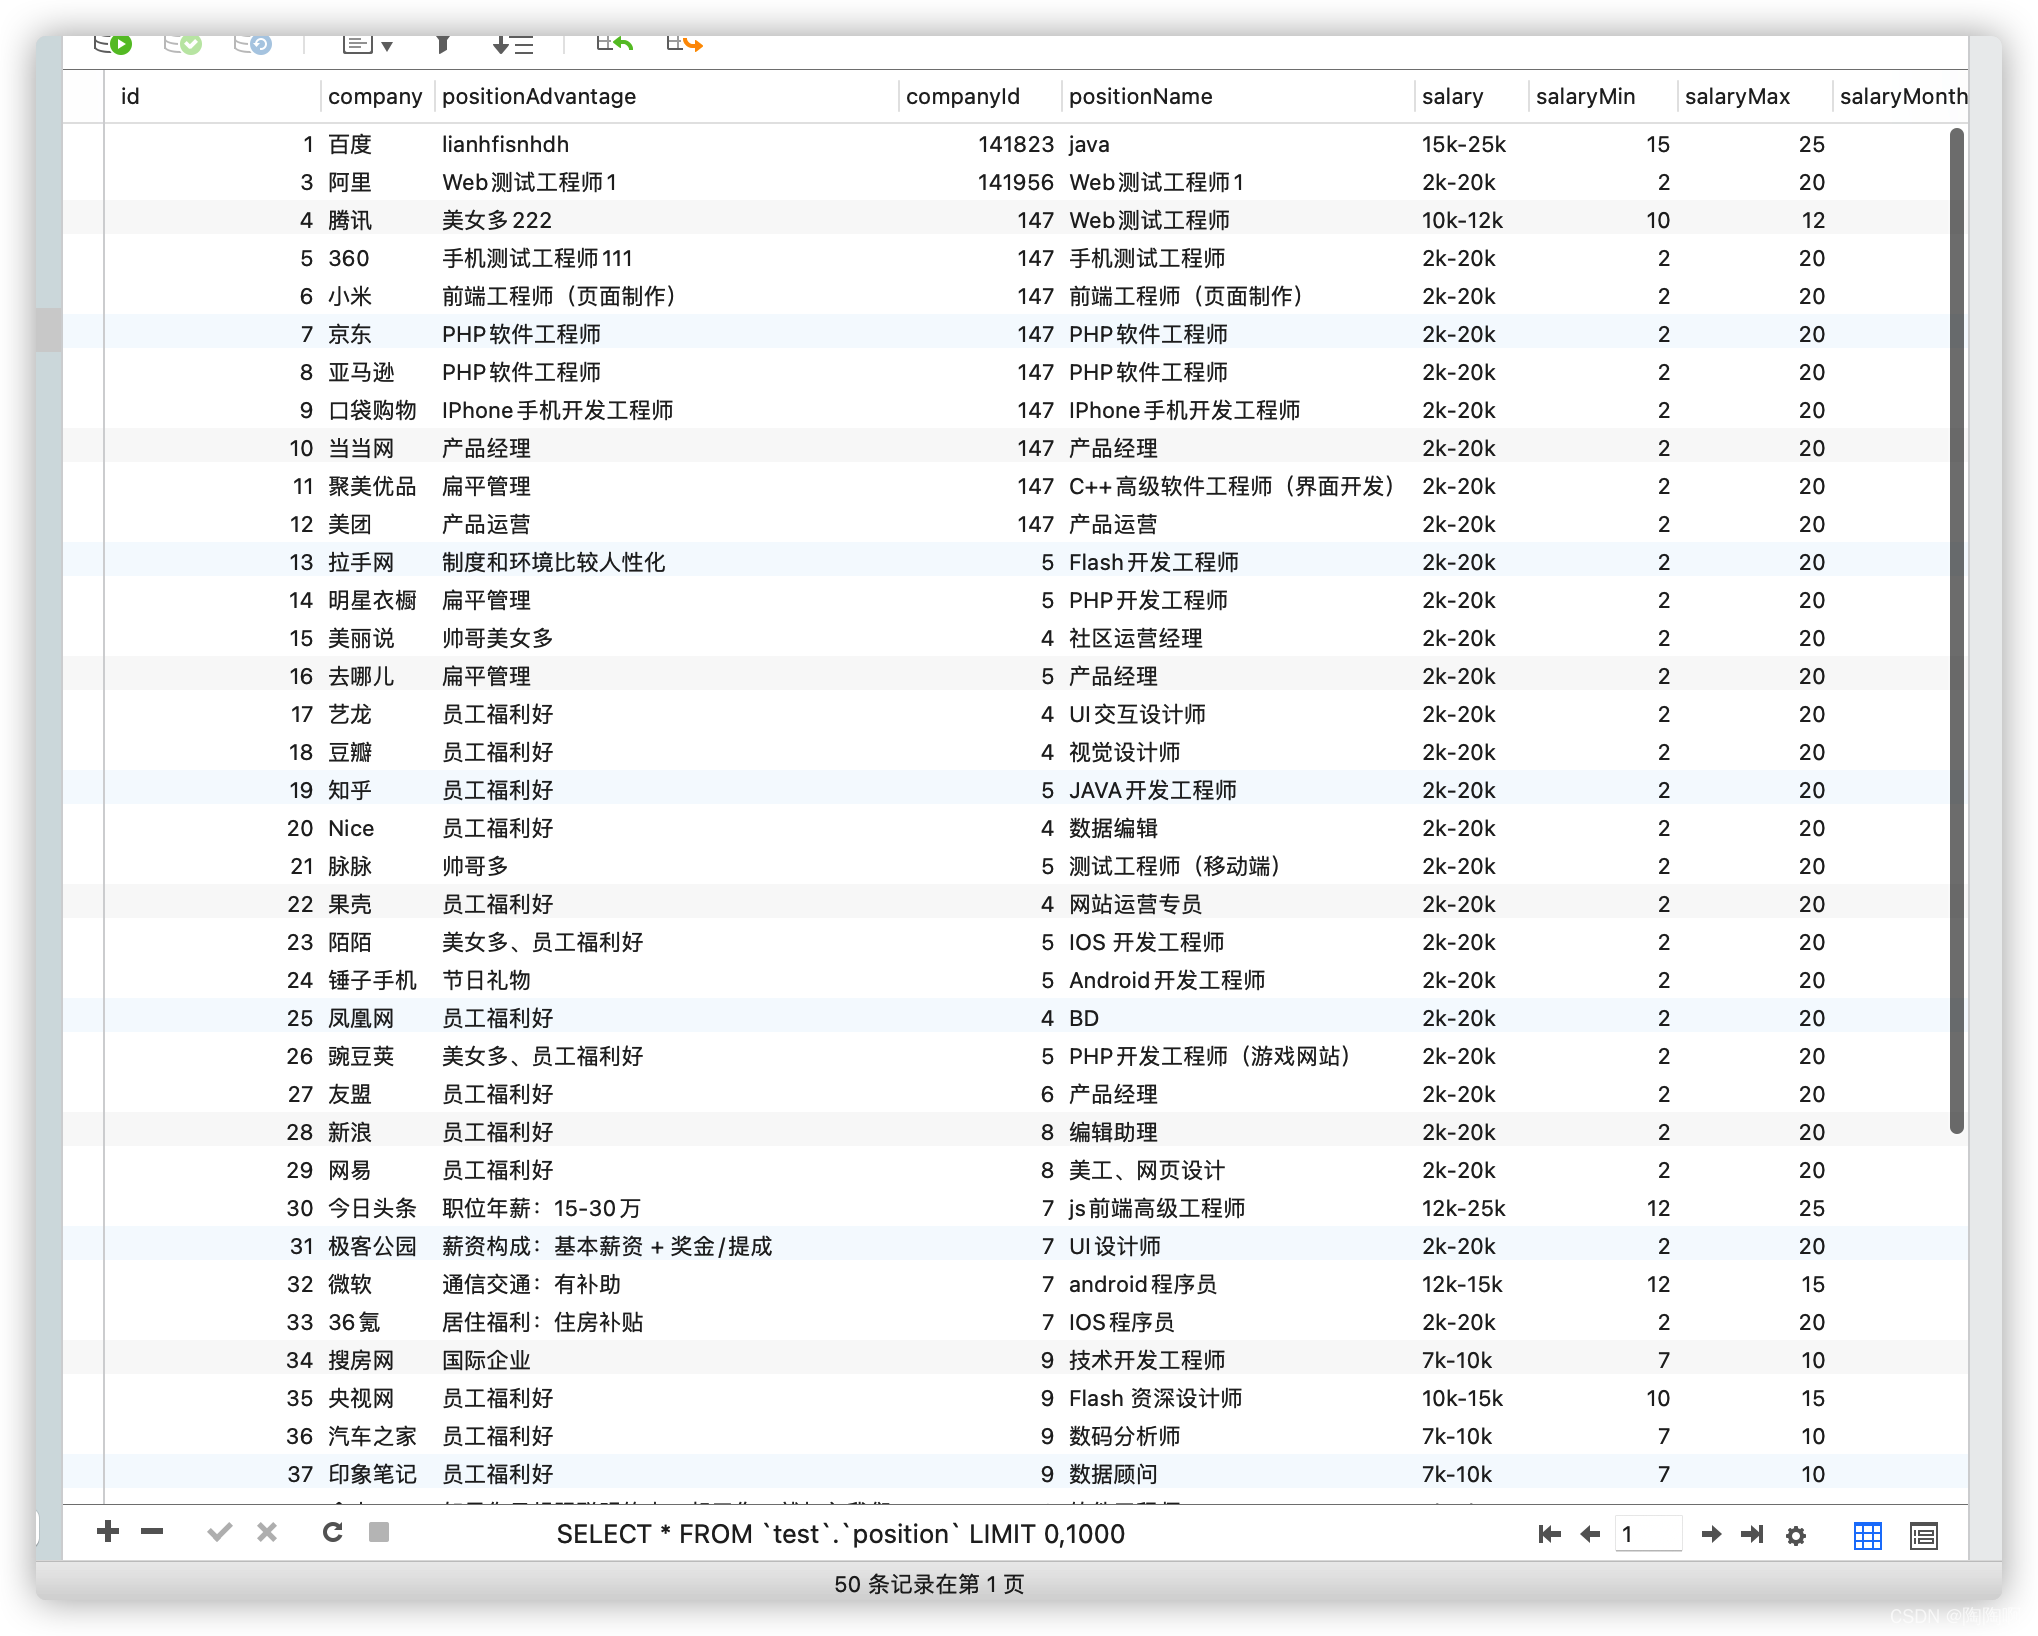
测试
我们调用http接口
http://127.0.0.1:8080/api/import?dbTableName=position&esIndexName=position_index
可以看到我们的后台导入日志50条数据
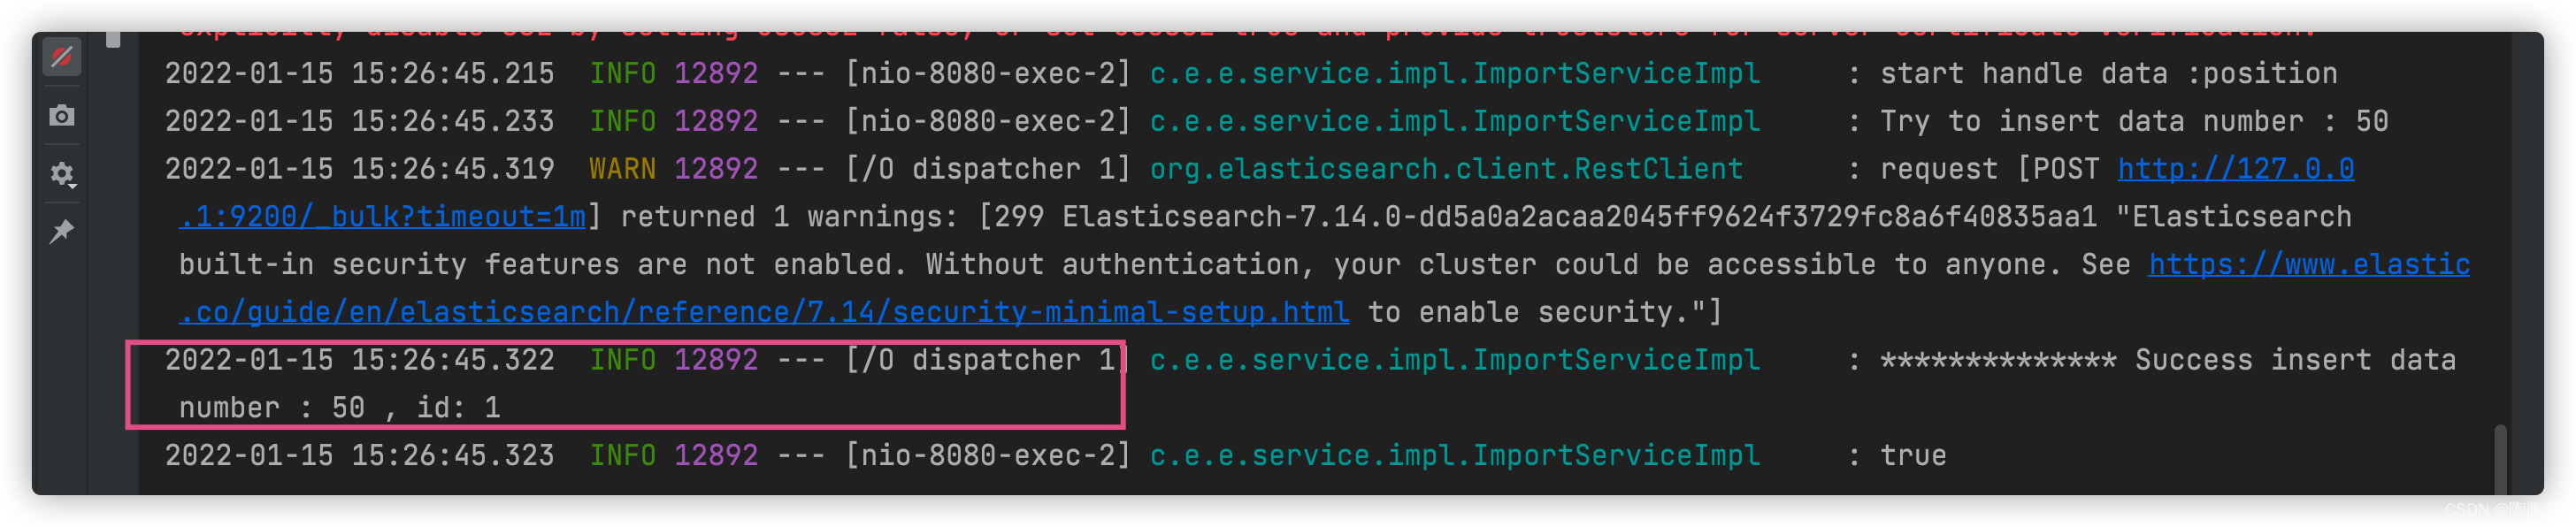
我们去es中查询如下100条(这里我请求了2次,所以是100条)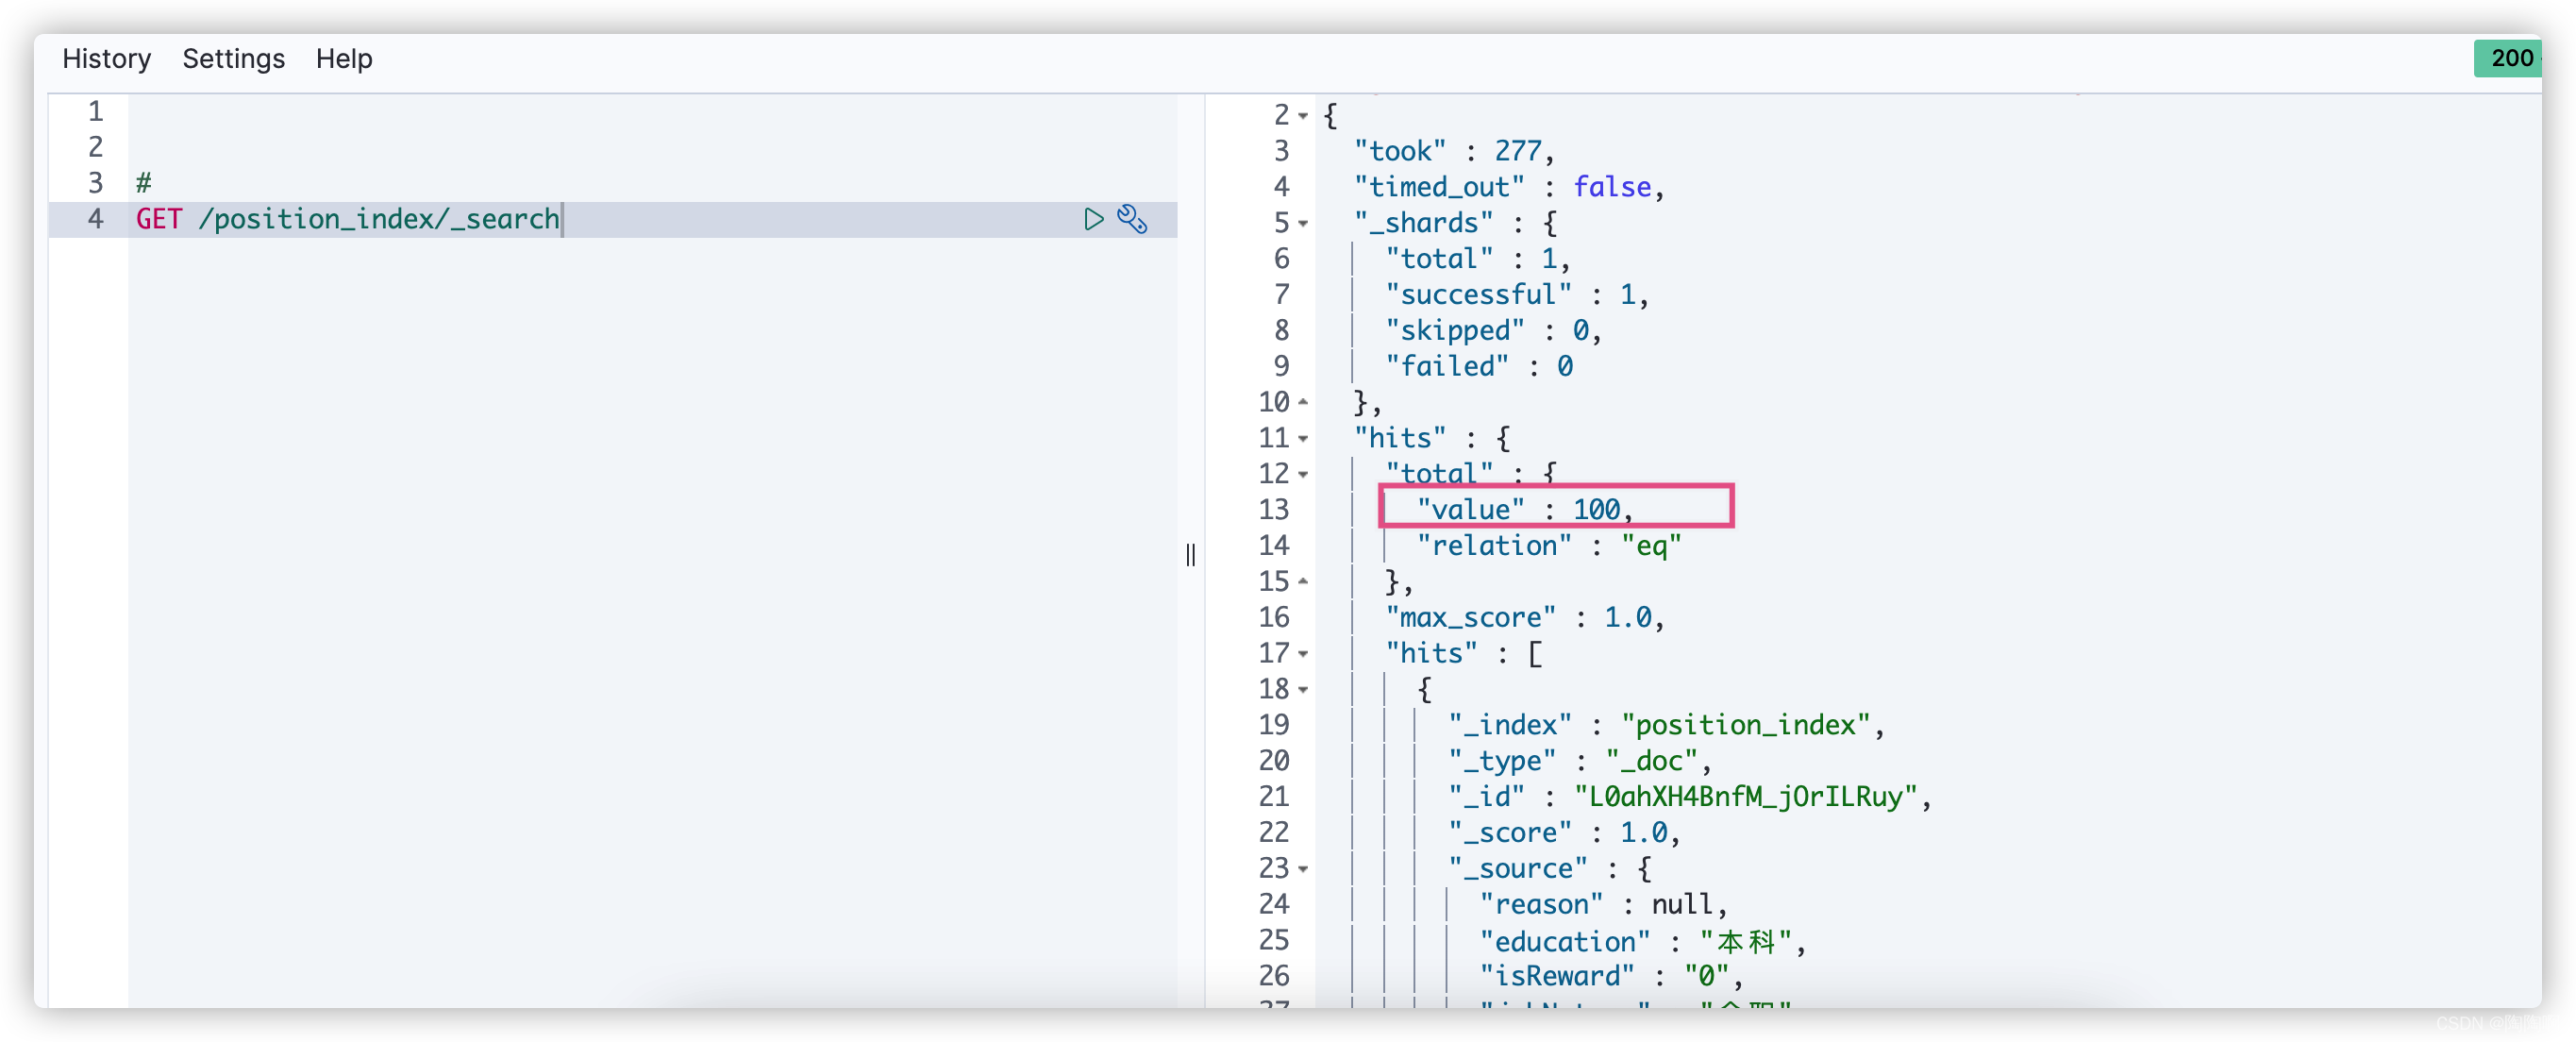

为开发者提供学习成长、分享交流、生态实践、资源工具等服务,帮助开发者快速成长。
更多推荐


 7
7 0
0- 0


 已为社区贡献5条内容

所有评论(0)