tk-mybatis和mybatisplus使用和区别
概念:使用Mybatis时,最大的问题是,要写大量的重复SQL语句在xml文件中,除了特殊的业务逻辑SQL语句之外,还有 大量结构类似的增删改查SQL。而且,当数据库表结构改动时,对应的所有SQL以及实体类都需要更改。这大量增 加了程序员的负担。避免重复书写CRUD映射的框架有两个通用mybatis(tk mybatis)mybatis plus,通能更加强大一.tk-mybatis的使用1.tk
概念:
一.tk-mybatis的使用
1.tk-mybatis需要引入启动器,直接引入即可。
pom.xml中引入如下内容
<!-- 通用 mapper --><dependency><groupId> tk.mybatis </groupId><artifactId> mapper-spring-boot-starter </artifactId><version> 2.0.2 </version></depe
ndency>
2. 创建实体类
tk mybatis 实体类使用的注解是jpa注解 JPA注释详解参考手册
@Table ( name = "tb_user" )public class User implements Serializable {private static final long serialVersionUID = 1L ;@Id@GeneratedValue ( strategy = GenerationType . IDENTITY )private Long id ;// 用户名private String userName ;....
3.创建接口实现继承
@Mapperpublic interface UserMapper extends tk . mybatis . mapper . common . Mapper < User > {public List < User > findByUser ( User user );}
如果有自定义的映射文件方法,就在接口中设置方法,然后配置对应的xml文件。
没有自定义的方法,此接口中不用写任何内容。
注意:此处的xml文件名称要和接口名称相同,xml中的id要与接口中的方法名称相同。
注意:如果使用mapperScan注解而不是Mapper要把MapperScan类改成tk-mybatis构件的类
例如:@MapperScan("com.lxs.demo.dao") 加到springBoot启动类Application上。
@MapperScan和@Mapper的区别就是 :后者是单个类接口的实现,前者是包扫描的接口的实现的。
此处是自定义的xml方法,通过判断name,和note不为null的情况下,进行对name,note的模糊查询。
<?xml version="1.0" encoding="UTF-8"?>
<!DOCTYPE mapper PUBLIC "-//mybatis.org//DTD Mapper 3.0//EN" "http://mybatis.org/dtd/mybatis-3-mapper.dtd">
<mapper namespace="com.lxs.demo.dao.UserMapper">
<select id="findByUser" resultType="user">
 SELECT *FROM tb_user
    <where>
        <if test="name != null">
         name like '%${name}%'
         </if>
        <if test="note != null">
         and note like '%${note}%'
         </if>
    </where>
</select>
</mapper>
一旦继承了tk-mybatis Mapper,继承的Mapper就拥有了该Mapper所有的通用方法:
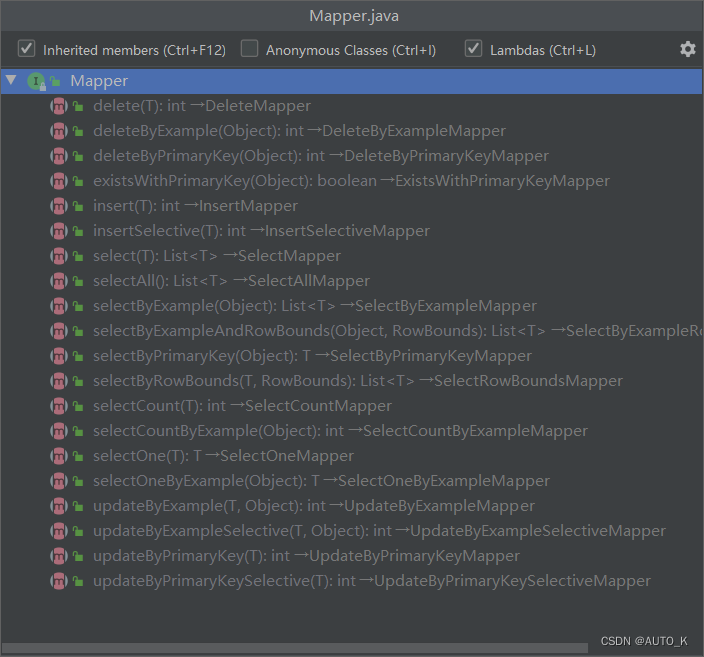
@RunWith(SpringRunner.class)@SpringBootTestpublic class UserDaoTest {@Autowiredprivate UserMapper userMapper;//自定义的方法测试@Testpublic void testFindByUser() {User user = new User();user.setName("a");List<User> list = userMapper.findByUser(user);for (User user : list) {System.out.println(user);}}@Testpublic void testFindAll() {List<User> list = userMapper.selectAll();for (User user : list) {System.out.println(user);}}@Testpublic void testFindById() {User user = userMapper.selectByPrimaryKey(4);System.out.println(user);}@Testpublic void testFindByExample() {Example example = new Example(User.class);example.createCriteria().andLike("name", "%a%");userMapper.selectByExample(example).forEach(user -> {System.out.println(user);});
二.mybatisplus的使用
1.引入mp的启动器。
<dependency><groupId>com.baomidou</groupId><artifactId>mybatis-plus-boot-starter</artifactId><version>3.3.2</version></dependency>
2.创建实体类
@Datapublic class User {private Long id;private String name;private Integer age;private String email;}
此处的@data注解是对实体类的get和set方法的简化,使用此注解可以省略get和set方法的创建。使用时候直接使用即可,需要引入lombok依赖和对应的插件,这里不再具体说明。
|
注解名称
|
说明
|
|
@TableName
|
实体类的类名和数据库表名不一致
|
|
@TableId
| 实体类中的成员名称和表中字段名称不一致> |
|
@TableField
|
排除实体类中非表字段
|
3.创建接口继承 BaseMapper
其实是mybatisplus包下的BaseMapper
com.baomidou.mybatisplus.core.mapper.BaseMapper
public interface UserMapper extends BaseMapper<User> {}
4.测试
@RunWith(SpringRunner.class)@SpringBootTestpublic class SampleTest {@Resourceprivate UserMapper userMapper;@Testpublic void testSelect() {System.out.println(("----- selectAll method test ------"));List<User> userList = userMapper.selectList(null);Assert.assertEquals(6, userList.size());userList.forEach(System.out::println);}}
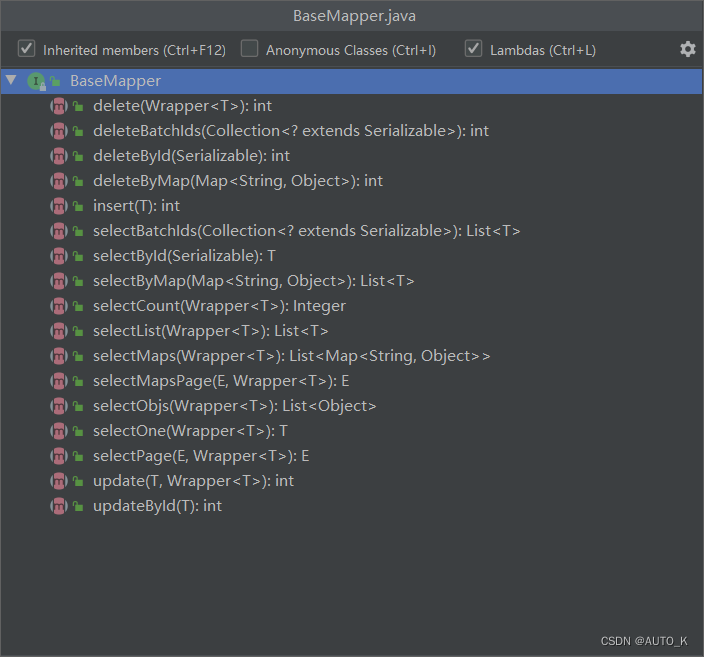
继承了 MP的 BaseMapper,继承的Mapper就拥有了BaseMapper所有的通用方法:
具体使用参考下面博文
gitee上的使用介绍:
mybatisplus:Mybatis-Plus
firstmybaits:firstmybaits
下面tk和mp的区别:

为开发者提供学习成长、分享交流、生态实践、资源工具等服务,帮助开发者快速成长。
更多推荐


 9
9 0
0- 0


 已为社区贡献2条内容

所有评论(0)