如何在Windows 11上的WSL2做到GPU直通,并用Deepracer本地训练炸干电脑的资源(显卡降价了,618等等党还等什么,一起来加入Deepracer的比赛学习交流吧)
如何在Windows 11上的WSL2做到GPU直通,并用Deepracer本地训练炸干电脑的资源(显卡降价了,618等等党还等什么,一起来加入Deepracer的比赛学习交流吧)
目录
- 第一步: 安装Docker
- *方式一:* 下载Docker Desktop并配置Nvidia-docker2
- *方式 二*: 使用 Docker-ce + Nvidia-docker2
- 第二步: 安装cuda11.6.2
- (可选步骤) 第三步: 建议将docker和wsl的镜像环境文件从C盘中移到其他盘中节省C盘启动盘的空间
- 3.1 改变Docker的默认路经,如果是用Docker-CE请直接参考3.2:
- 3.1.1 List your WSL2 VMs
- 3.1.2 将Docker Desktop软件彻底关闭
- 3.1.3 复制备份Docker Desktop Data到目标分区下:
- 3.1.4 注销docker-desktop-data:
- 3.1.5 将备份的Docker Desktop Data载入
- 3.2 将WSL2移动到新的文件夹
- 第四步: 配置"VcXsrv" X server和WSL2 DISPLAY
- 第五步: 安装部署DRfC
- 🔴划重点了🔴
第一步: 安装Docker
下面两种安装docker环境的方式中选其一
方式一: 下载Docker Desktop并配置Nvidia-docker2
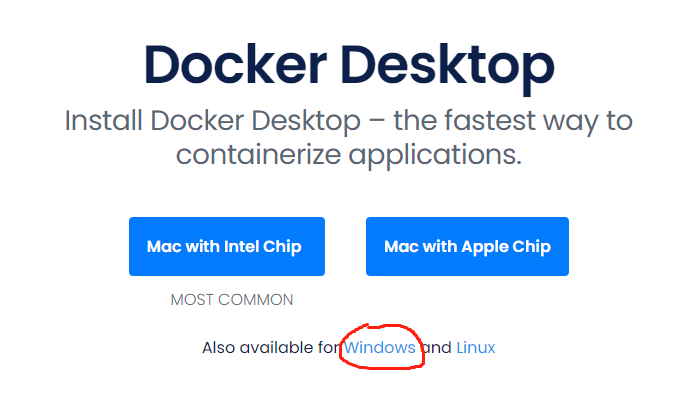
1.1 下载并安装 Docker Desktop
从docker的官方网站下载并安装:
1.2 在Docker Desktop中配置Nvidia docker环境
1.2.1 用下面的命令行代码在WSL2的环境中安装nvidia-docker2:
在WSL2 terminal中输入
distribution=$(. /etc/os-release;echo $ID$VERSION_ID)
curl -s -L https://nvidia.github.io/nvidia-docker/gpgkey | sudo apt-key add -
curl -s -L https://nvidia.github.io/nvidia-docker/$distribution/nvidia-docker.list | sudo tee /etc/apt/sources.list.d/nvidia-docker.list
sudo apt-get update
sudo apt-get install -y nvidia-docker2
sudo sed -i 's/#swarm-resource = "DOCKER_RESOURCE_GPU"/swarm-resource = "DOCKER_RESOURCE_GPU"/' /etc/nvidia-container-runtime/config.toml
1.2.2 在docker desktop界面修改Docker daemon配置文件添加使用nvidia容器的部分
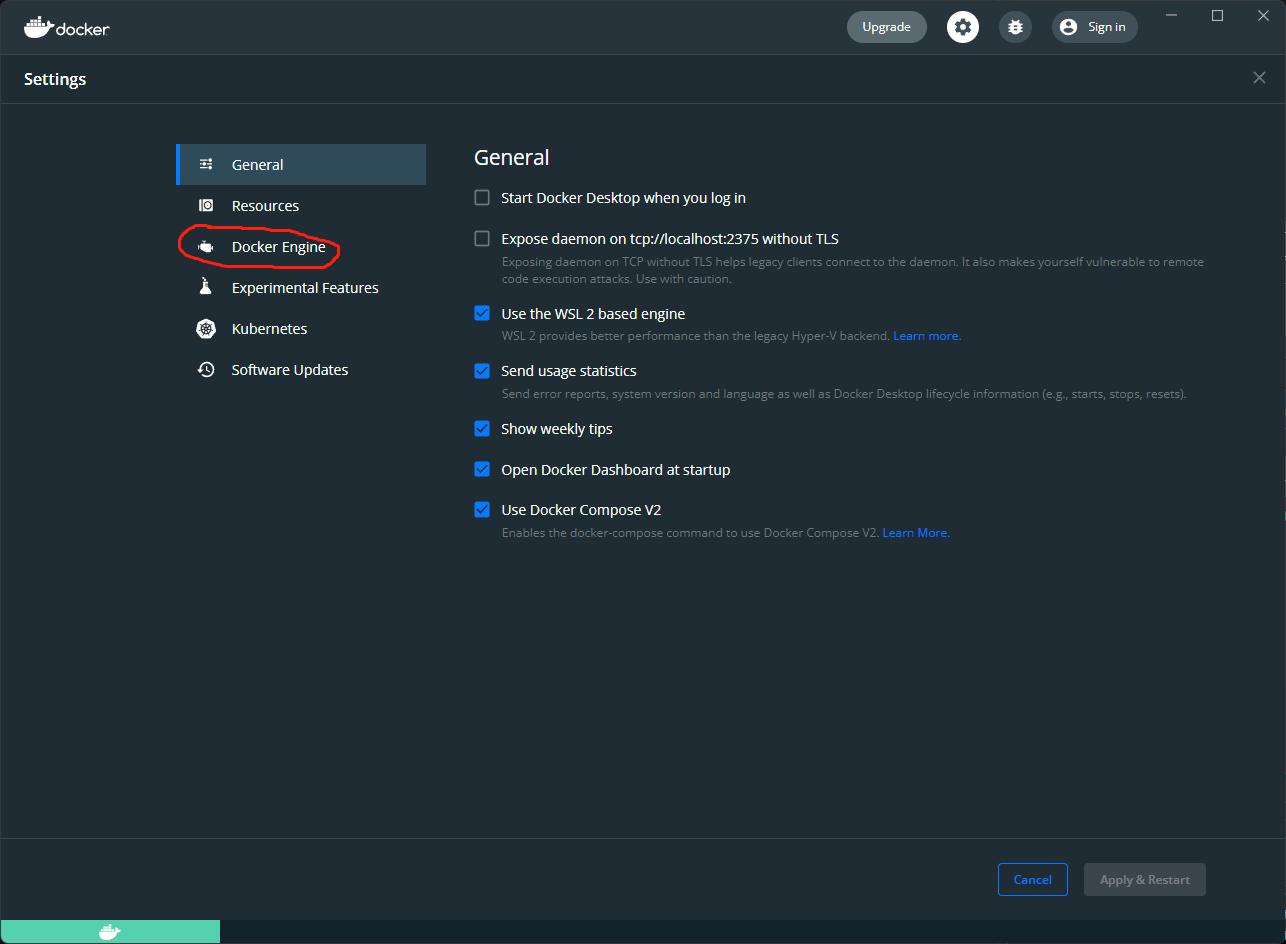
打开 Docker Desktop:
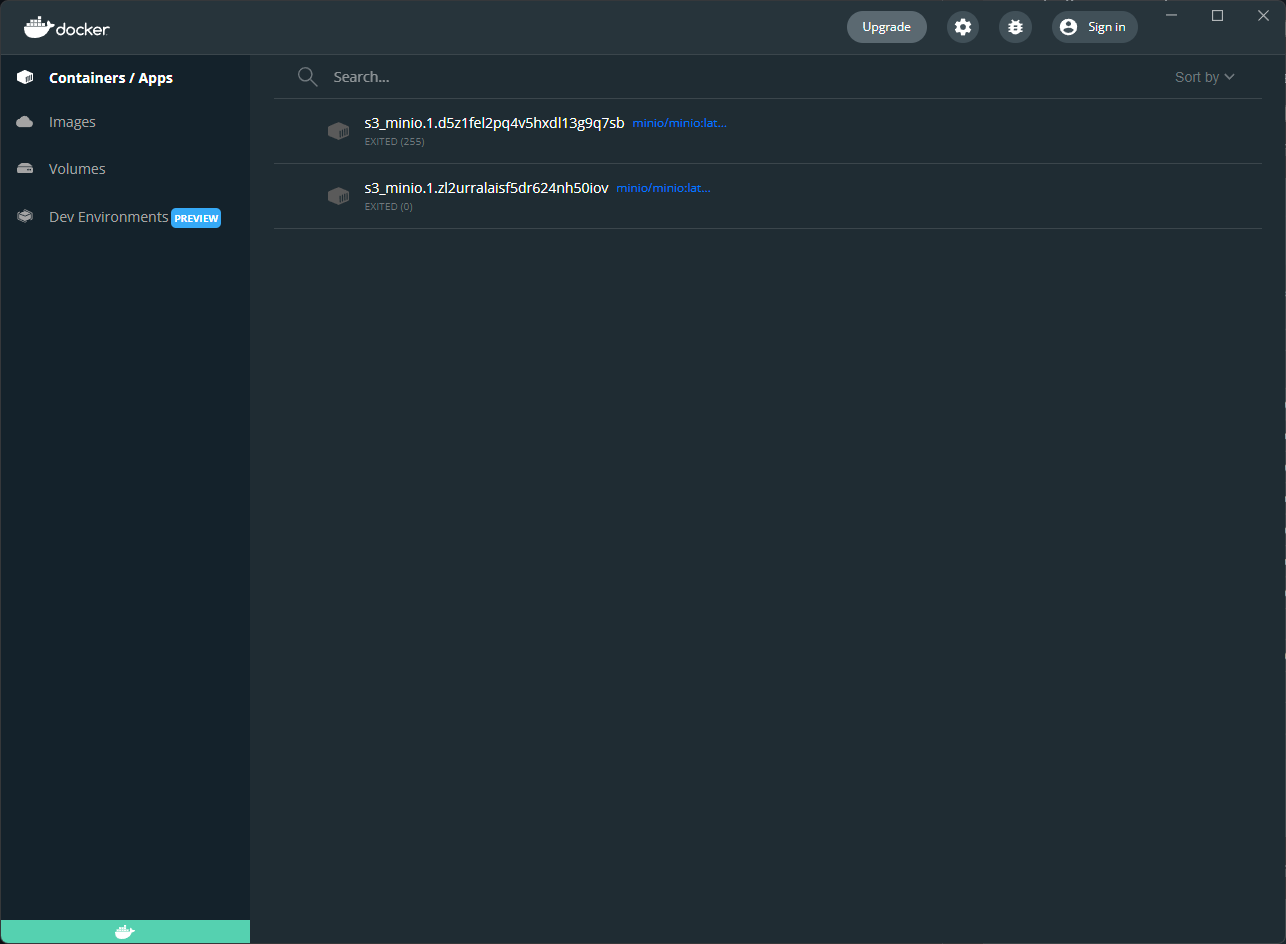
点击右上角那个齿轮文件打开设置菜单:
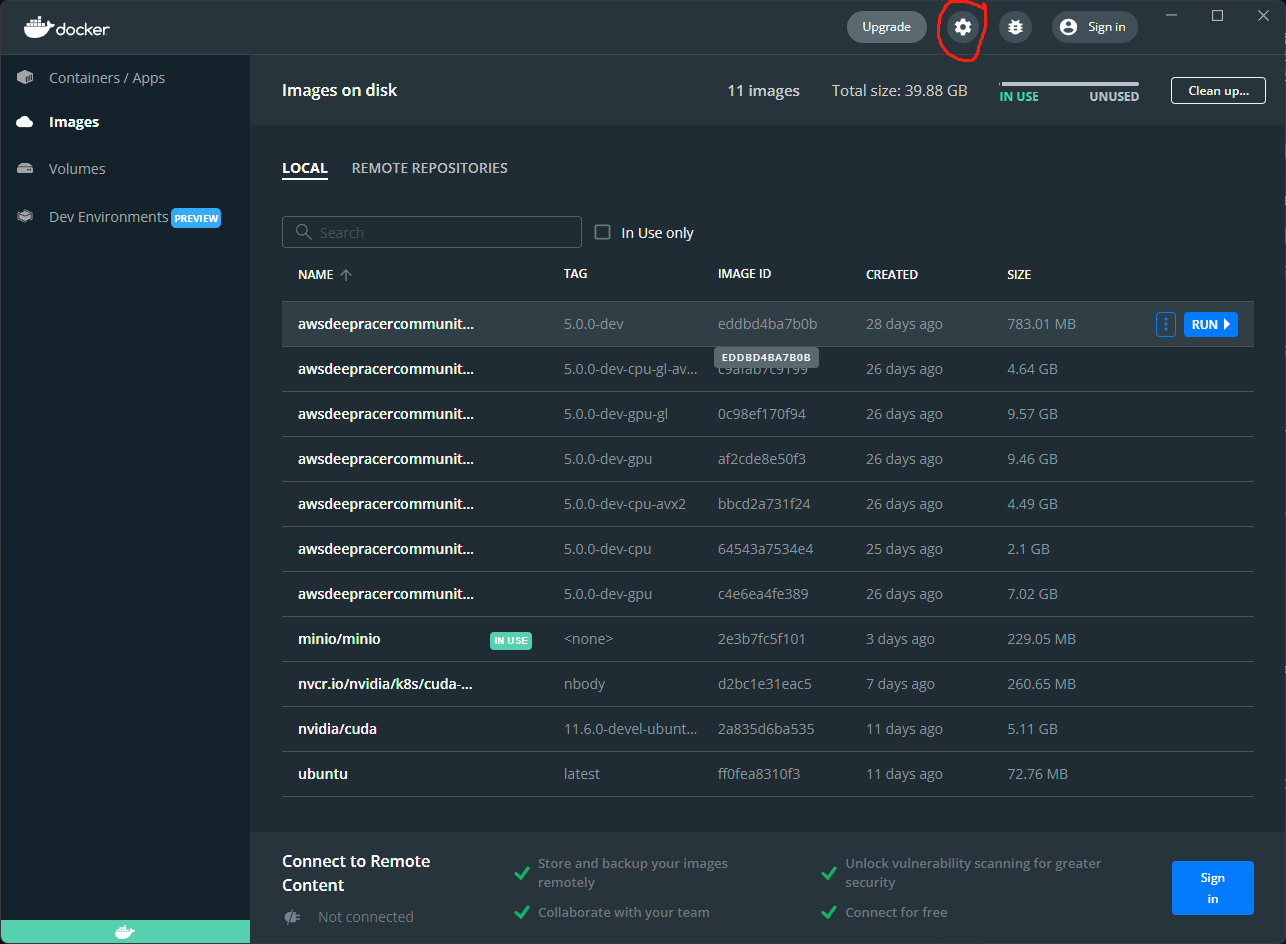
选择Docker Engine选项
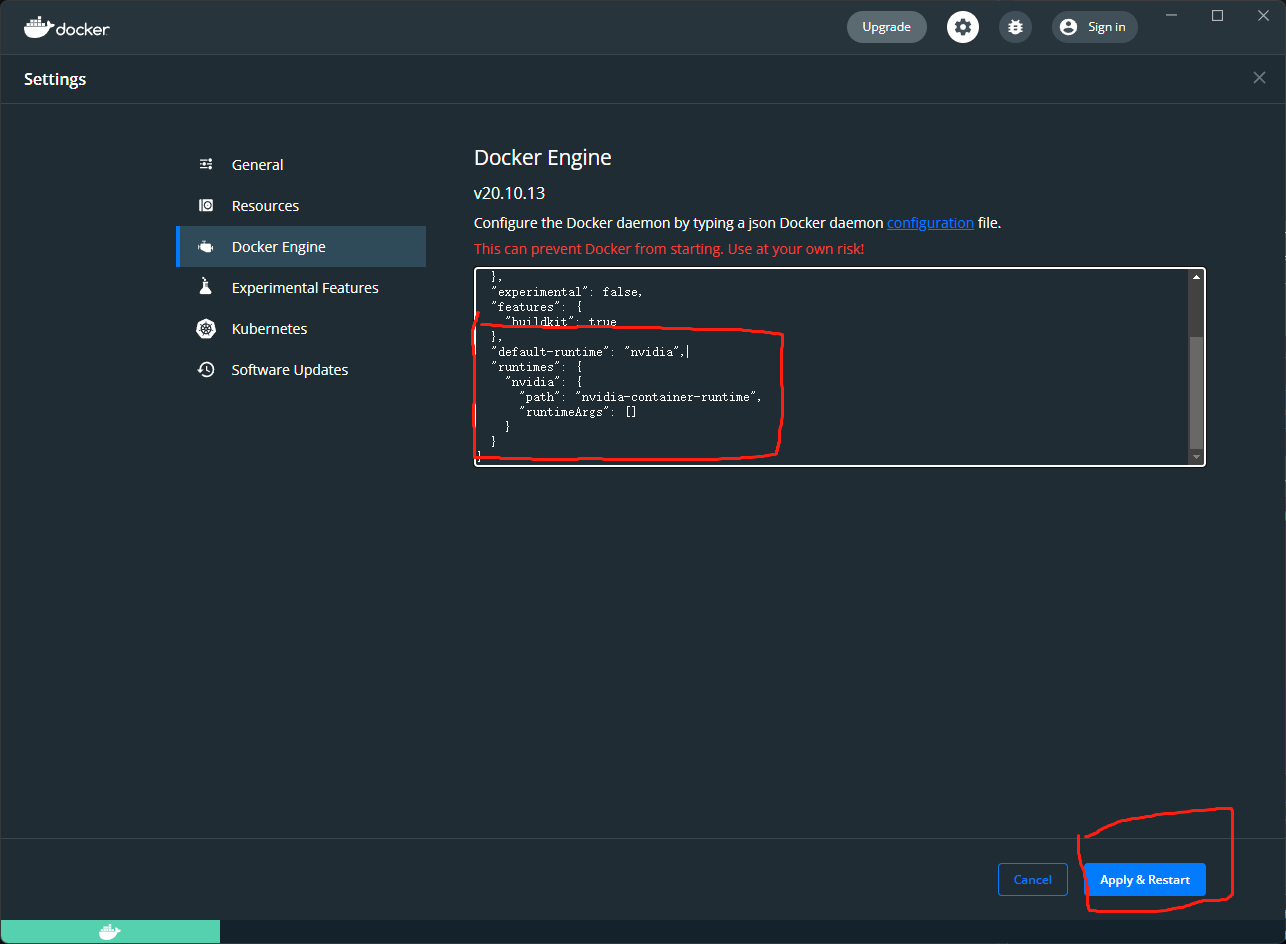
复制下面的内容到文本编辑框中:
注意逗号也要复制而且要粘贴到
"buildkit": true }的大括号后面
,
  "default-runtime": "nvidia",
  "runtimes": {
    "nvidia": {
      "path": "nvidia-container-runtime",
      "runtimeArgs": []
    }
  }
注意整个json文本框里的内容应类似下面这样:
{
  "builder": {
    "gc": {
      "defaultKeepStorage": "20GB",
      "enabled": true
    }
  },
  "experimental": false,
  "features": {
    "buildkit": true
  },
  "default-runtime": "nvidia",
  "runtimes": {
    "nvidia": {
      "path": "nvidia-container-runtime",
      "runtimeArgs": []
    }
  }
}
然后点击Apply and Restart,注意这里如果是编辑框中如果出现语法错误,那么Apply and Restart这个按键会是灰色不可点击的,请修改格式正确后继续。
1.2.3 检查一下WSL2中的docker环境在修改后是否正确运行:
在WSL2 terminal中输入
docker ps
结果应该于下面类似:
CONTAINER ID IMAGE COMMAND CREATED STATUS PORTS NAMES
1.2.4 故障排除:
如果出现下面的故障
permission denied while trying to connect to the Docker daemon socket at unix:///var/run/docker.sock:
请运行
在WSL2 terminal中输入
sudo chmod 666 /var/run/docker.sock
附加步骤: 如果docker desktop软件和WSL2没有联通
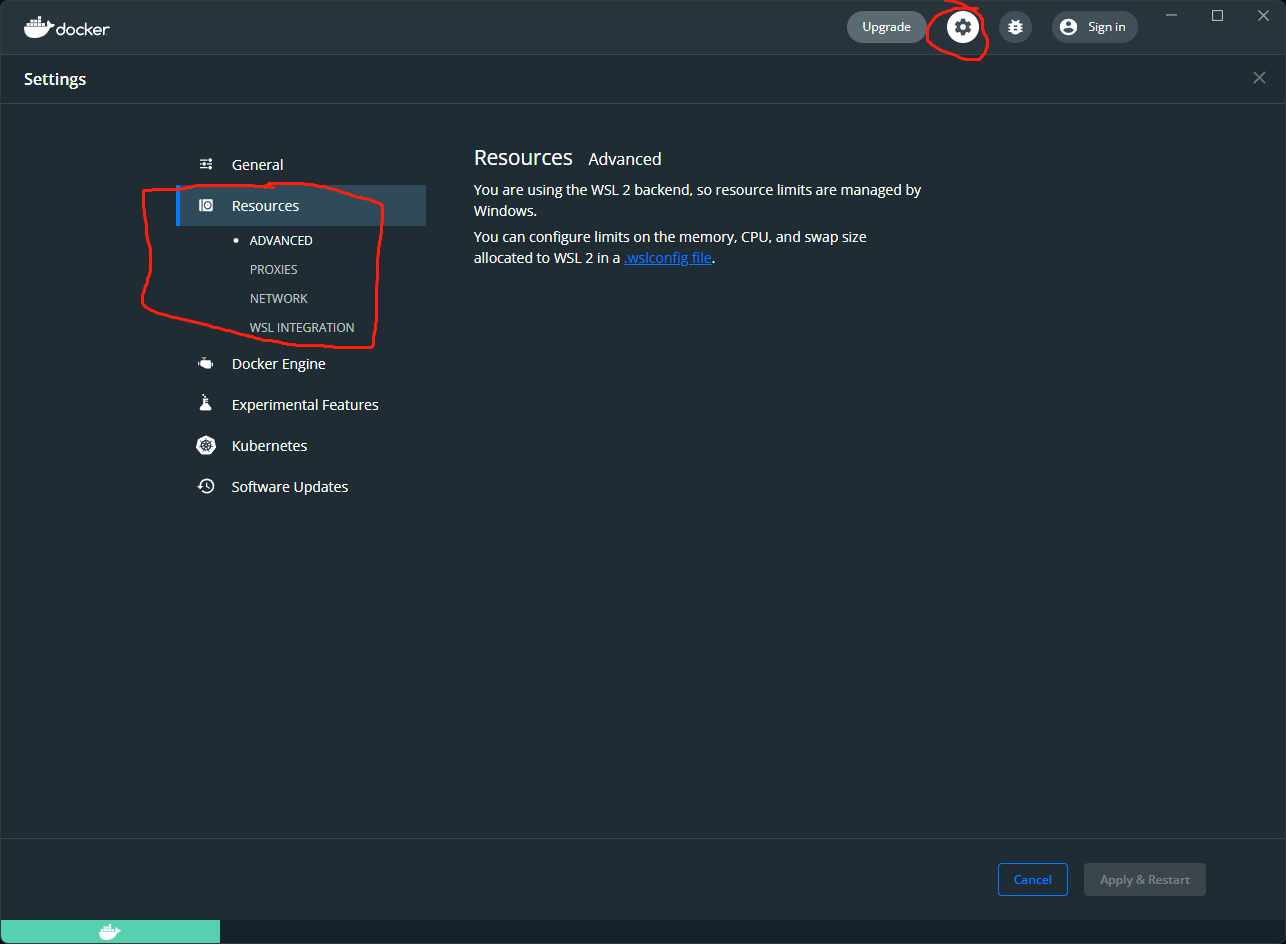
进入docker desktop的设置界面然后找到Resources选项:
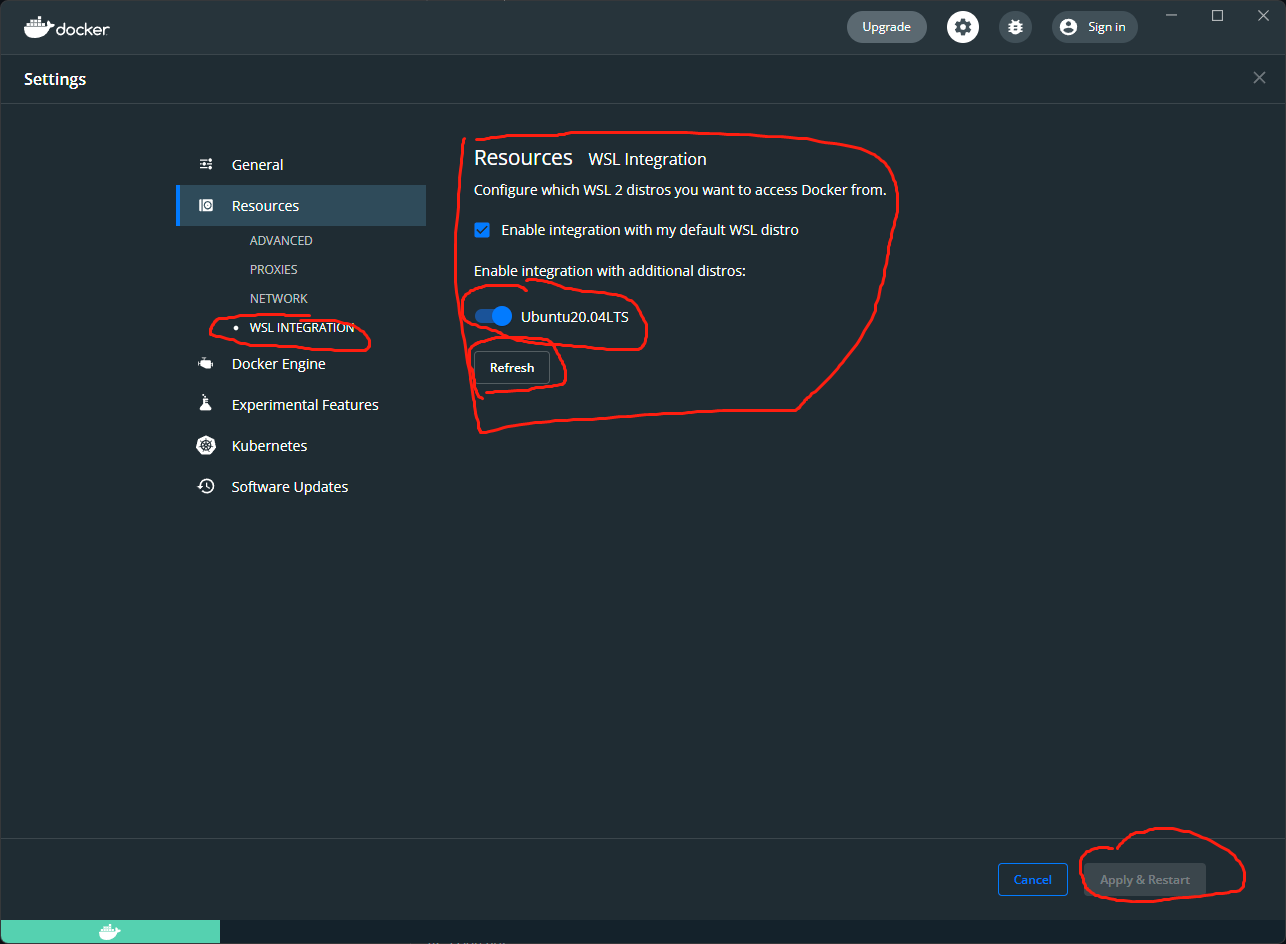
在Resources选项中找到”WSL INTERGRATION“,查看”Enble intergration with my default WSL distro"是否勾选,这里需要勾选并开启对应的Linux系统,然后按Apply & Restart:
方式 二: 使用 Docker-ce + Nvidia-docker2
2.1 在WSL2 terminal中安装docker-ce:
如果已经安装了docker desktop请忽略此步骤,如果是使用WSL2中原生的docker-ce请根据本步骤配置Nidia-docker2
在WSL2 terminal中输入
curl -fsSL https://download.docker.com/linux/ubuntu/gpg | sudo apt-key add -
sudo add-apt-repository    "deb [arch=amd64] https://download.docker.com/linux/ubuntu $(lsb_release -cs) stable"
sudo apt-get update && sudo apt-get install -y --no-install-recommends docker-ce docker-ce-cli containerd.io
2.2 在docker-ce中配置Nvidia docker environment
使用下面命令在WSL2 terminal中配置安装nvidia-docker2:
在WSL2 terminal中输入
distribution=$(. /etc/os-release;echo $ID$VERSION_ID)
curl -s -L https://nvidia.github.io/nvidia-docker/gpgkey | sudo apt-key add -
curl -s -L https://nvidia.github.io/nvidia-docker/$distribution/nvidia-docker.list | sudo tee /etc/apt/sources.list.d/nvidia-docker.list
sudo apt-get update
sudo apt-get install -y jq nvidia-docker2
cat /etc/docker/daemon.json | jq 'del(."default-runtime") + {"default-runtime": "nvidia"}' | sudo tee /etc/docker/daemon.json

sudo sed -i 's/#swarm-resource = "DOCKER_RESOURCE_GPU"/swarm-resource = "DOCKER_RESOURCE_GPU"/' /etc/nvidia-container-runtime/config.toml

sudo usermod -a -G docker $(id -un)
在操作完成后请根据Deepracer for cloud的Windows环境配置wiki教程中的Known Issues部分完成部署。
第二步: 安装cuda11.6.2
参考英伟达的教程: https://developer.nvidia.com/cuda-downloads?target_os=Linux&target_arch=x86_64&Distribution=WSL-Ubuntu&target_version=2.0&target_type=deb_local
在WSL2 terminal中输入
wget https://developer.download.nvidia.com/compute/cuda/repos/wsl-ubuntu/x86_64/cuda-wsl-ubuntu.pin
sudo mv cuda-wsl-ubuntu.pin /etc/apt/preferences.d/cuda-repository-pin-600
wget https://developer.download.nvidia.com/compute/cuda/11.6.2/local_installers/cuda-repo-wsl-ubuntu-11-6-local_11.6.2-1_amd64.deb
sudo dpkg -i cuda-repo-wsl-ubuntu-11-6-local_11.6.2-1_amd64.deb
sudo apt-key add /var/cuda-repo-wsl-ubuntu-11-6-local/7fa2af80.pub
sudo apt-get update
sudo apt-get -y install cuda
测试nvidia docker是否正常工作
参考: https://docs.nvidia.com/cuda/wsl-user-guide/index.html#ch05-sub01-simple-containers
在WSL2 terminal中输入
docker run --gpus all nvcr.io/nvidia/k8s/cuda-sample:nbody nbody -gpu -benchmark
正常结果如下:
Unable to find image 'nvcr.io/nvidia/k8s/cuda-sample:nbody' locally
nbody: Pulling from nvidia/k8s/cuda-sample
11323ed2c653: Pull complete
b6166589502e: Pull complete
df6d4a51da82: Pull complete
a65da20ce53d: Pull complete
f02d6169d353: Pull complete
56e9fab00773: Pull complete
af3342639518: Pull complete
95e5f8cb48e9: Pull complete
ba0cb6713727: Pull complete
Digest: sha256:fa0c8b471d223df44b82795dee54a7bc36d372fc5a2c7197f8df89e30f2abf48
Status: Downloaded newer image for nvcr.io/nvidia/k8s/cuda-sample:nbody
Run "nbody -benchmark [-numbodies=<numBodies>]" to measure performance.
        -fullscreen       (run n-body simulation in fullscreen mode)
        -fp64             (use double precision floating point values for simulation)
        -hostmem          (stores simulation data in host memory)
        -benchmark        (run benchmark to measure performance)
        -numbodies=<N>    (number of bodies (>= 1) to run in simulation)
        -device=<d>       (where d=0,1,2.... for the CUDA device to use)
        -numdevices=<i>   (where i=(number of CUDA devices > 0) to use for simulation)
        -compare          (compares simulation results running once on the default GPU and once on the CPU)
        -cpu              (run n-body simulation on the CPU)
        -tipsy=<file.bin> (load a tipsy model file for simulation)

NOTE: The CUDA Samples are not meant for performance measurements. Results may vary when GPU Boost is enabled.

> Windowed mode
> Simulation data stored in video memory
> Single precision floating point simulation
> 1 Devices used for simulation
GPU Device 0: "Ampere" with compute capability 8.6

> Compute 8.6 CUDA device: [NVIDIA GeForce RTX 3060]
28672 bodies, total time for 10 iterations: 23.606 ms
= 348.248 billion interactions per second
= 6964.959 single-precision GFLOP/s at 20 flops per interaction
(可选步骤) 第三步: 建议将docker和wsl的镜像环境文件从C盘中移到其他盘中节省C盘启动盘的空间
3.1 改变Docker的默认路经,如果是用Docker-CE请直接参考3.2:
3.1.1 List your WSL2 VMs
在Windows POWERSHELL中输入
wsl --list -v
3.1.2 将Docker Desktop软件彻底关闭
保证STATE是在Stopped的状态下,结果如下:
  NAME                   STATE           VERSION
* docker-desktop         Stopped         2
  docker-desktop-data    Stopped         2
3.1.3 复制备份Docker Desktop Data到目标分区下:
在Windows POWERSHELL中输入
wsl --export docker-desktop-data "<目标分区的文件夹路经>"
例如:
wsl --export docker-desktop-data "D:\Docker\wsl\data\docker-desktop-data.tar"
3.1.4 注销docker-desktop-data:
在Windows POWERSHELL中输入
wsl --unregister docker-desktop-data
3.1.5 将备份的Docker Desktop Data载入
在Windows POWERSHELL中输入
wsl --import docker-desktop-data "<目标文件夹名称>" "<备份的docker desktop data tar压缩文件路经>" --<版本>
例如:
wsl --import docker-desktop-data "D:\Docker\wsl\data" "D:\Docker\wsl\data\docker-desktop-data.tar" --version 2
3.2 将WSL2移动到新的文件夹
3.2.1 查看WSL2的虚拟机
在Windows POWERSHELL中输入
wsl -l -v
结果如下:
  NAME      STATE           VERSION
* Ubuntu    Running         2
  docker-desktop         Stopped         2
  docker-desktop-data    Stopped         2
3.2.2 将WSL2 ubuntu关机:
在Windows POWERSHELL中输入
wsl -t Ubuntu
3.2.3 复制备份Ubuntu的虚拟文件到目标分区下:
在Windows POWERSHELL中输入
wsl --export Ubuntu "<目标分区>"
例如:
wsl --export Ubuntu "D:\wsl\ubuntu-ex.tar"
3.2.4 注销默认的Ubuntu发行版:
在Windows POWERSHELL中输入
wsl --unregister Ubuntu
3.2.5 将备份的Ubuntu发行版载入
在Windows POWERSHELL中输入
wsl --import Ubuntu "D:\wsl" "D:\wsl\ubuntu-ex.tar"
3.2.6 设置默认的Ubuntu发行版
在Windows POWERSHELL中输入
wsl -s Ubuntu
3.2.7 设置默认的linux用户
在Windows POWERSHELL中输入
ubuntu config --default-user {your ubuntu username}
现在你就可以看到默认的docker和wsl的.VHDX文件在新文件夹里
第四步: 配置"VcXsrv" X server和WSL2 DISPLAY
4.1 在WSL2环境中配置display
4.1.1 设置自动启动display:
在WSL2 terminal中输入
  echo $'export DISPLAY=$(ip route list default | awk \'{print $3}\'):0' >> ~/.bashrc
  echo 'export LIBGL_ALWAYS_INDIRECT=1' >> ~/.bashrc
4.1.2 挂载一下新环境
在WSL2 terminal中输入
source ./bashrc
4.1.3 检查一下DISPLAY是否正确配置:
在WSL2 terminal中输入
echo $DISPLAY
这个输出的结果应该是类似ip-address:0,我的输出结果是:
192.168.208.1:0
注意: the ip-address is your WLS2 ip-address you could use it for later to access the DRfC web viewer
4.1.4 创建.Xauthority文件来解决.Xauthority不存在问题
如果遇到报错:
xauth: file /home/username/.xauthority does not exist error
在WSL2 terminal中输入
touch ~/.Xauthority
4.1.5 用Xauth配置一个授权的$DISPLAY
Xauth generate命令注释:“Then run following command to create an authorization entry for connection to the server specified in displayname and uses the SECURITY extension in order to get the key data to store in the authorization file.“
在WSL2 terminal中输入
xauth generate $DISPLAY
4.1.6 将WSL中的Xauthority文件复制到Windows的文件夹下
这后为了设置WSL和Windows之间的授权连接
在WSL2 terminal中输入
cp ~/.Xauthority /mnt/c/Users/{your windows username}/
4.1.7 检测X是否在WSL2中设置成功:
在WSL2 terminal中输入
xset q
结果如下:
Keyboard Control:
  auto repeat:  on    key click percent:  0    LED mask:  00000002
  XKB indicators:
    00: Caps Lock:   off    01: Num Lock:    on     02: Scroll Lock: off
    03: Shift Lock:  off    04: Group 2:     off    05: Mouse Keys:  off
  auto repeat delay:  500    repeat rate:  31
  auto repeating keys:  00feffffdffffbbf
                        fadfffffffdfe5ef
                        ffffffffffffffff
                        ffffffffffffffff
  bell percent:  50    bell pitch:  400    bell duration:  100
Pointer Control:
  acceleration:  2/1    threshold:  4
Screen Saver:
  prefer blanking:  yes    allow exposures:  yes
  timeout:  600    cycle:  600
Colors:
  default colormap:  0x20    BlackPixel:  0x0    WhitePixel:  0xffffff
Font Path:
  C:\Program Files\VcXsrv\fonts/misc/,C:\Program Files\VcXsrv\fonts/TTF/,C:\Program Files\VcXsrv\fonts/OTF,C:\Program Files\VcXsrv\fonts/Type1/,C:\Program Files\VcXsrv\fonts/100dpi/,C:\Program Files\VcXsrv\fonts/75dpi/,C:\Program Files\VcXsrv\fonts/cyrillic/,C:\Program Files\VcXsrv\fonts/Speedo/,C:\Program Files\VcXsrv\fonts/terminus-font/,built-ins
DPMS (Energy Star):
  Server does not have the DPMS Extension
4.2 安装VcXsrv程序
4.2.1 下载并安装
下载连接:https://sourceforge.net/projects/vcxsrv/
或者根据这个教程安装:https://www.shogan.co.uk/how-tos/wsl2-gui-x-server-using-vcxsrv/
当安装完VcXsrv后清根据这个问题里的步骤配置Xlaunch: https://github.com/microsoft/WSL/issues/4106#issuecomment-502920377.
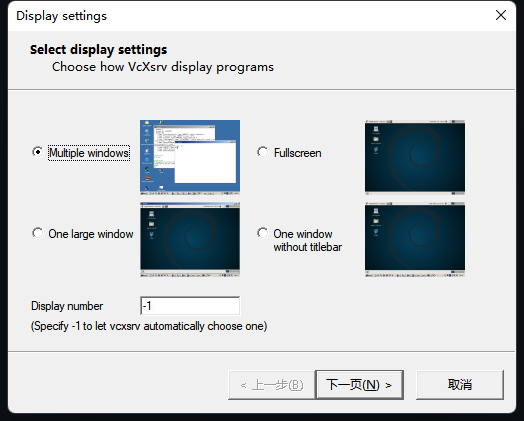
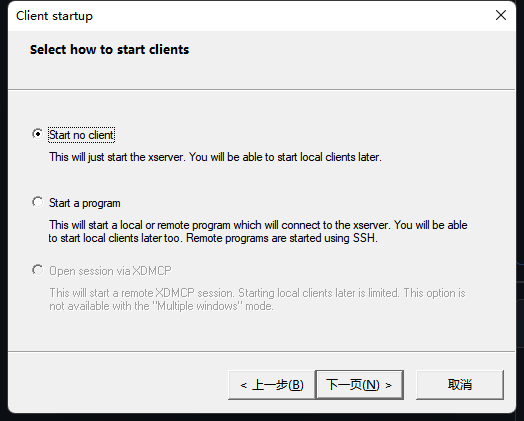
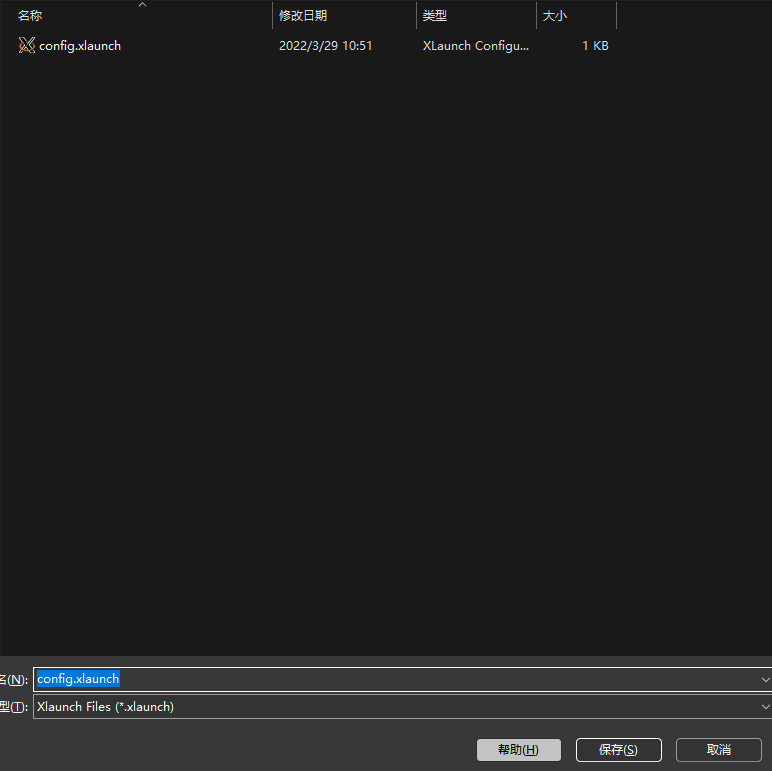
4.2.2 配置XLaunch程序
在安装完VcXsrv后请找到XLaunch程序,打开并按照下面步骤配置:
在Addtional parameters for VcXsrv的对话框中输入,注意请根据你电脑的情况修改对应的路经:
-auth C:\Users\(**your_username**)\.Xauthority
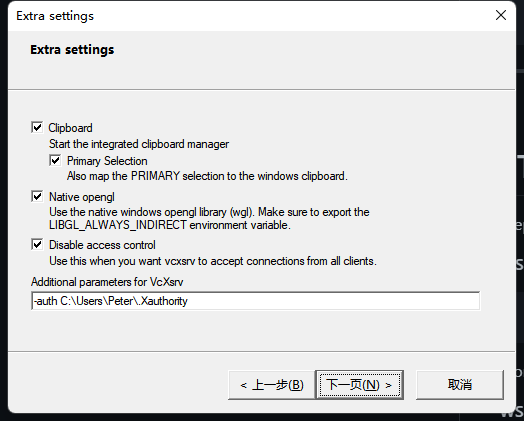
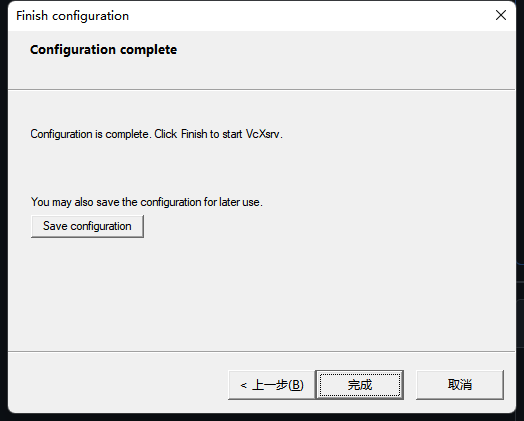
点击Save configuration并保存在路经: C:\Users"YOUR_USERNAME"\AppData\Roaming\Microsoft\Windows\Start Menu\Programs\Startup 中(请根据你电脑的情况修改对应的路经)
4.2.3 在WSL2 terminal中测试一下配置情况:
在WSL2 terminal中输入
安装x11-apps
sudo apt install x11-apps -y
在WSL2 terminal中输入
运行xeyes程序
xeyes
结果应该和这个差不多:
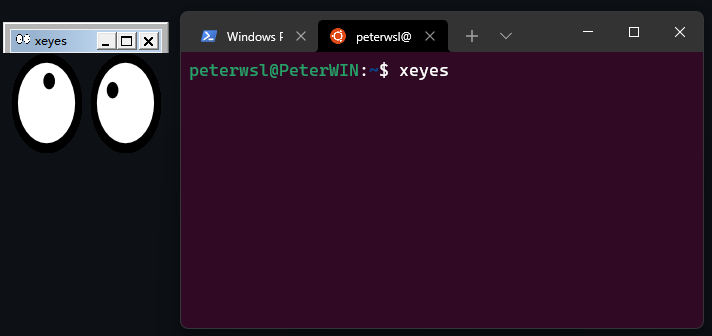
如果没看到结果试下输入下面的命令
export XAUTHORITY=~/.Xauthority
第五步: 安装部署DRfC
5.1 准备工作:
在WSL2 terminal中输入
sudo apt-get install jq awscli python3-boto3 docker-compose
5.2 克隆DRfC库并设置到最新的第5代物理环境分支:
在WSL2 terminal中输入
  git clone https://github.com/aws-deepracer-community/deepracer-for-cloud.git

  cd deepracer-for-cloud

  git checkout version-5
5.3 初始化设置DRfC本地环境和CPU架构:
在WSL2 terminal中输入
bin/init.c -c local -a cpu
5.4 手动拉 GPU docker镜像:
在WSL2 terminal中输入
  docker pull awsdeepracercommunity/deepracer-robomaker:5.0.0-dev-gpu-gl
  docker pull awsdeepracercommunity/deepracer-sagemaker:5.0.0-dev-gpu
5.4.1 现在你的环境中应该有一下的docker镜像:
- robomaker:5.0.0-dev-gpu-gl
- sagemaker:5.0.0-dev-gpu
- deepracer-rlcoach:5.0.0-dev
可以使用下面的命令查看:
在WSL2 terminal中输入
docker image ls
5.4.2 如果发现缺少deepracer-rlcoach:5.0.0-dev镜像请运行:
在WSL2 terminal中输入
docker pull awsdeepracercommunity/deepracer-rlcoach:5.0.0-dev
5.5 现在用Windows Powershell重启一下WSL2:
在Windows POWERSHELL中输入
wsl -t Ubutnu
5.6 打开WSL2 terminal并用vscode打开并配置system.env文件
在WSL2 terminal中输入
cd deepracer-for-cloud
code system.env
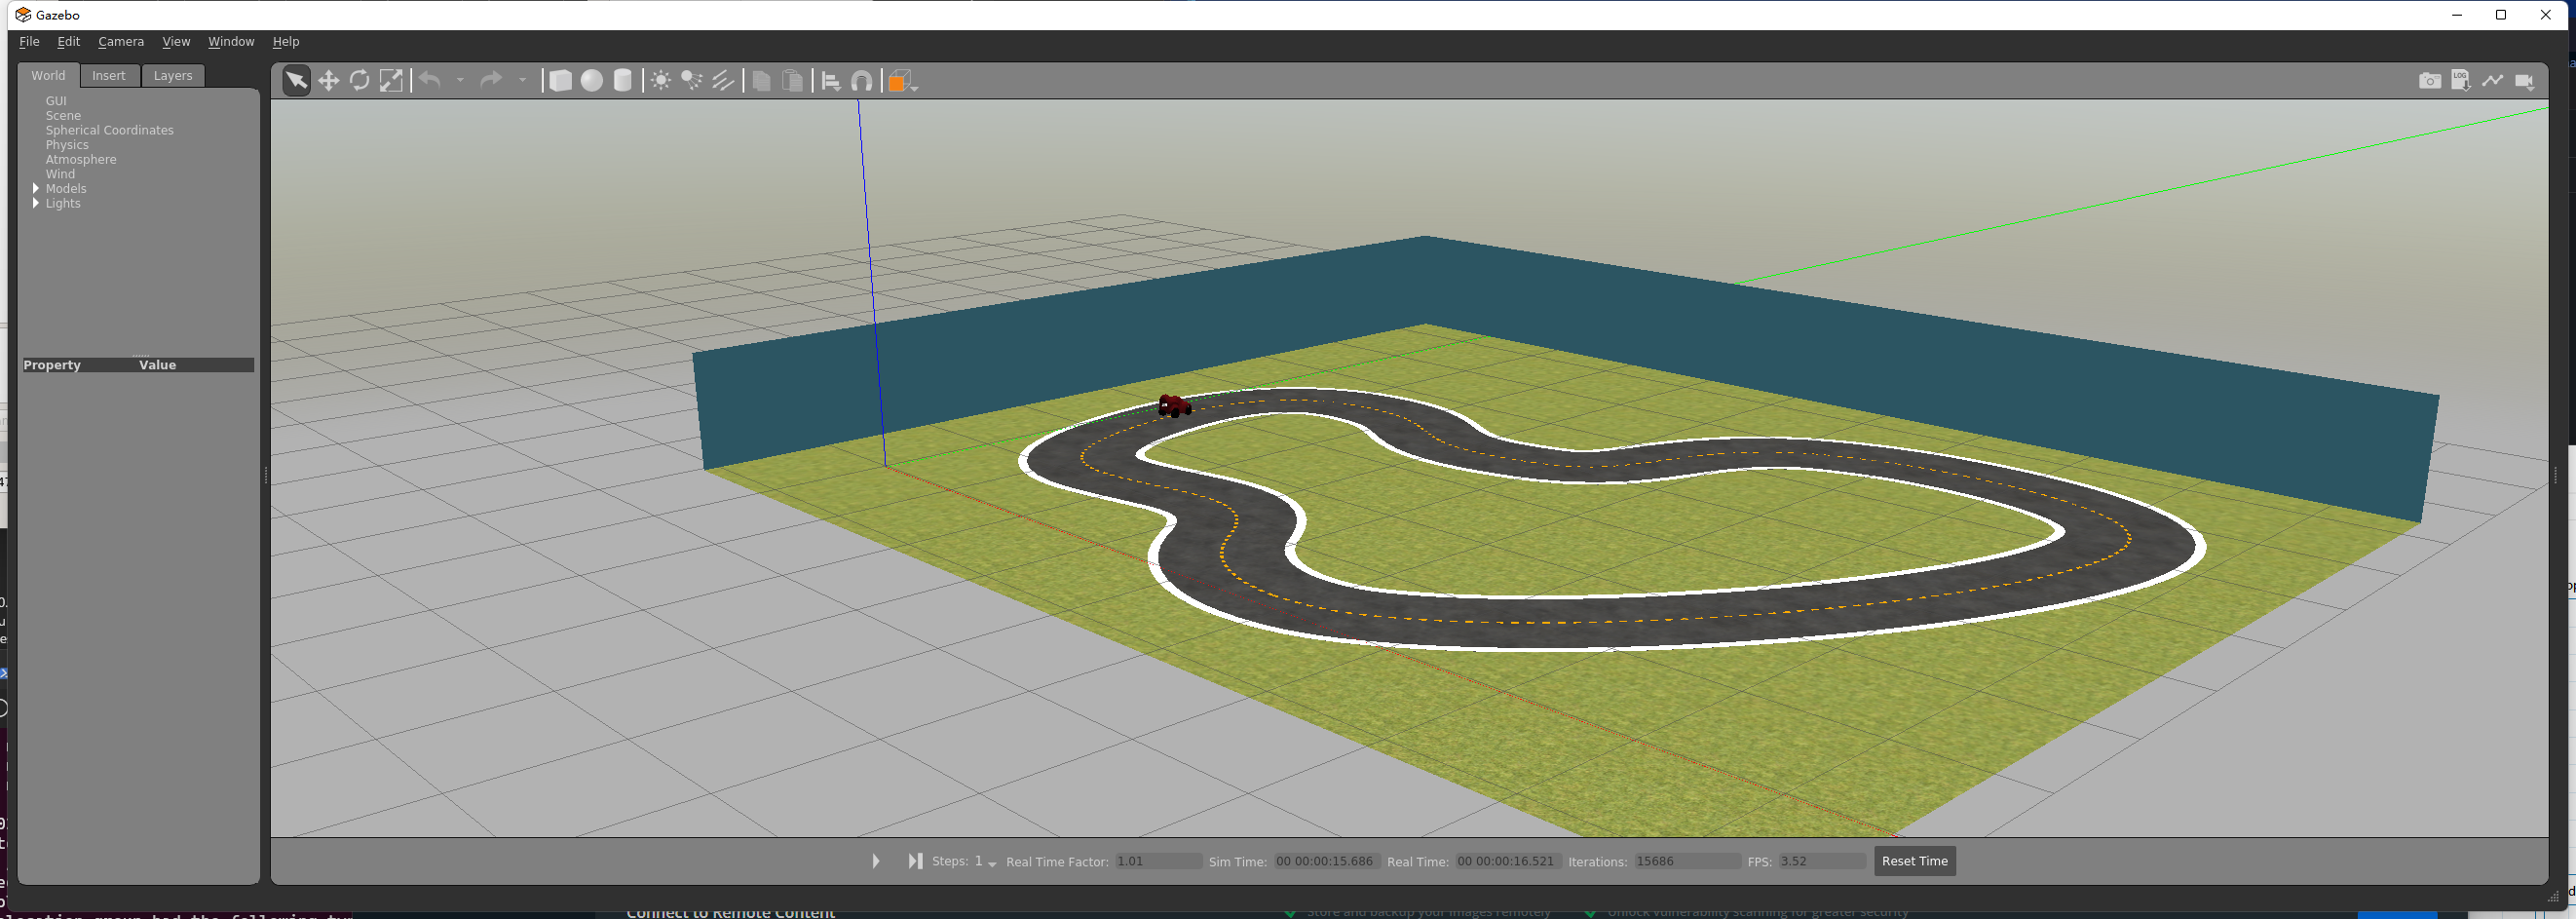
注意 1: 如果想要测试 gazsbo 虚拟器请设置DR_GUI_ENABLE=True 但是这个玩意很不稳定,仅在sagemaker docker镜像设置为CPU 并且 robomaker docker镜像设置为GPU gl的情况下开启并闪退,其他情况根本打不开
注意 2: 设置DR_HOST_X=True
注意 3: DR_DISPLAY要先用
echo $DISPLAY命令看下当前$DISPLAY的配置然后把输出的内容复制到DR_DISPLAY=后面, 我这里是192.168.208.1:0.
注意 4: 取消CUDA_VISIBLE_DEVICES=0的注释
这是我的settings.env的配置环境可供参考:
DR_CLOUD=local
DR_AWS_APP_REGION=us-east-1
DR_UPLOAD_S3_PROFILE=default
DR_UPLOAD_S3_BUCKET=not-defined
DR_UPLOAD_S3_ROLE=to-be-defined
DR_LOCAL_S3_BUCKET=bucket
DR_LOCAL_S3_PROFILE=minio
DR_GUI_ENABLE=False
DR_KINESIS_STREAM_NAME=
DR_KINESIS_STREAM_ENABLE=True
DR_SAGEMAKER_IMAGE=5.0.0-dev-gpu
DR_ROBOMAKER_IMAGE=5.0.0-dev-gpu-gl
DR_ANALYSIS_IMAGE=cpu
DR_COACH_IMAGE=5.0.0-dev
DR_WORKERS=1
DR_ROBOMAKER_MOUNT_LOGS=False
DR_CLOUD_WATCH_ENABLE=False
DR_DOCKER_STYLE=swarm
DR_HOST_X=True
DR_WEBVIEWER_PORT=8100
DR_DISPLAY=192.168.208.1:0
# DR_REMOTE_MINIO_URL=http://mynas:9000
CUDA_VISIBLE_DEVICES=0
5.7 挂载DRfC的环境:
在WSL2 terminal中输入
source bin/activate.sh
5.8 更新一下DRfC的配置环境:
在WSL2 terminal中输入
  dr-update
  dr-update-env
开始训练前修改一下Deepracer的三项关键文件hyperparameters.json, model_metadata.json和reward_function.py文件,然后运行上传文件:
dr-upload-custom-files
5.9 开始训练:
在WSL2 terminal中输入
dr-start-training
输入 nvidia-smi 检查是否有python3.6的进程跑在了GPU上t:
+-----------------------------------------------------------------------------+
| NVIDIA-SMI 510.60.02    Driver Version: 512.15       CUDA Version: 11.6     |
|-------------------------------+----------------------+----------------------+
| GPU  Name        Persistence-M| Bus-Id        Disp.A | Volatile Uncorr. ECC |
| Fan  Temp  Perf  Pwr:Usage/Cap|         Memory-Usage | GPU-Util  Compute M. |
|                               |                      |               MIG M. |
|===============================+======================+======================|
|   0  NVIDIA GeForce ...  On   | 00000000:2D:00.0  On |                  N/A |
|  0%   47C    P2    49W / 146W |   5335MiB / 12288MiB |      4%      Default |
|                               |                      |                  N/A |
+-------------------------------+----------------------+----------------------+
+-----------------------------------------------------------------------------+
| Processes:                                                                  |
|  GPU   GI   CI        PID   Type   Process name                  GPU Memory |
|        ID   ID                                                   Usage      |
|=============================================================================|
|    0   N/A  N/A       135      C   /python3.6                      N/A      |
|    0   N/A  N/A       341      C   /python3.6                      N/A      |
+-----------------------------------------------------------------------------+
或者打开资源管理器看看GPU内存的占用:
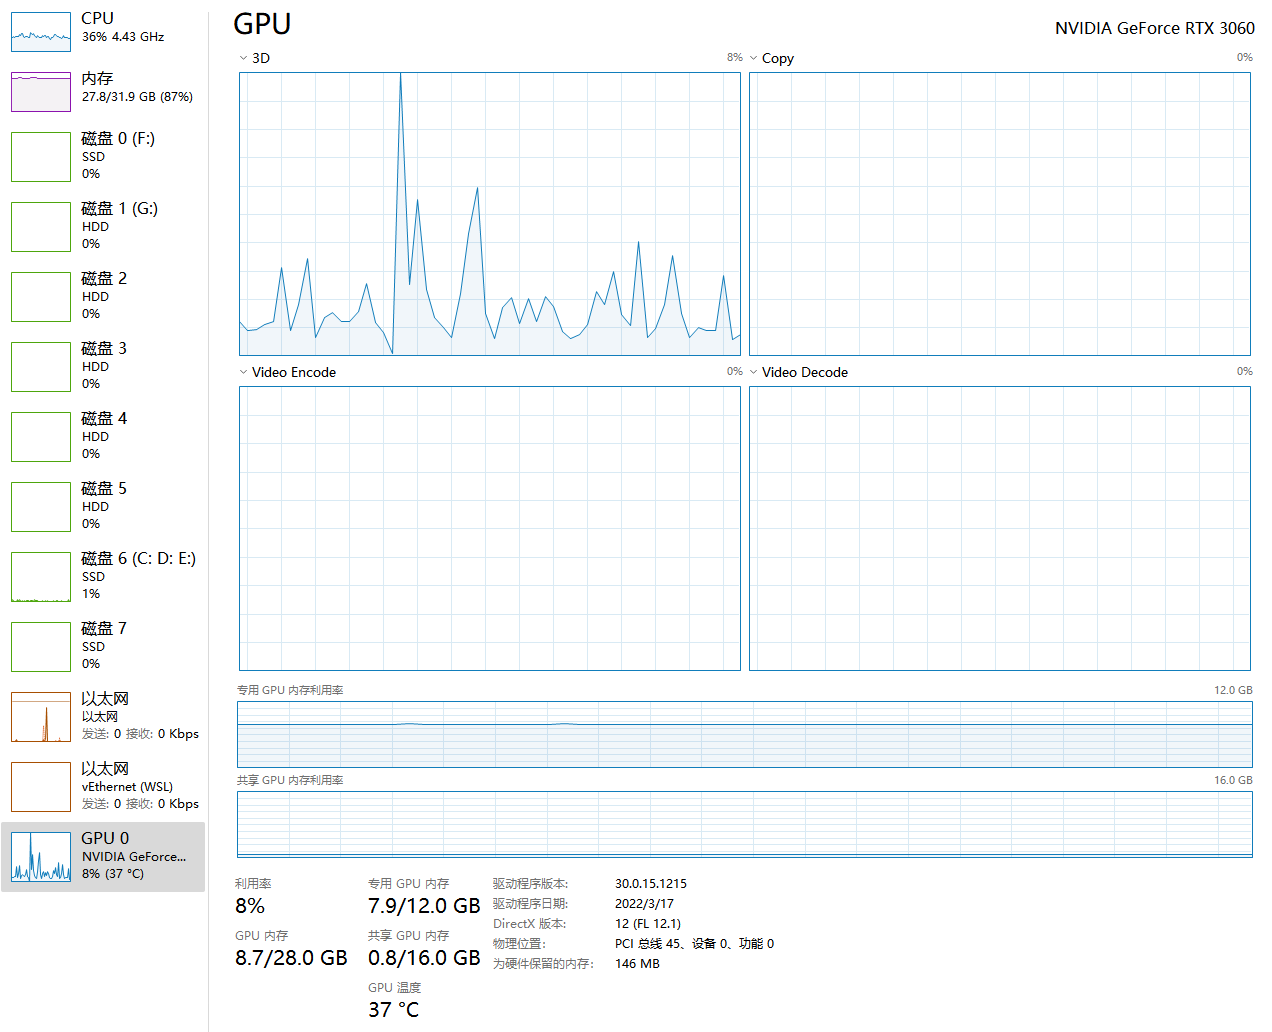
注意这里有个迷惑的地方就是cpu的占用越来越高,GPU只是时不时的工作一下,其实这个是正常现象,GPU只是在policy updating时工作。
炫一下我配置环境:
硬件:
- CPU: AMD Ryzen 9 5900X
- GPU: RTX 3060 12GB
- RAM: 32GB
- SSD: 1TB
系统和软件:
- Windows 11 21H2 + WSL2 (kernel: 5.10.60.1 + ubuntu20.04)
- Nvidia Driver: 512.15
- Cuda version 11.6
- Docker Desktop
- VcXsrv
- DRfC: https://aws-deepracer-community.github.io/deepracer-for-cloud/
快乐的享受Deepracer比赛吧!!!
🔴划重点了🔴
亚马逊云中国举办的2022年月赛的季前赛已经开始了:
在拿奖品的同时,也能在整个学习使用Deepracer小车和参加比赛的过程中深度体验人工智能和强化学习带来的成就感和“人生哲理”。
参赛连接:https://us-east-1.console.aws.amazon.com/deepracer/home#raceToken/PqOZFuS6Sxuwh6iLcCY2kw

为开发者提供学习成长、分享交流、生态实践、资源工具等服务,帮助开发者快速成长。
更多推荐


 6
6 0
0- 0


 已为社区贡献1条内容

所有评论(0)